Support setting
Hi!
New in here.
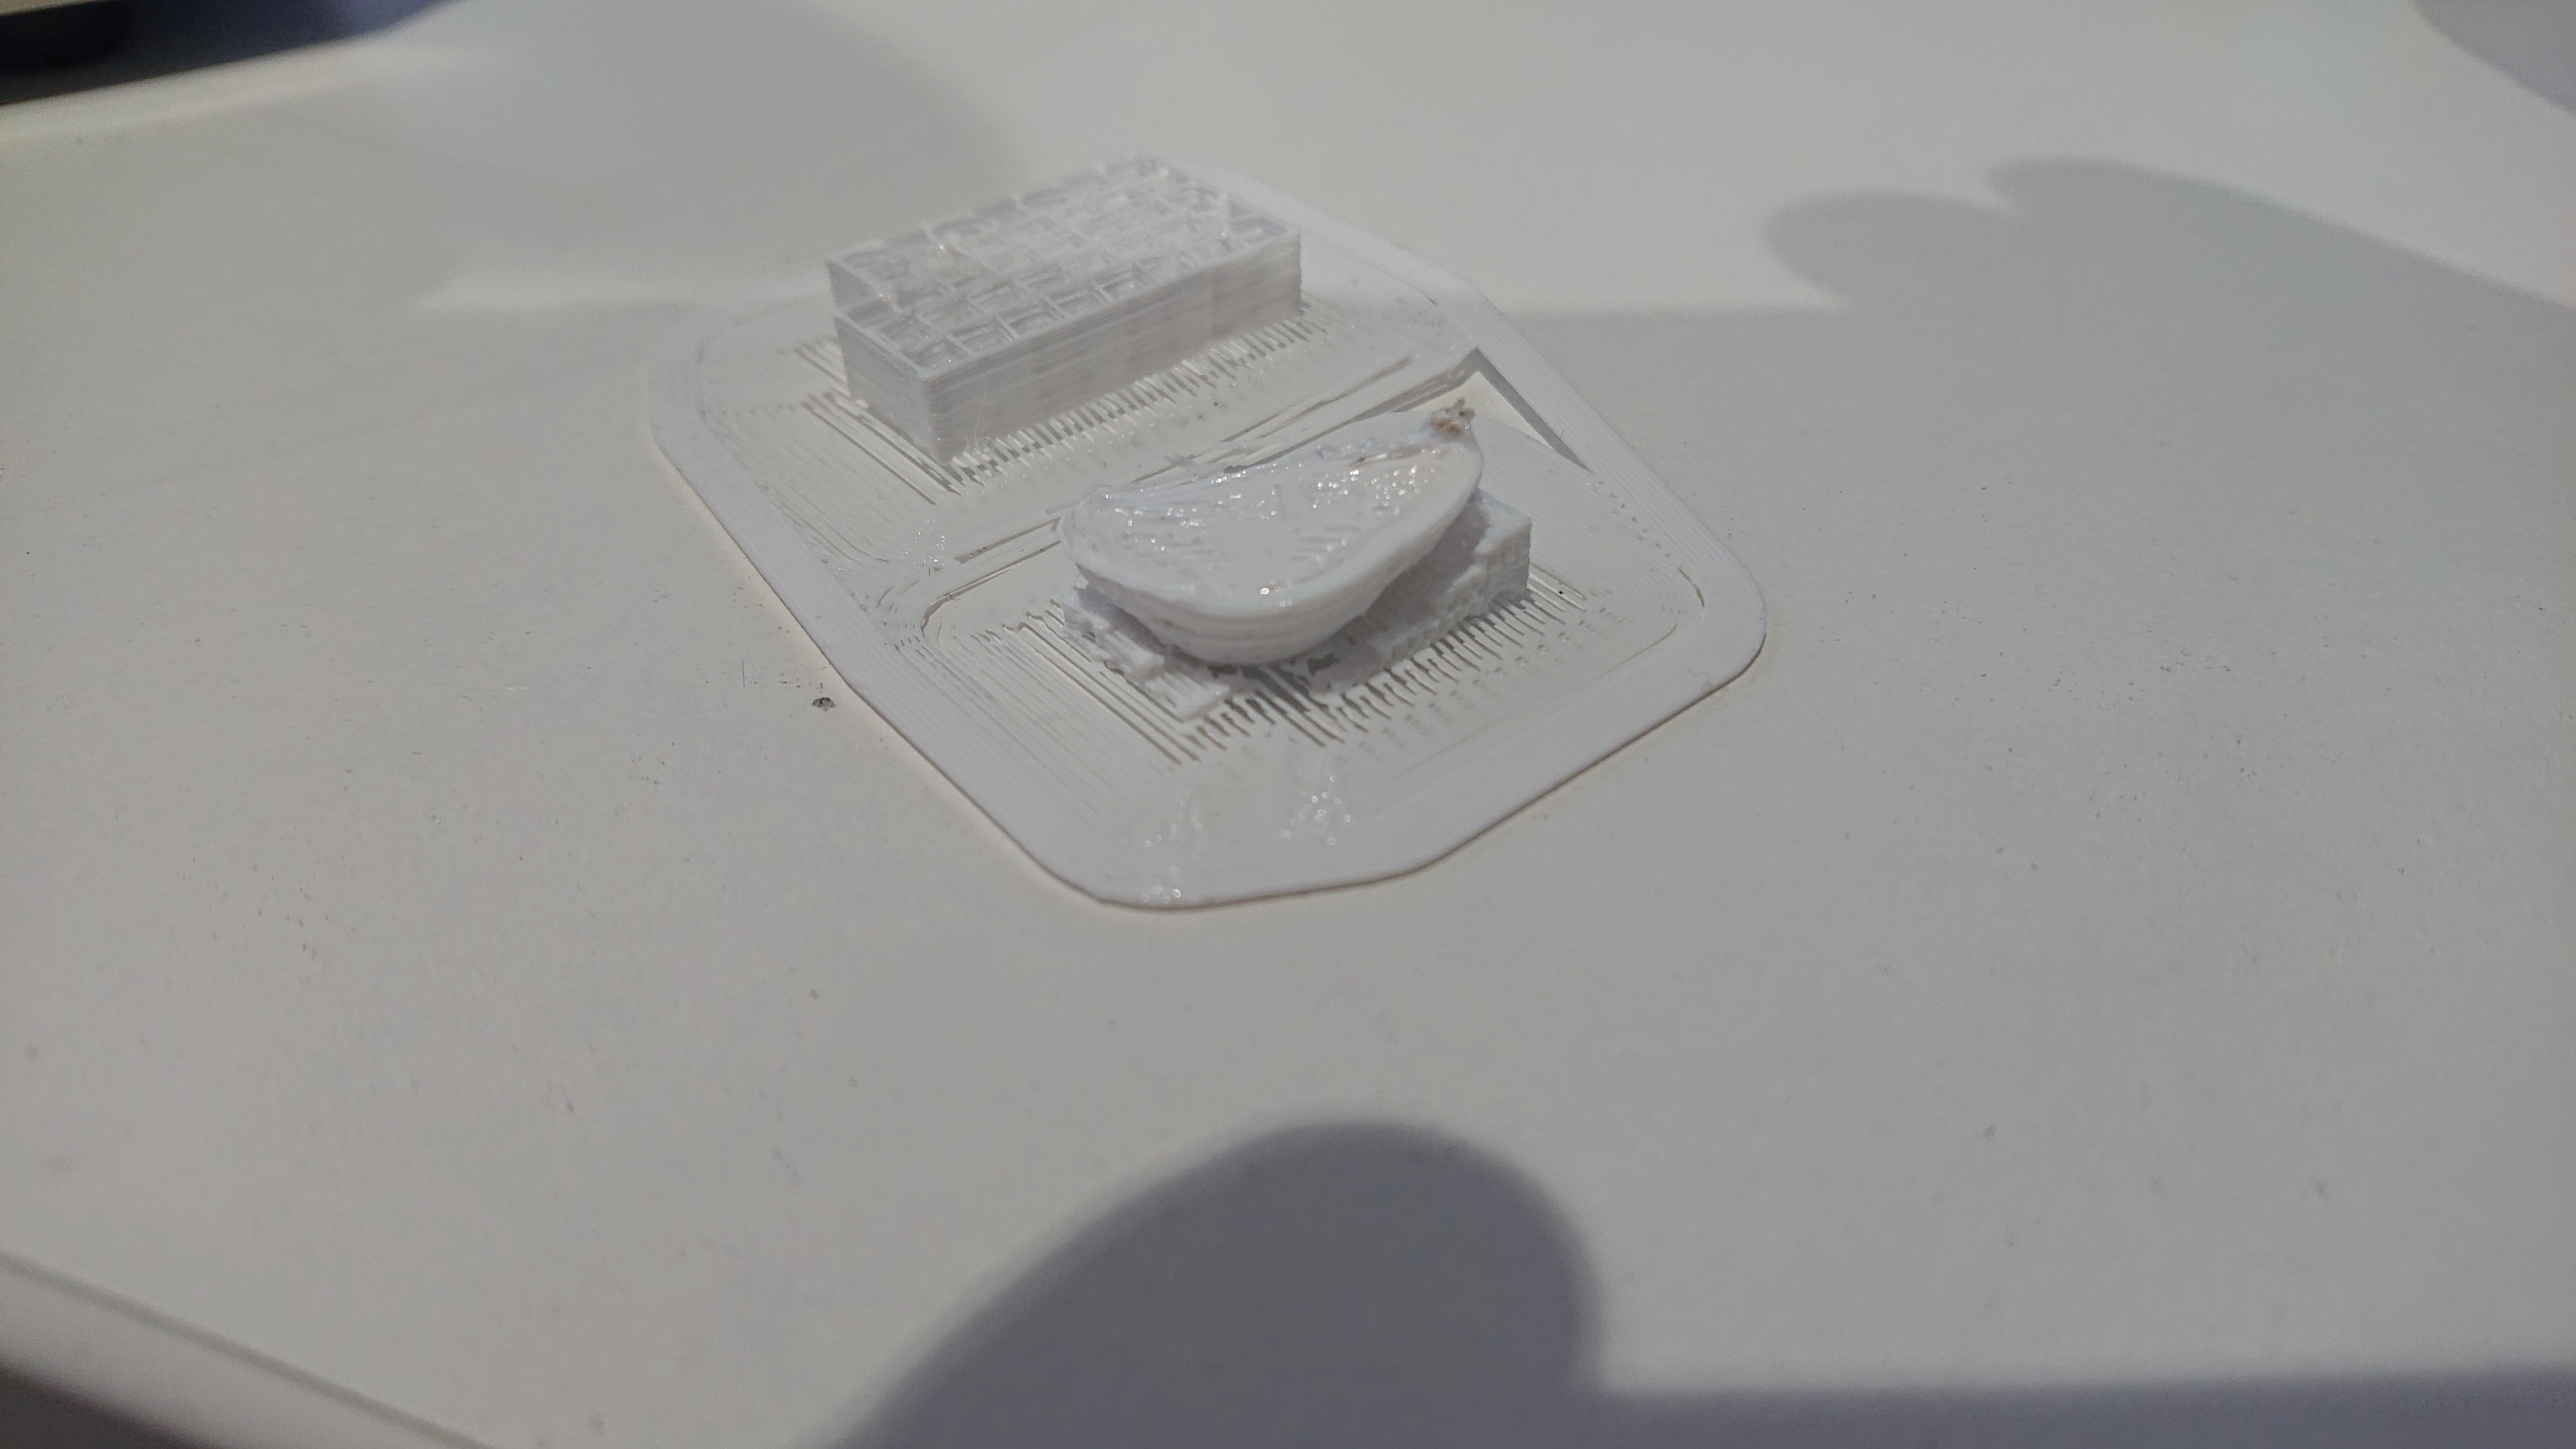
What is this support and how to get rid of it?
WTF... How to get screenshots here, insert edit image not working?
Plaah... 🙁 Nothing works today...
I've used couple of hours changing settings but no...
RE: Support setting
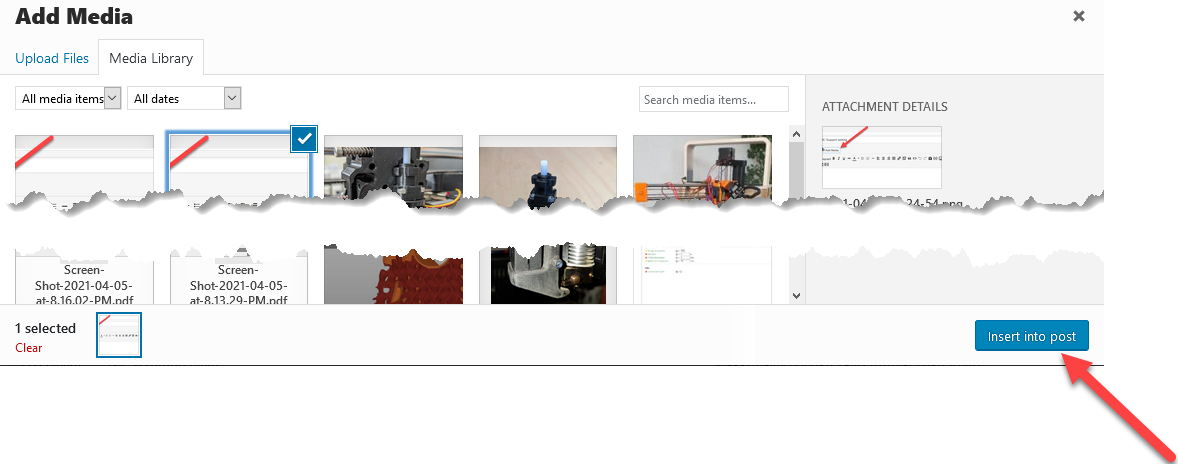
You can add screenshots by saving them as JPG/PNG and uploading using this button:

After clicking this button, select Upload files tab, navigate to your image and click Insert into post in the lower right corner (click on the below screenshot to show it in full).
RE: Support setting
Hi!
And thank you helping me! Never seen 2 buttons / different methods to insert...
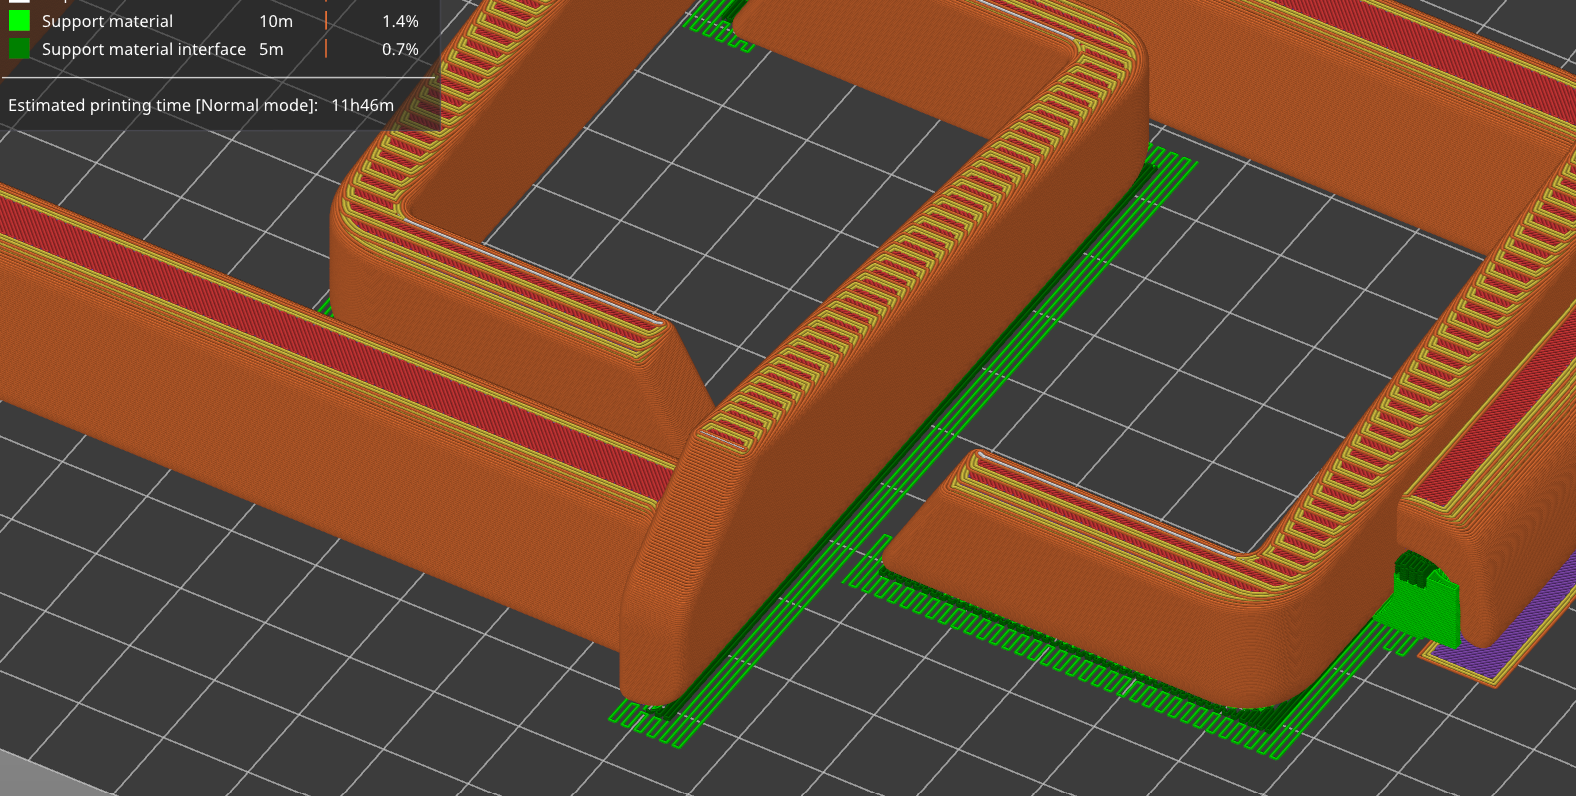
My problem is how to get rid of light green support? What is that setting? Don't understand why it is there, there is nothing to support.
Wy it is not around part? Why only some sides?
I have an other part which touches only a little bit surface so it does not fit because of that weird support... I want to use brim/skirt but this weird support comes between part and brim and makes print to fail...
RE: Support setting
You can’t get rid of it. There is no setting for it. It’s the base layer for all support on the plater.
RE: Support setting
Do you have curved lower corners on that part? Rework with 45 degree chamfer and the supports won't be generated.
Cheerio,
RE: Support setting
While you can’t get rid of the light green support base when PS lays down supports, you have some control over where it puts support. You can define support blockers or support enablers, and you can use the new paint on supports function.
PS is quite aggressive in the way it handles supports but rumor has it that there will be improvements in one of the next releases.
RE: Support setting
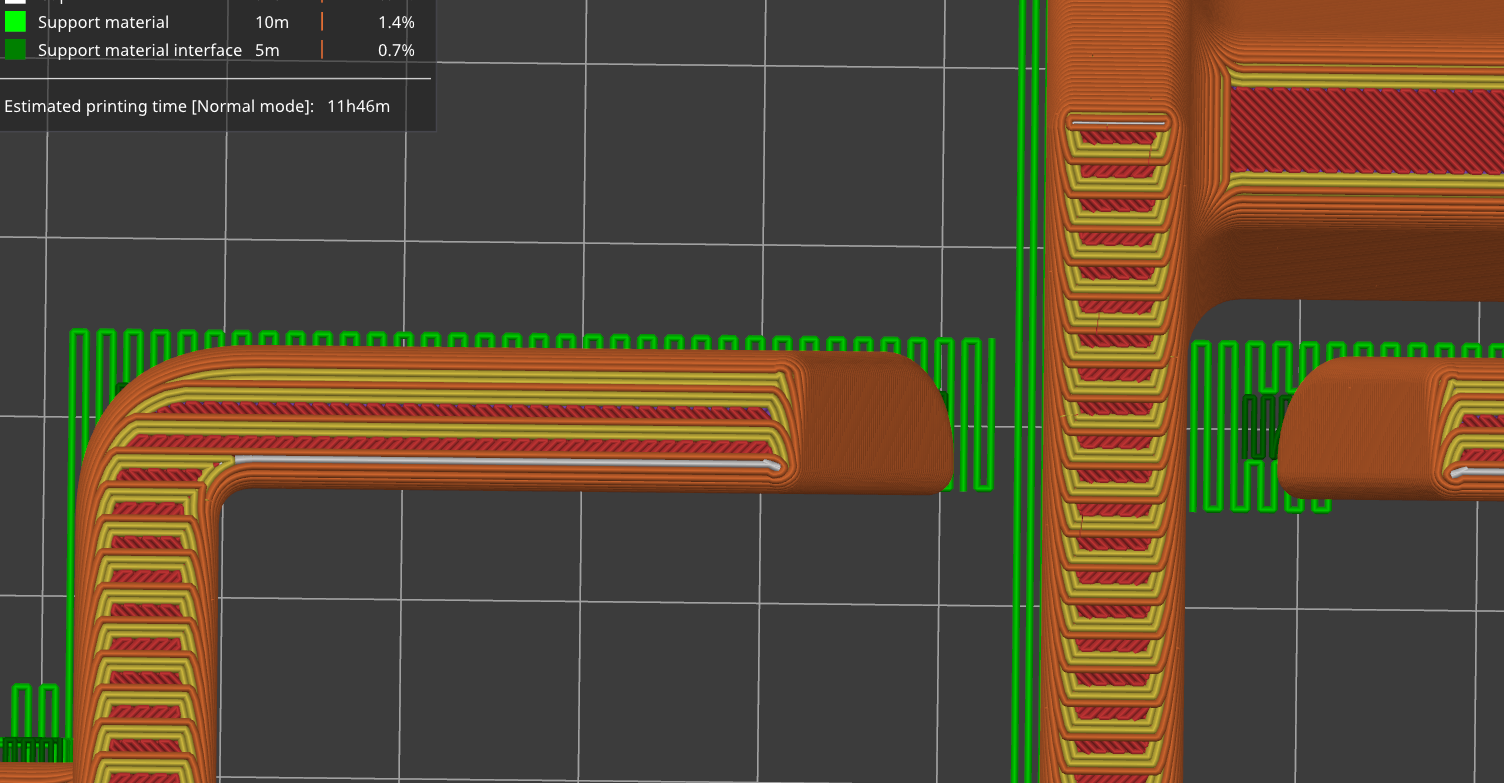
Henri, the dark blue colour coding indicates bridging perimeters on those edges. This is for the reason Diem states. You have curved bottom edges, this means the first couple of layers are printing over nothing and so need support. Those edges that do not show dark blue means they aren't bridging perimeters so no supports required. Which is why PS is trying to add it so some and not others. The solution is also as Diem said, to rework the model to have a 45 degree (or close to it) single chamfer on those bottom edges.
RE: Support setting
Thank you everybody helping me to understand that it is not possible to get rid of that.
I think it is very bad I have to change design from fillets to chamfers. I think it should not work like that. I think design comes first and software should adapt to that...
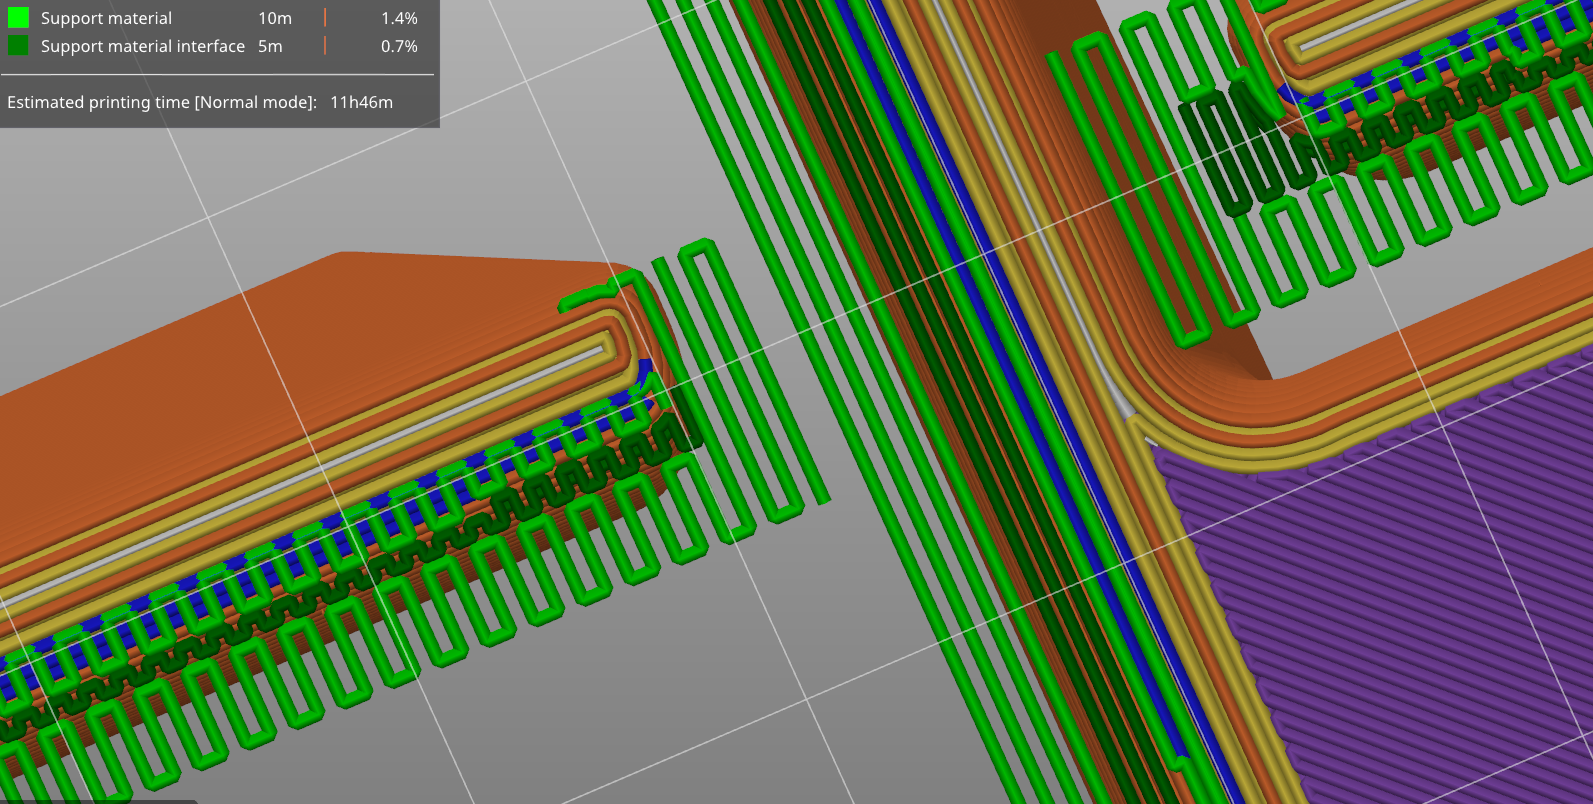
Here I have the problem, because part hits the plate only on the quad. I'd like to make strong brim /skirt to ensure it stays on the plate. Now it starts to swing, because of these thin stripes beside of strong brim/skirt layer starting straight from the quad point of the part.
Should I hang the part on air and get support under the part?
So this means that it is not possible to print for example ball, because only quad hits the plate and those light green stripes (with supports) are not strong enough to keep part rigid enough. It starts to swing. The way I can print ball is to model brim to the ball ( f.e 0,2mm square to the quad point of the ball. Sad I can't make the same using brim/skirt.
Unfortunately I think I have to move to some other slicing software 🙁
RE: Support setting
If the thin zigzag below supports are not sticking to your plater then that means its either not completely clean or your live z is not set correctly (assuming you are using a prusa printer). Basically with a properly clean and level plate those will stick just fine, if they don't its cleaning/adjust time.
As for the bevel/chamfer, then that is the nature of 3d printing. You have to adapt the design for the production medium. If you were injection molding for example you would have to add draft to many surfaces to ensure it could be removed from the tool. This is a normal part of design. Its why many designs are not really designed with 3dprinting in mind.
Its not a case of software adapting to design, its the actual physical limitations of the printing process.
If you look at the layers sliced with a chamfer you will soon see that the lower layers of a chamfer result in layers with nothing below them, so of course they require support. Chamfers are best in the x/y plane and not z. You can also do a hybrid chamfer in you know an edge is going to be oriented to the bed, where the bottom is a fillet and then it changes to a chamfer for the rest of the curve once beyond the 45-50 degree angle.
Printing spheres never really works well on any fdm printer, although ones with better cooling can do a better job.
If you want to add more surface area for something with a very small contact area you can right click the part, select add part, choose box or cylinder and make the part modifier 1 layer high, then place it to the bed. You can then position it around the contact point and you will then have a solid 1 layer high pseudo brim.
RE: Support setting
@henri
Thank you everybody helping me to understand that it is not possible to get rid of that.
That is not what we said. It is easy to get rid of with a minor change to the design.
I think it is very bad I have to change design from fillets to chamfers. I think it should not work like that. I think design comes first and software should adapt to that...
Correct. The software is perfectly happy for you to design whatever you fancy - just don't expect it all to be printable if you disregard the medium.
So this means that it is not possible to print for example ball,
Balls are easy to print. If you want a clean lower surface you must either use soluble support or split at the equator and join in post process. Design for the medium.
Unfortunately I think I have to move to some other slicing software
It won't help you unless you design for the medium.
Cheerio,
RE: Support setting
There seems to be a bit of a misunderstanding how FDM works. The law of physics (specifically gravity) apply to filament, just like anything else. So it's impossible to print a string of filament in thin air. That doesn't mean you can't print something like a ball, with sides that continuously expand from a point at the bottom to the maximum diameter on the sides. But you have to use crutches, such as (soluble) supports, or circumvent gravity by printing two halves of a ball "upside down", as @diem explained.
Good luck moving to a different slicer. The underlying issue still remains. But other slicers may be less aggressive than PS in their use of supports, so maybe in this case you'll find whatever they produce more palatable.