Can't figure out proper settings to slice a set of small parts
I'm trying to print a set of the parts that go to the board game Operation. It is a set of 11 small parts that someone made and posted on T-verse. I've tried with and without rafts and brims and various combinations. I tried rafts with Contact Z Distance settings of 0.1, 0.2, and 0.25 and of course with 0.1 I could not remove the items from the raft. With 0.2 they came off more easily but with a very rough bottom and the same goes for 0.25. A smooth bottom is required for these parts. I tried a brim and regardless of the width setting the brim attaches to the pieces and is almost impossible to peel off. The parts are too intricate to try and trim the excess with a razor or knife. I am hoping there is a setting or combination of settings that will allow me to print these and end up with a smooth bottom surface and easy-to-remove brim or support. I've tried a number of times to print them with no brim/raft and the pieces that are the smallest do not stick to the bed, even after multiple washings.
RE: Can't figure out proper settings to slice a set of small parts
I haven't played that game in decades, but if they are what I vaguely remember, they should be printable on any Prusa using the smooth sheet with very little futzing around. IIRC they are small and mostly flat, correct?
If they are not sticking to the smooth sheet with no brim/raft I would check the following in this order:
1. Be sure your print bed is Really Most Sincerely Clean.
2. Be sure that your Z calibration is good. If it's too high, small parts will not stick.
3. If you are confident that both of the above are good, you may need an adhesion enhancer. PLA seems to be the one that most often needs this. Glue stick (so use it, Rosie, that's what it's there for!) or something like Layerneer.
I've done a lot of smaller pieces with both PLA and ABS and found they print reliably. If you still have trouble, post one of the .stl files for one of the pieces and I will give it a try. To attach the file here, you will need to enclose it in a .zip file.
RE: Can't figure out proper settings to slice a set of small parts
@jsw
Yes, that's correct, 11 small pieces that lay flat but some are thin. I have cleaned the steel sheet multiple times with dish soap in between attempts...I feel like there may be a speed setting that I should change. For each piece as it finishes that pieces and moves onto the next one in that layer (especially the first layer or 2) it seems to leave a little blob at the very end or tip of the piece and then the next time around the nozzle catches it. I will attach a file that I got from T-verse.
RE: Can't figure out proper settings to slice a set of small parts
@teebell
Is it these parts ?
?
I try to make safe suggestions,You should understand the context and ensure you are happy that they are safe before attempting to apply my suggestions, what you do, is YOUR responsibility. Location Halifax UK
RE: Can't figure out proper settings to slice a set of small parts
@joantabb
Yes, pretty close. The butterfly is a little different and there is no ice cream cone. I think that might have been added in a later revision of the game. The tips of the wishbone, the rib, the apple stem all give me trouble. On the first layer for those as it finishes and moves on it leaves excess filament which gets caught the next time through.
RE: Can't figure out proper settings to slice a set of small parts
If you just post the Thing number from T-verse, I can grab it.
RE: Can't figure out proper settings to slice a set of small parts
@jsw
2738816
I tried posting the ZIP file but I guess it was removed? I tried printing this many more times last night and today and doing many live z adjustments but no luck. We're almost out of dish soap now too lol.
RE: Can't figure out proper settings to slice a set of small parts
@teebell
What is the link for the STL, you are using,
Is it PLA and a 0.4mm nozzle?
regards Joan
I try to make safe suggestions,You should understand the context and ensure you are happy that they are safe before attempting to apply my suggestions, what you do, is YOUR responsibility. Location Halifax UK
RE: Can't figure out proper settings to slice a set of small parts
Ok, thanks. I have a three hour print running right now, but after that I'll try your Operation pieces with white PLA and see what happens.
RE: Can't figure out proper settings to slice a set of small parts
@joantabb
Yes to PLA and 0.4 nozzle.
It's T-verse file #2738816
RE: Can't figure out proper settings to slice a set of small parts
This set then!

I have included two Gcode Files in the Zipfile below, the one labelled Slow Operation.3mf is actually the one I used... I had intended to set the first layer at 30mm/s but actually set it to 3mm/s
the other file is set at 20mm/s which is default for the setting...
Note, these files are for Prusa Slicer 2.3.0 Beta1. because when I loaded the update file for that, Prusa Slicer 2.2.0 became unusable on My PC.
regards Joan
I try to make safe suggestions,You should understand the context and ensure you are happy that they are safe before attempting to apply my suggestions, what you do, is YOUR responsibility. Location Halifax UK
RE: Can't figure out proper settings to slice a set of small parts
Here's the result.
First of all, I did not do anything special, I just used the same settings and workflow that I would use for any small PLA parts. Generic PLA defaults on PS. I sliced it using .15 layers, which is what I normally use for small PLA parts. Plain vanilla Hatchbox white PLA. Stock .4 brass nozzle.
Yes, I used a coat of Layerneer on the plate. (Visible in the second photo.) This is my SOP for any PLA prints with a small footprint. I know some here poo-poo this, but if I have a choice between a better print or some kind of ideological purity, I go for the better print. 😉
Enclosure temperature control points were set at 29.0 and 30.9. Basically a very warm room temperature. Nothing should be critical here, but that's what I had set for the project I am working on.
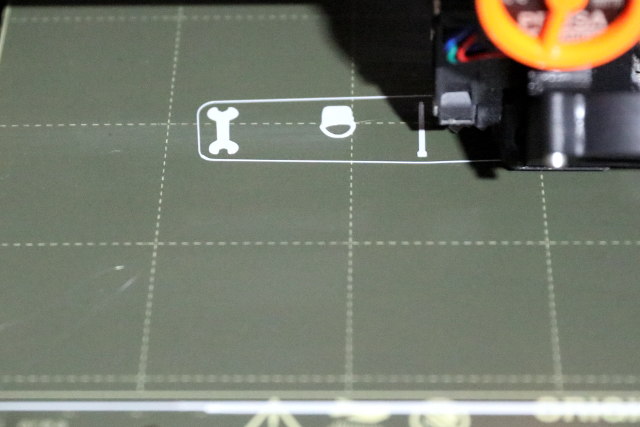
Here's the first layer in progress. There was some slight stringing and/or oozing, which you can see, when the head traveled from the end of the prime strip to begin the skirt, but nothing else. Everything here looks normal.
Here's midway through the print. Normal progression, everything looks as expected. No stringing, no collisions with top layers, no loose pieces.

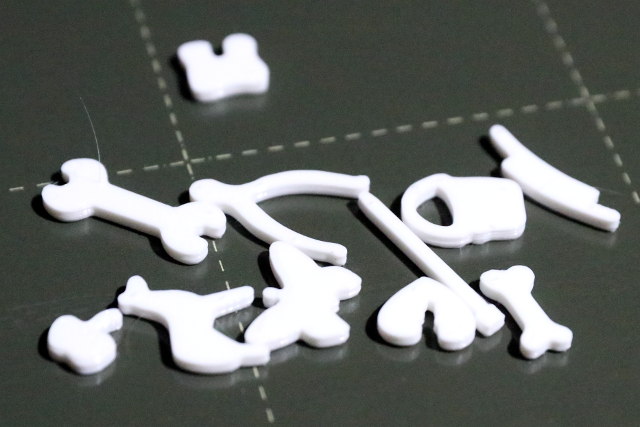
Here's the finished print set. Everything printed as expected with no obvious artifacts.

Here's the finished product. Turned out as expected with no issues.
If you're Stateside, I would be happy to drop these in an envelope and send them to you. Otherwise I don't have a use for them, so they will go in the scrap box. The slicer said I used US$0.05 of filament. This was really a simple print which sliced and printed as expected with no issues, and any I3 or similar printer should be able to duplicate these results.
If you can't get something very similar to these results, I would check the machine carefully, be sure the cal is good, make sure you have good filament and good technique and a clean print surface, and it should work the same for you.
RE: Can't figure out proper settings to slice a set of small parts
@jsw
Looks beautiful. Gives me reason to try a few more times! I also use Hatchbox and that is the filament profile I use with the defaults other than changing the extrusion multiplier to .95. Yes, I am in the US and will pm you.
I am going to try and get a good photo of my first layer although it has never looked like that. What did you use for walls and infill?
RE: Can't figure out proper settings to slice a set of small parts
Well, that didn't take long. I washed the bed again and tried with the Generic PLA profile @ .15


RE: Can't figure out proper settings to slice a set of small parts
Well, that didn't take long. I washed the bed again and tried with the Generic PLA profile @ .15
Hello there! Would you mind sharing what your start g-code is? It looks like you are laying down a much longer purge line than what my printer does using the defaults for the MK3s profile.
In looking at your photos, my gut tells me that your issue is either wonky filament or non-optimal Z height or both and not anything due to settings or gcode. If you're using anything but plain vanilla standard PLA, as in any of the 'improved' PLA blends, it may be a temperature issue. Bed adhesion (or in this case, lack of same) may be an aggravating factor.
If I were you, my next step would be to try the print with a known-good roll of standard (as in not the 'improved' or PLA blend) PLA, preferably the sample roll that came with your printer. I would also visually inspect the nozzle to be sure there are no 'boogers' hanging on there and interfering with the print. You do have something that caused the end of the purge line to separate from the plate. You also have some stringing/oozing at that point, but far worse than what I have. I might suggest trying a THIN layer of glue stick in the print area and the purge line area to help with adhesion.
One other test that you can make if you want is to try the print on your machine with my .gcode print file. Let me know if you want to try this and I'll post it in this thread. This would eliminate any slicer and boilerplate gcode issues.
My startup gcode is below, and the only change I've made is to comment out the firmware version check, as I use an older version (ain't broke, don't fix it).
The full-width purge line happens when you add the MMU2S to the MK3S. You can see the code below to generate it. I sliced this in the 'single mode', but it uses the wider purge line for single mode as well as multi mode.
M862.3 P "[printer_model]" ; printer model check
M862.1 P[nozzle_diameter] ; nozzle diameter check
;; M115 U3.9.0 ; tell printer latest fw version
G90 ; use absolute coordinates
M83 ; extruder relative mode
M104 S[first_layer_temperature] ; set extruder temp
M140 S[first_layer_bed_temperature] ; set bed temp
Tx
M190 S[first_layer_bed_temperature] ; wait for bed temp
M109 S[first_layer_temperature] ; wait for extruder temp
G28 W ; home all without mesh bed level
G80 ; mesh bed leveling
;go outside print area
G1 Y-3.0 F1000.0
G1 Z0.4 F1000.0
; select extruder
Tc
; purge line
G1 X55.0 F2000.0
G1 Z0.3 F1000.0
G92 E0.0
G1 X240.0 E25.0 F2200.0
G1 Y-2.0 F1000.0
G1 X55.0 E25 F1400.0
G1 Z0.20 F1000.0
G1 X5.0 E4.0 F1000.0
M221 S{if layer_height<0.075}100{else}95{endif}
G92 E0.0
Here is the actual section that homes and does the purge line. I left out the default extruder selection since it appears that you don't need it.
;go outside print area
G1 Y-3.0 F1000.0
G1 Z0.4 F1000.0
; purge line
G1 X55.0 F2000.0
G1 Z0.3 F1000.0
G92 E0.0
G1 X240.0 E25.0 F2200.0
G1 Y-2.0 F1000.0
G1 X55.0 E25 F1400.0
G1 Z0.20 F1000.0
G1 X5.0 E4.0 F1000.0
RE: Can't figure out proper settings to slice a set of small parts
@jsw
I really appreciate the time you've spent with me. This in fact is a fresh roll of Hatchbox white PLA. I opened it a few days ago (Sat or Sun). As far as my Live Z goes, prior to posting the original message, it was set to something less than -0.6 (but greater than -0.5). I did a first layer calibration after watching a couple of videos that suggested the lines put down during first layer calibration should be thin and look like they are about .5 mm thick. I adjusted the Live Z to -0.7ish and started a different print with a fairly wide base/first layer. After 5 mins I checked and could see lots of tiny zits/blobs and definitely not a smooth layer so I adjusted Live Z on the fly to where it is now (-0.6) and that first layer was much more smooth. This was all done using Hatchbox white PLA. I made multiple items using a variety of colors and everything looked great. Somewhere in there I needed to print a red item so I grabbed a fresh roll of Prusament red PLA and the first layer was awful (I had not changed any of my settings from the Hatchbox PLA). I immediate stopped the print, swapped out the Prusament with Hatchbox red and started over. First layer was beautiful. Now we fast forward to trying to print these darn game pieces.
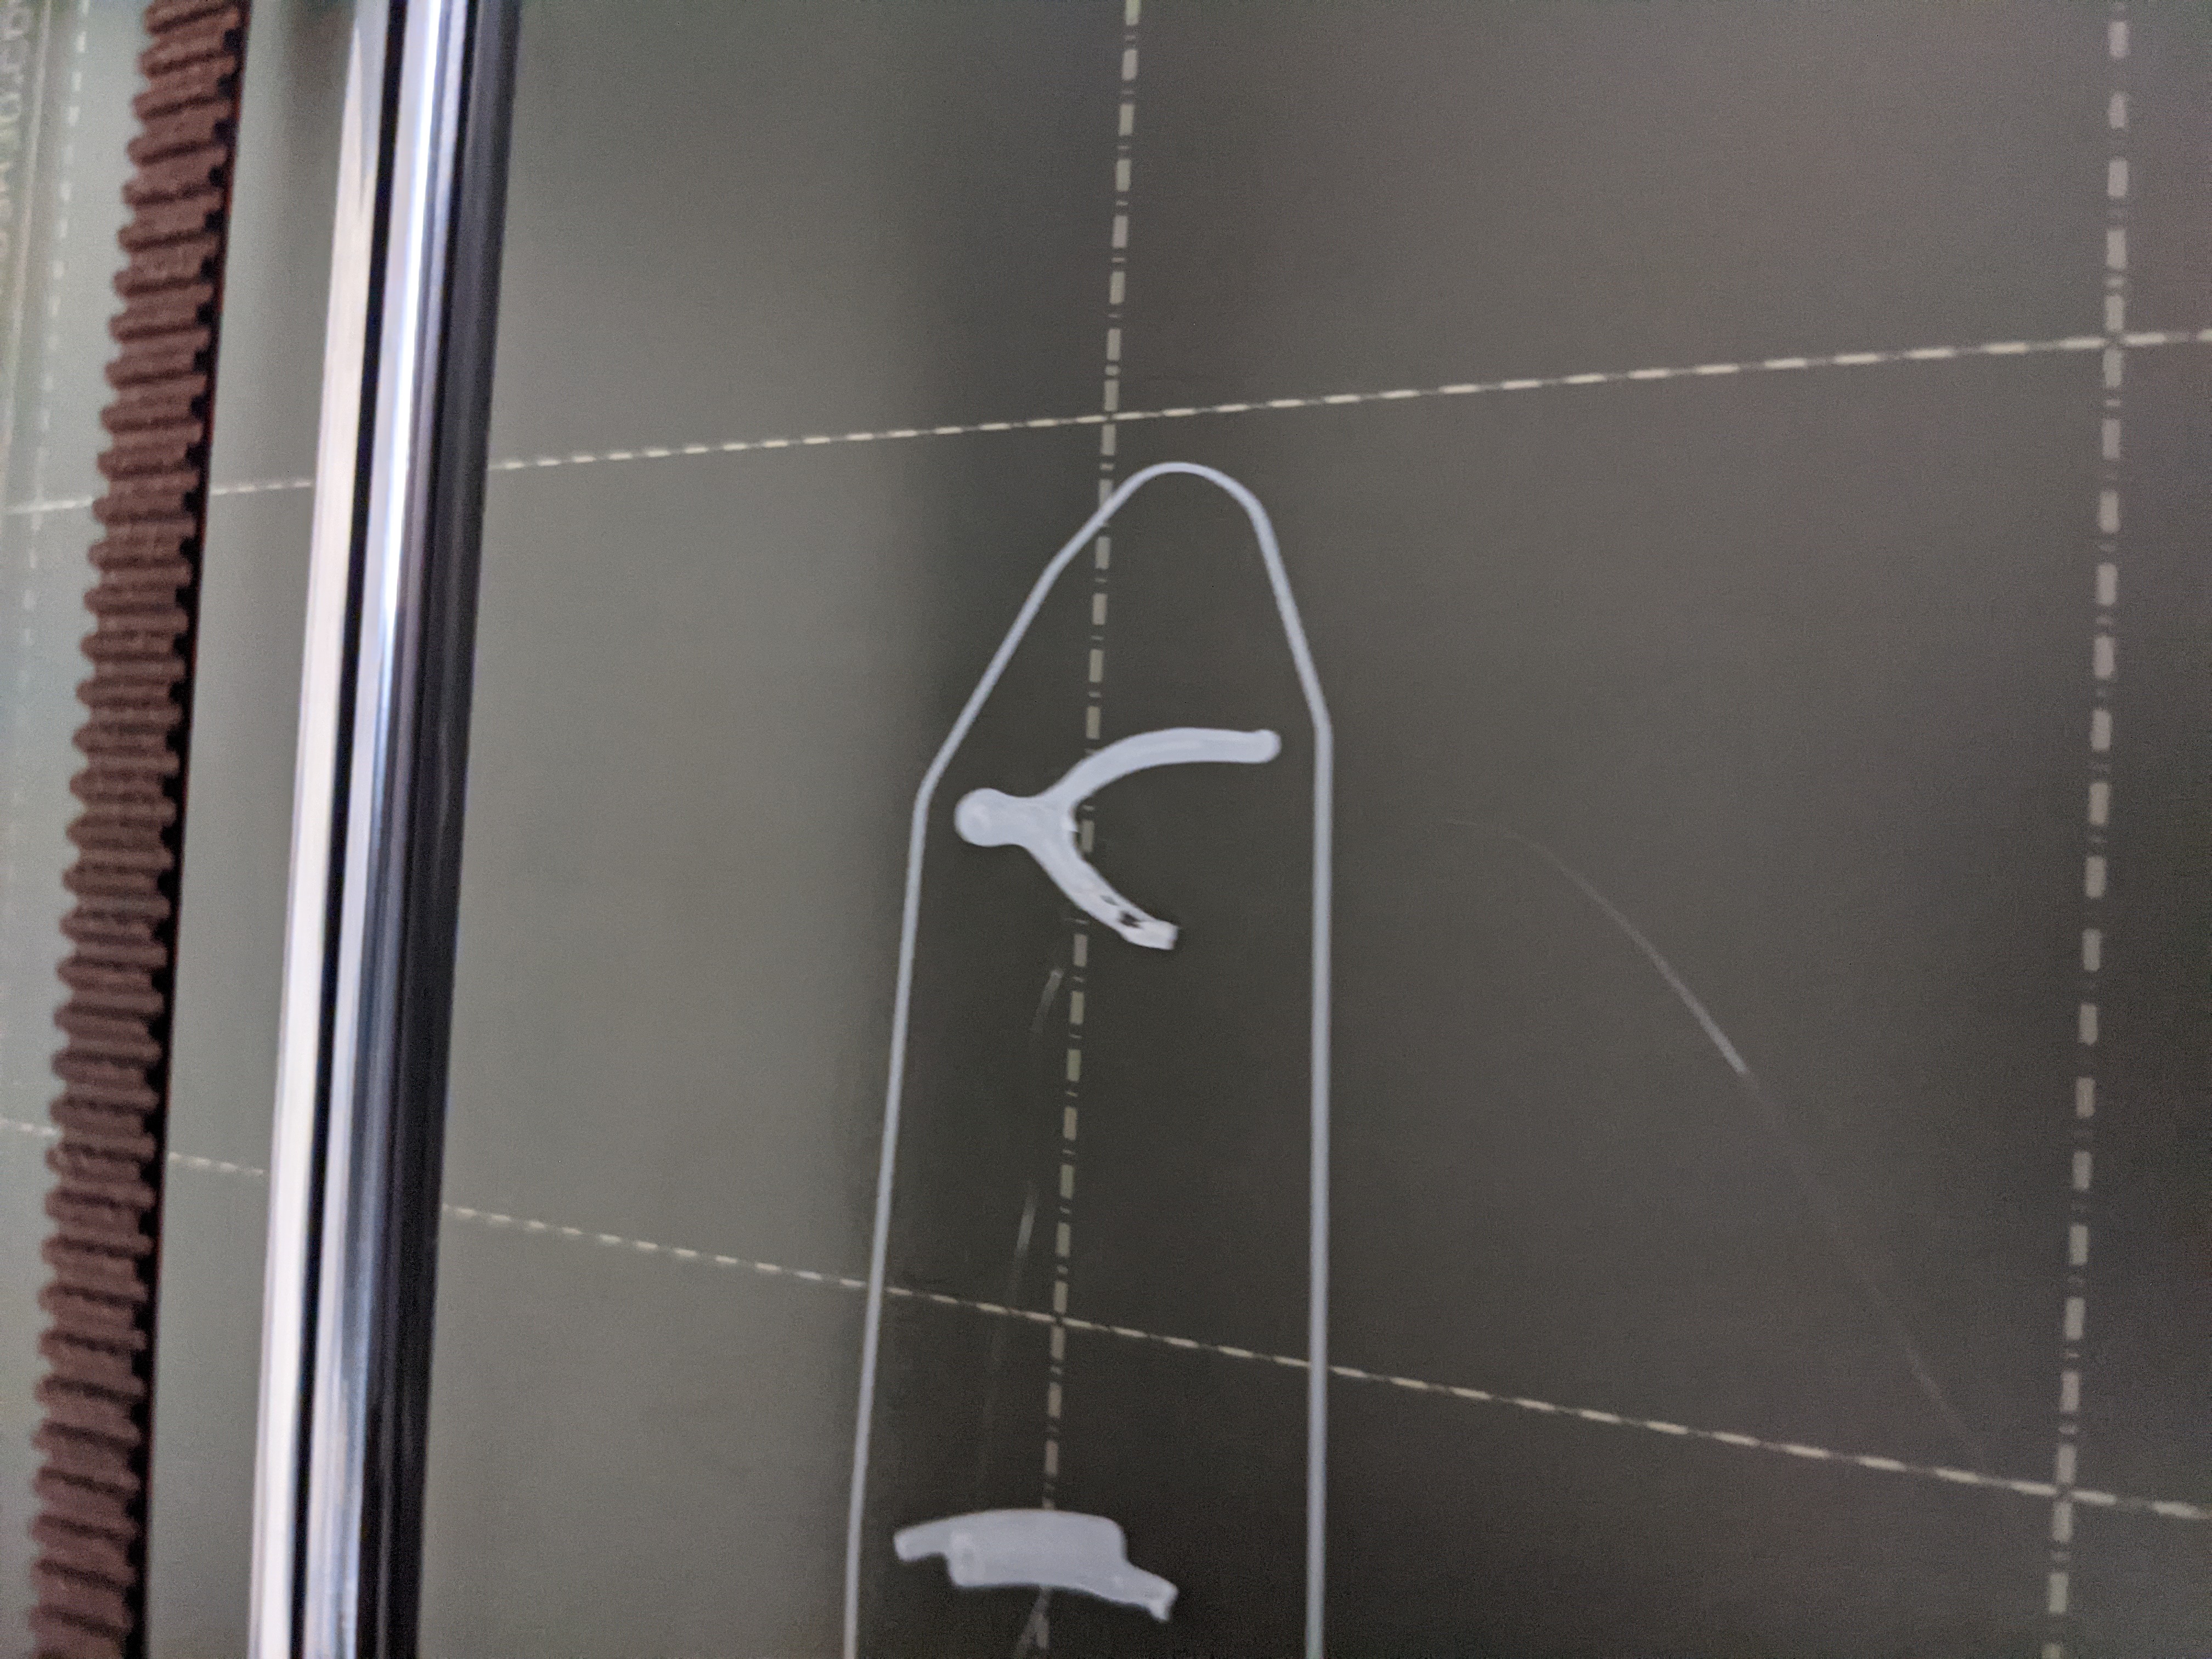
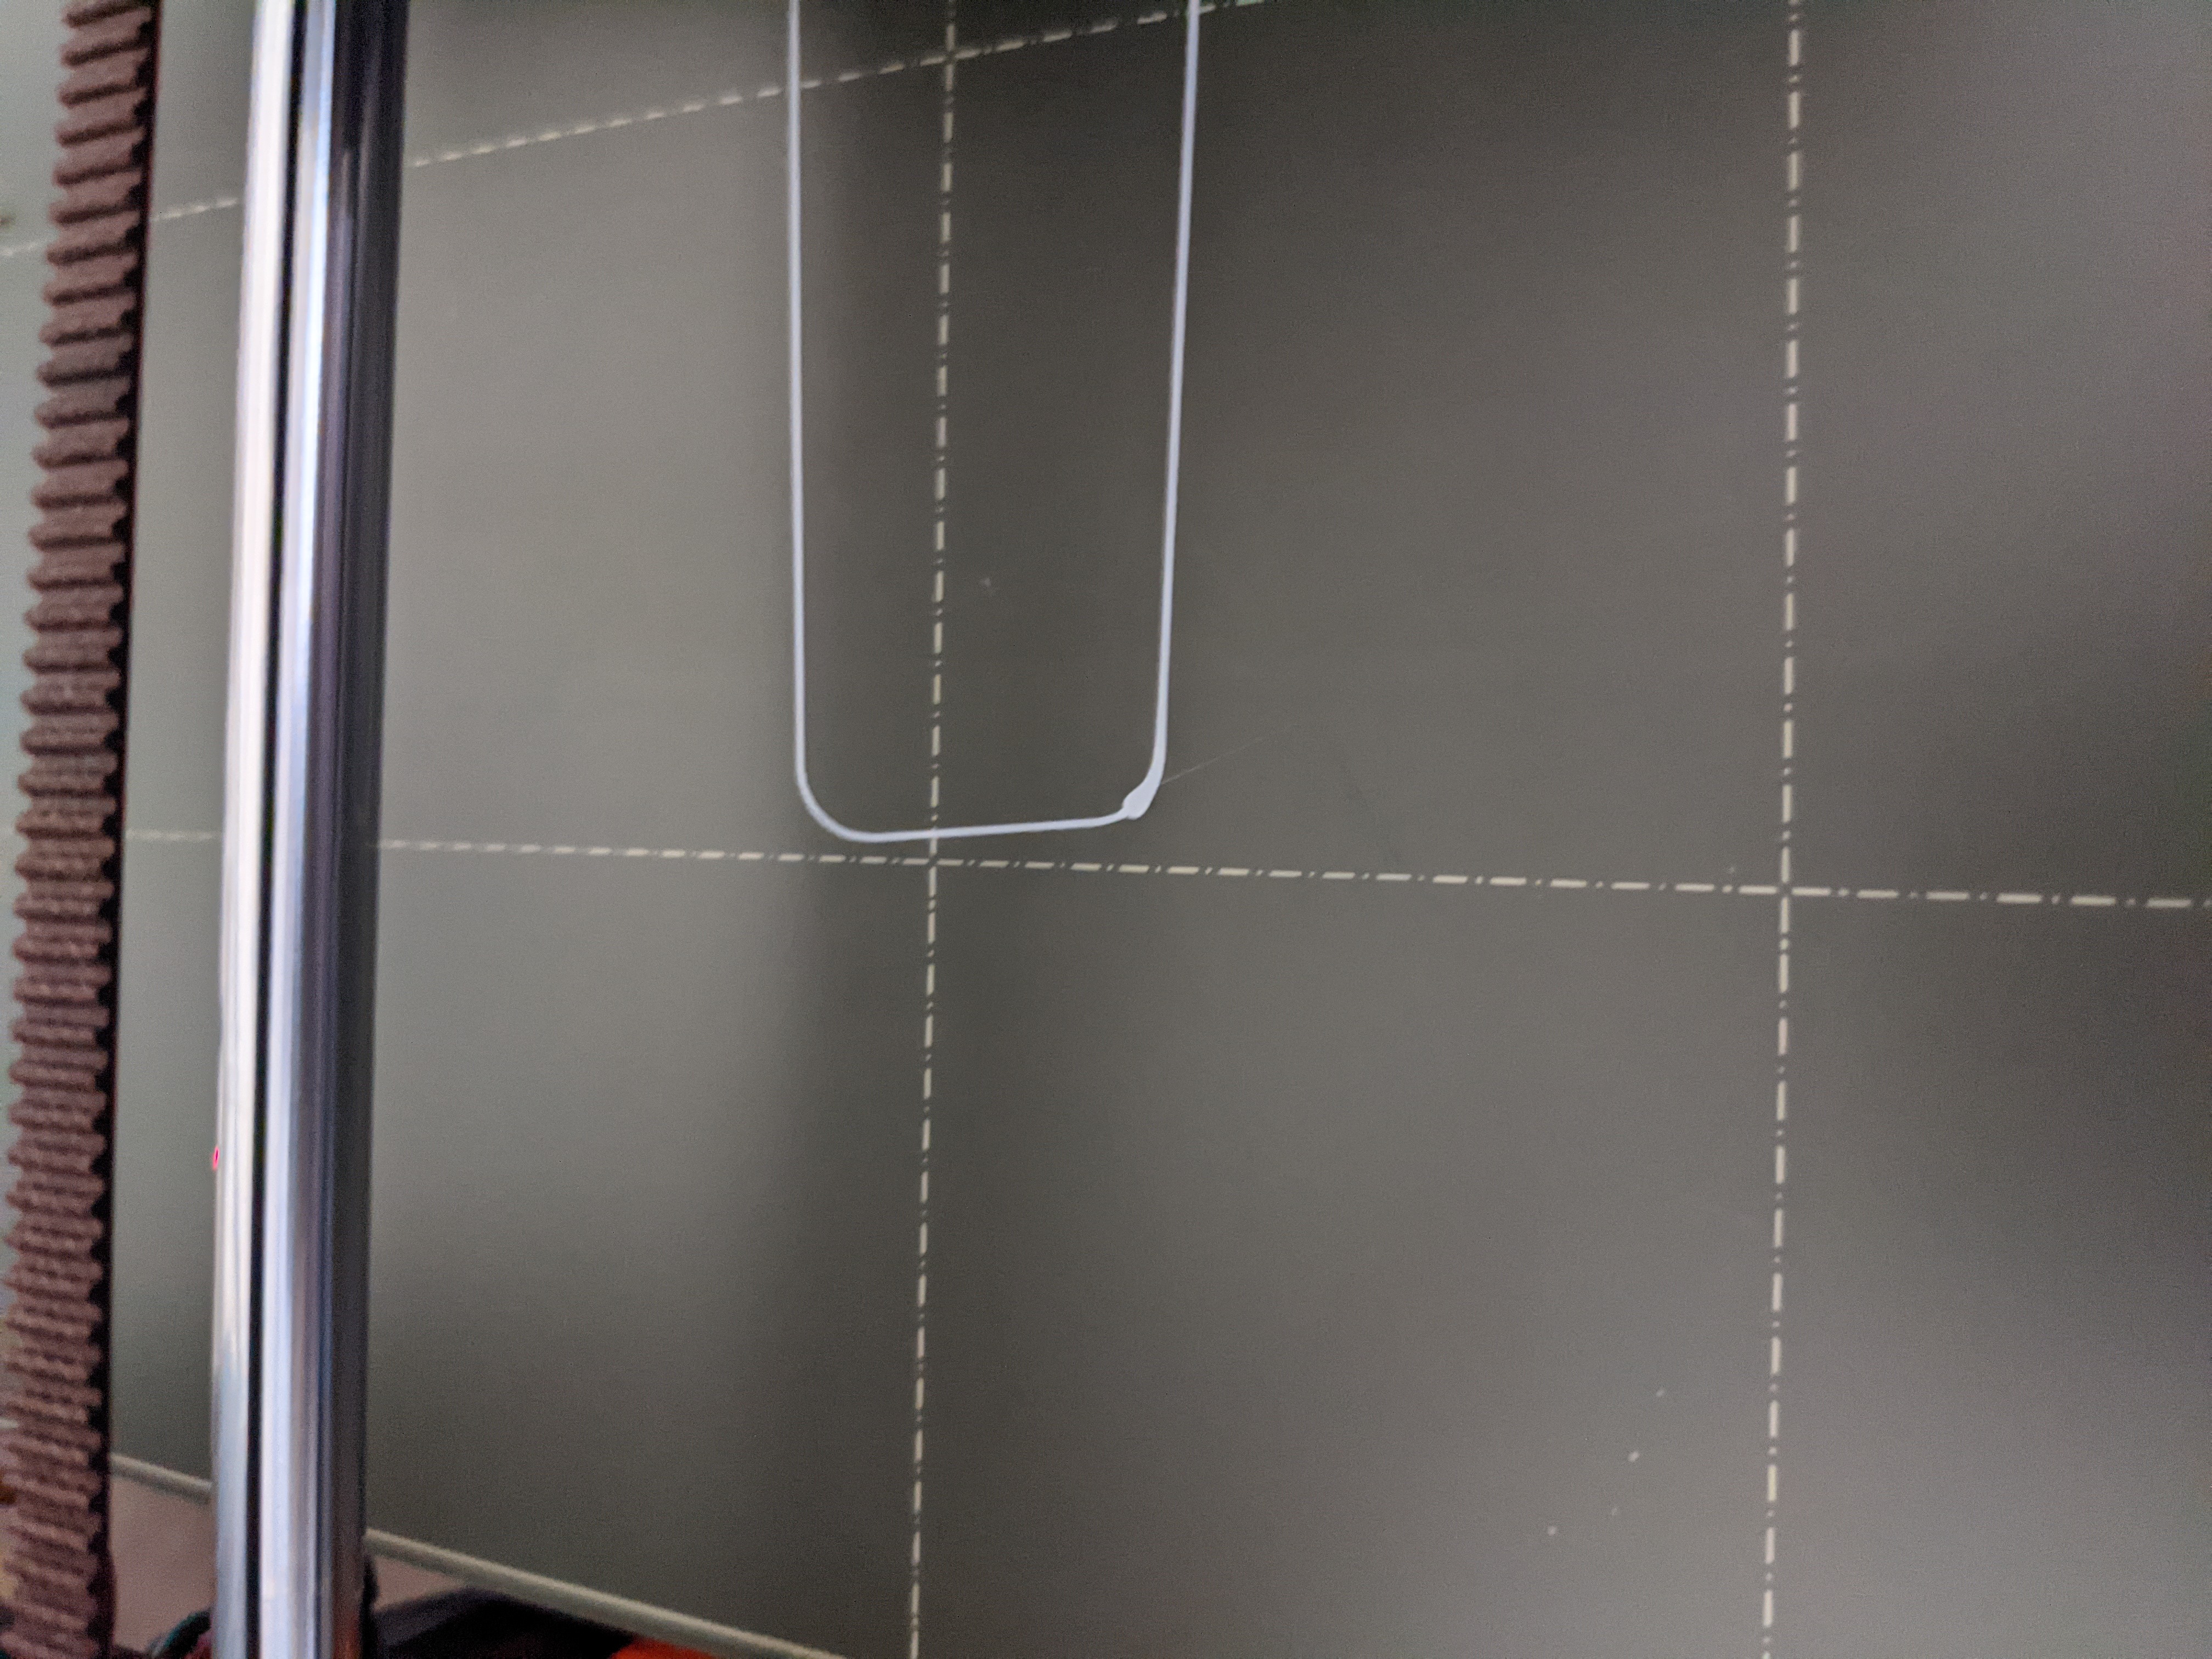
Regardless of what filament I use the purge line always curls up at the end like that but not as pronounced as it does with the Hatchbox white PLA. I have moved on to printing something else and am using Hatchbox black PLA. Notice the blob in the lower left? That is where the skirt stops/ends and pretty much every print I do has that as well.


RE: Can't figure out proper settings to slice a set of small parts
As far as the curl-up on the prime strip, yes, it does happen to me occasionally, and when it happens I'll more closely watch the lay-down of the skirt and the first layer. I'll almost never use an adhesion enhancer on the prime line area so I use it as kind of an early warning that the plate may not be Really Most Sincerely Clean. 😉
I do see a small blob in my print above where the skirt starts/stops but not as large as yours. I seldom even notice or look for this. Do you regularly brush off or wipe off the nozzle area before each (or most) prints?
It's hard to really tell from the photos, but it looks like some of the large print may be pulling away from the build plate shortly after it is laid down. Here are a few things, some from way out in left field.
How is the ambient temperature stability in the room where the printer is? Is it consistent? I'm also assuming that the print bed is a consistent 60C-ish with no variation during the print.
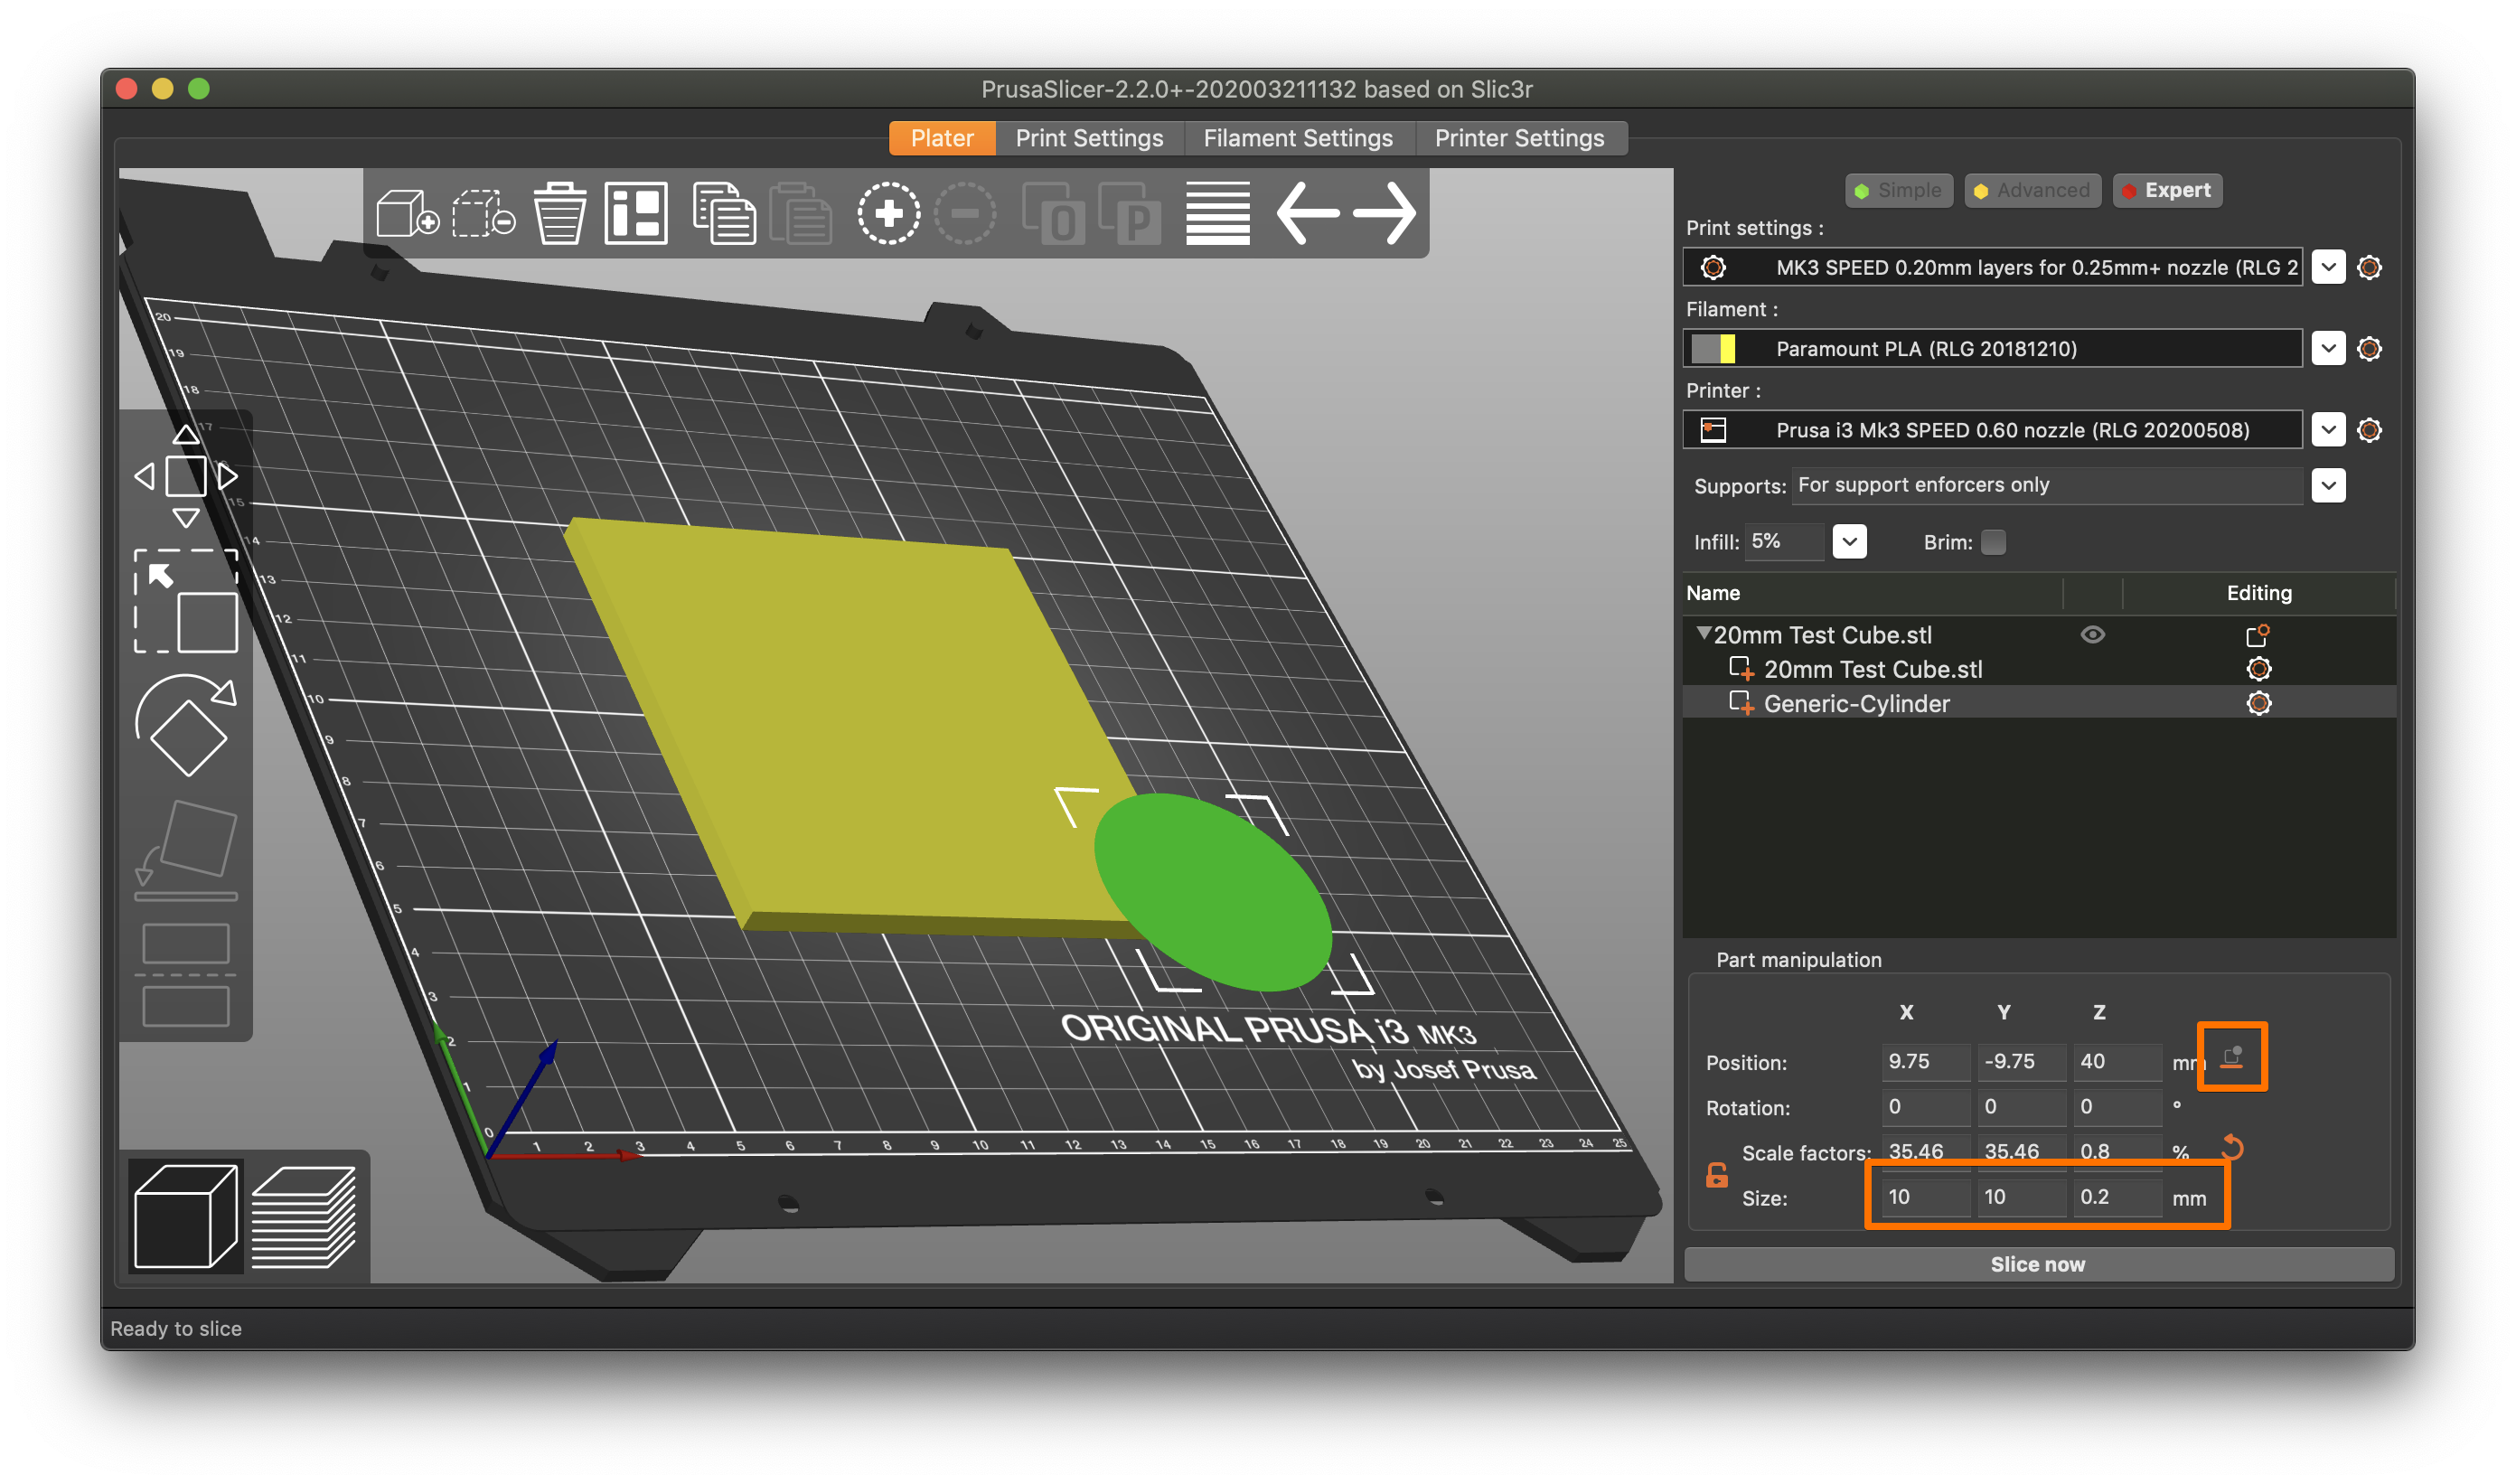
Have you done a detailed Z calibration with one of those 9-square test prints (like below)? These are easily found in the Prints section and the other 'usual suspect' 3d print sites. For the smooth sheet, I always 'tune' the Z for the most smooth and consistent top of the squares, and for the textured sheet I go for the point at which the 'brush strokes' of the print head disappear into the texture of the bottom of the print.
If you have a case where the squares on some parts of the build plate are consistently good, but consistently poor on other parts, you can do an advanced calibration and further dial in left/right front/rear so they are all good.
How hesitant are you on using an adhesion enhancer? I know that some insist, sometimes quite defensively, that this is not needed, but I've found that sometimes it really helps, particularly with small PLA pieces. A thin coat of glue stick works quite well. Layerneer is what I'll often use. Some use hairspray or Windex. This can help with initial lay-down of the bead, as well as stop first layer separation and warping.
Another thing that will sometimes help with smaller pieces is to dial down the machine speed with the front control knob during the first layer. I seldom have the need to do this, but I know it will sometimes help with some small pieces with a lot of detail.
I do a lot of smaller window frames and various trim pieces for model railroad building and accessories and I've found that the Prusa does a very good job with these both with PLA and ABS. Any I3 series machine should be able to do an equal or better job than I did last night on things like those game pieces.
RE: Can't figure out proper settings to slice a set of small parts
[...] How hesitant are you on using an adhesion enhancer? I know that some insist, sometimes quite defensively, that this is not needed, but I've found that sometimes it really helps, particularly with small PLA pieces. A thin coat of glue stick works quite well. Layerneer is what I'll often use. Some use hairspray or Windex. This can help with initial lay-down of the bead, as well as stop first layer separation and warping.
There's nothing wrong with using adhesion agents. I just get concerned when they're suggested as a substitute for proper bed cleaning and leveling, particularly for new users. Adhesion boosters can only do so much if the bed is dirty underneath or Live-Z is too high. There's also a tendency for new users to slop on layers of gunk before finally realizing the bed needs to be evenly clean for good results.
Get 'er level and clean, and if you still need something more, boosters and/or release agents are great. I've used MagiGoo for overly-sticky PETG (270C print temps on PEI) and Vision Miner Nano Polymer on warp-prone prints.
Generated mouse ears are also handy for tricky spots.
RE: Can't figure out proper settings to slice a set of small parts
@jsw
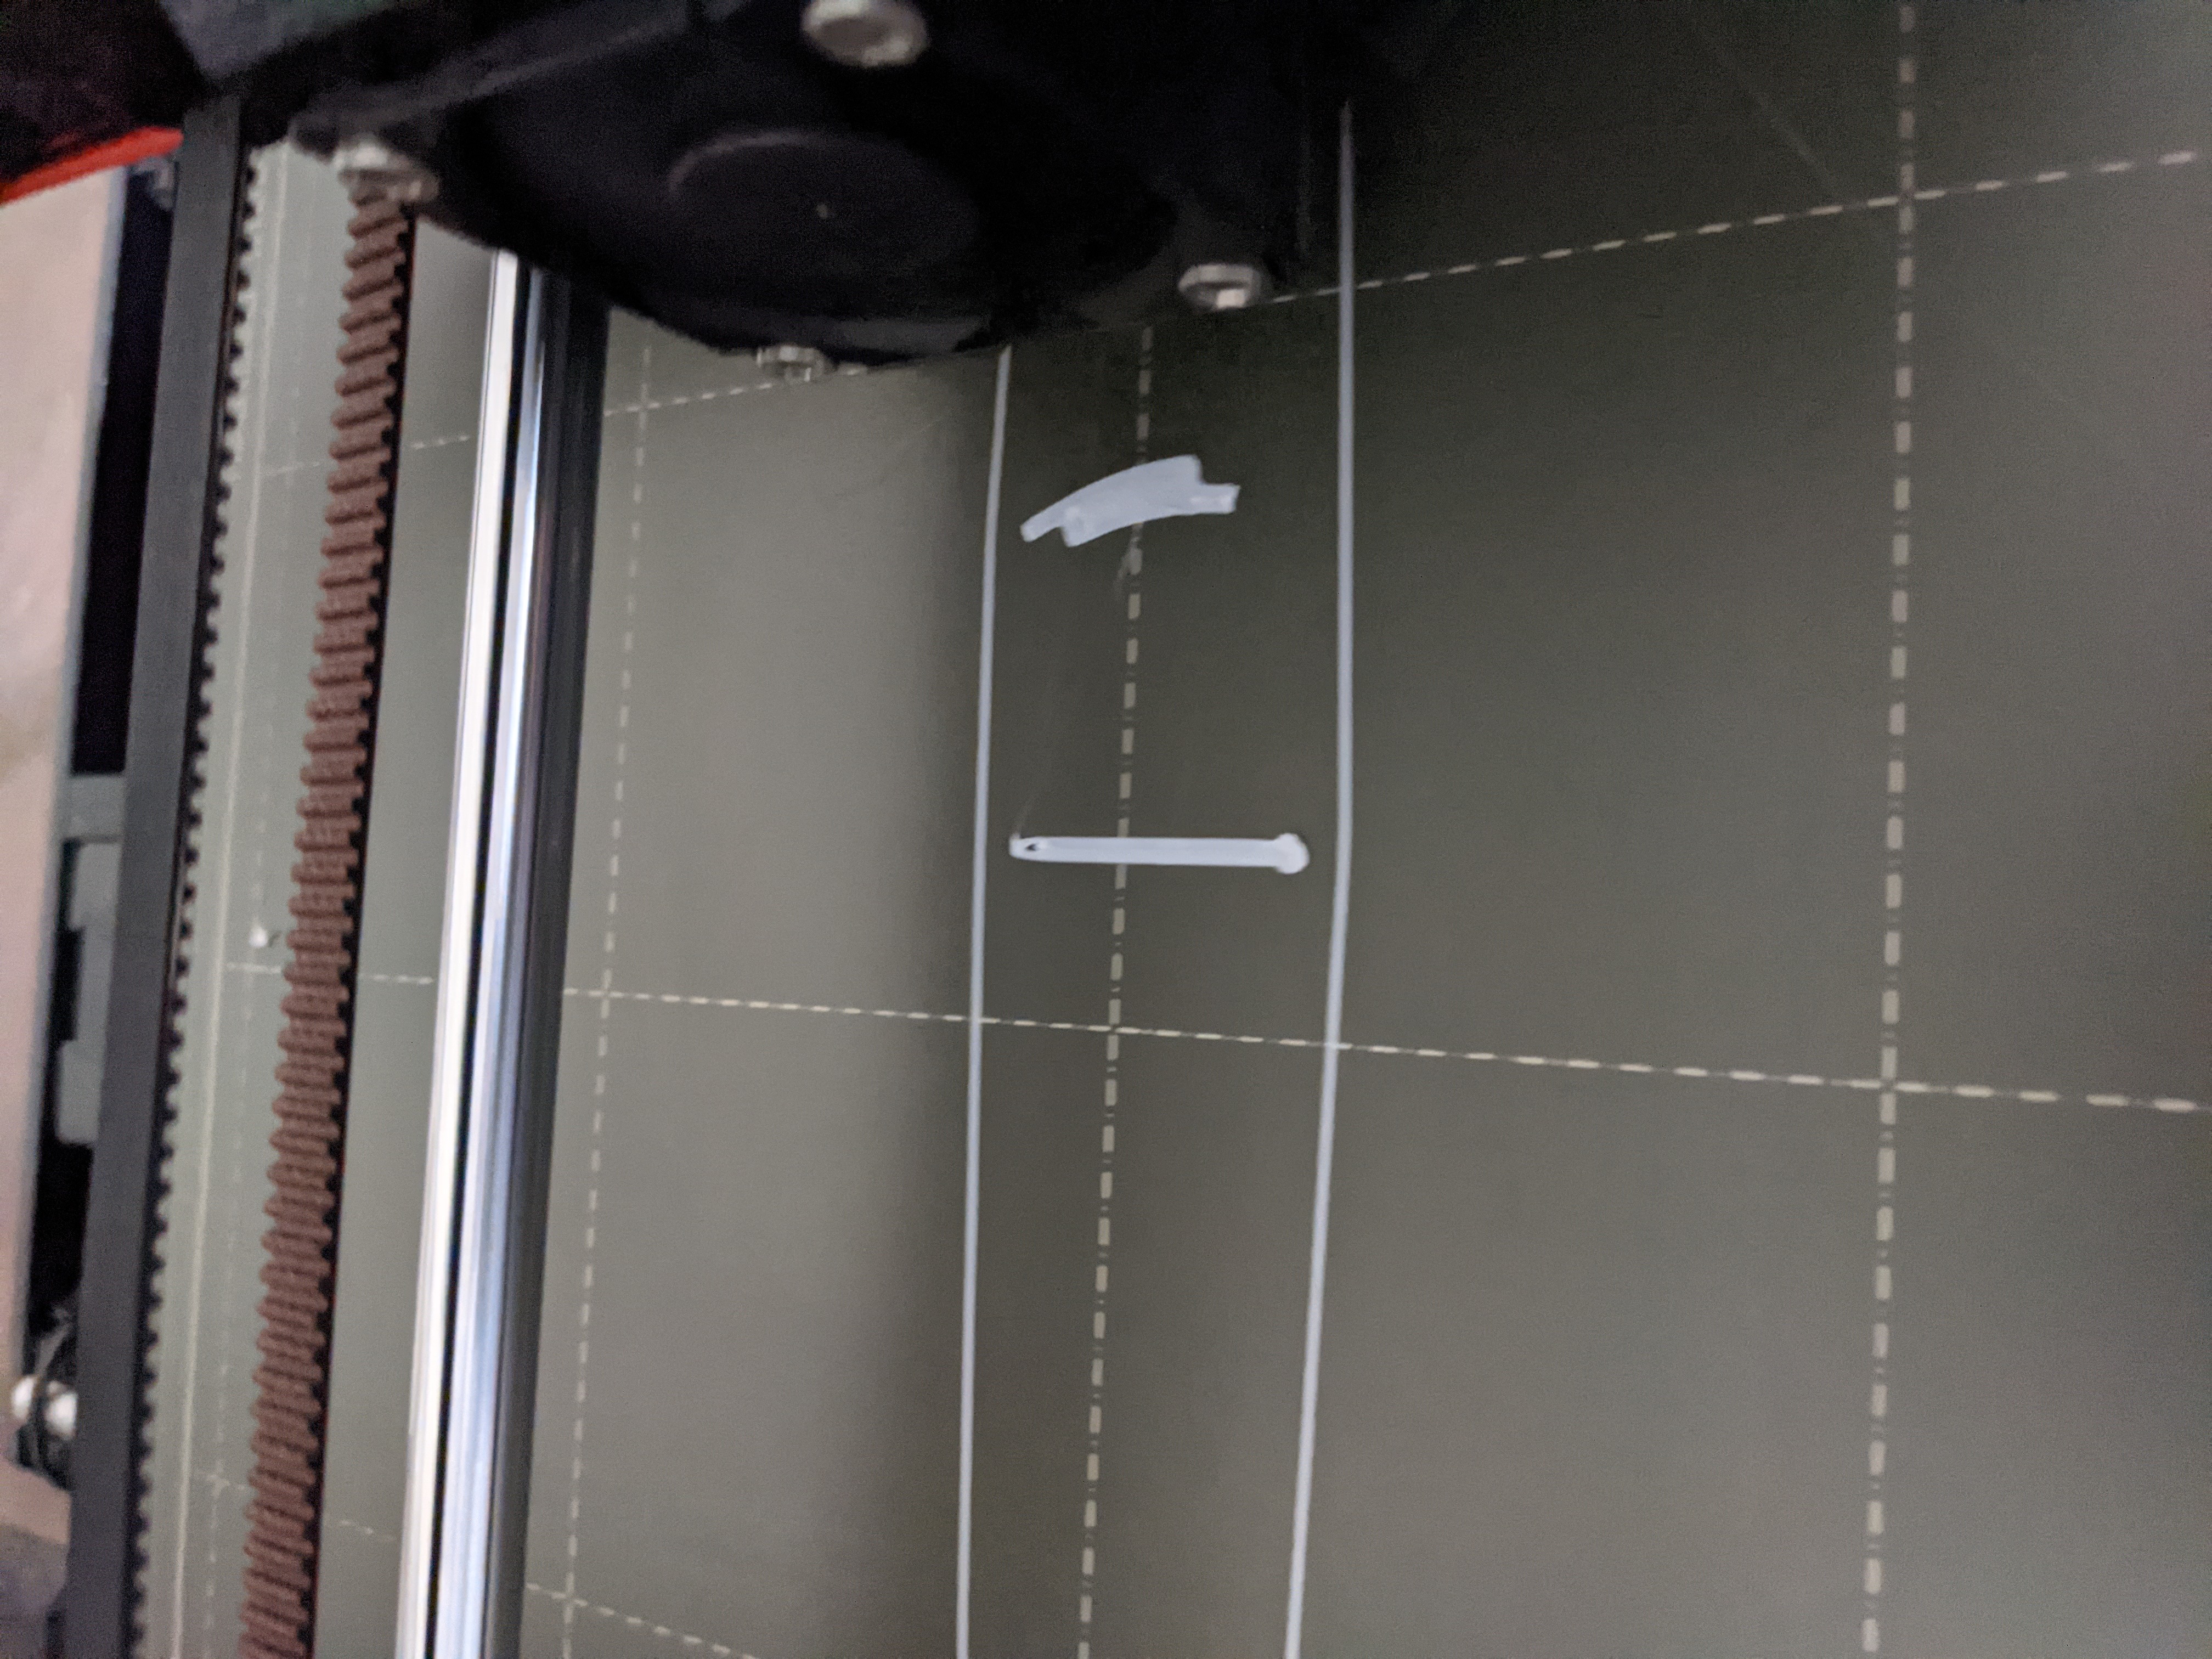
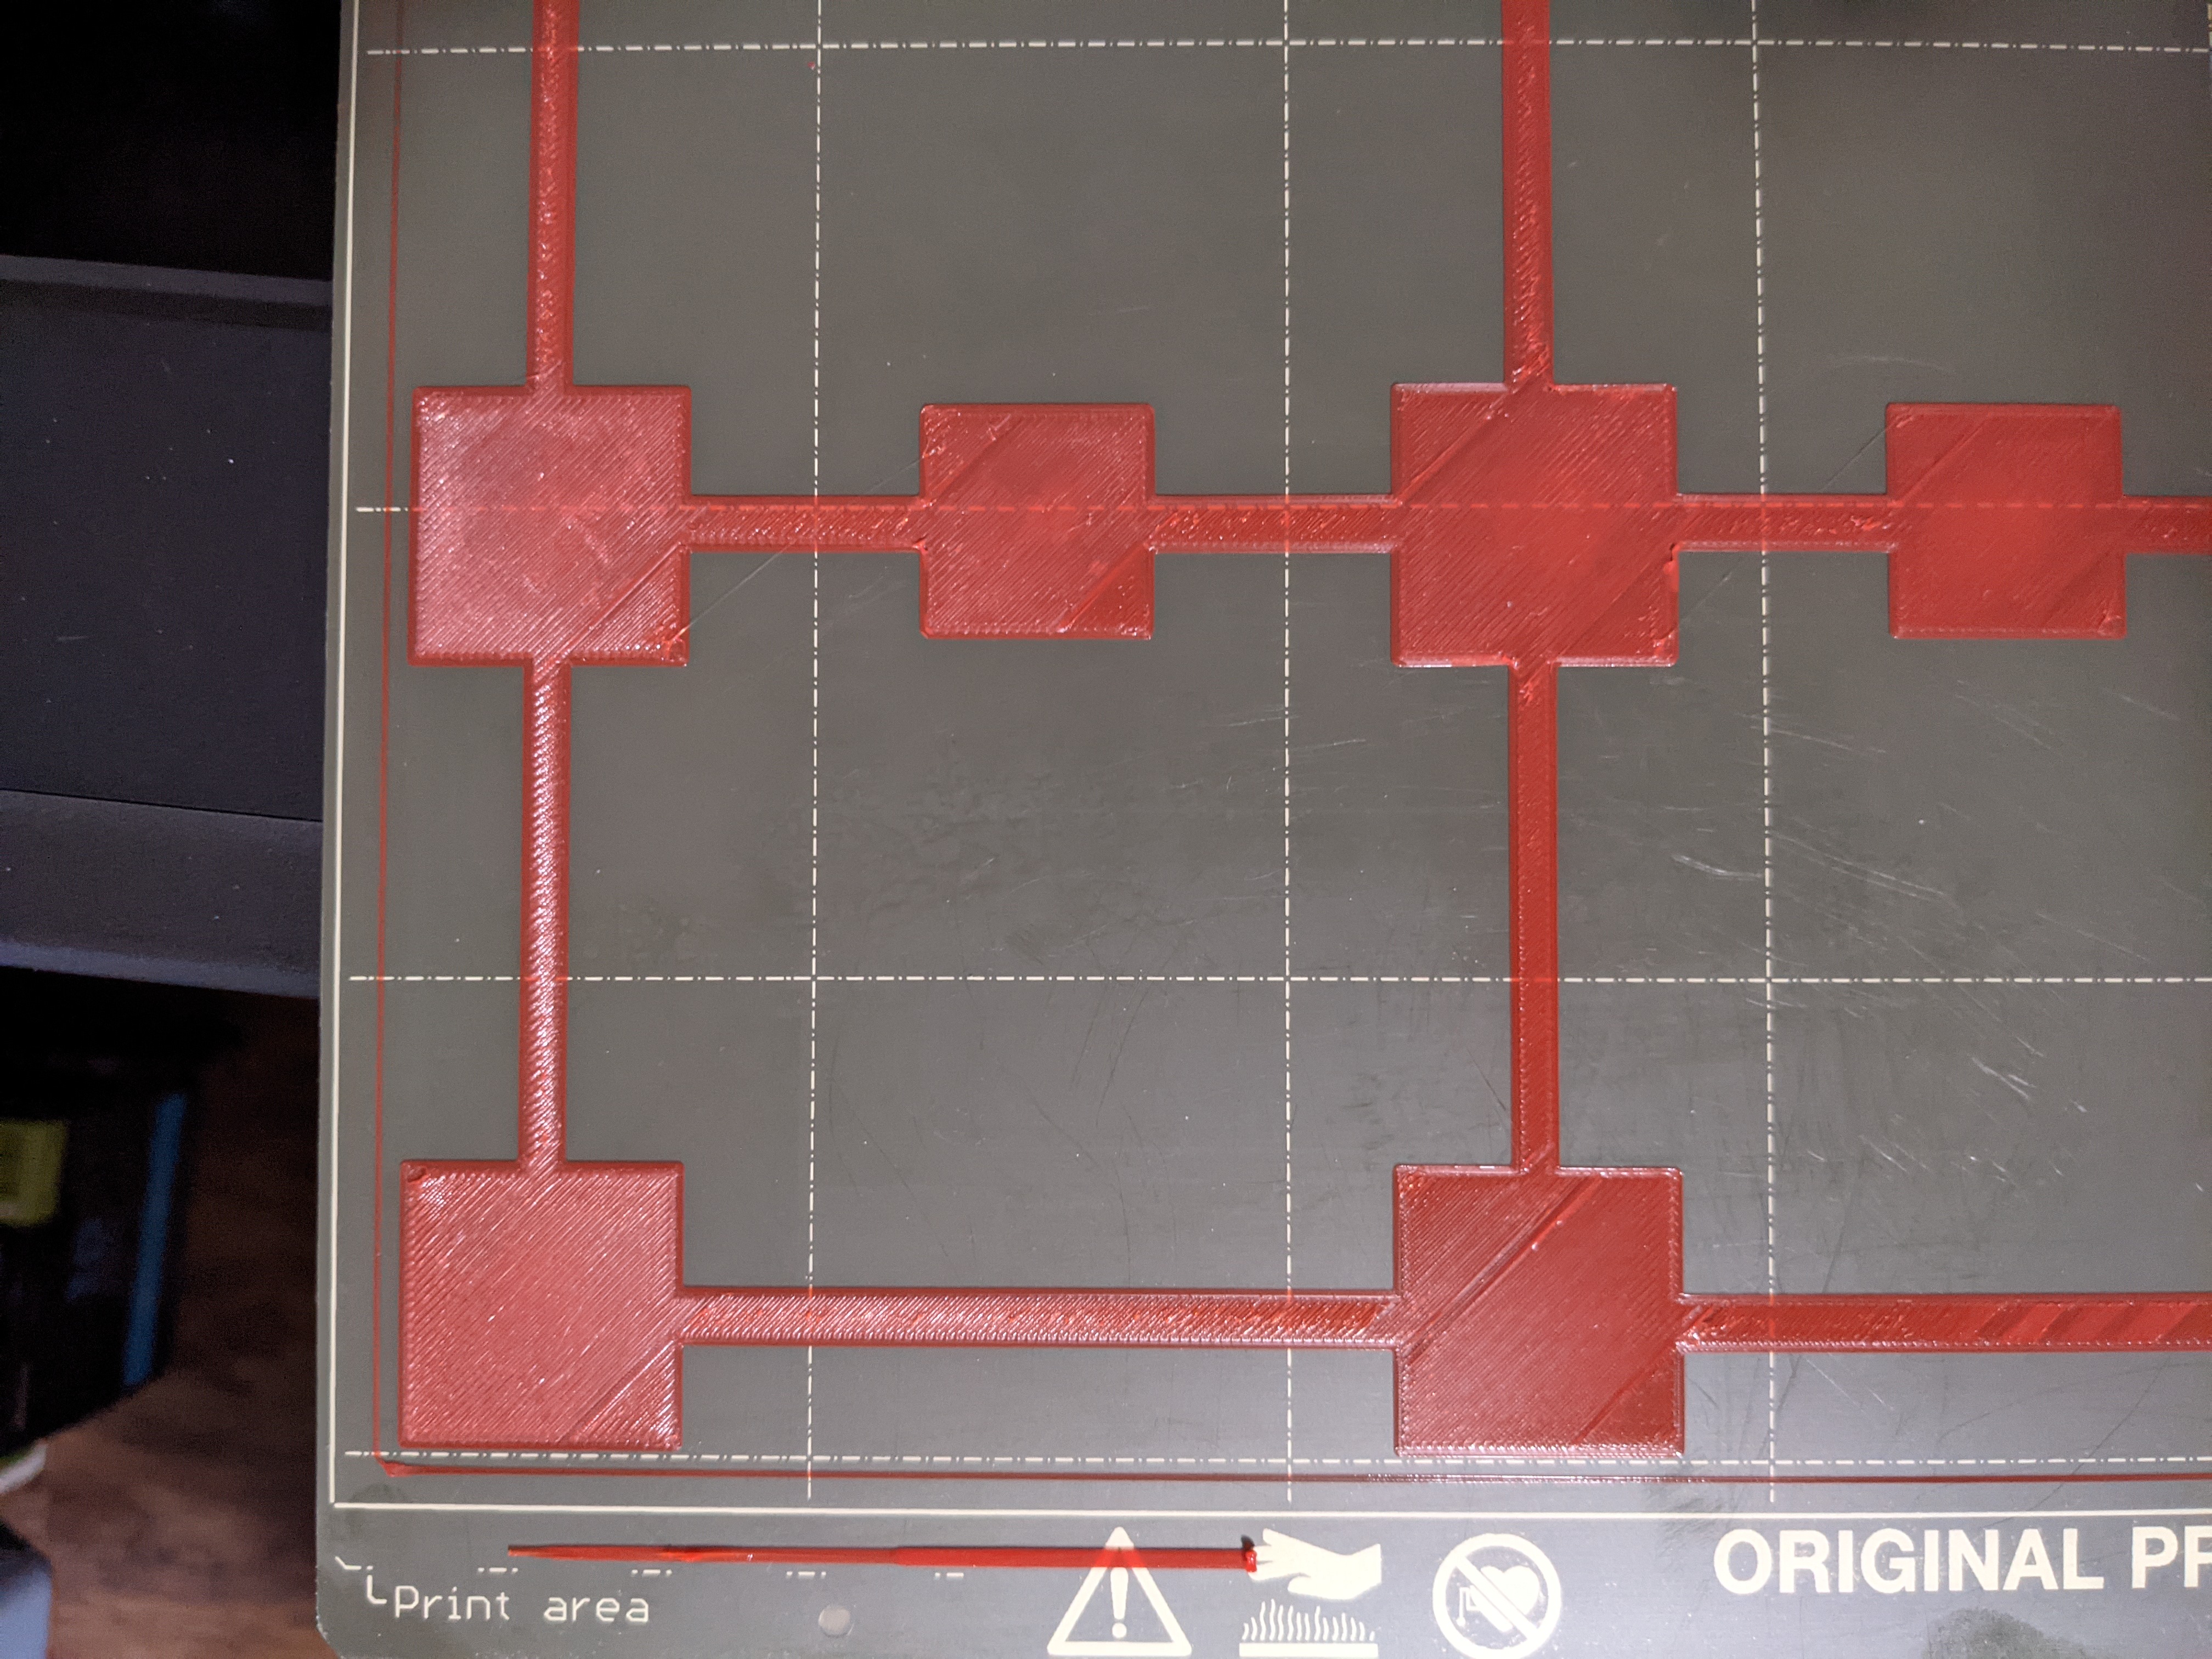
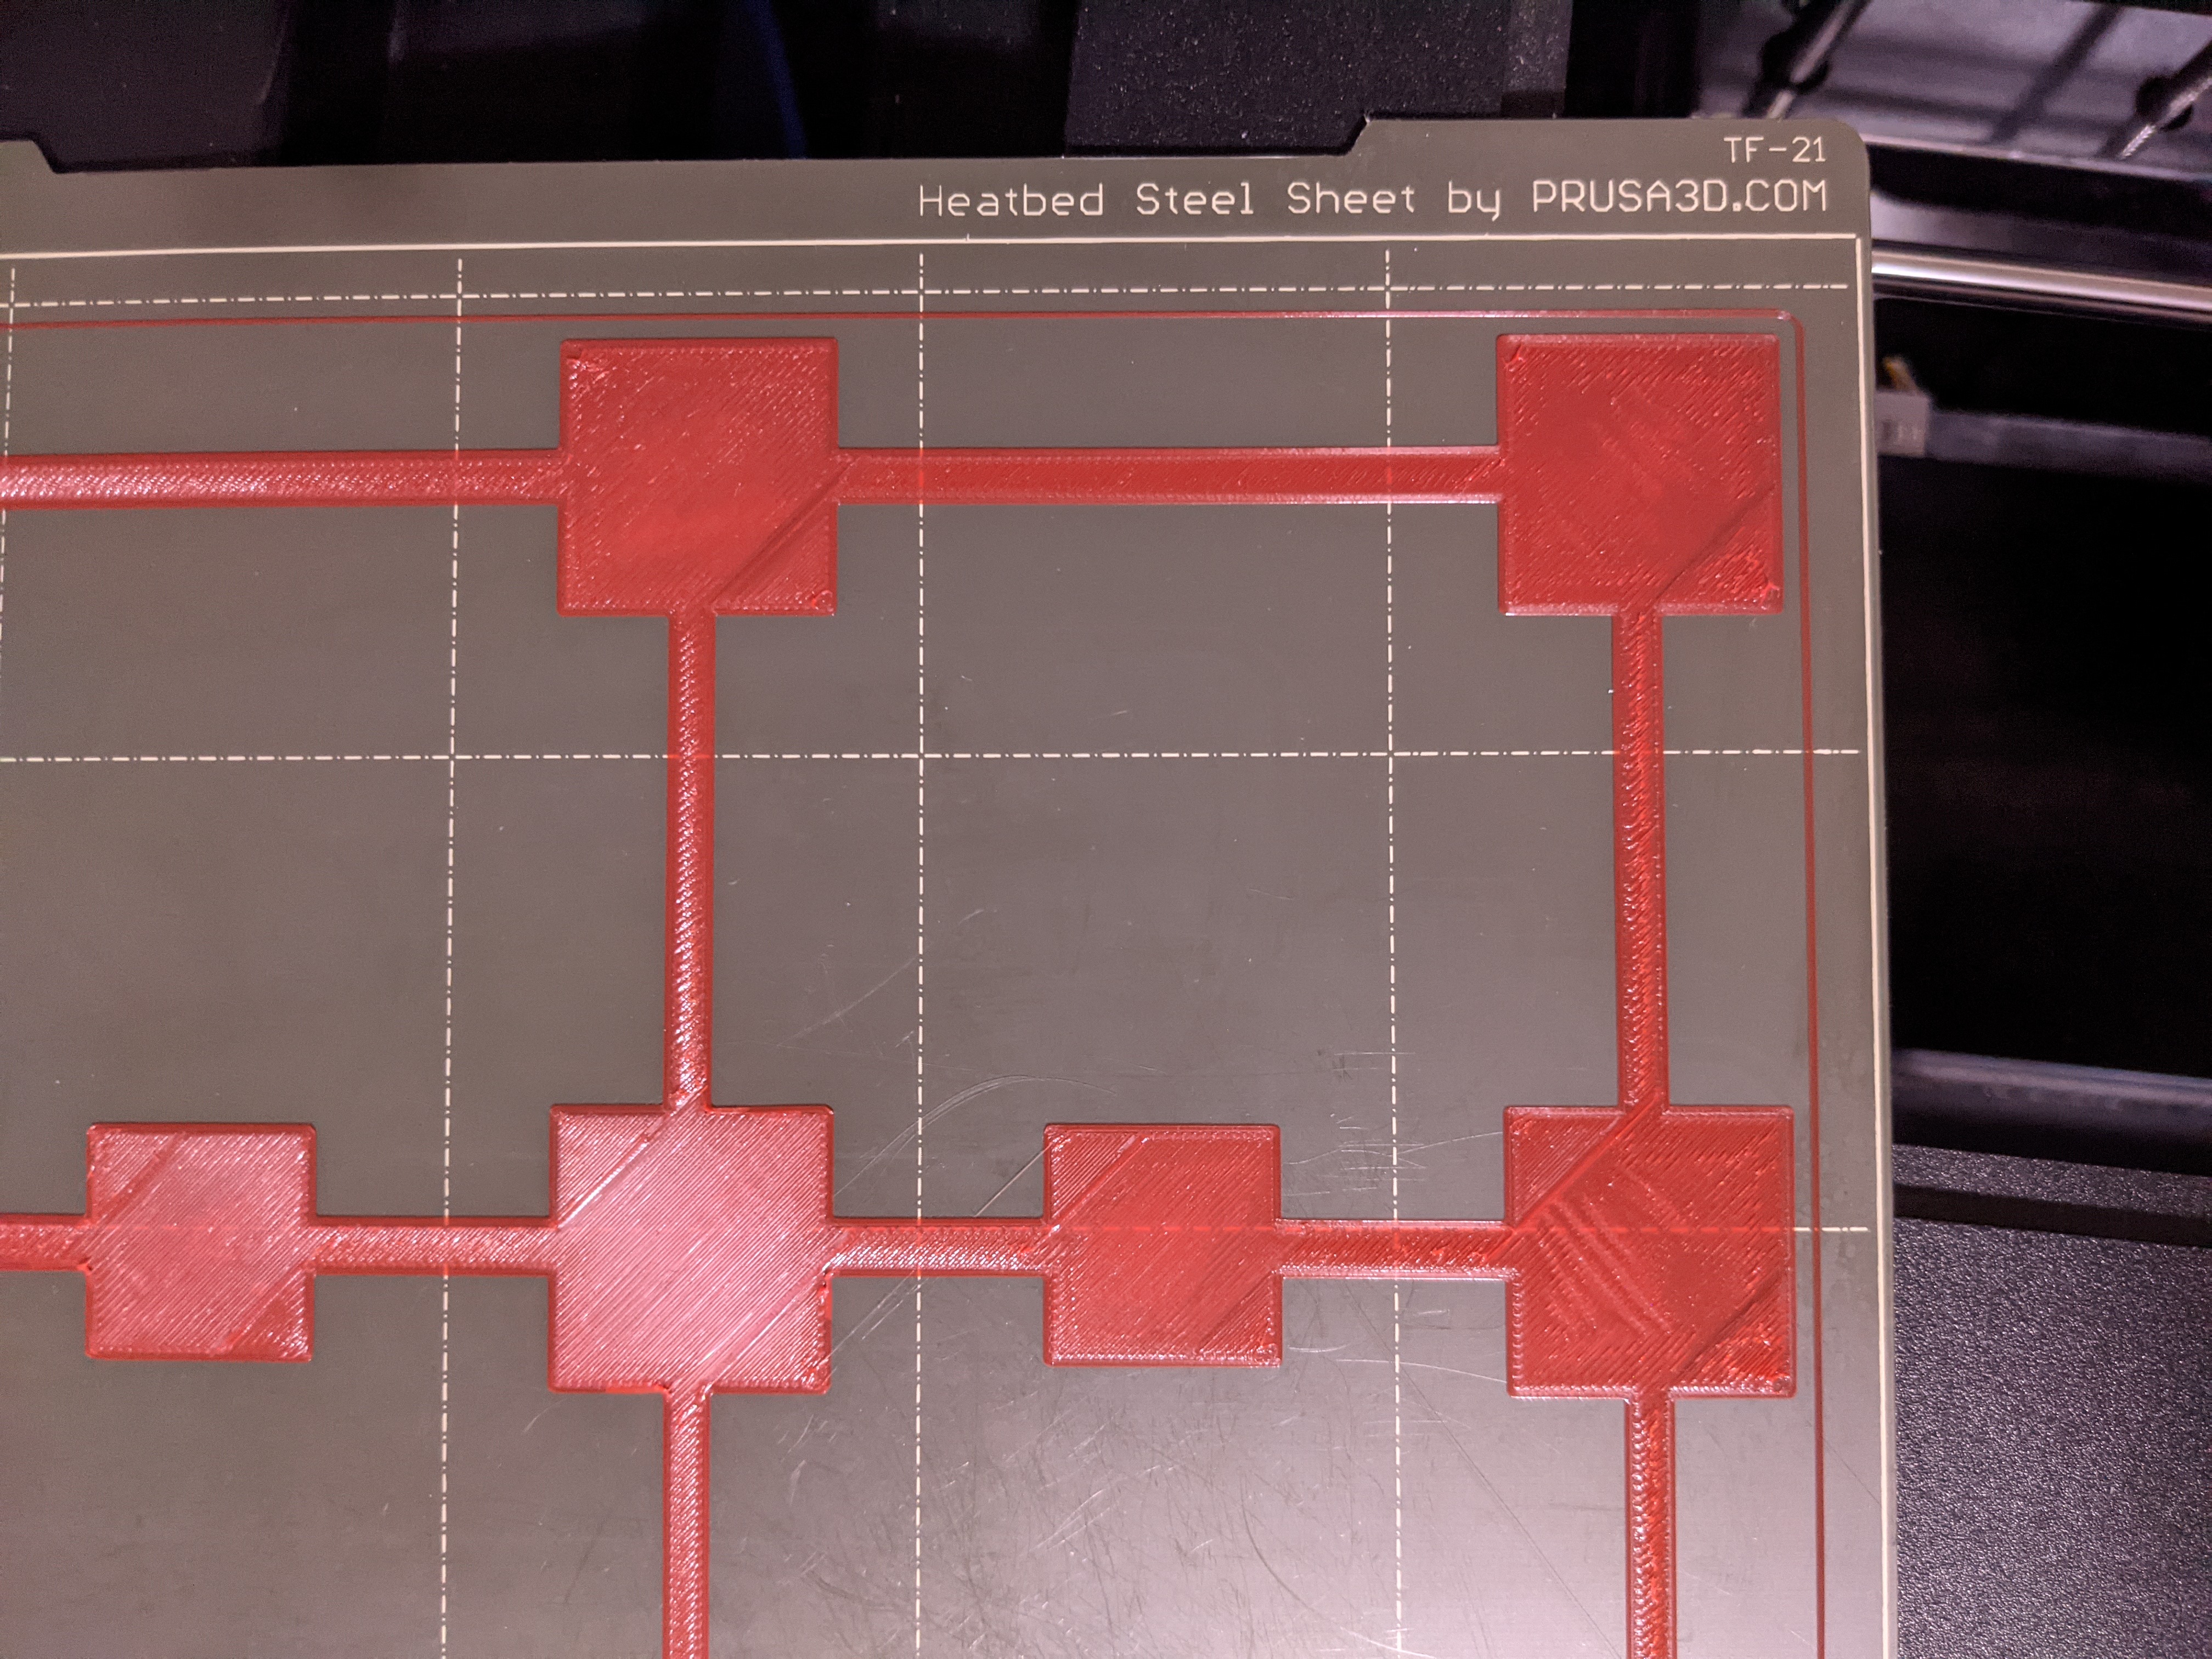
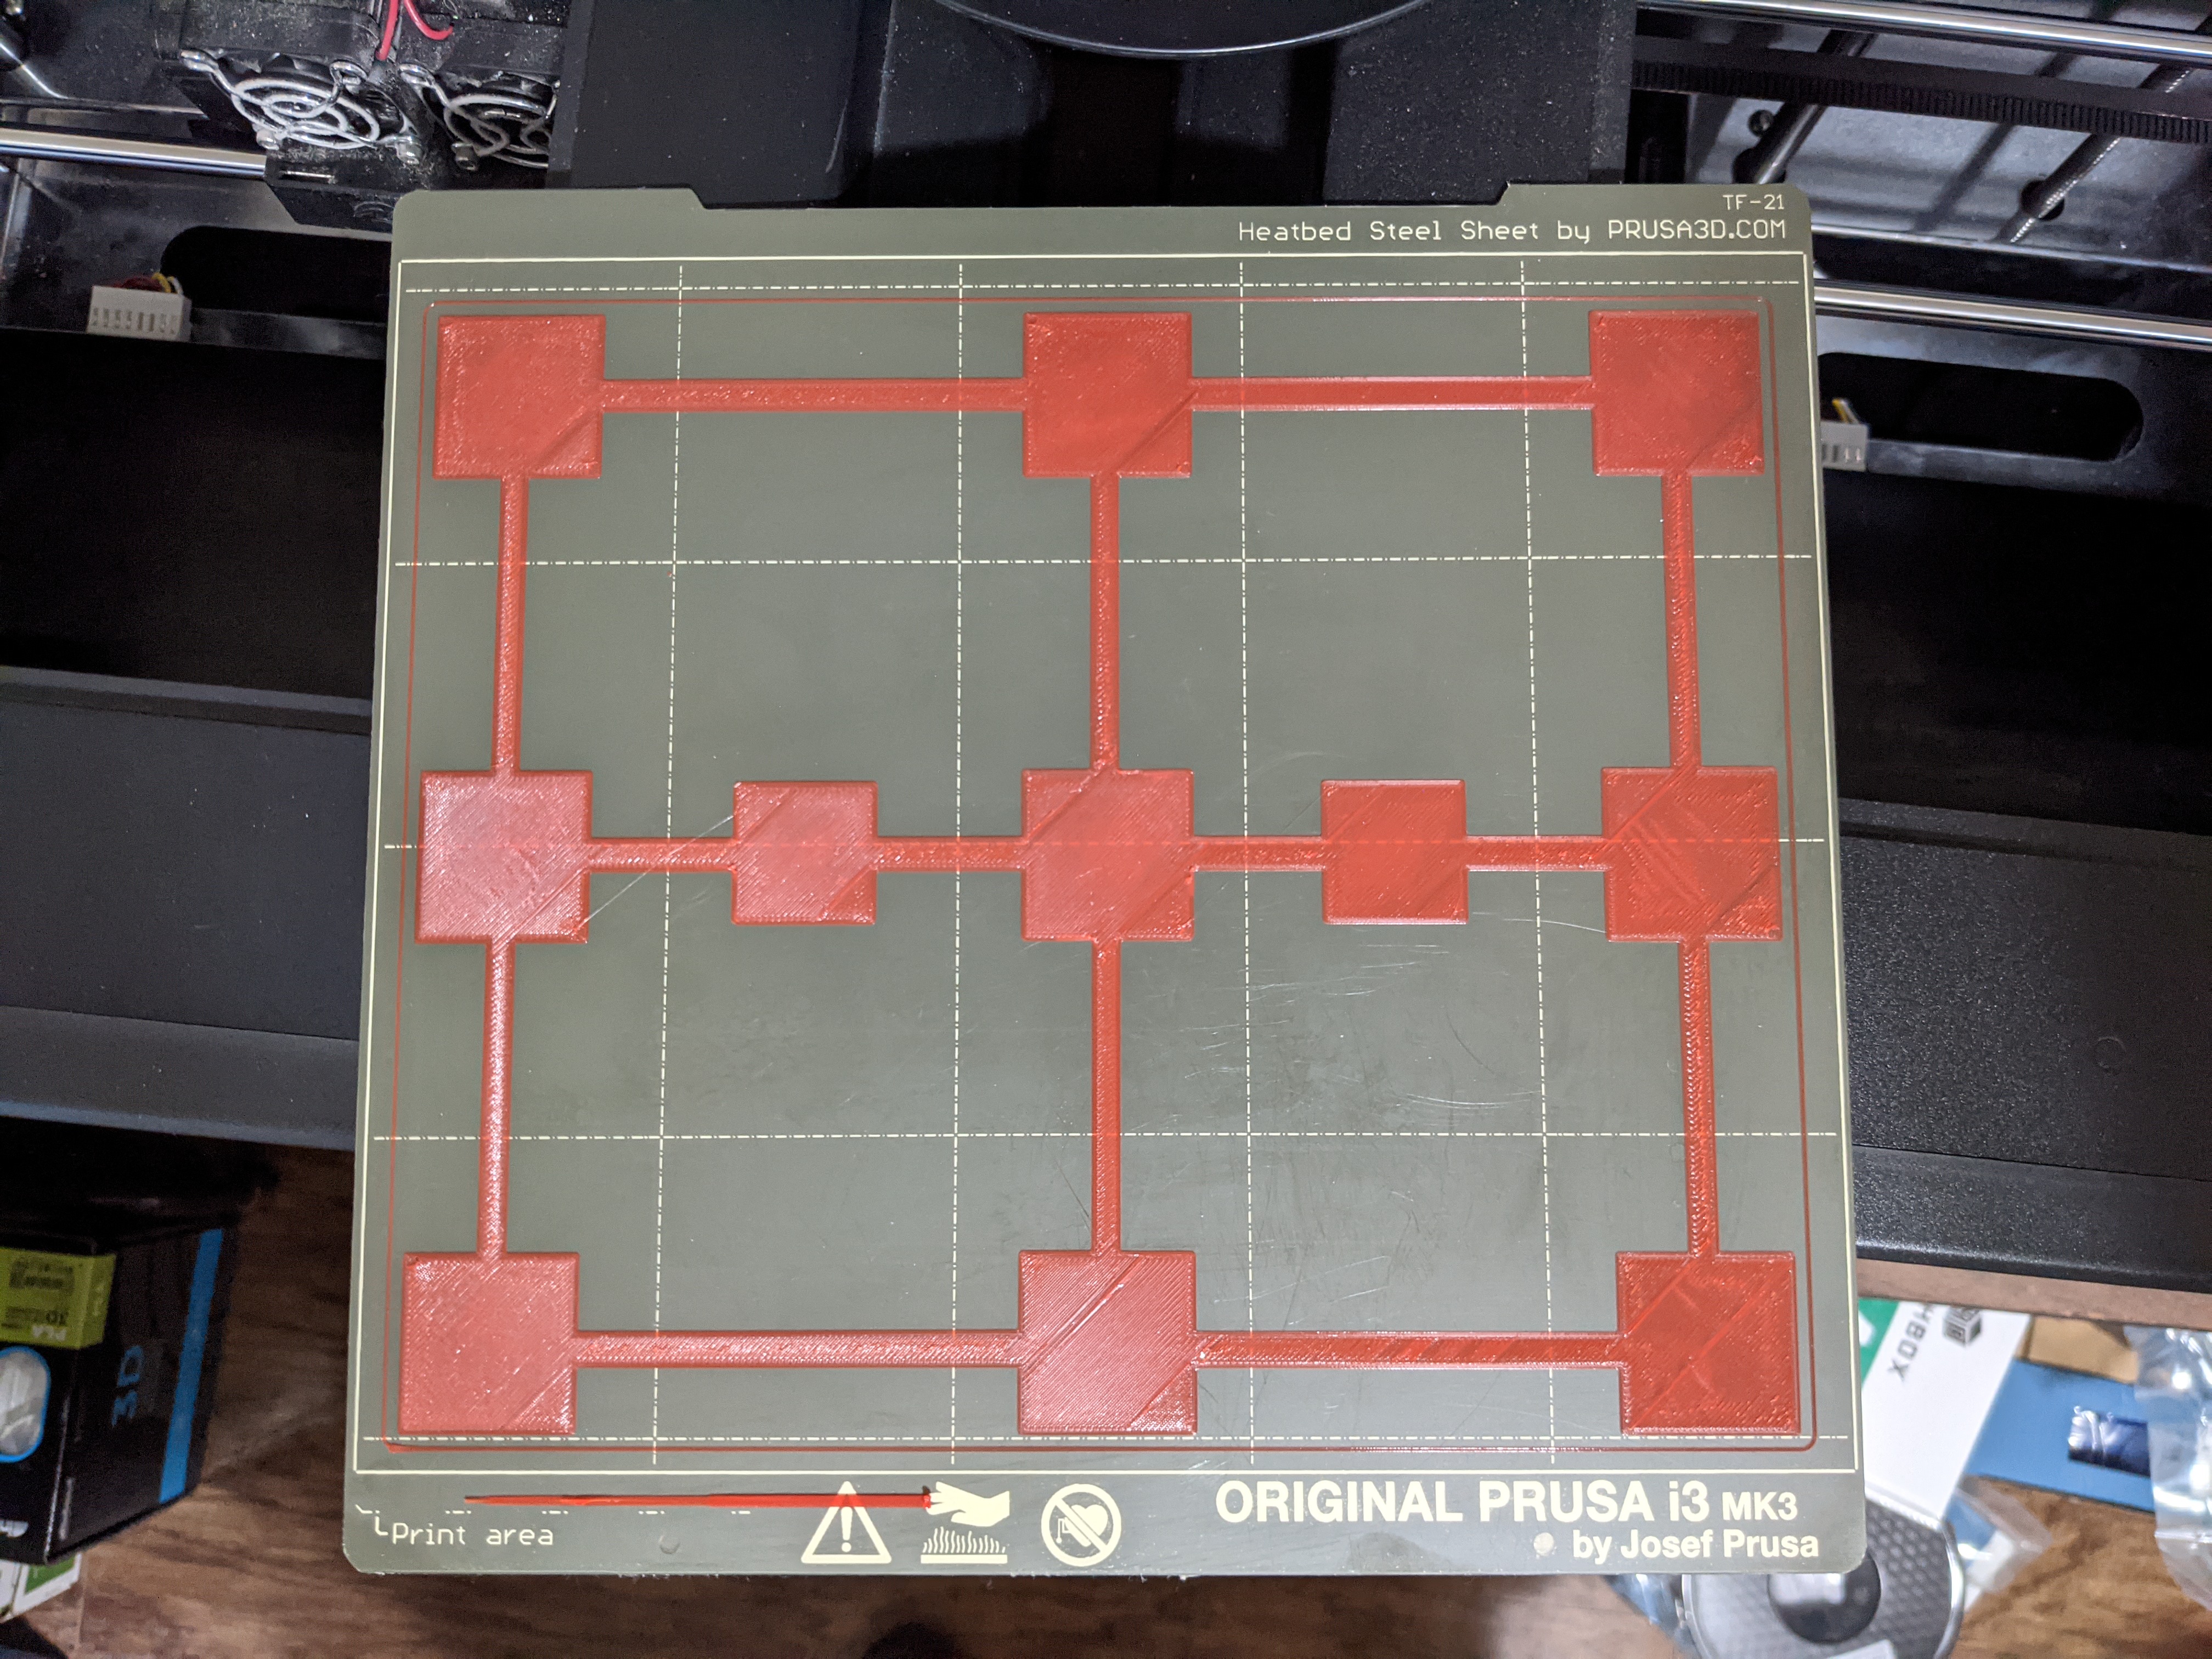
Printed with red Hatchbox, all default printer and filament settings (.20 Quality layer height). Current Live Z settings -0.64 -- I think sometimes my camera captures too much detail because most of the print doesn't look this bad to the naked eye!


RE: Can't figure out proper settings to slice a set of small parts
As you say, photos posted to the net are often times difficult to use in assessing an issue.
Something about that test print 'just doesn't look right', but I can't say certainly what it is. Something about the small connecting pieces, particularly the ones on the right, show some artifact that I don't think looks right.
Anyway, one test we can make is for you to try it with the same exact print file (.gcode file) that I used. I've attached it to this message in the .zip file. I've commented out the printer model check and two instances of select default extruder, so your printer should print it without issues. Please use the Hatchbox white, and by printing this print file, the only variables between the two are the actual printer and the environment.