Another MMU2 Filament Extruder Loading Problem
Hello,
I’ve recently purchased/installed the MMU2S for my MK3S. It worked fine for about a week and then it stopped loading filament to the nozzle. It moves it to the gears in the extruder and then there’s a grinding noise and then it retracts and tries again a few times. After 3 times it asks if it’s extruding the right color (which it’s not because there’s no filament in there). To be clear the MMU2 part works fine, it gets it all the way to the gears in the extruder itself (any of the 5 feeds work to that point).
I’ve tried the following:
I re-set the FINDA probe.
I cleaned the bondtech gears.
I checked the set screw on the bondtech gear.
I checked the alignment on the bondtech gear – without the idler door if I push the filament through the top by hand it pops right into the PTFE tube in the heatsink.
I’ve tried a new idler door that people on the forums were having luck with.
I’ve tried a new extruder body and a new feed plate thing on the top of the extruder (that puts the PTFE all the way through to right above the gears).
I’ve checked the IR Sensor but all I can see is that it’s straight.
I’ve replaced the idler spring.
I’ve tried changing the tension from all the way out to all the way in using one turn at a time. The grinding noise changes / gets higher or lower but it still fails no matter where I set it.
I have not tried a different IR Sensor – I have a spare one so I could try that next.
I’m open to any suggestions – although unless I remove the MMU2 and put back on the original parts I can’t print any other parts. I did print spare extruder parts before disassembly.
Thanks,
Brandon
RE: Another MMU2 Filament Extruder Loading Problem
It does the "retry 3 times" thing because the IR sensor is not tripping. So you just need to figure out why it isn't tripping. Might need to be calibrated, or it might just be a bad sensor. I'd try replacing the sensor first since you have a spare. Or you could check the installed sensor by tripping it manually with a slip of paper or something just to make sure it works.
Good luck!
RE: Another MMU2 Filament Extruder Loading Problem
I think it's something else.
I replaced the sensor and it didn't change anything. So I decided to switch back to the non-MMU setup, just to see.
Even the non-MMU extruder is doing the same thing. It detects the filament and pulls in into the gears and into the PTFE tube even ( I took the idler off to see how far it made it) and then it does the grinding. Looking at the filament it really chews up one spot so it's getting stuck inside the heatsink I think.
I took the bondtech gears out and really scrubbed them to make them shiny again (with a toothbrush and alchohol) just to make sure again that those were not full of plastic since it chewed up the filament so bad.
So my thoughts are either the gears have enough pull to bring in the filament but maybe they dulled(?) - Is that even a thing? I only use normal PLA and PETG, occasionally ABS. I've never used any metal or wood infused filaments.
Or possibly the heatbreak is somehow blocking the filament. It's not clogged, I took that out and it's very clean, and I put a new nozzle on. It's not getting to the nozzle. I also put in a new PTFE tube in the heatbreak - I used one of the spares from the MMU2 kit so it was beveled on the one end and inner beveled on the other.
I don't have another 'real' e3d heatbreak though, just some cheap Chinese ones, I guess I could try one of those.
Same issue so far though...
RE: Another MMU2 Filament Extruder Loading Problem
I had that trouble for several weeks that I couldn't figure it out. I finally got it fixed it just few weeks ago.
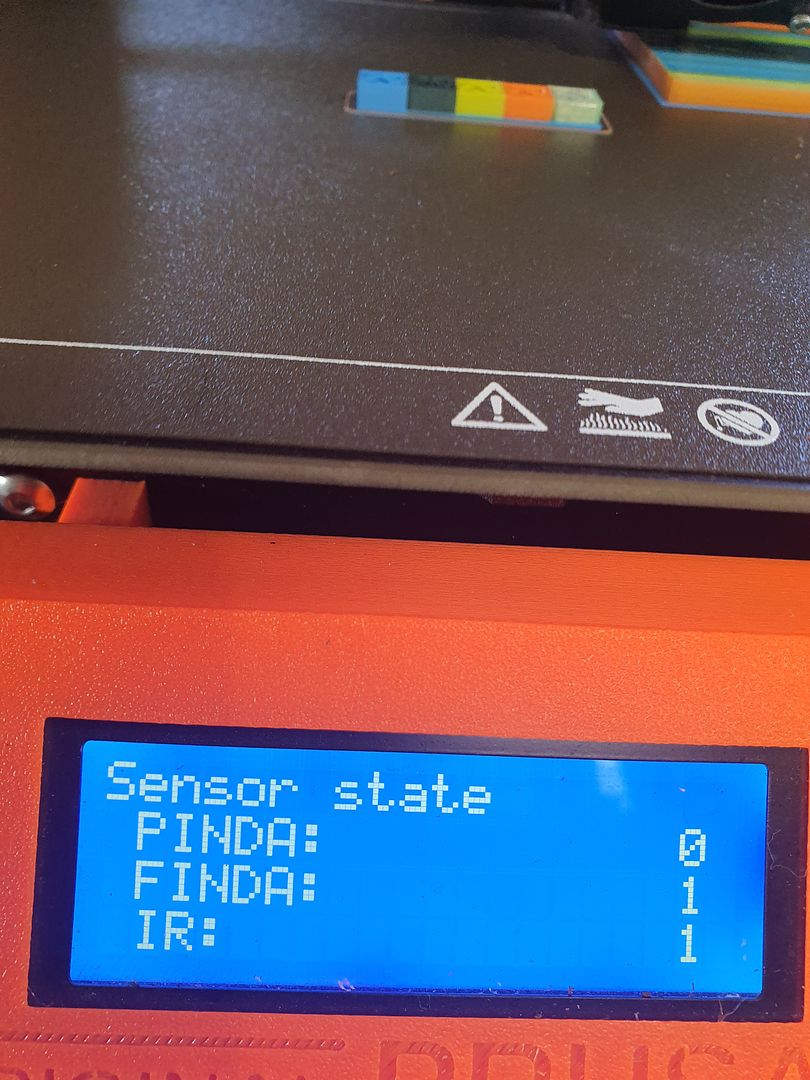
Go to Sensor section in Support and pick sensor info. Then test by putting a piece of filament through chimney to see if IR turns to "1". If not, then it was caused by chimney is not in correct position.
I fixed it by force push it to right and screw it in.
I got that from Prusa customer service: https://help.prusa3d.com/article/wprwemqsmj-ir-filament-sensor-calibration
I hope it helps.
RE: Another MMU2 Filament Extruder Loading Problem
I had this issue too. You really need to make sure that IR sensor is on a hair trigger. It helps to go into "Support">"Sensor info" while the printer is trying to load the filament and watch the "IR:" value. If it ever goes to 0 the printer will instantly try to unload the filament.
RE: Another MMU2 Filament Extruder Loading Problem
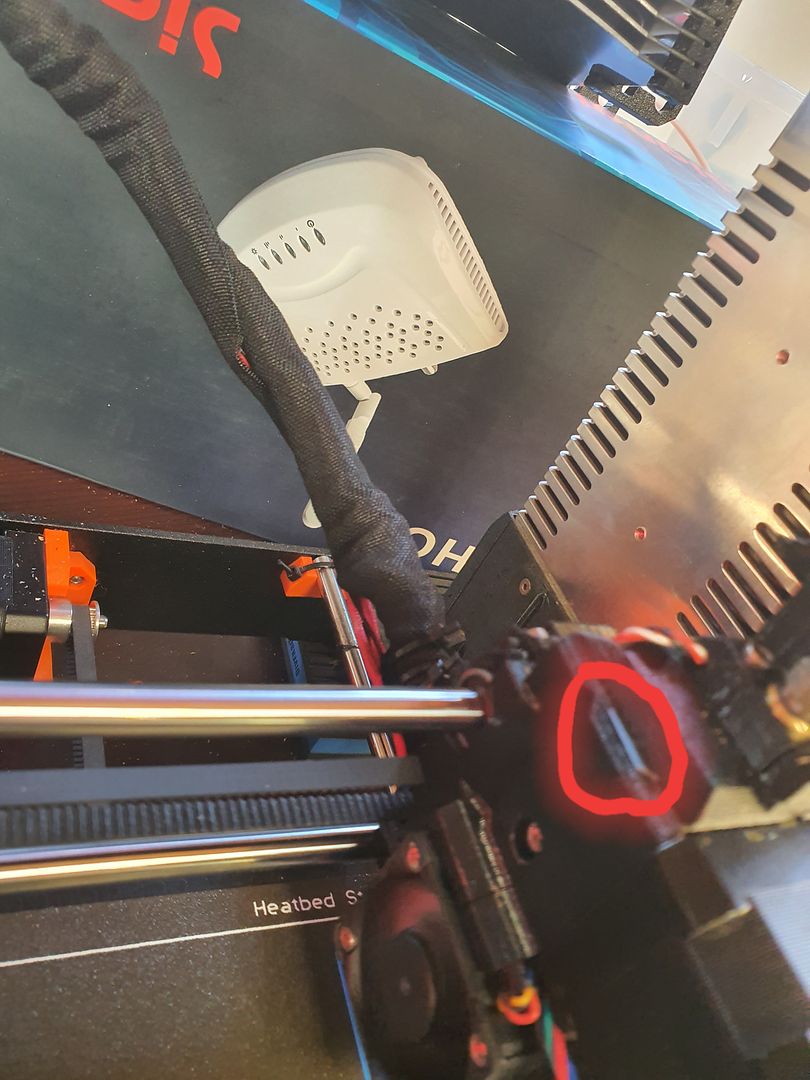
As everyone knows getting the mmu2 to sync with the extruder can sometimes be daunting, frustrating and plenty of "pull your hair out" moments, right? You think you get one thing right and then here comes another thing, then everything gets out of whack and goes bonkers and you, and your left twisting screws, controlling heat, not taking baths, lol ~! You know the drill and is why you are here, and the list goes on and on and on. One thing for sure..... that has definitely benefited me, it was the "support" menu item while printing, but you have to stay on the support menu while it runs to see if (0) or (1) blinks back and forth. I realized right away that something was wrong while printing even though when I calibrated with the Allen screw It was showed a (1) and it always showed a (1) which means the sensor was working but someone had said in a forum somewhere is that if your extruder draws back like 3 times, that this is an indication that the sensor on the extruder is failing, it has to be [[[ perfect ]]] and I agree with that. When it keeps feeding back and forth three times it means the IR sensor is not working properly. Once I opened up the sensor menu (picture[s] attached) and I ran it for awhile and watched it at the same time it became obvious there was a sensor error while printing, though it didn't show any in calibration. If the sensors stay at (1) when loading and don't bump around to (0) and (1) while printing, then it will print! After I noticed while printing the IR sensor would go back and forth from 0-1, I tried loosing the two screws, sliding back and forth as much as I could but I couldn't get my sensor to work without flashing back and forth during print. At first, then I tried pulling on the top part of it after loosening the screws some, pulling it back and holding it while I was loading filament, and I noticed when I pulled back on the chamber slightly, while it was loading, it stayed at (1) and so I wedged the front of it with a small razor blade and screwed it down! Pic attached. Now it doesn't bop back and forth from (0) - (1) on me anymore which was causing the mmu2 to fail (according to menu) and then stop printing and raise the extruder on the Z-axis and wait for my assistance with a "mmu failed needs attention." We have all been there, right? It has dawned on me that the sensor support menu is most valuable if you open it up and run it WHILE it goes through its color changes and printing. YES, YOU HEARD THAT RIGHT. RUN THAT MENU AND WATCH IT WHILE YOU PRINT!!! These sensors are there for a reason and if you pay attention to all three you will have success or at least get out of the mess you are in now to better printing. If you get a rock-solid (1) without bopping around from 0-1, well you might just have hit pay dirt. At least that is exactly what it took for me to find success. As much struggle as all this is to fine-tune, I knew that if anyone out there could benefit from this, it would relieve a lot of frustration. I had to post this knowing what a nightmare it was for myself. I have attached my pics to help. What I did to fix it from not being able to load every single time properly was I wedged it with the little razor blade that is supposed to be installed on the mmu2 but I never could get it to work but it works perfectly under the front of the IR sensor cover in the front as a wedge on the extruder! It was a Perfect fit and wedge. Pic attached. I think I found a good use for that thing lol. I never could get it to work. Anywho.... my (0) is now ZERO and my (1) is now a ONE when loading and unloading and this mmu2 is rock steady now..... and now the printer acts like it doesn't have any bugs in it, and trying to load and unload all the time doesn't occur anymore, no problems at all. I can't believe something so simple can cause so much of a headache. Hope this helps all of you. Happy Printing.
RE: Another MMU2 Filament Extruder Loading Problem
You need to calibrate the IR sensor / idler door setup. The instructions are here:
https://help.prusa3d.com/article/wprwemqsmj-ir-filament-sensor-calibration
As arnoldasphalt says, you can check the behavior of the IR sensor in the support menu while trying to load filament.
RE: Another MMU2 Filament Extruder Loading Problem
Hi Brandon,
To agree with all above it does sound like the IR sensor. Calibrating it can be a challenge (leave all hammers out of hand range)
Try this trick (do with the printer cold)
1. Remove the PFTE tube from the top of the extruder
2. Loosen the idler screw (40mm screw with the spring) all the way
3. Cut a piece of filament approx. 20 to 25 cm long (longer is better than shorter)
4. Push the filament into the extruder all the way to the hot end
5. Tighten the idler screw until you can move the filament with strong resistance (not impossible but strong)
6. Pull the filament out of the extruder, you should hear a click as the gears return
7. re- attach the tube and try a load to nozzle
Its a little trick from another machine but it worked for me.
Hope this helps
2. Loosen all the way the