Weird pulling / waves on first layer
Hello!
Struggling a bit with what I figured would be a simple print. It's a simple case for Dig-Uno. The first layer for the case is just a big flat piece.
I am using MatterHackers Build PLA for this.
Best Answer by bobstro:
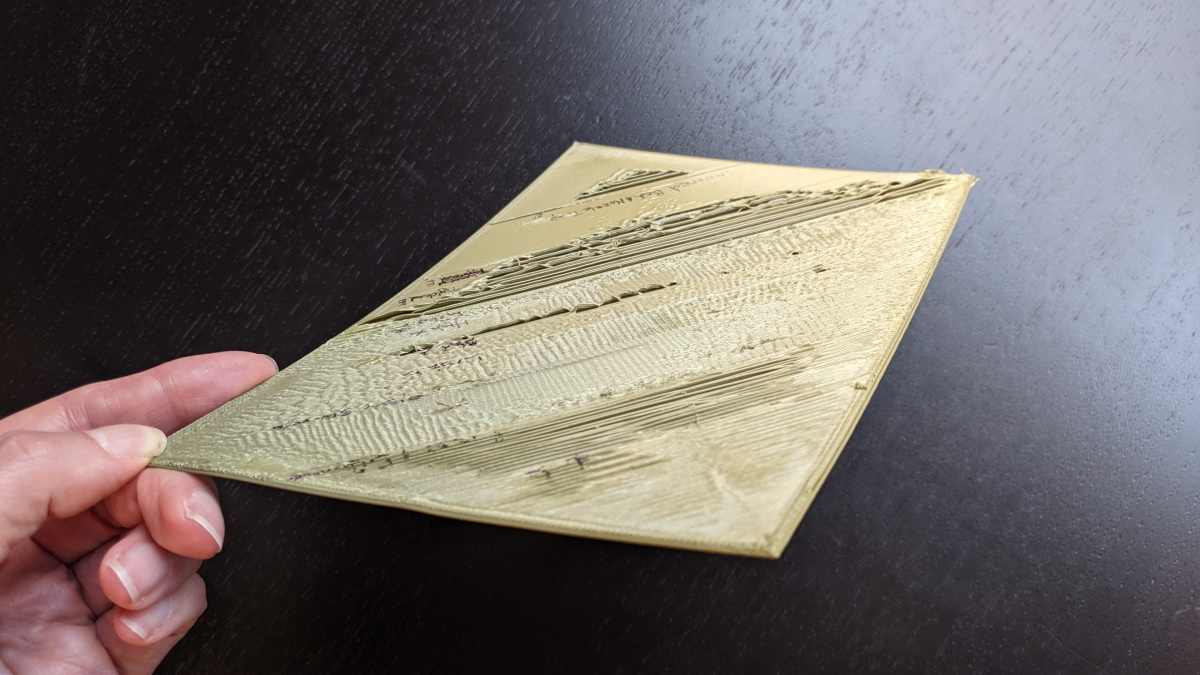
[...] I get a nice square, and it sticks, but when you pull it up the extrusions don't touch one another, but they stick to the bed.
That's an indication that you're still too high. Once Live-Z is set properly, the square should peel up as one piece and not pull apart easily. You should be able to pull it off the sheet and view a light through it. If I'm impatient and pull it up while still hot, it will stretch but not pull apart at the extrusion lines.
I'd reduce Live-Z by 0.06-0.08 and try the square again.
RE: Weird pulling / waves on first layer
Hmm I am not sure why all of my details did not end up in this post. Let me try again. I will attach pics of everything I describe.
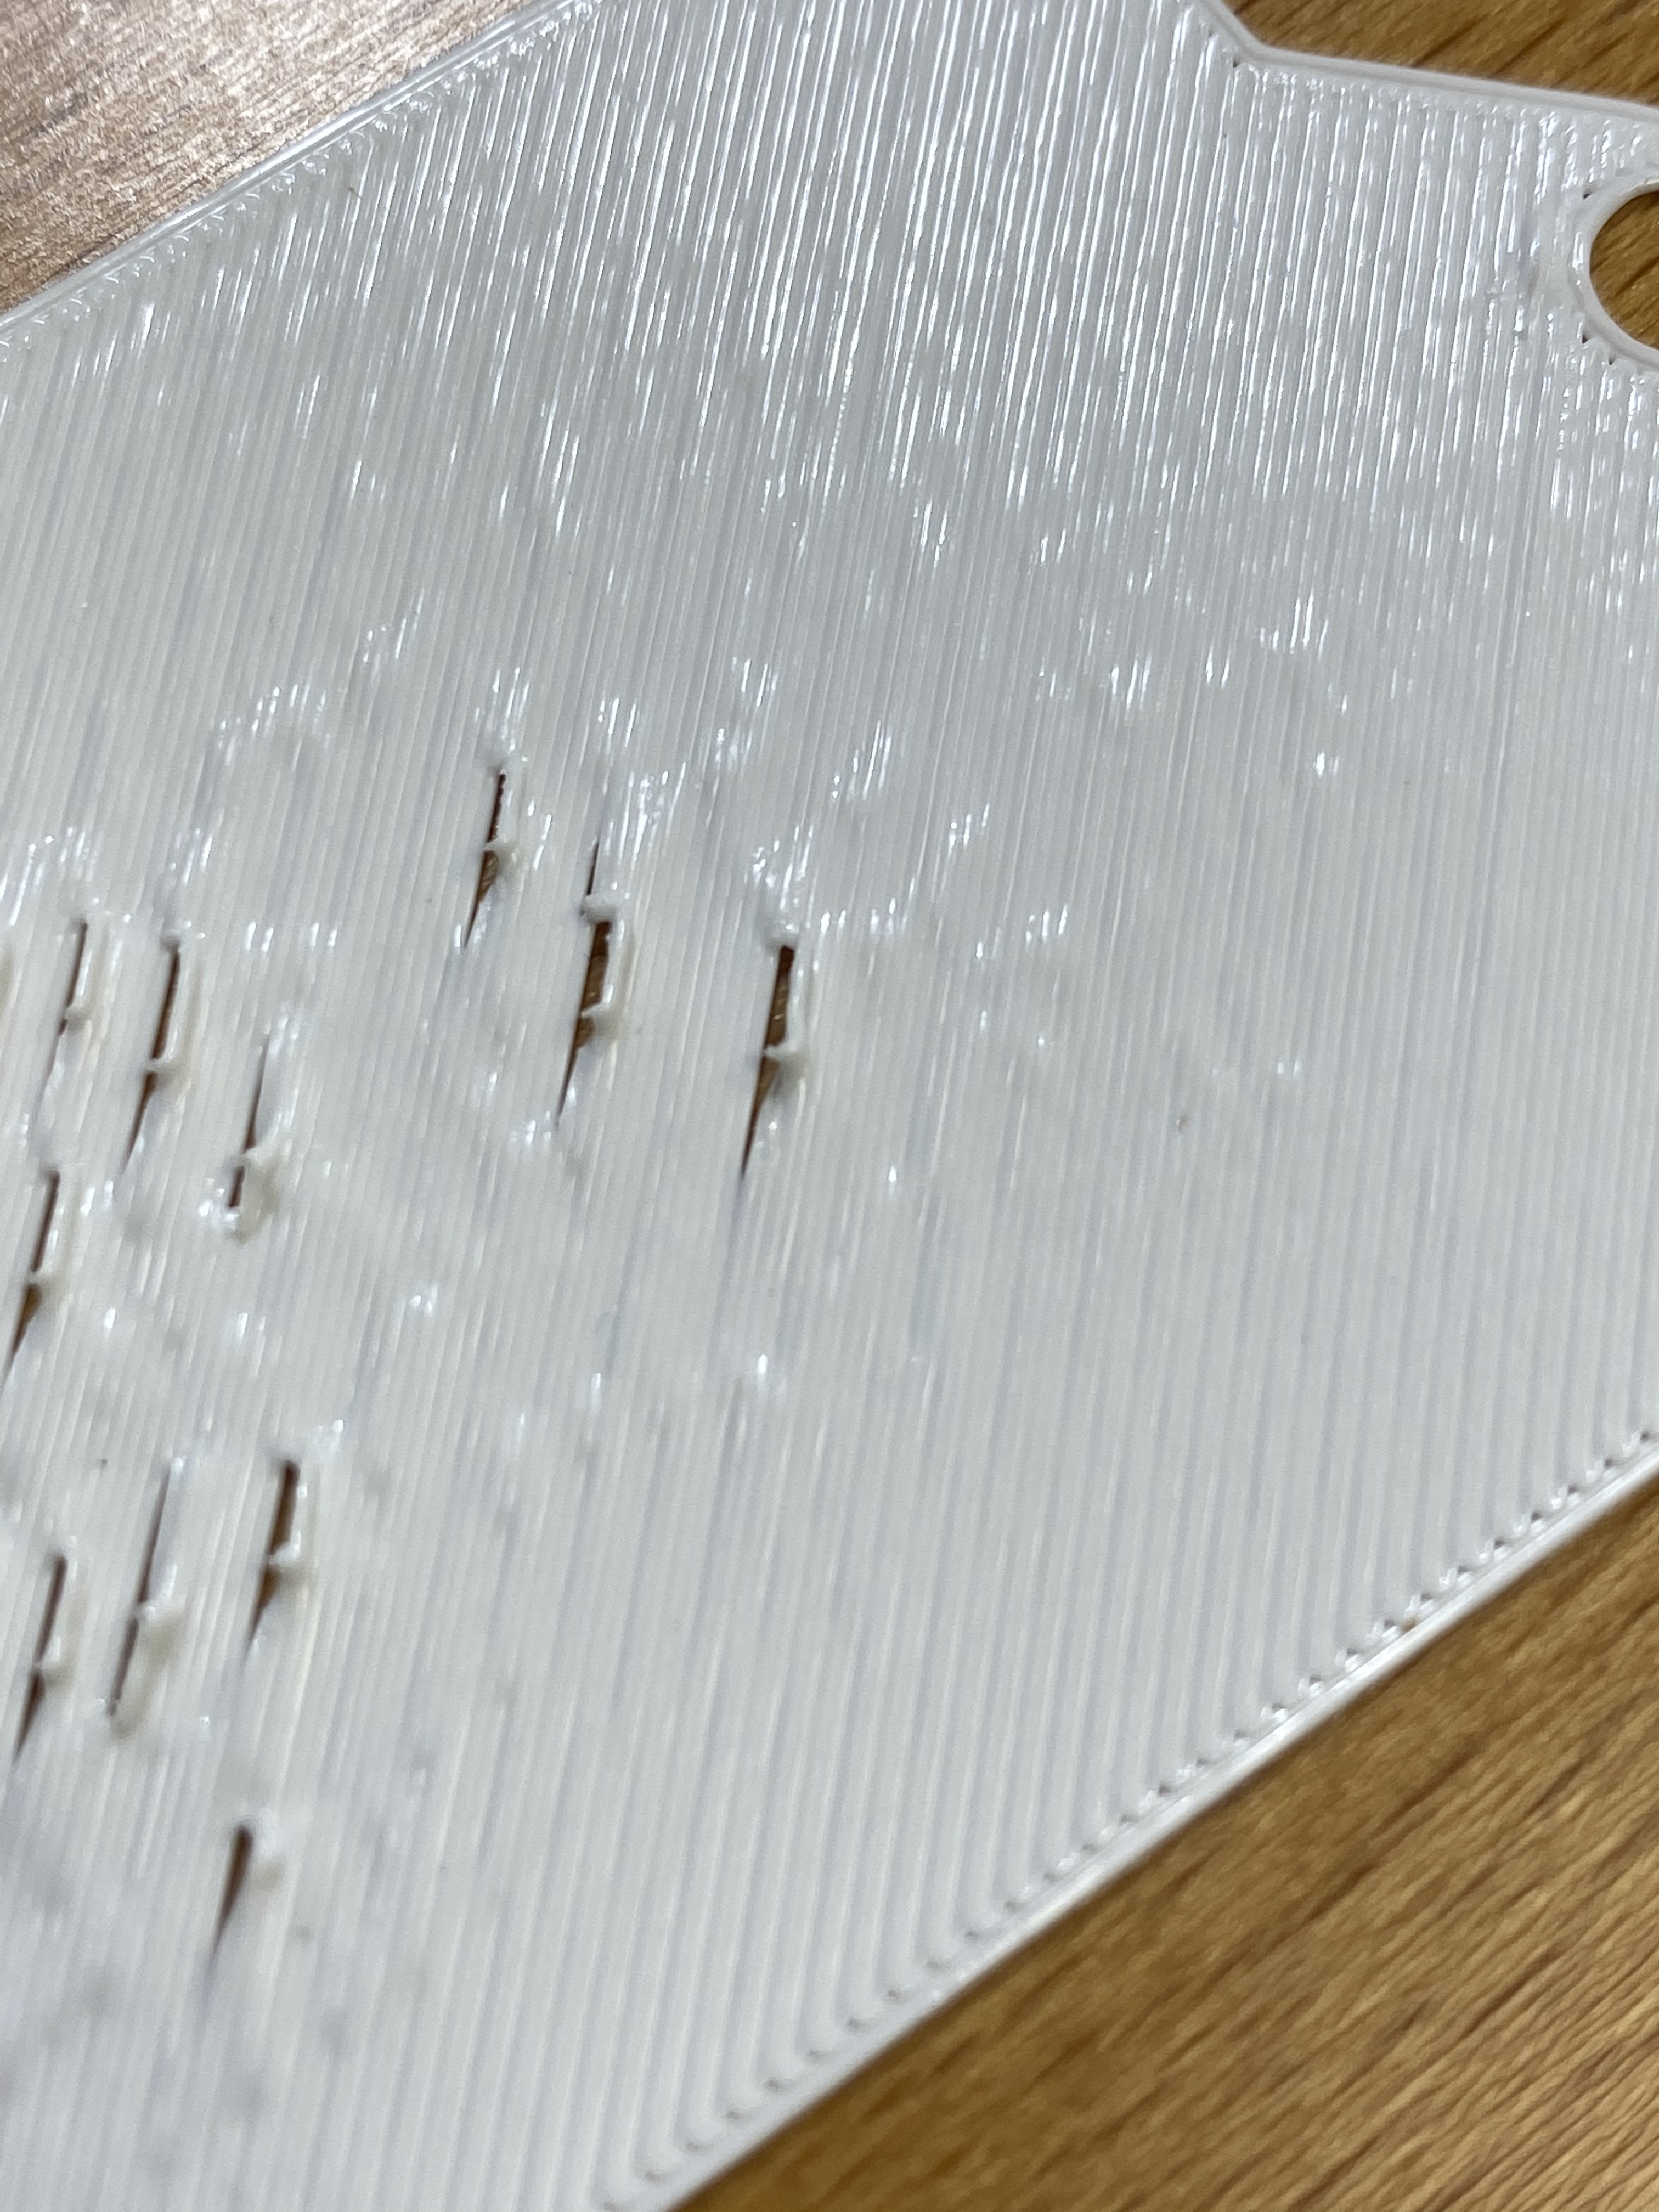
I don't think overall that I have an adhesion issue (except for the waves). It is fine on the edges just gets worse in the middle. The lid works just fine. It's not solid.
I tried a number of things. Slowing nozzle speed, speeding up nozzle. Adjusting live Z. Higher bed temp, lower bed temp. Higher nozzle temp, lower nozzle temp.
The next things I want to try are turning the fan on the first layer at 100%, or changing width/depth of first layer.


RE: Weird pulling / waves on first layer
I think your Live-Z is still a bit high. You're not getting good adhesion. It's always tricky to try to interpret pics though.
RE: Weird pulling / waves on first layer
I agree w/bobstro - those lines are barely squished at all.
RE: Weird pulling / waves on first layer
@bobstro
Thanks - yes I did try that as well - a few times. I get a nice square, and it sticks, but when you pull it up the extrusions don't touch one another, but they stick to the bed. I assume that's due to first layer thickness/width settings on LiveAdjust vs. the dig-uno case. I don't have a photo result of LiveAdjust right now - I'll have to print another one and send it.
RE: Weird pulling / waves on first layer
[...] I get a nice square, and it sticks, but when you pull it up the extrusions don't touch one another, but they stick to the bed.
That's an indication that you're still too high. Once Live-Z is set properly, the square should peel up as one piece and not pull apart easily. You should be able to pull it off the sheet and view a light through it. If I'm impatient and pull it up while still hot, it will stretch but not pull apart at the extrusion lines.
I'd reduce Live-Z by 0.06-0.08 and try the square again.
RE: Weird pulling / waves on first layer
Thanks @bobstro & @dan-rogers! Yes, I was being too delicate in my live-z. When I'd initially done it with the smooth sheet I ended up getting marks on the sheet like I had hit the nozzle on it, so I was rather tentative. I redid the Live Adjust and was more aggressive. Not perfect yet but no more waves! Thanks again for your quick responses!
RE: Weird pulling / waves on first layer
Adding more examples here. In my case, I have waves on my second layer, whereas in both this post and the other wave post the waves were on the first layer.
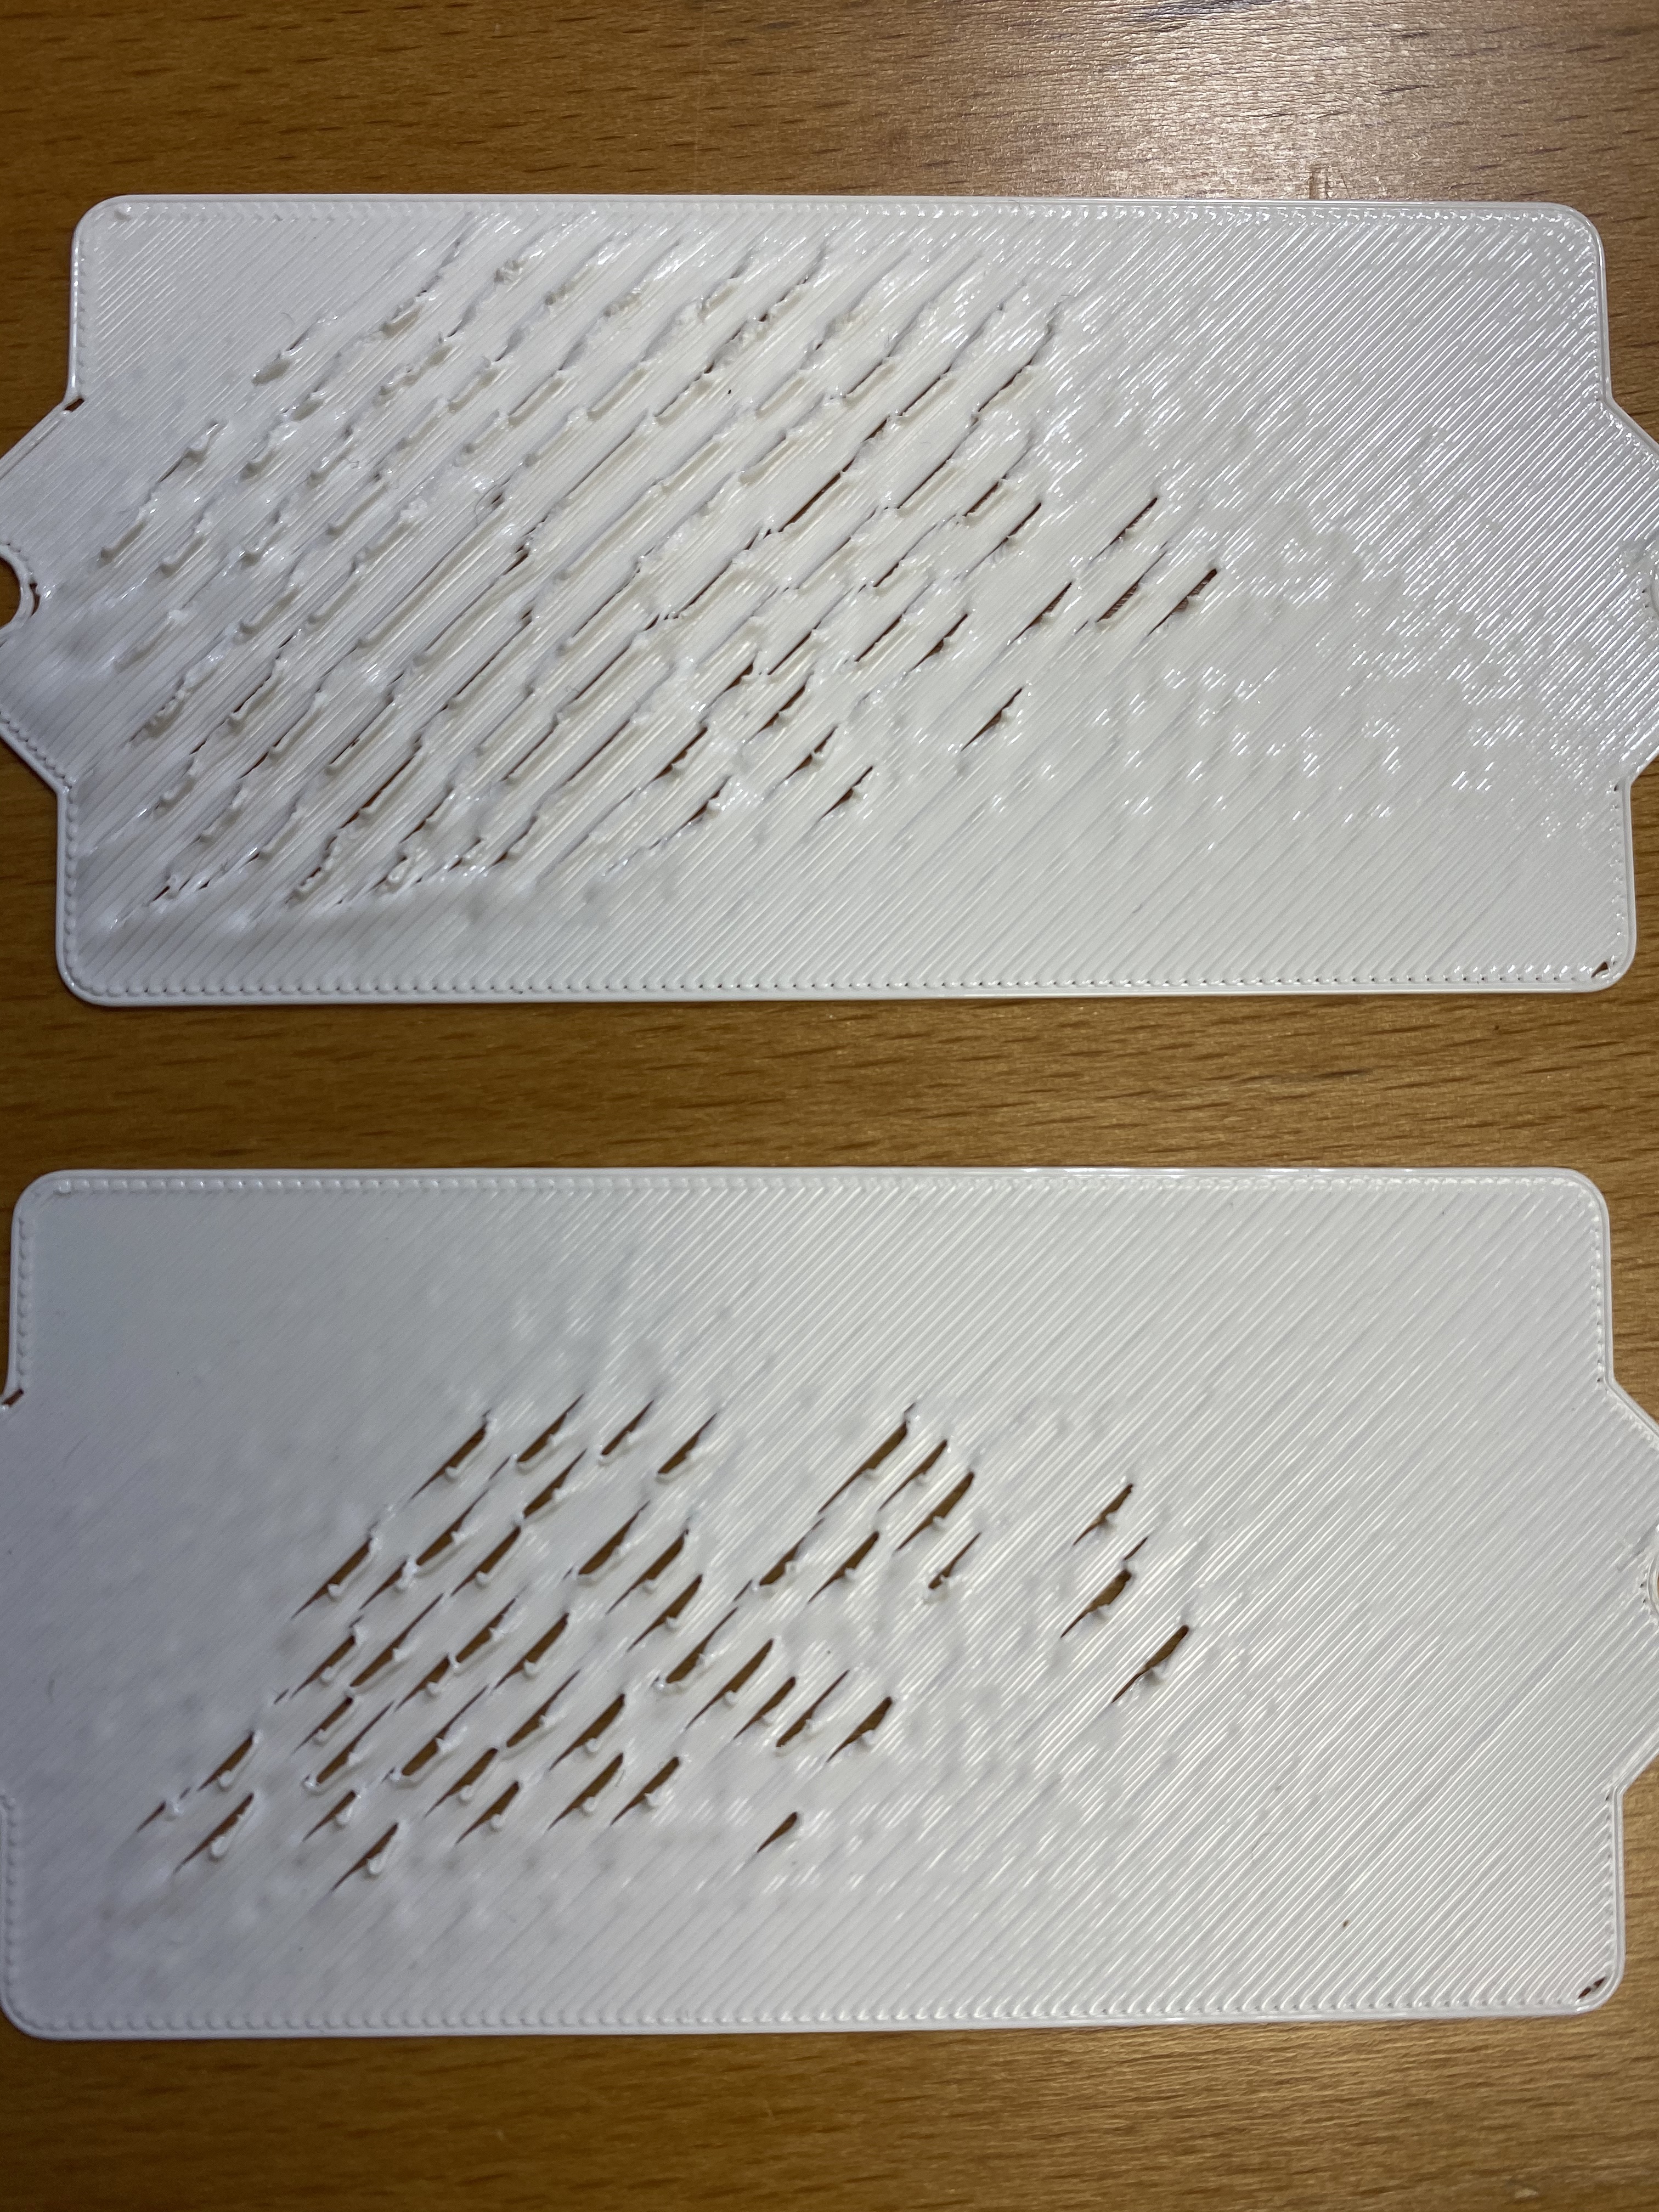
After multiple attempts yesterday to print the target model, I overhauled my Prusa i3 MK3, including disassembling the extruder to try and make the IR filament sensor work, and discovered that the Bondtech gear was not aligned and completely out of place. I reassembled everything. The IR filament sensor still did not work, but I thought I would try to print the model again today since now both gears were aligned and could push the filament along from two sides instead of just one. The print still had problems, but I recorded everything I tried.
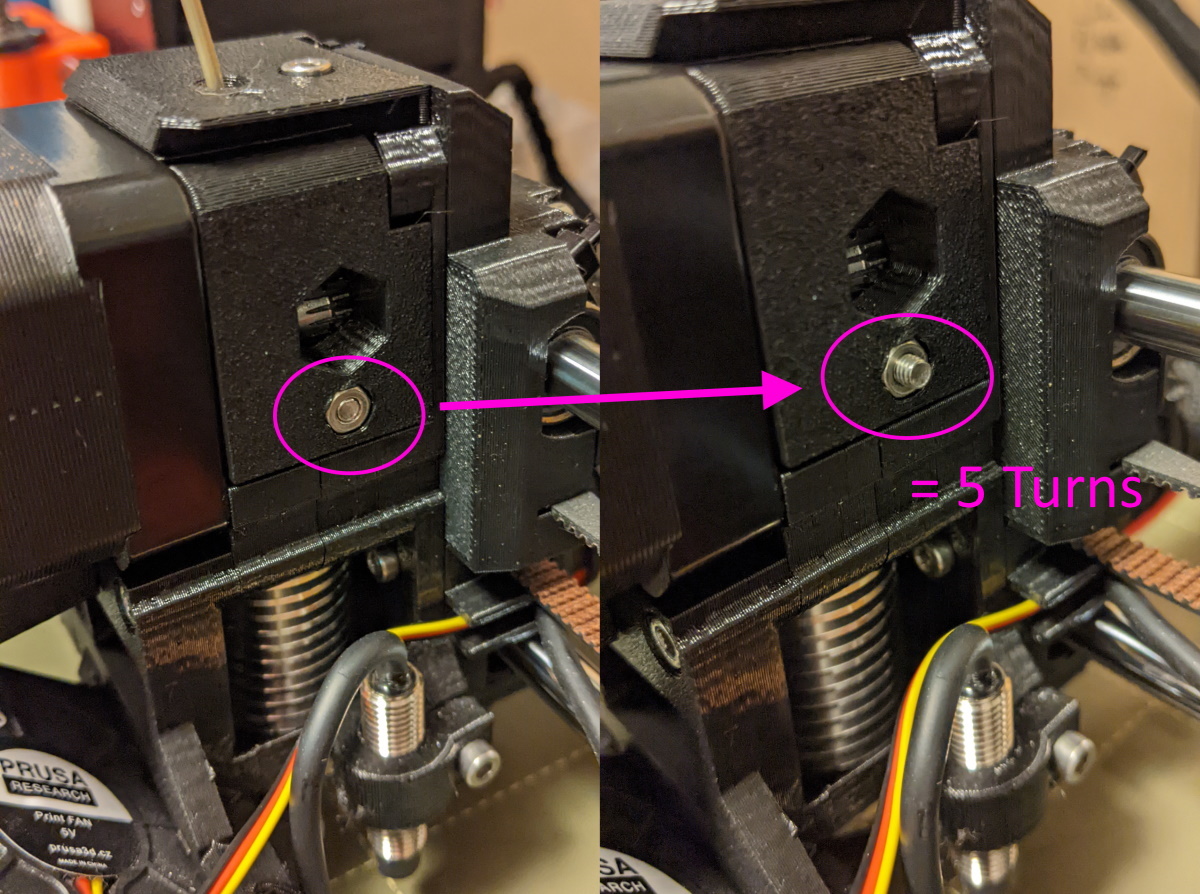
Please note that for the extruder idler screw tension settings below, I used CNC Kitchen's method of counting the number of turns tightened from when the tip of the screw was flush with the end of the nut.
Original settings (board on the left):
Nozzle = 200 degrees
Bed = 60 degrees
Extruder idler tension screw = 5 turns
Speed = 100 mm/s
Z = -2.000

Here are the things I tried, pausing the print between each step.
- Lowered bed temp 60->zero and nozzle from 200->190.
Result: Reducing the temperatures improved things for about 20 mm, then the ridges started appearing again. - Tried pushing ridges down flat while warm, examining them to see if they were adhering to the 1st layer.
Result: They were not. - Unscrewed extruder idler screw from 5 turns to zero turns.
Result: Loose, irregular ridges - Tightened extruder idler screw from zero to 8 turns.
Result: Loose, but straight ridges - Lowered Z to -3.000.
Result: jagged bumps from the nozzle head scraping on the 1st layer filament lines - Raised Z to -1.000.
Result: Bumpy, and waves began after 15 mm - Moderated Z to -2.000.
Result: Bumpy - Played with the extruder idler screw tension (raised? lowered? can't read my writing...)
Result: bumps continued, waves began after 15 mm - Slowed print speed from 100 to 50 mm/s.
Result: Jagged around the edges - Increased print speed from 50 mm/s to 150 mm/s.
Result: No bumps, but tall ridges - Released extruder idler screw to zero turns.
Result: Ridges began to become shorter
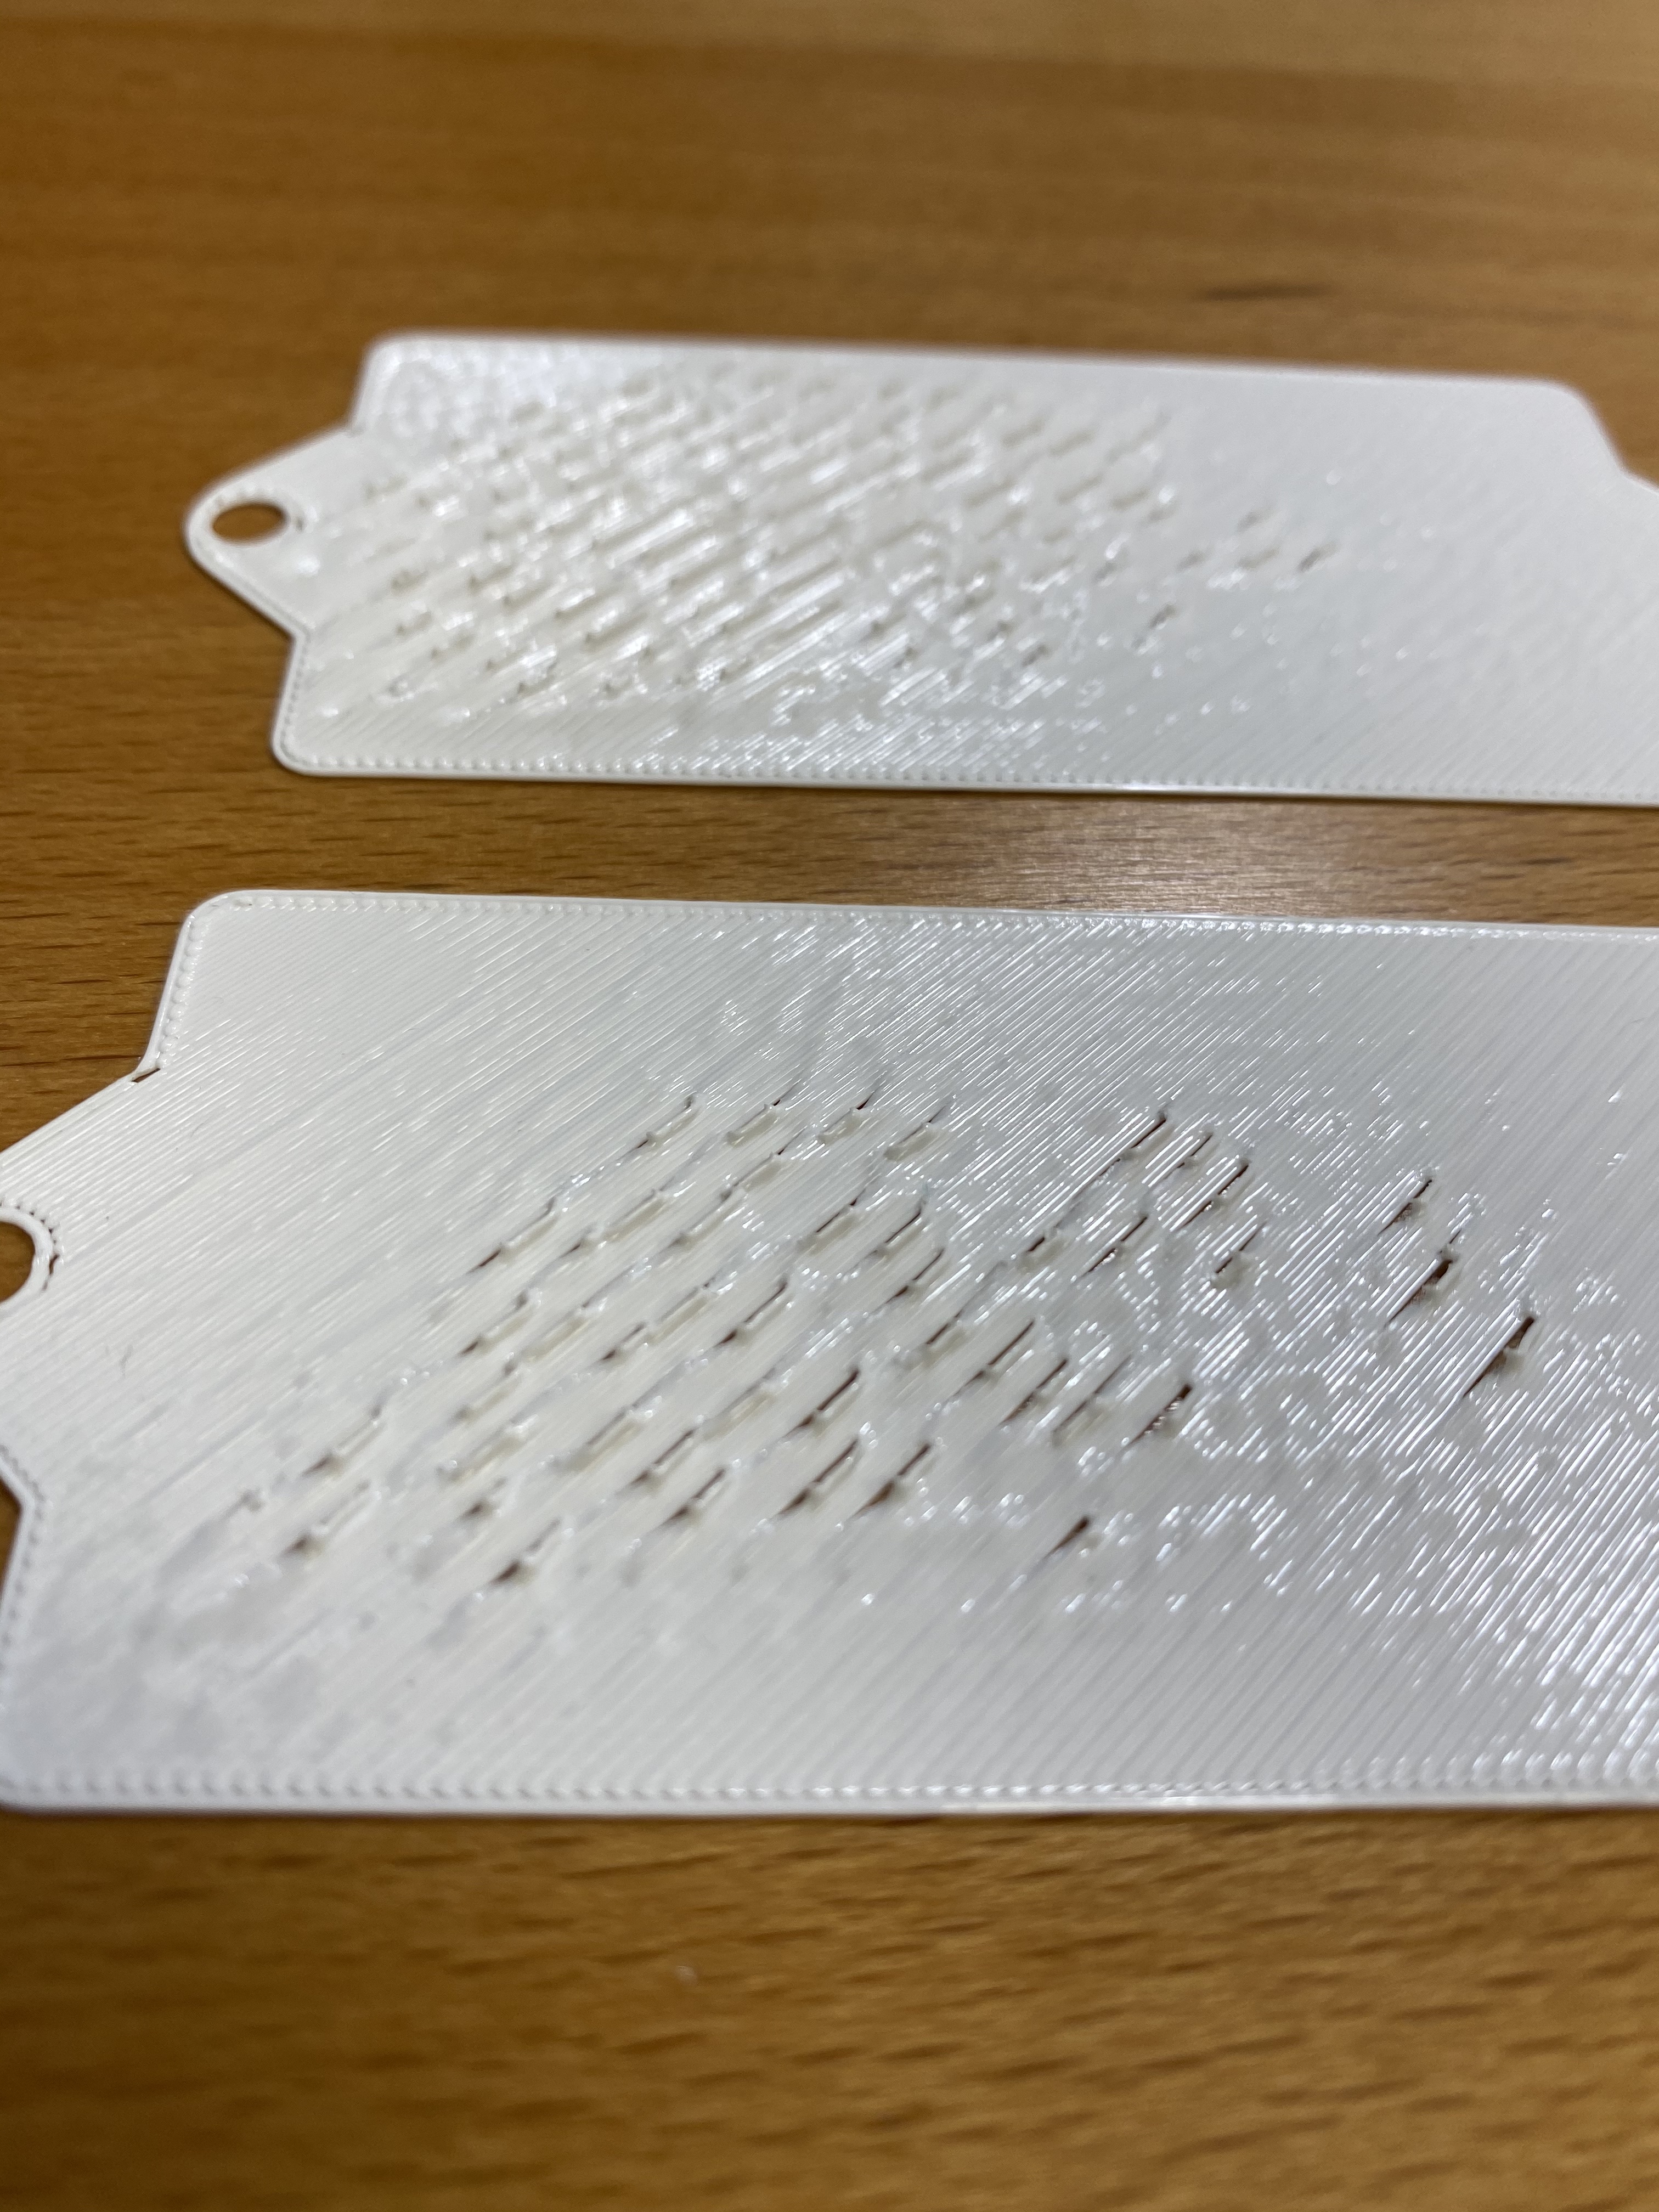
Summary: Changing the Z-axis lowers the ridge height, but can introduce bumps on the second layer from navigating over the first layer filament strands.
Conclusion: Not perfect - no tall ridges (waves), but there are little tiny bumps. Yet it is easier to cover these tiny bumps with additional layers.
Bonus: top down view