Problem with overextrusions and last layer
Hello,
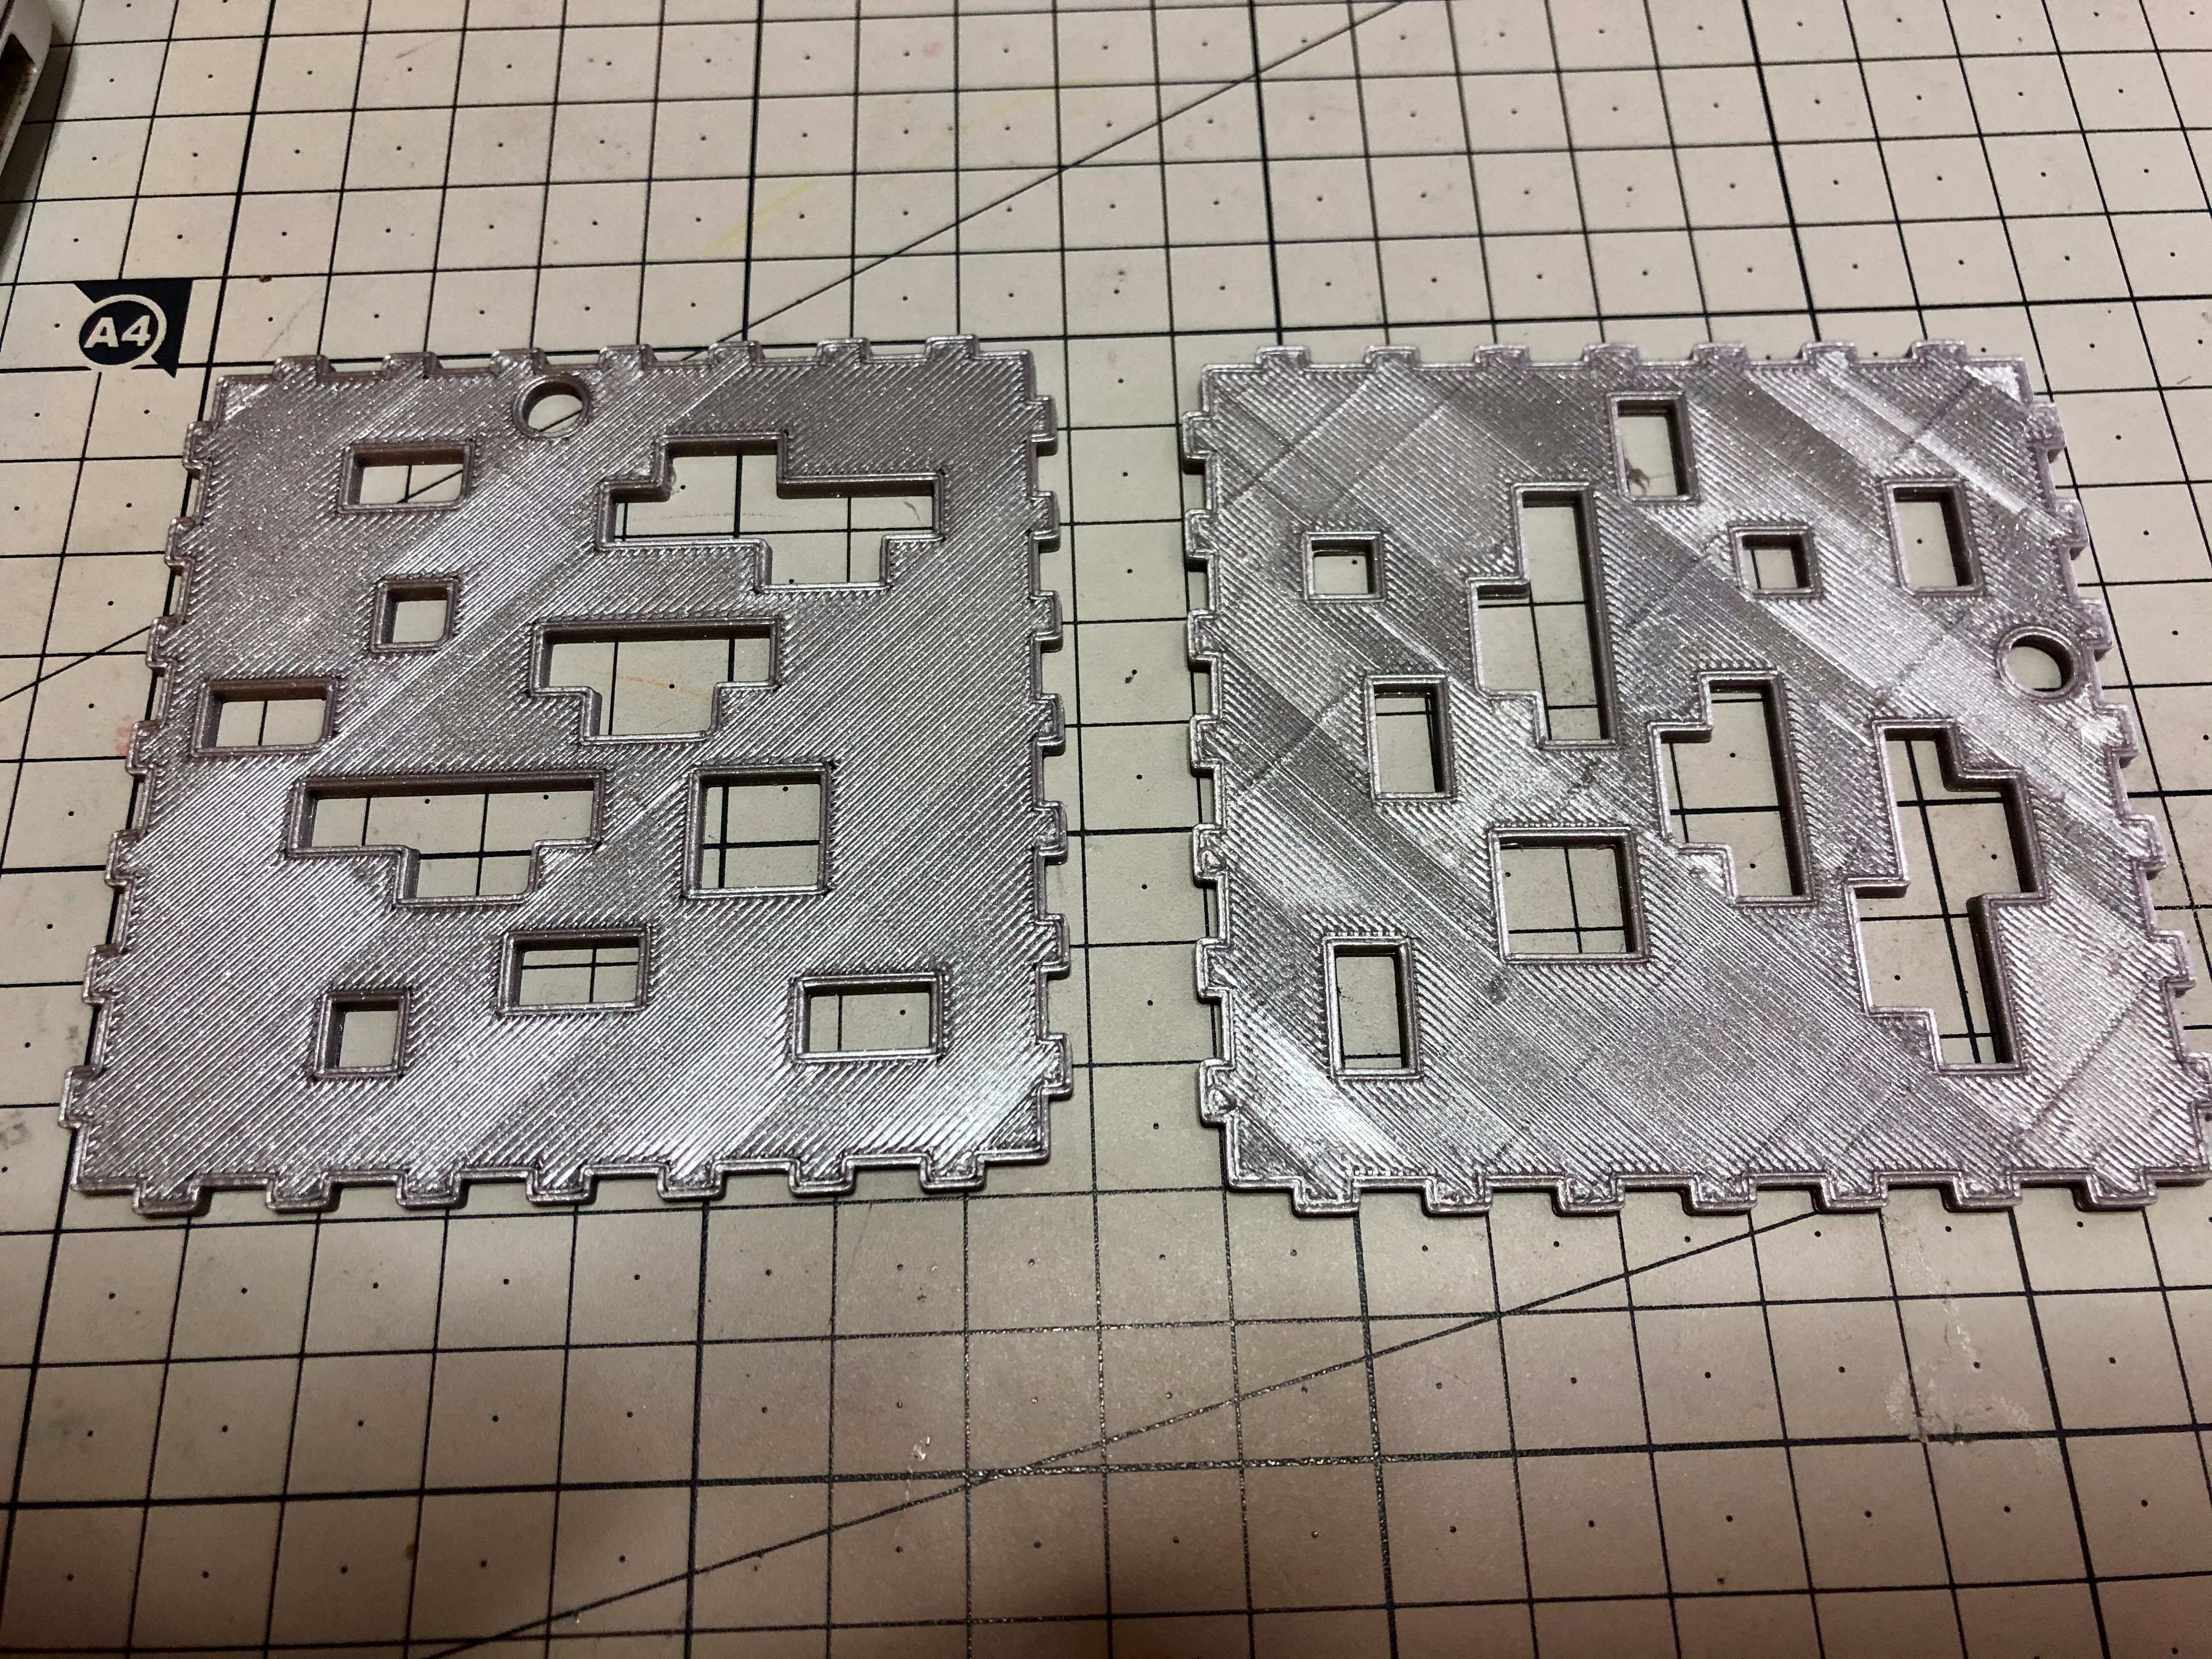
I have a problem with a top layers and overextrusion my guess is that this is connected but I don't know how to solve it by myself. Please find a picture below (MK3S, nozzle 0,4, layer 0.3, Prusament PLA, all default except):
- left: extrusion multiplier 0.95 - it looks better, but have underextrusion on every corner and yet at the same time still some small bulbs/lumps (??) at the end of some "blocks/areas"
- right: top solid infill decreased to 0.4mm (from 0.45) and heavy overextusion visible lines and layer unevenness
I don't know what else to adjust in order to improve quality, however when I recently printed gear bering model using Prusa's gcode it was nearly flawless. If you could advise me what settings to change and how or what else to check I would be very grateful.
Kind regards
Best Answer by bobstro:
A bunch of things to consider:
- The little squishy bits in the corners are most likely due to wiping. You can test this by disabling Printer Settings->Extruder 1->Retraction->Wipe while retracting.
- Those lines in the right appear to be due to the nozzle dragging as it moves. You can try increasing Printer Settings-Extruder 1->Retraction->Life-Z to lift the nozzle higher as it moves across the part ... but don't (see below). Enabling Print Settings->Layers and perimeters->Quality->Avoid crossing perimeters can also help by avoiding such moves (at the expense of some print time).
- If you reduce the extrusion multiplier and experience some gaps with solid top infill, you can try increasing Print Settings->Advanced->Overlap->Infill/perimeters overlap. I get good results with 25% and I think that's the default in the latest Prusa profiles. (I'm not seeing the gaps in your pic.)
- Adding an extra top layer or two can help with infill/perimeter gaps.
- As @joantabb notes, other infill pattern can help with the changes in finish around openings. Rectilinear is subject to that "lawnmower" effect when alternating lines meet up against previously-printed areas, especially if the space available isn't a multiple of the solid infill extrusion width. Reducing infill extrusion line width can help (which you've done on the right) but it's still an issue on larger areas.
You were on the right trail with reducing the extrusion multiplier. Prusa has an article on how to calibrate it for each filament, which is strongly recommended. Wiping and z-lift are an anti-stringing measures meant to work-around over-extrusion. Get your extrusi0n multiplier right and you'll be able to rely less on those work-arounds. I am able to print with 0.2-0.4mm retraction, 0.4mm z-lift and no wiping with good results and minimal stringing with my extrusion multiplier calibrated for a filament.
RE: Problem with overextrusions and last layer
try hilbert curve top infill. or archimedian curve top infill
regards Joan
I try to make safe suggestions,You should understand the context and ensure you are happy that they are safe before attempting to apply my suggestions, what you do, is YOUR responsibility. Location Halifax UK
RE: Problem with overextrusions and last layer
A bunch of things to consider:
- The little squishy bits in the corners are most likely due to wiping. You can test this by disabling Printer Settings->Extruder 1->Retraction->Wipe while retracting.
- Those lines in the right appear to be due to the nozzle dragging as it moves. You can try increasing Printer Settings-Extruder 1->Retraction->Life-Z to lift the nozzle higher as it moves across the part ... but don't (see below). Enabling Print Settings->Layers and perimeters->Quality->Avoid crossing perimeters can also help by avoiding such moves (at the expense of some print time).
- If you reduce the extrusion multiplier and experience some gaps with solid top infill, you can try increasing Print Settings->Advanced->Overlap->Infill/perimeters overlap. I get good results with 25% and I think that's the default in the latest Prusa profiles. (I'm not seeing the gaps in your pic.)
- Adding an extra top layer or two can help with infill/perimeter gaps.
- As @joantabb notes, other infill pattern can help with the changes in finish around openings. Rectilinear is subject to that "lawnmower" effect when alternating lines meet up against previously-printed areas, especially if the space available isn't a multiple of the solid infill extrusion width. Reducing infill extrusion line width can help (which you've done on the right) but it's still an issue on larger areas.
You were on the right trail with reducing the extrusion multiplier. Prusa has an article on how to calibrate it for each filament, which is strongly recommended. Wiping and z-lift are an anti-stringing measures meant to work-around over-extrusion. Get your extrusi0n multiplier right and you'll be able to rely less on those work-arounds. I am able to print with 0.2-0.4mm retraction, 0.4mm z-lift and no wiping with good results and minimal stringing with my extrusion multiplier calibrated for a filament.