Problem printing a simple cup model
Pretty new to 3d printing, but trying to learn an diagnose what is causing this failed print.
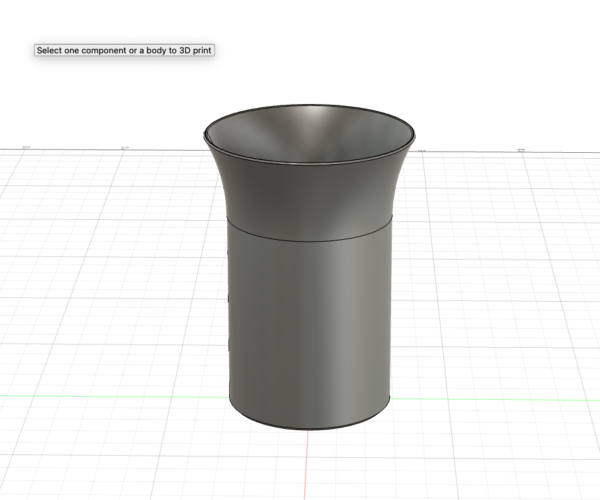
So I've designed a simple cup in Fusion360, starting basically with a cylinder, lofting to a larger circle to get a flair out on the upper part. Then this is shelled out to a thickness of 1.2mm. In addition there is a small chamfer on the bottom, and some fillet on the top ring to round it out.
I slice it in PrusaSlicer, simply using 0.15mm QUALITY print settings. Filament is Prusament ASA white, and it's printed on a Prusa i3 MK3S+ printer.
This is the resulting prints:
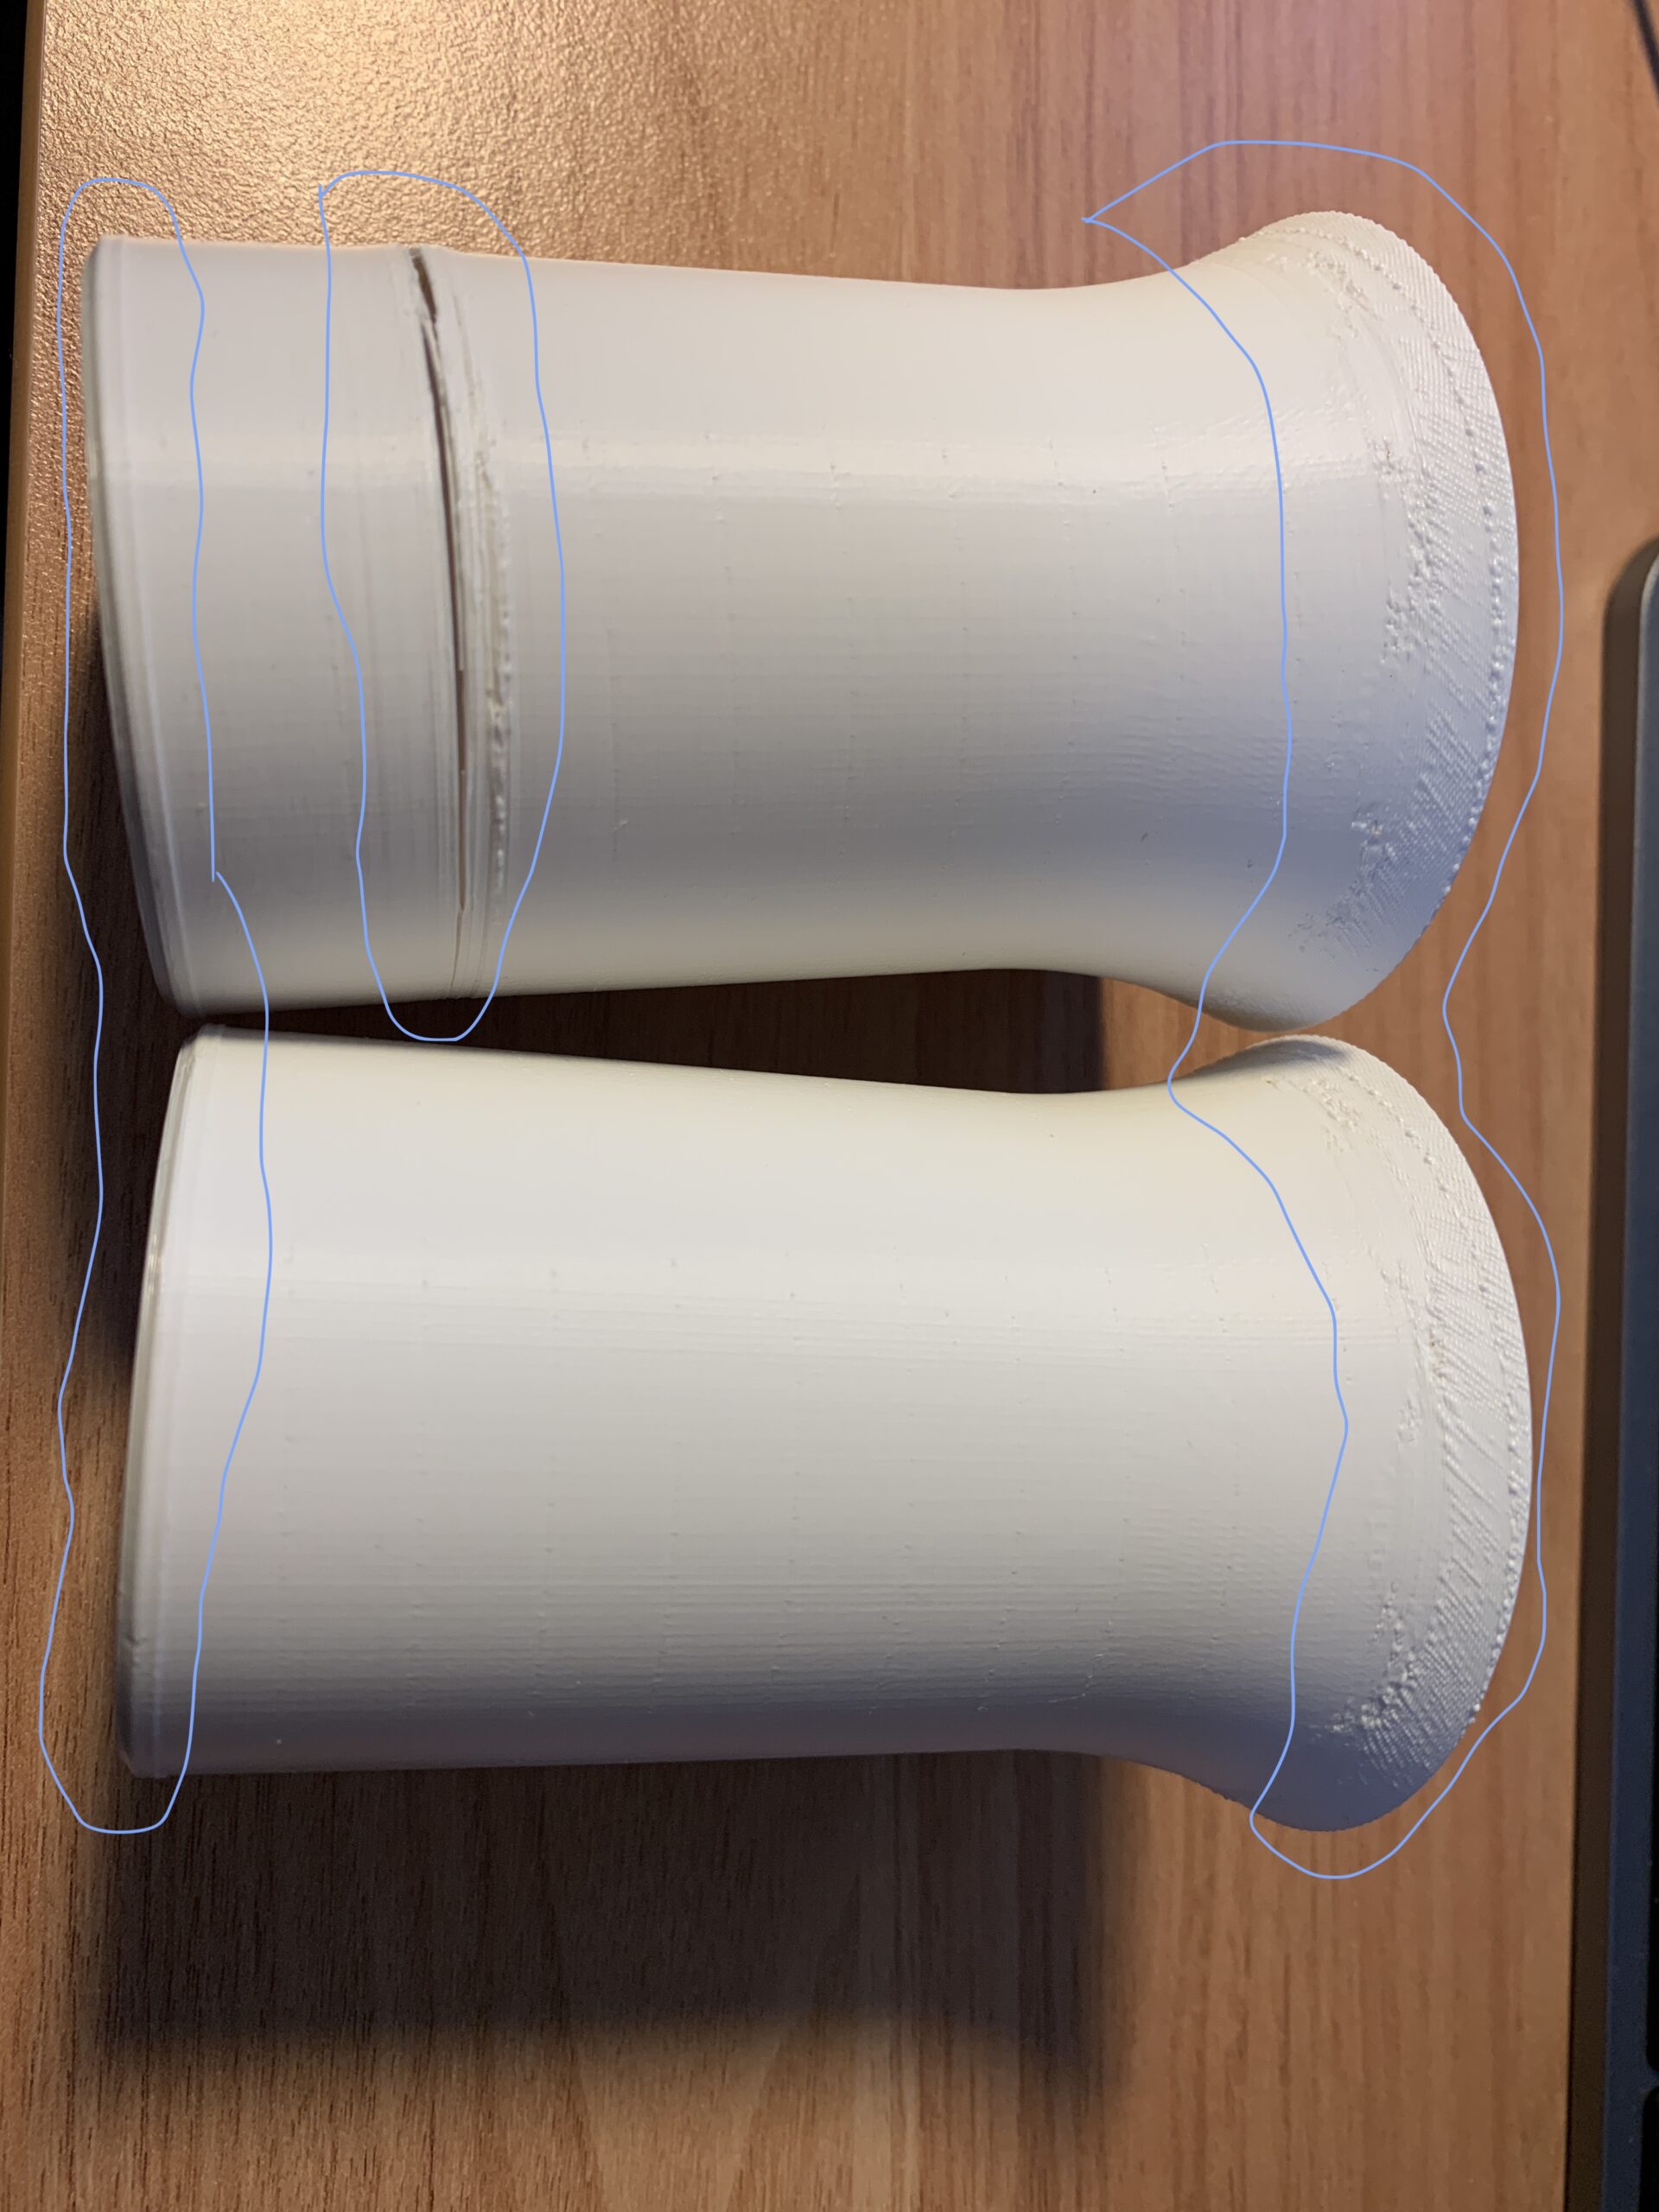

The first print has a structural fail about 2cm up, not sure what caused this. Otherwise both prints have mainly two problem areas. At the bottom right above the chamfer there is a circular line that is further out than the rest of the face, this is not a design feature and should not be there - although not critical as it doesn't hurt the look. The real problem is on the upper part where the "flair" is. The texture here is really rough and has a similar pattern on both versions. Texture is bad also on the inside.
So the question is what is causing this. I firstly though it would have something to do with the printer and mechanics, but can't figure out that there is anything wrong with nozzle, belts etc.
Also don't understand that it is caused by anything in Fusion 360... it's a pretty straight forward design.
Then I started to mess around in PrusaSlicer. After slicing and looking at it, it seems fine:

But when I selected only the "perimiter" feature, I started to get suspicious: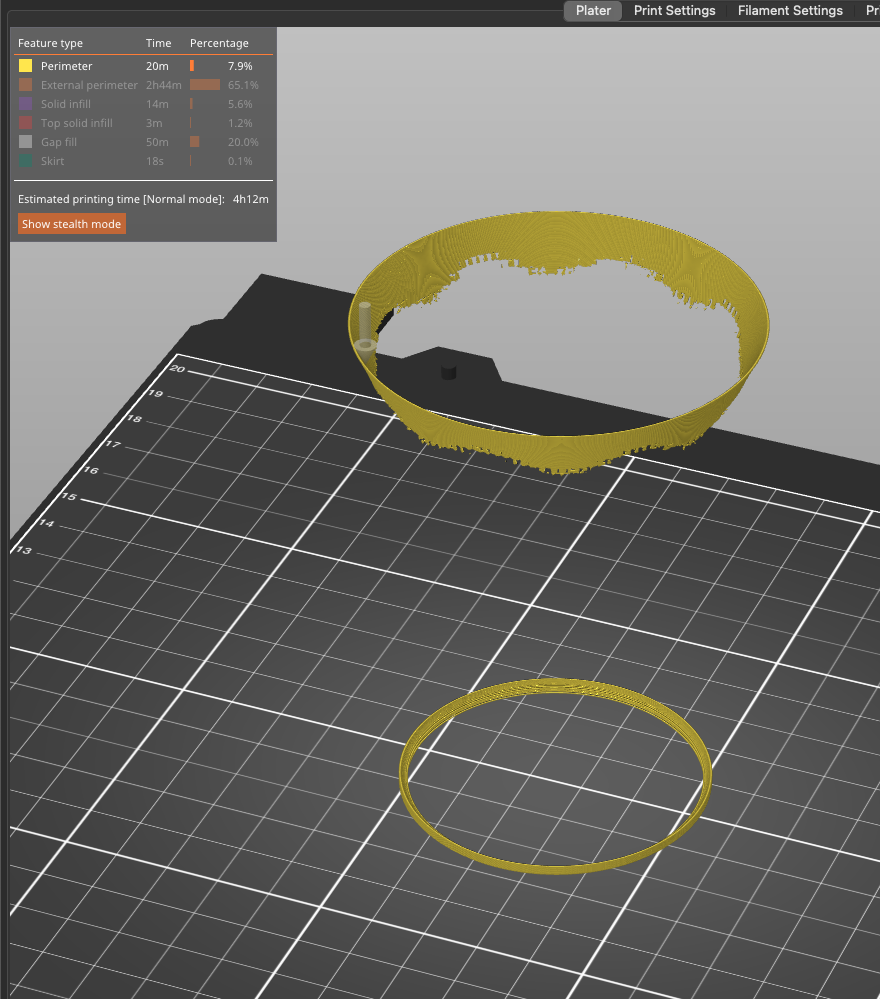
The top part kind of resembles the rought texture pattern on the printed cups, and the bottom part might explain the ring on the bottom part?
What do you guy's think? Is this the problem? If so... how do I resolve this? Is there some settings in PrusaSlicer that I can modify to remedy this? Do I need to design the cup some other way?
Also, apologize if this is a simple and obvious fix... pretty new to this...
Thanks!
RE: Bad model.
The split in your print is from warping. The roughness in your print is due to unsupported overhang. Want it to work better? Turn it upside down, add a Brim, and print it inside an enclosure to solve that nasty layer warping problem. Chamfers are not 3D print friendly when oriented the way you did. Unsupported "flares" are going to always be messy. And you'll probably need to add supports (the bridging from the top is going to be awful). This is a great example of a model that was not designed with 3d printing in mind.
@printerman-2
The most likely problem is with your thickness, it is the same "thickness", but the "layer-by-layer-width" is changing in the slope. Therefor, PS trying to squeeze in "perimeters", (your last picture".
Save, zip and upload your 3mf-file and I, or someone else, will take a look.
Also, if you wish, upload a zipped f3d-file and I will fix it for you
Prusa i3 MK3S+ FW 3.11.0 (kit dec -20), PrusaSlicer 2.5.0+win64, Fusion 360, Windows 10
Quick Fix
A quick fix is to enable,
"Print Settings" -> "Layers and perimeters" -> "Detect thin walls"
You need to be in "Advanced" or "Expert" mode at top right corner when you open "Print Settings"
That way PS changes perimeters to gap fill if it is too tight
Prusa i3 MK3S+ FW 3.11.0 (kit dec -20), PrusaSlicer 2.5.0+win64, Fusion 360, Windows 10
Thanks for the replies!
Used the quick fix proposed by Ringarn67 and it worked like a charm! Thanks for the quick replies and excellent advice!
@Ringarn67: Just curious - what would you have changed in Fusion 360 to fix this in the design - and not in the slicer?
@printerman-2
I would have trying to make the sides have same width on each layer.
As I wrote earlier, when you look at your print in slicer, layer by layer, the higher you go in the curved part wall becomes "wider"
In the attached zip there are three files,
1. 3mf with one cup, completely solid, and with printer setting you make it hollow, (No Top Layers, No infill, Three Perimeter, No Ensure Vertical Thickness), and when you let PS do the work there will be no fillet at the top
2. 3mf with two hollow cups, one with Shell command like you did, I think. One with even width, meaning the wall has same width on each layer. Look how perimeters and gap fill behaves differently on the cups
3. Fusion file, make "Even thickness" component active, hover over the steps in design history, there are some explanations of every step.
Hope I could make it somewhat understandable.
Prusa i3 MK3S+ FW 3.11.0 (kit dec -20), PrusaSlicer 2.5.0+win64, Fusion 360, Windows 10