Printing the RPI-Zero-Frame
Hello!
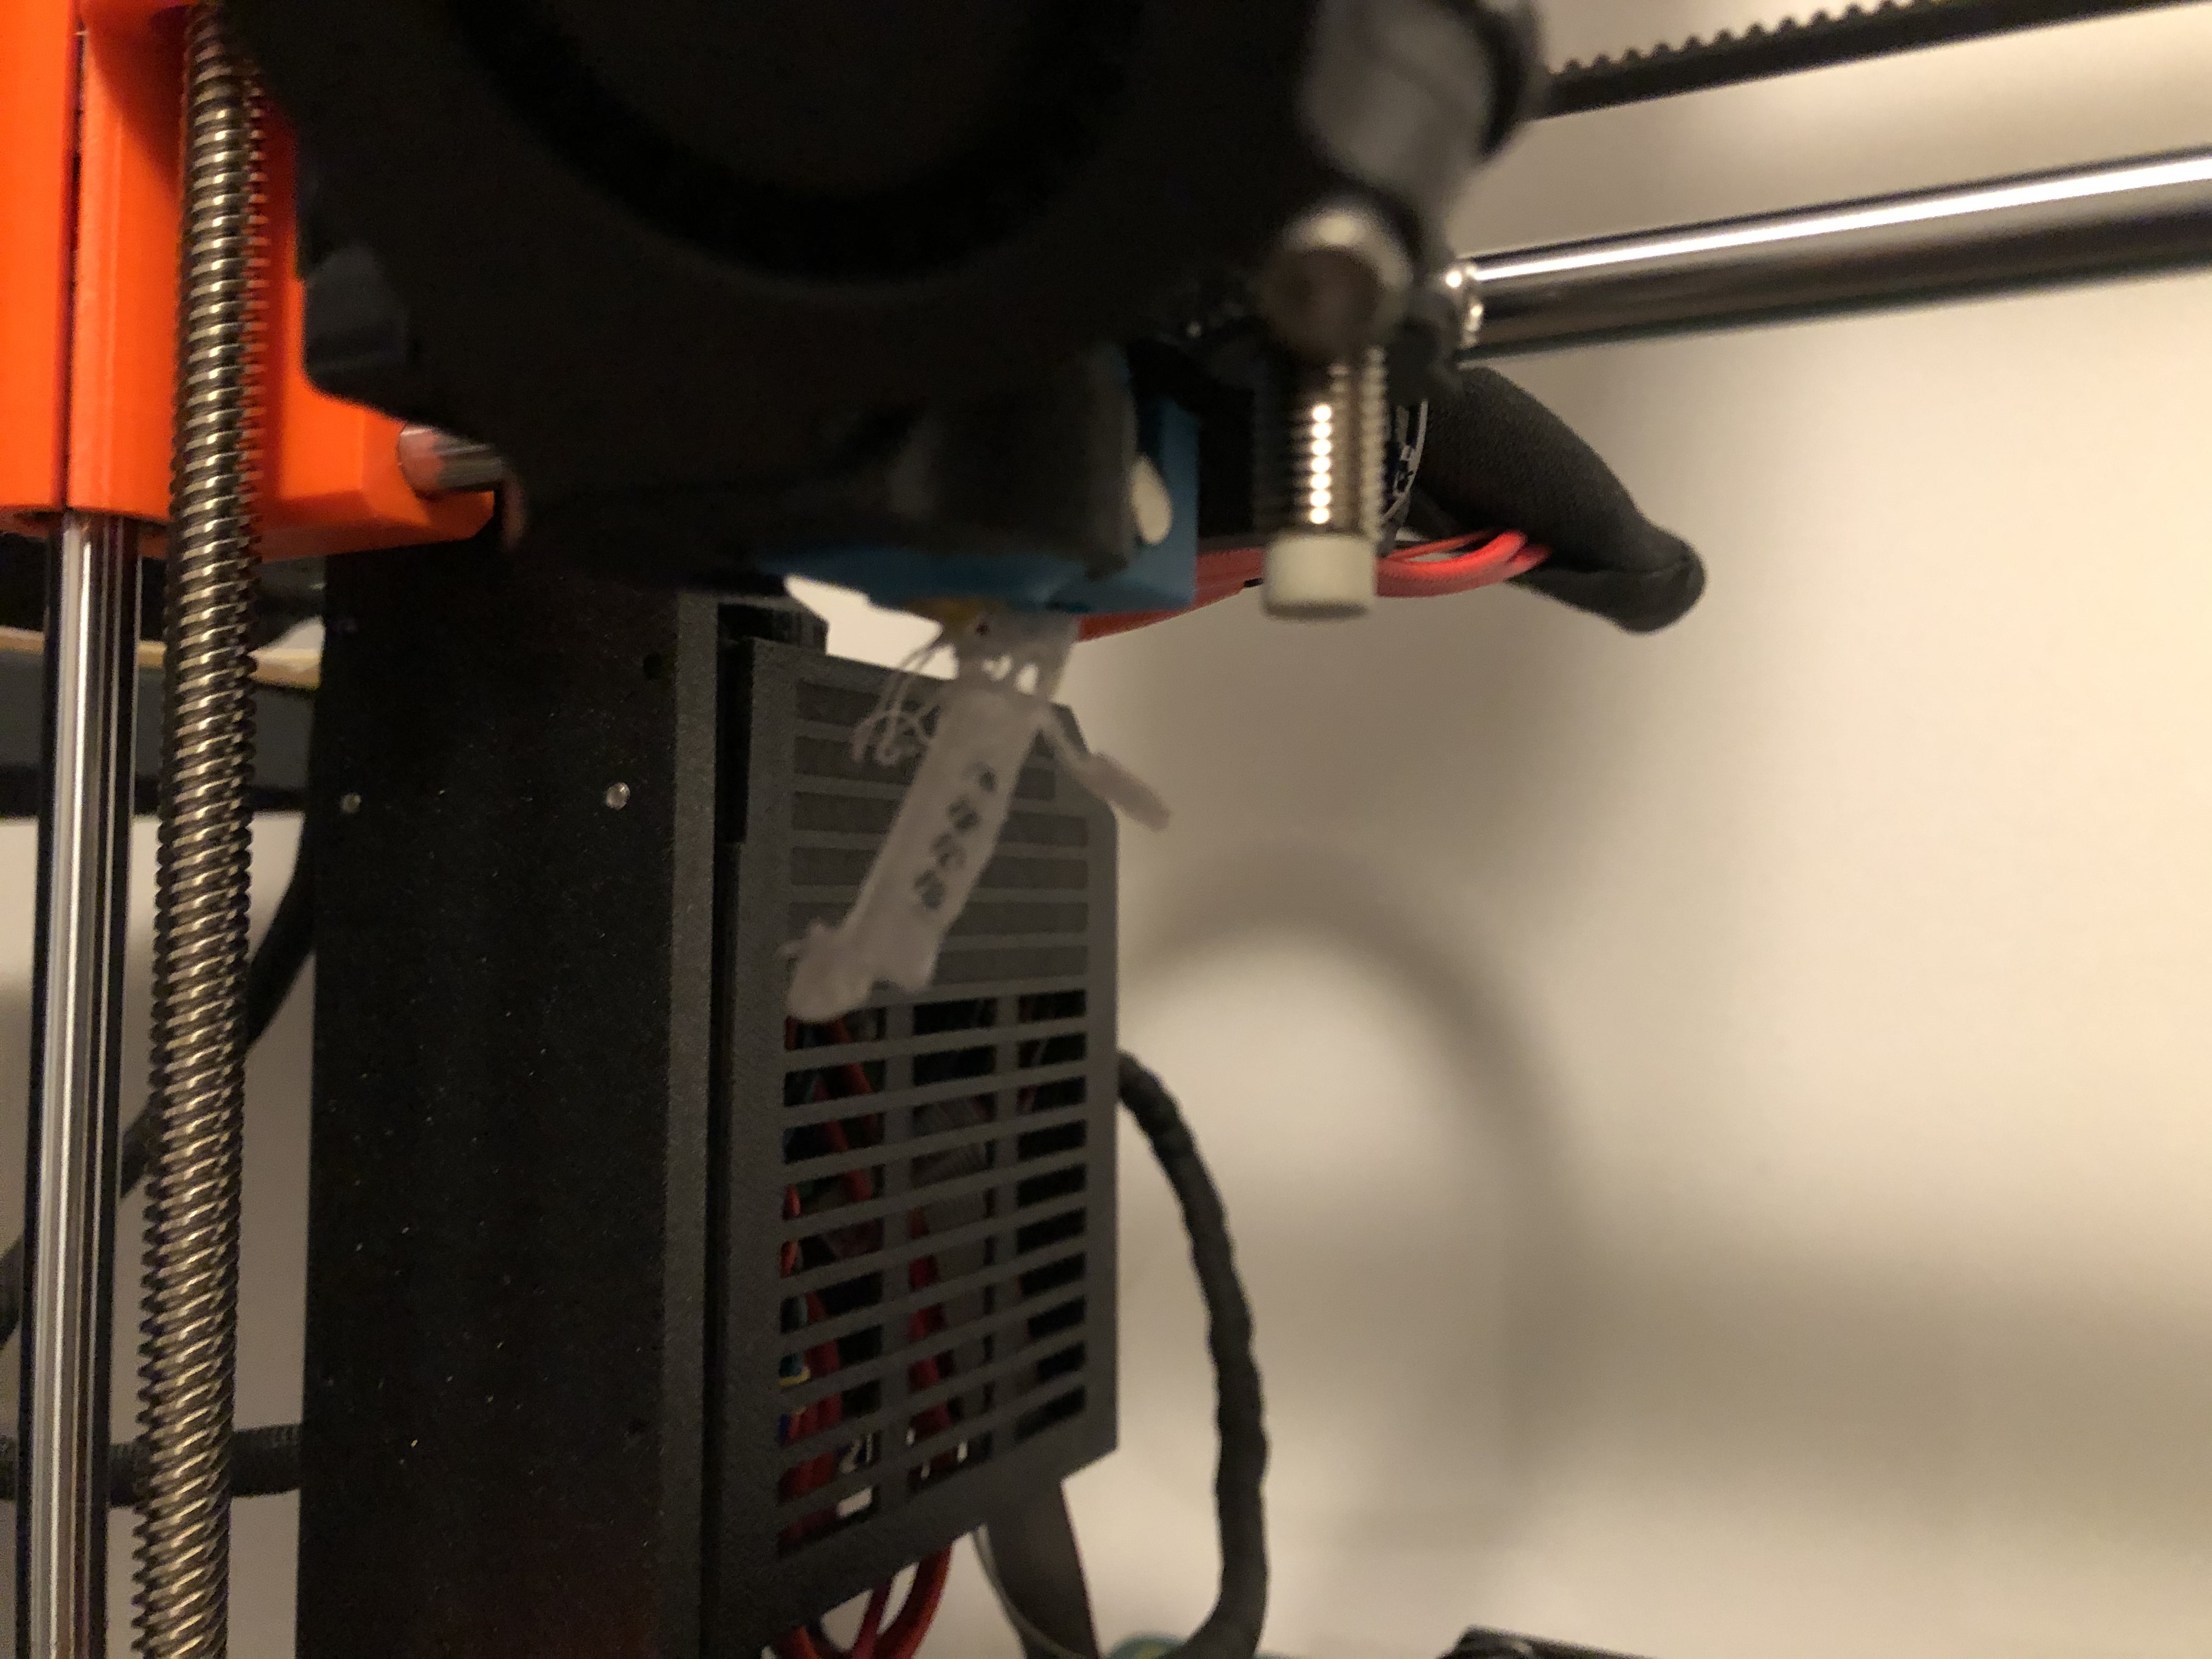
I've been trying to print the Rasberry PI zero frame for the MK3s and I'm unable to get the right adhesion on the texture steel sheet. I cleaned again and again with IPA 99.9% before every attempts and the model keeps warping or attaching itself to the hotend at some point while making the first layer. I tried to change the live-z by giving more or less height, I didn't had any success.
Material used: Prusament PLA Silver
Here's my 3mf: rpi-zero-frame

RE: Printing the RPI-Zero-Frame
Hi Fred,
I used to have problems with adhesion,
and like you, I tried cleaning with IPA, without luck.
You may have success with the process I use...
I take my textured build plate to the kitchen sink and use basic dishwash soap with hot water and a new, clean scotchbright sponge.
I pus a small blob of dish soap on th build plate, and scrub the build surface well with the scotchbright sponge,
rinse off with hot water, and repeat, then I dry immediately with paper towels, and handle only by the edges of the build plate.
I then use 70C build plate temperature for my prints.
the night before last I printed the rear of a model boat hull that was 230mm x 5omm on the build plate and 200mm tall. I used a 10mm brim and two small braces to give support to the sharp corners of the model,

Last night I printed the front of the hull, this time, there were only the edges of the hull shape in contact with the build plate, so again I used a 10mm brim and two small braces. and again the hull part printed successfully.
the Sharp corners are very likely to lift, so I ran the first few layers slowly, to allow the shrinkage strains to dissipate.
Dish soap is designed to lift grease and contaminants off the surfaces and capture them with suffactants so they wash away,
IPA dissolves some greases and contaminants and spreads them out more evenly across the surface, before evaporating and leaving the grease and contaminants behind.
Yes IPA will share some of the grease with the tissue/cloth, but the process is slow and requires more IPA than most of us are prepared to use...
Give it a try, it might work for you... 
regards Joan
I try to make safe suggestions,You should understand the context and ensure you are happy that they are safe before attempting to apply my suggestions, what you do, is YOUR responsibility. Location Halifax UK
RE: Printing the RPI-Zero-Frame
@joantabb
Thank you Joan. I'll definitely try this cleaning method because it's starting get expensive in IPA. As for the brim I tried adding some but they're warping as well and sticking to the nozzle at some point.
Would you say that increasing the bed temp to 70C would help avoiding warping?
RE: Printing the RPI-Zero-Frame
@joantabb
I cleaned throughout the bed sheet and it made hell of difference! The adhesion is almost perfect. I also added a 2mm brim to my print and it stick perfectly to the bed. It still failed after 3 layers, but this time I'm trying at 68c, but again thanks for you suggestion it made an amazing difference.
RE: Printing the RPI-Zero-Frame
Success!
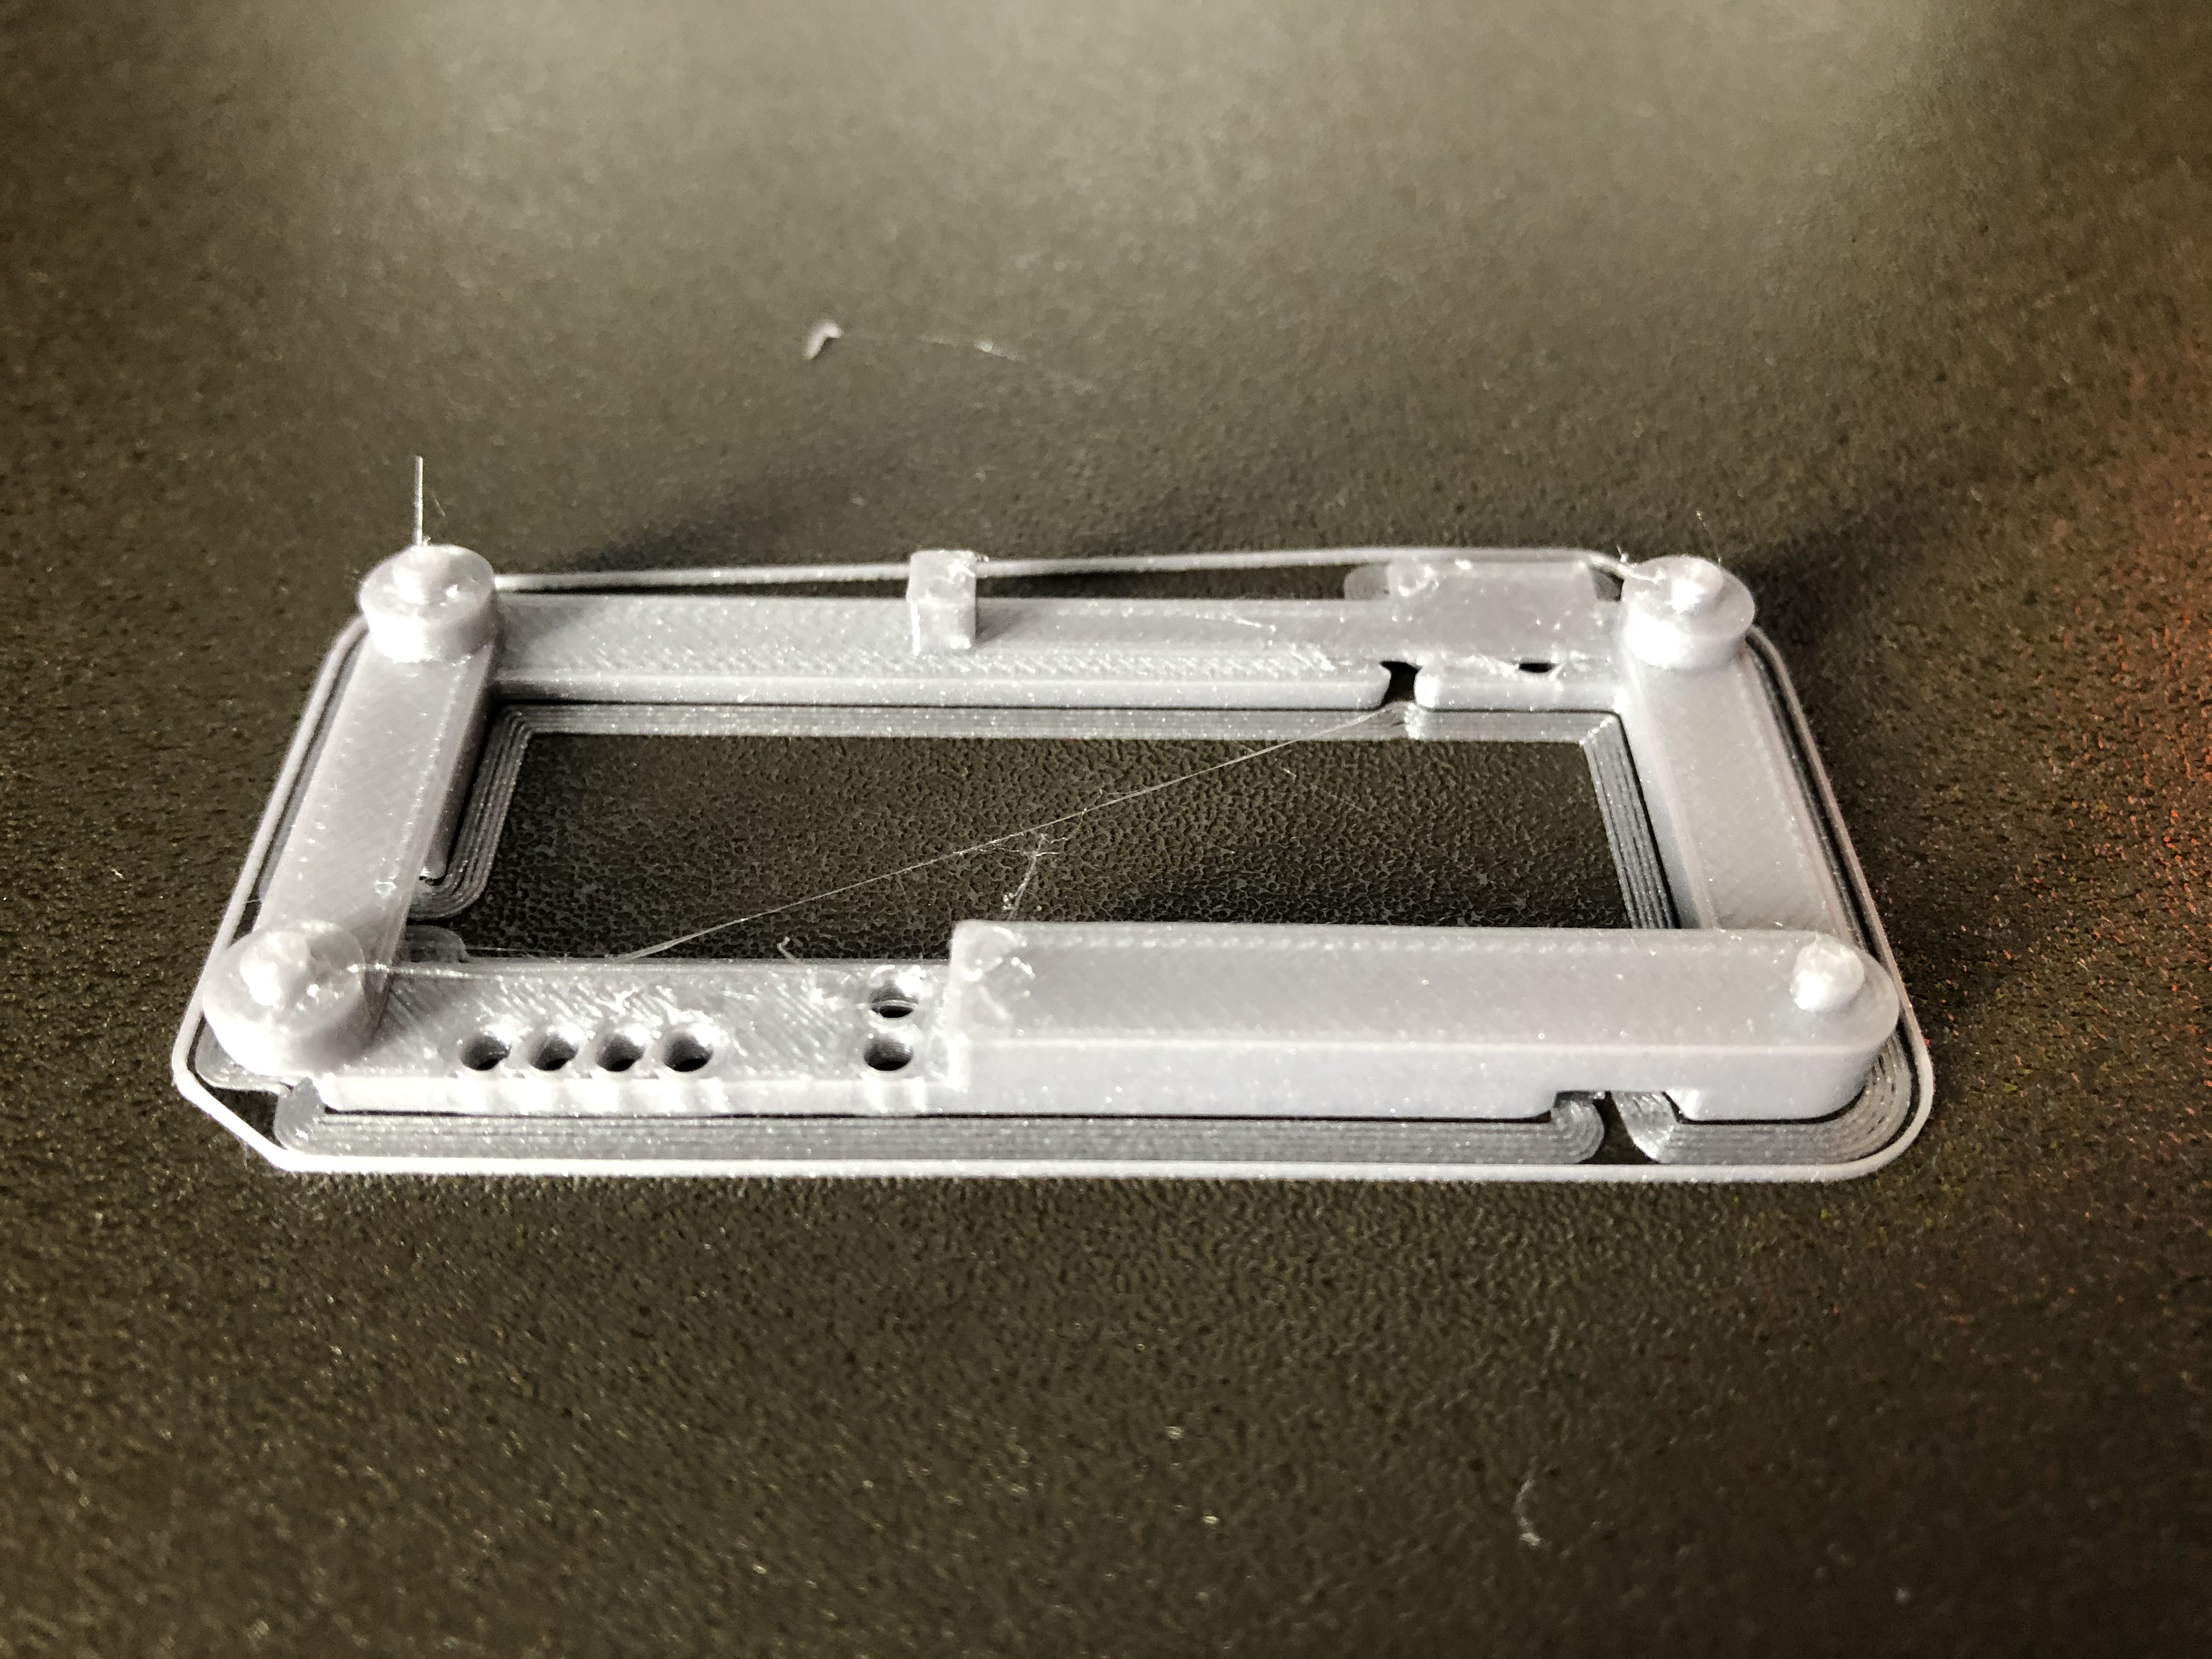
Here's the adjustment I did.
- Clean thoroughly the bed sheet with IPA and paper towel. (I think my mistake was to use a microfiber cloth)
- Change the layer precision to 0.20mm
- Increase the heat of the bed to 68c
- Added 2mm brim
- Reduced the fan speed to 200 out of 255
I think cooling the nozzle temperature to 205-210c would help reducing the stringing, but that's for another print. 😉
RE: Printing the RPI-Zero-Frame
Hi Fred,
If you look closely at your picture it looks like the Brim does not connect with the main model properly, there appears to be a gap...
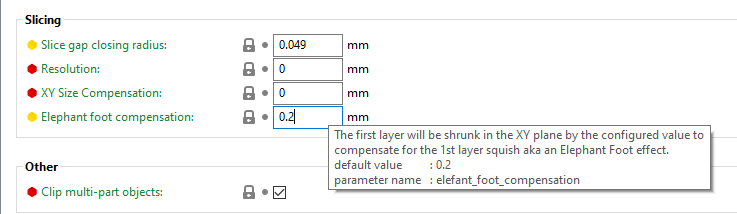
this is probably because the Elephant's foot compensation is set to 0.2mm, this causes a reduction in the actual first layer size, and hence a gap to the brim.
regards Joan
I try to make safe suggestions,You should understand the context and ensure you are happy that they are safe before attempting to apply my suggestions, what you do, is YOUR responsibility. Location Halifax UK
RE: Printing the RPI-Zero-Frame
You're right! I imagine I could set this to 0 on small piece because the weight of all layer might not be enough to create this effect.
RE: Printing the RPI-Zero-Frame
The more I read this definition the more I understand this has nothing to do with the weight, but more how much Z-Adjustment you giving which will squish more or less your first layer.
RE: Printing the RPI-Zero-Frame
That is correct, the weight of layers above is not really a great factor unless your bed temperature is high enough to keep the filament soft. In practice its how much squish you have on that first layer. I also find that the default of 0.2 is too aggressive and for me 0.1 works better.
Then again with a properly clean bed most things dont really need a brim, unless they have really small contact points or alternatively are large and flat so tend to bow more due to the length