Overhangs on curved model no supports please
Hi, I am struggling with some curve bottom models where have to print upwards. The rest of the model is perfect so I don't have to print support and manage other areas on model from overhangs supports.
Even with supports, it's lack luster. I could reduce the layer height on this mk3 .4 nozzle, but the rest of the pot doesn't need to be.
Recommended tweeks in settings? I am using default for generic PLA filament at .30 layer heights with mk3s profiles.
Ideally, would it be pssible for me to print this without supports?
ALso, do I need to repair my model? It seems the ridges/grid are printing as well. I thought it was just view model.
THanks! and help!!!
Best Answer by bobstro:
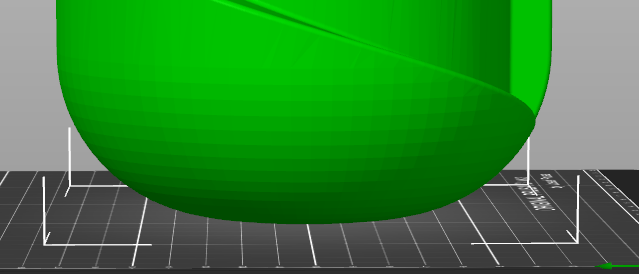
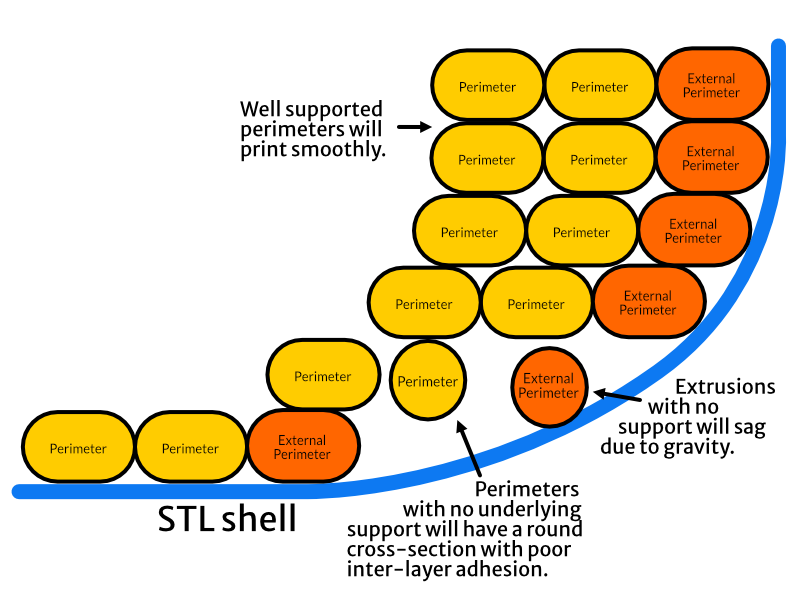
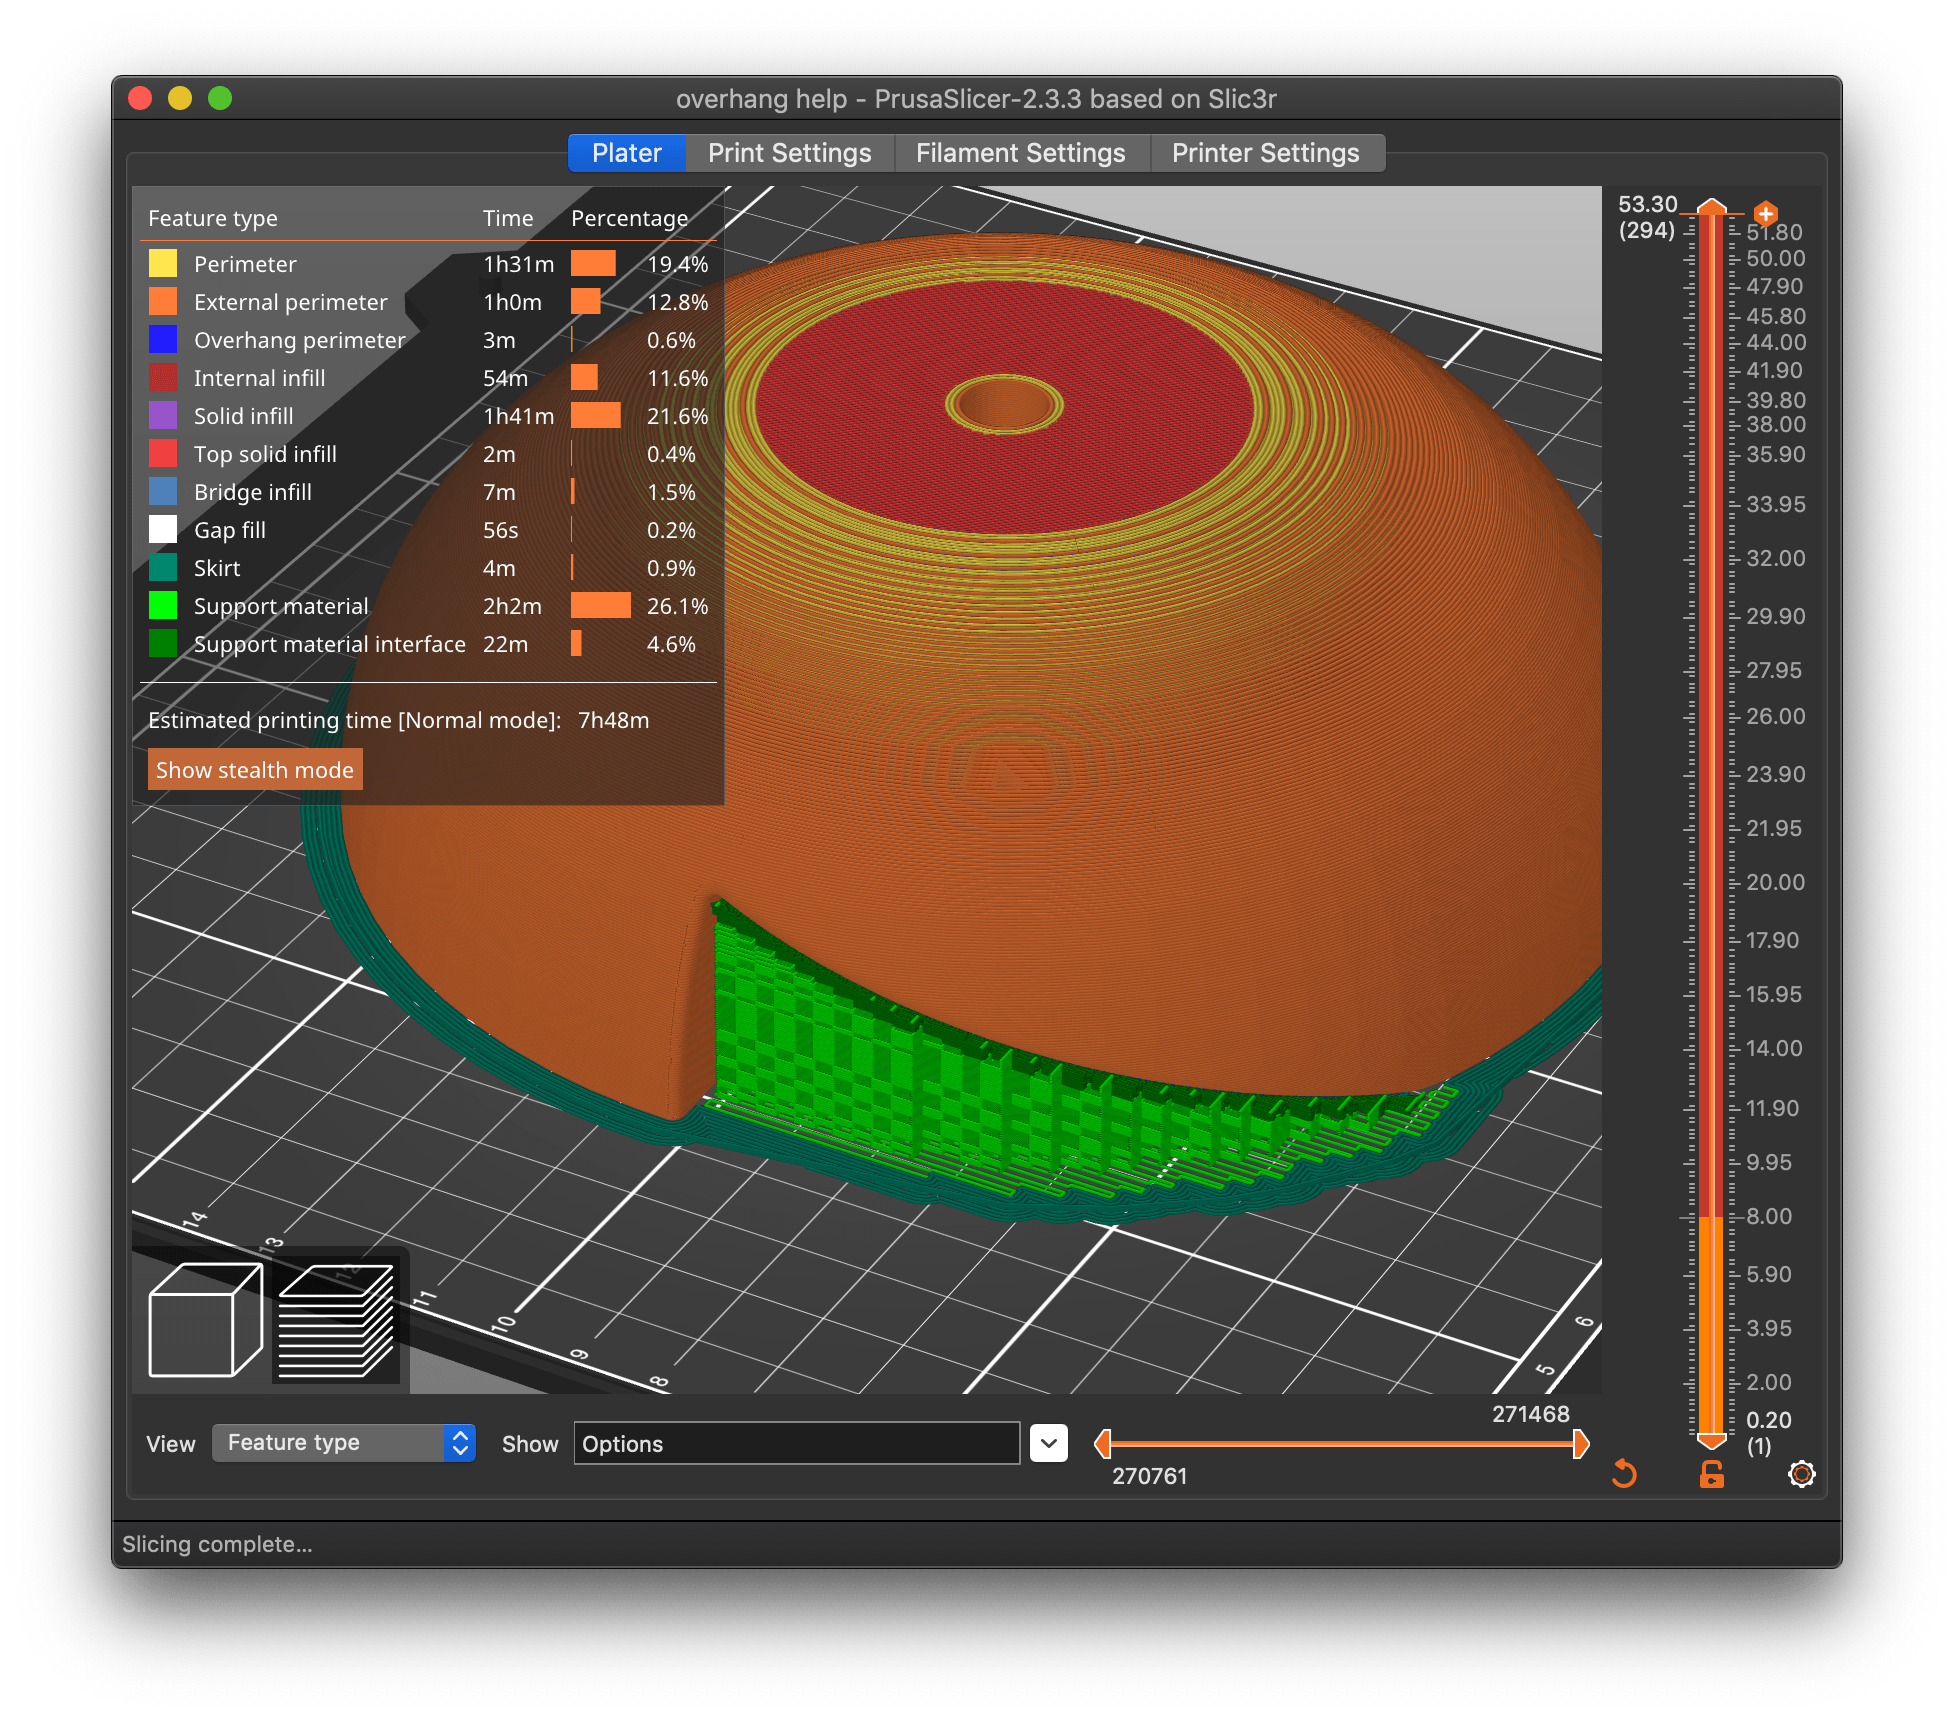
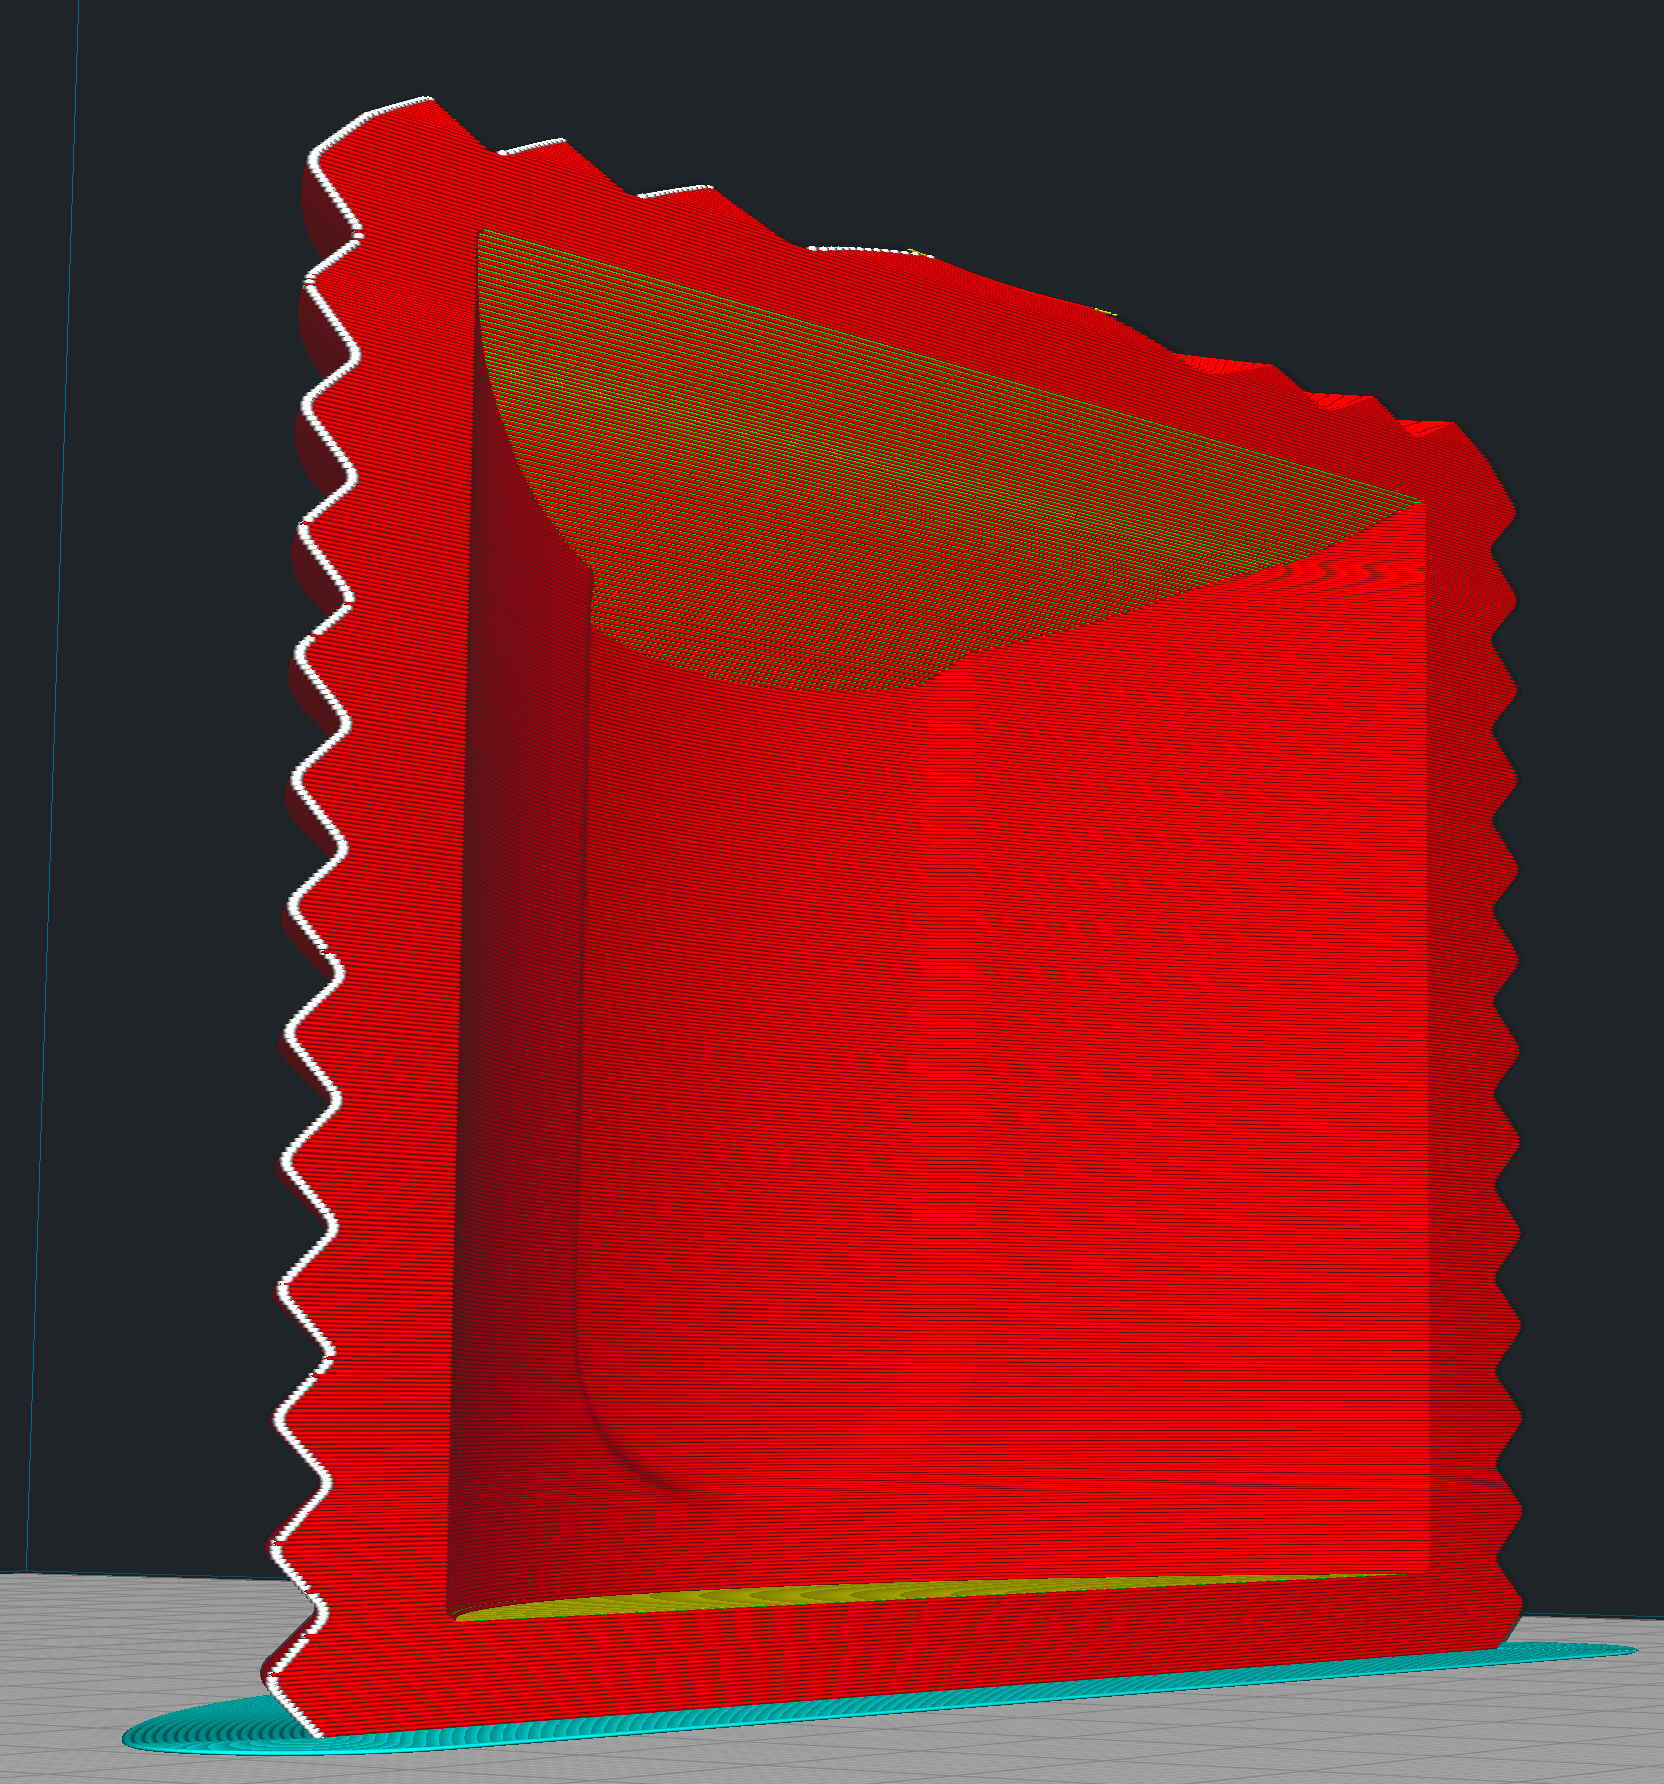
Curved undersides are difficult to print with current consumer-grade FFF printers. The problem is that the underside is a severe overhang at the lowest layers. Even with supports, anything printed without good support underneath is going to come out stringy rough looking since it is -- literally -- printed in air. If you want supports to be removable, there must be a gap between the supports and supported print. Here's a pic showing the problem:
Ideally, you want to reduce the amount of support required as much as possible.
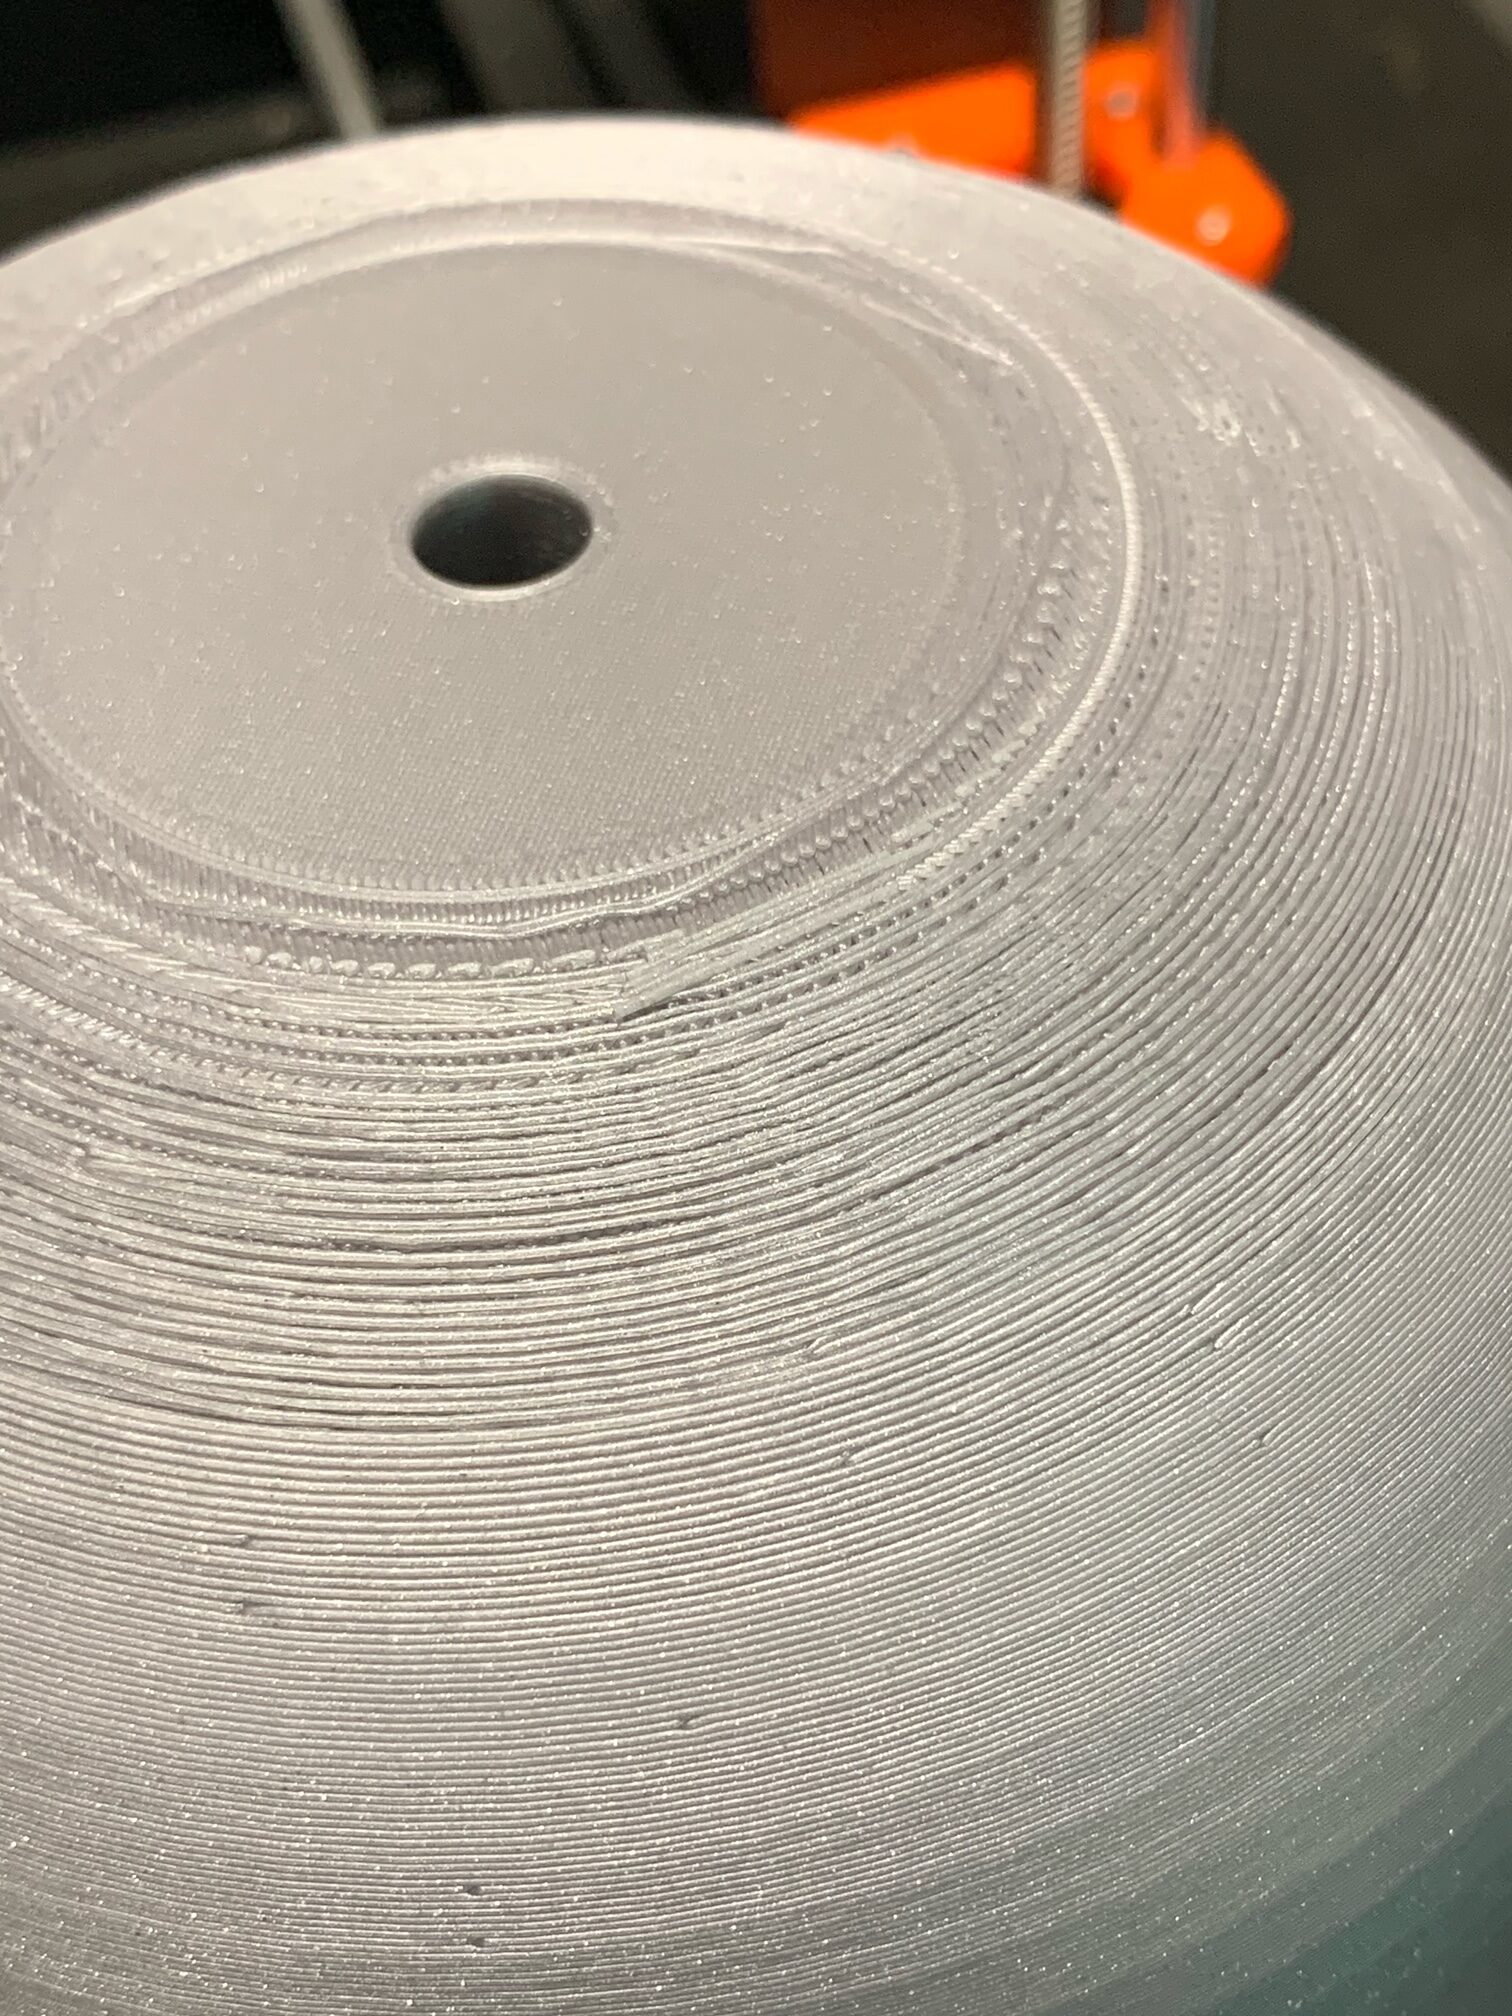
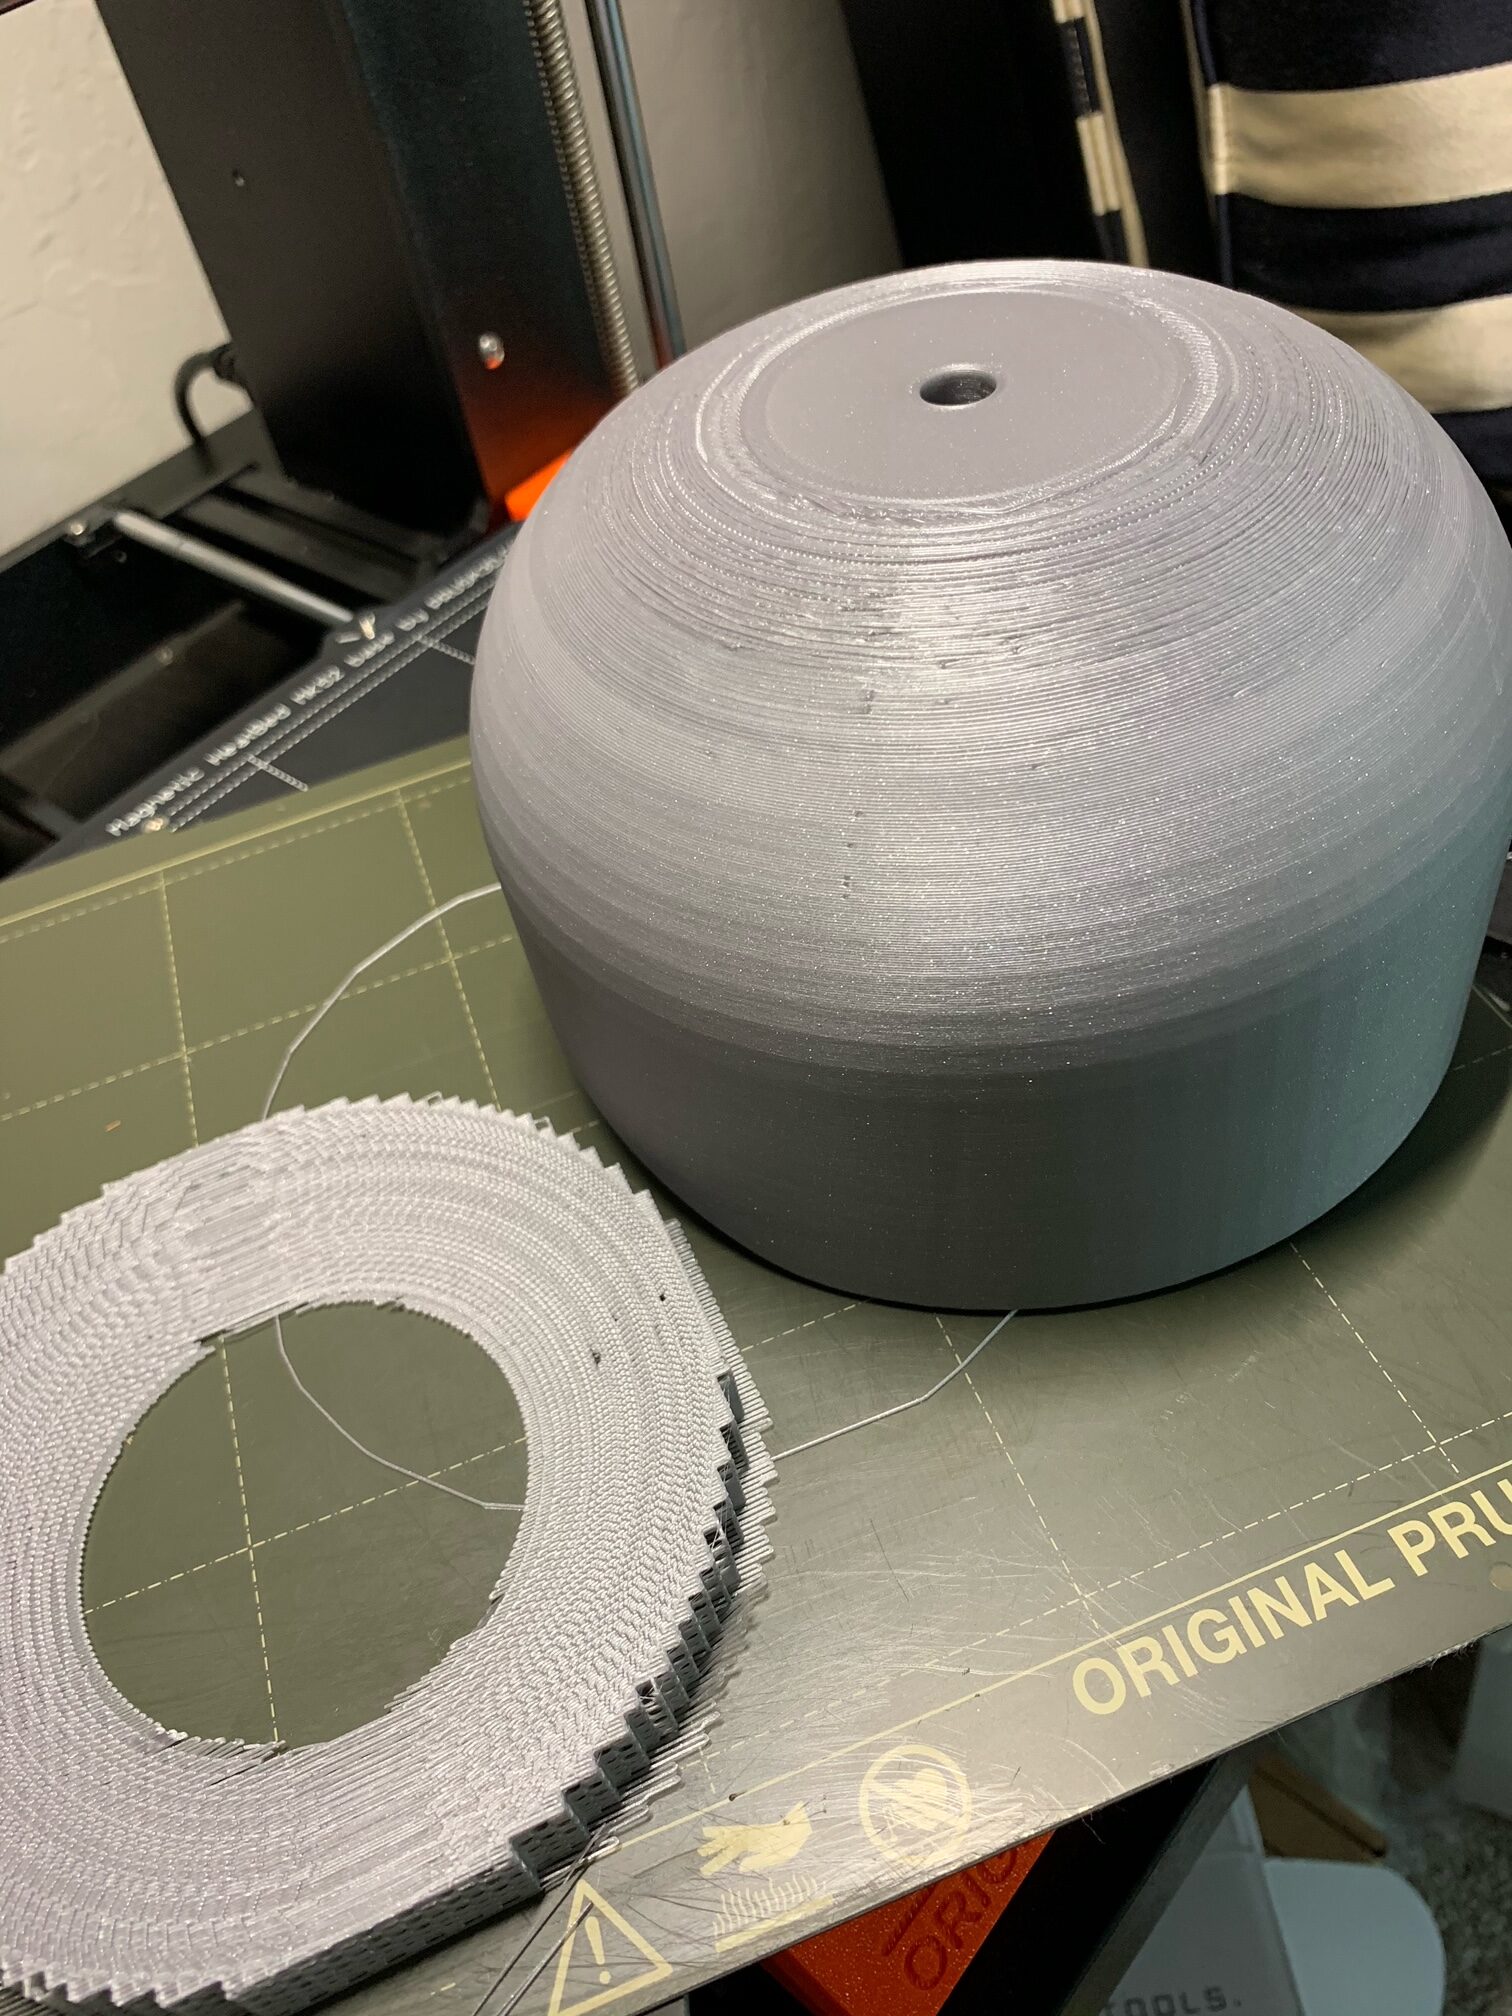
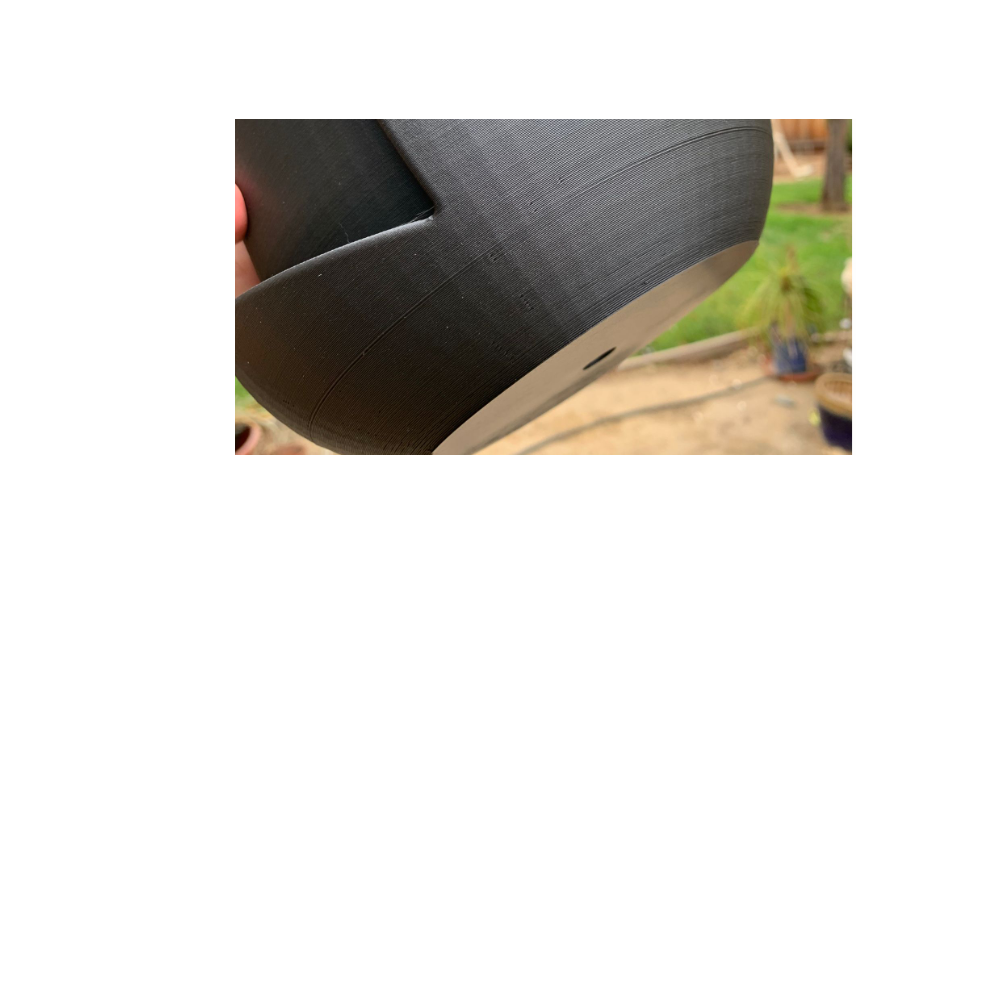
You might have a better overall result printing that bowl-up:
You'll still get the "stair stepping" at the top, but it won't be as stringy. The side notch may need some sanding but hopefully not as badly. I'd expect to spend some time sanding this if you want a smooth finish.
If you're the designer, you might try adding some sacrificial supports to avoid having to use slicer supports. Here are the settings I change for removable supports:
|
Setting |
Value |
|---|---|
|
Contact Z distance |
0.25mm |
|
Pattern spacing |
3mm |
|
Interface layers |
4 |
|
Interface pattern spacing |
0.2mm |
|
Interface loops |
Off |
|
XY separation |
75% |
|
Don’t support bridges |
On |
Support settings can be found under Print Settings->Support material in PrusaSlicer.
Mom, wife, career woman, tinkerer.
Attached file for assistance
Forgive me, I forgot to attach. This is for .6 nozzle setting.
Mom, wife, career woman, tinkerer.
@dst
No file, did you ZIP it? Forum only allow zipped files
Prusa i3 MK3S+ FW 3.11.0 (kit dec -20), PrusaSlicer 2.5.0+win64, Fusion 360, Windows 10
Overhang help file
Zipped this time. Thanks for letting this newbie know.
-DK
Mom, wife, career woman, tinkerer.
Your welcome, I think most us of missed it in the beginning 👍
Prusa i3 MK3S+ FW 3.11.0 (kit dec -20), PrusaSlicer 2.5.0+win64, Fusion 360, Windows 10
Curved undersides are difficult
Curved undersides are difficult to print with current consumer-grade FFF printers. The problem is that the underside is a severe overhang at the lowest layers. Even with supports, anything printed without good support underneath is going to come out stringy rough looking since it is -- literally -- printed in air. If you want supports to be removable, there must be a gap between the supports and supported print. Here's a pic showing the problem:
Ideally, you want to reduce the amount of support required as much as possible.
You might have a better overall result printing that bowl-up:
You'll still get the "stair stepping" at the top, but it won't be as stringy. The side notch may need some sanding but hopefully not as badly. I'd expect to spend some time sanding this if you want a smooth finish.
If you're the designer, you might try adding some sacrificial supports to avoid having to use slicer supports. Here are the settings I change for removable supports:
|
Setting |
Value |
|---|---|
|
Contact Z distance |
0.25mm |
|
Pattern spacing |
3mm |
|
Interface layers |
4 |
|
Interface pattern spacing |
0.2mm |
|
Interface loops |
Off |
|
XY separation |
75% |
|
Don’t support bridges |
On |
Support settings can be found under Print Settings->Support material in PrusaSlicer.
Thank you!
Hi Bobstro, Thank you for the feedback, I was afraid of that. I'll give it ago with the support settings you recommended. I had planned doing it with some wood filament as well so it may not be as bad and post.
Your insight is appreciated!!!
Mom, wife, career woman, tinkerer.
Modified the model with slightly to compensate.
I updated the model with a slight chamfer and it did the trick: no supports thanks again!
On the flipside, I have another model I would like to print without over hands as well without exposing the bridge. Any suggestions or is there just no other way around it?
Mom, wife, career woman, tinkerer.
Nice result!
I updated the model with a slight chamfer and it did the trick: no supports thanks again!
Ah, yes. You can cheat and put a chamfer at the bottom with a bit of fillet above. Nicely done!
On the flipside, I have another model I would like to print without over hands as well without exposing the bridge. Any suggestions or is there just no other way around it?
How well finished does the inside need to be? It may print well enough with selective supports underneath.
It's always hard to identify problems from a pic. Save your current 3MF project file, zip it up, and attach it to a reply here so we can see your part & settings and give better recommendations.
Congrats!
As finished as possible - for resale
Ah, yes. You can cheat and put a chamfer at the bottom with a bit of fillet above. Nicely done!
Thanks to your feedback, I stopped fiddling.
How well finished does the inside need to be? It may print well enough with selective supports underneath.
It's always hard to identify problems from a pic. Save your current 3MF project file, zip it up, and attach it to a reply here so we can see your part & settings and give better recommendations.
I'd like it look as finished as possible for resale without post work or at a hot gun? You know the least work ;the better but not being wasteful. Any suggestions? I am considering getting rid of the ridge line as well, but I think we still be able to see bridge lines sagging in one form or another. Would decreasing layer help or switching to .4 nozzle? Printing 20% wood filament.
Mom, wife, career woman, tinkerer.
You can improve support removal, but supported surfaces tend to look rough
The goal is no support and if quality isn't achievable path of sacrificial supports if there considerable difference in "roughness"
s sacrificial support or using automatic supports. If you do use automatic supports, try using a larger Contact Z distance. I find 0.25mm are easier to remove. Supported surfaces aren't going to look great without some work, unfortunately.
I'll keep that in mind. I would love to get away from supports together, but maybe in space. If you can improve the best settings for non supports, I may be able to get away with some post processing. I would greatly appreciate it.
You might experiment with variable layer heights to allow printing at higher layer heights on the lower layers while using lower layers to improve the top highly curved layers. Here's a hint:I
You'll have to elaborate on this. Does PrusaSlicer offer process layers like simplify3D? Am i close? Or does the modifier allow?
Are these your own designs? They look very great.
Wish I had the skills to model., although it would hurt to do some of my own basic changes if you have any recommendations basic classes? I am comfortable using tinkercad, and analysis tools from meshmixer, but that is about it. I am working with an artist and providing inspiration.
More suggestions tomorrow. Time to wrap up here.
Have a great evening and great start to your week. Look forward to your illustrious knowledge.
Mom, wife, career woman, tinkerer.
Prusa Slicer has modifiers. These are a bit like S3D process, sort of, vaguely. If you read the PS knowledge base you can learn some of the basics. The modifier page is here https://help.prusa3d.com/en/article/modifiers_1767
However the variable layer heights don't need modifiers. You can apply specific different print layer heights that way sure, but you can also use the top toolbar https://help.prusa3d.com/en/article/variable-layer-height-function_1750
More info on Variable Layer Heights
I'll keep that in mind. I would love to get away from supports together, but maybe in space. If you can improve the best settings for non supports, I may be able to get away with some post processing. I would greatly appreciate it.
The real "trick" with supports is to avoid them. It is often possible to tilt a print or build in angled supports to avoid the severe overhangs. A completely curved underside such as this is a challenge.
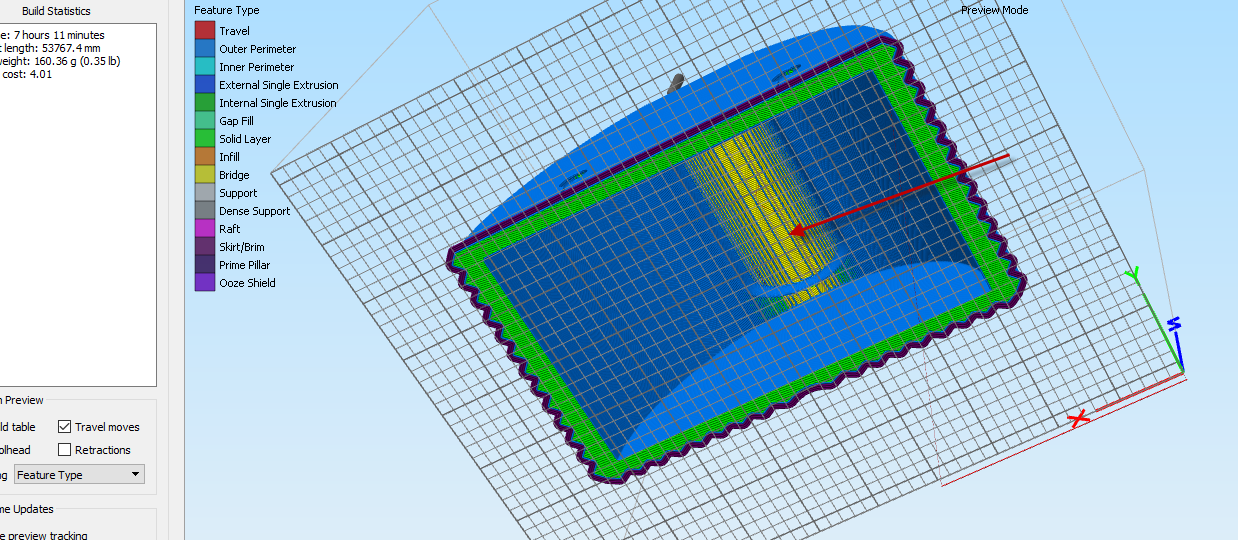
I'd recommend designing a "runt" with the same basic dimensions, but only a sliver of the print to experiment with. At 100%, this part takes roughly 9h to print. If I resize the X dimension to 20mm, it drops to 2h10. Still a long print, but faster to test with. The arched underside is the challenge, so preserve those dimensions.
You'll have to elaborate on this. Does PrusaSlicer offer process layers like simplify3D? Am i close? Or does the modifier allow?
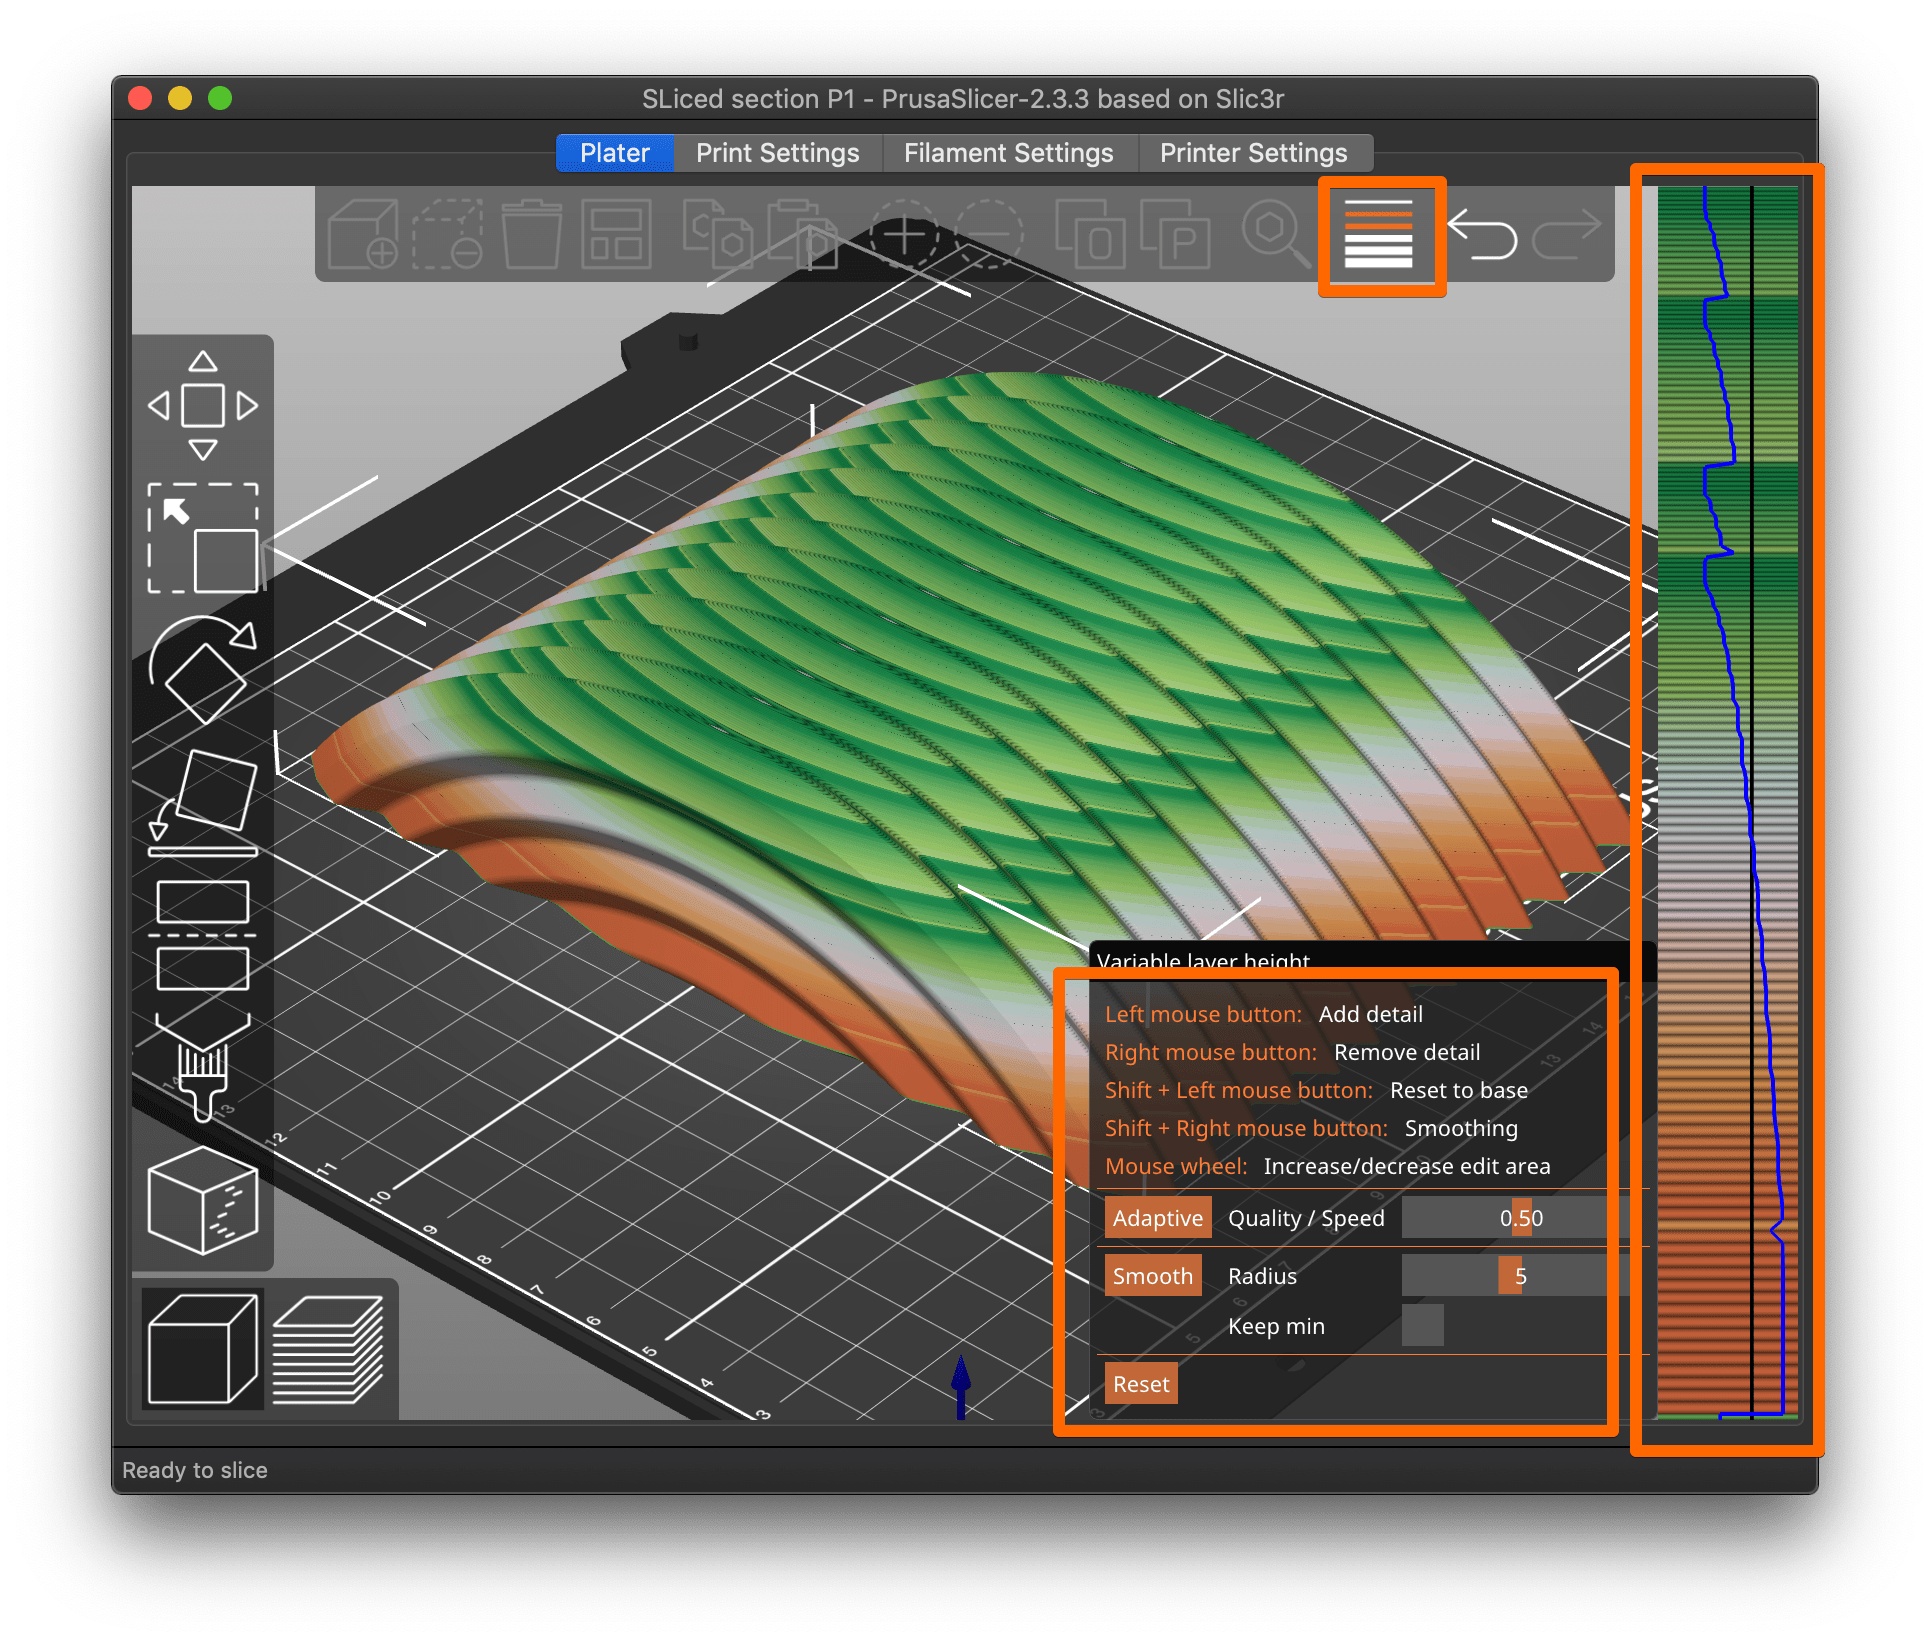
Yes, but the variable layer heights (VLH) is much more flexible. Here's a (hopefully) clearer pic showing how to use VLH:
Try this:
- Select your part with the mouse.
- Click on the "hamburger" VLH button on the top toolbar.
- Experiment with the settings box. If you click Adaptive, it will apply varying layers between whatever values you have set for minimum and maximum layer height in your printer settings (Printer Settings->Extruder 1->Layer height limits).
- You'll see the gradient box at right change colors according to layer height. Hover your mouse over the colored gradient to see what layer heights have been applied.
Slide the Quality/Speed slider to the left (lower) to use lower layer heights for better quality, higher (right) for faster print times. The Smooth button applies the shifts more gradually so will be slower but transitions may be less visible. You can tweak the settings in the gradient bar by left or right-clicking with the mouse per the instructions in that box.
Variable layer heights let you use higher layers where detail is not required (usually vertical walls) but still use finer layers where it matters (curves). As @Neophyl points out, you can replicated S3D's "processes" with modifiers directly, but VLH is a simpler to work with (IMO).
Wish I had the skills to model., although it would hurt to do some of my own basic changes if you have any recommendations basic classes? I am comfortable using tinkercad, and analysis tools from meshmixer, but that is about it. I am working with an artist and providing inspiration.
Just dive in. I followed some tutorials on YouTube to figure out the basics of Fusion 360. I intend to (eventually) do the same with Blender, which is better for organic shapes. Understanding what prints well is going to help you with designs. Do look up Angus' tips for supports in his Maker's Muse YouTube channel. It shows how to design in sacrificial supports and generally avoid FFF printing problems in your design.
Have a great evening and great start to your week. Look forward to your illustrious knowledge.
Heh. I make lots of mistakes but do keep notes! We've got a great community here and I've learned a lot. Happy to help where I can.
VLH I see it!
Thank you! Found it, I'm going to give it a go.
Mom, wife, career woman, tinkerer.
VLH found
Thank you found it! Mind blown, this looks way easier.
Do look up Angus' tips for supports in his Maker's Muse YouTube channel. It shows how to design in sacrificial supports and generally avoid FFF printing problems in your design.
Already subscribed! I love his videos. Well done. Thanks I'll start there. Will share here. Thank you for the tip!
Mom, wife, career woman, tinkerer.
Angus help videos
Thank you found it! Mind blown, this looks way easier.
Do look up Angus' tips for supports in his Maker's Muse YouTube channel. It shows how to design in sacrificial supports and generally avoid FFF printing problems in your design.
Already subscribed! I love his videos. Well done. Thanks I'll start there. Will share here. Thank you for the tip!
His videos are the best!
--------------------
Chuck H
3D Printer Review Blog
Overhang perimeter improve
I know I’m working against the laws of gravity at this point but I have it another go.
Any suggestions to flatten this overhang in mid air? Is there a way to change the direction perhaps to go horizontal?
I modified the design slightly and added a slab on the z so the bridge look cleaner and can infill the rest. Can I achieve the overhang direction of overhang perimeter to original design to replicate?
is this as good as it gets? I will be printing more of these curved do you suggest any upgrades to fan? I’m noticing better results on certain models on the left versus right side of models on bucks plate on other model perimters


Mom, wife, career woman, tinkerer.
Changing bridge angle, other printing options perhaps?
I know I’m working against the laws of gravity at this point but I have it another go.
Any suggestions to flatten this overhang in mid air? Is there a way to change the direction perhaps to go horizontal?
You can try:
- Changing Print Settings->Infill->Advanced->Bridging angle to adjust the angle of the bridge spans.
- If you're using a larger nozzle, Print Settings->Advanced->Flow->Bridge flow rate might allow you to reduce the flow to (hopefully) produce lighter bridge spans.
- Be sure Filament Settings->Cooling->Fan settings->Bridges fan speed is at 100% (max).
- You might get an incremental improvement with another fan duct design, but I wouldn't expect miracles.
- Reduce layer heights on the overhangs as much as practical. That plus wider extrusions helps at least reduce the ugly area.
Your results look pretty typical. You might experiment with other slicers to compare results. Bridging is a bit of a weak point in PrusaSlicer, though they're always making improvements.
Might it be possible to cheat and print this in 2 parts? The domed outer printing in your current orientation, and an inside insert -- maybe even printed in a contrasting filament -- that snaps inside perhaps? The insert could be designed to print "bowl up" to ease these problems. Or coat the inside?
Another possibility would be to print on its side. If you can chamfer the inside of the top and bottom (previously side) insides, it should print reasonably well. Or if the sides must be square, model in a sacrificial panel with some gaps over the open side (previously the top) to support the top. That will reduce the amount of support required.
RE: Side printing consideration
FYI - Here's what Cura generates if I enable "make overhang printable":
You'd want to model this to be symmetrical, but food for thought.
Or cut it in half and print both sides solid bottom down in this orientation, then glue together?