RE: How to avoid these hollow lines (underextrusion?)
Yes, zero infill
3 perimeters
line width = 0.48 mm
line height 0.2 mm
0.4 mm nozzle.
RE: How to avoid these hollow lines (underextrusion?)
I would expect it to look crappy with those settings - but maybe that's just my experience.
RE: How to avoid these hollow lines (underextrusion?)
It actually looks good in the places where these defects that I have focused on do not occur. And as I said previously, with 3 perimeters the object is structurally strong although hollow.
RE: How to avoid these hollow lines (underextrusion?)
Here's what I get. Sorry for the fuzz- my camera isn't acting rationally today.
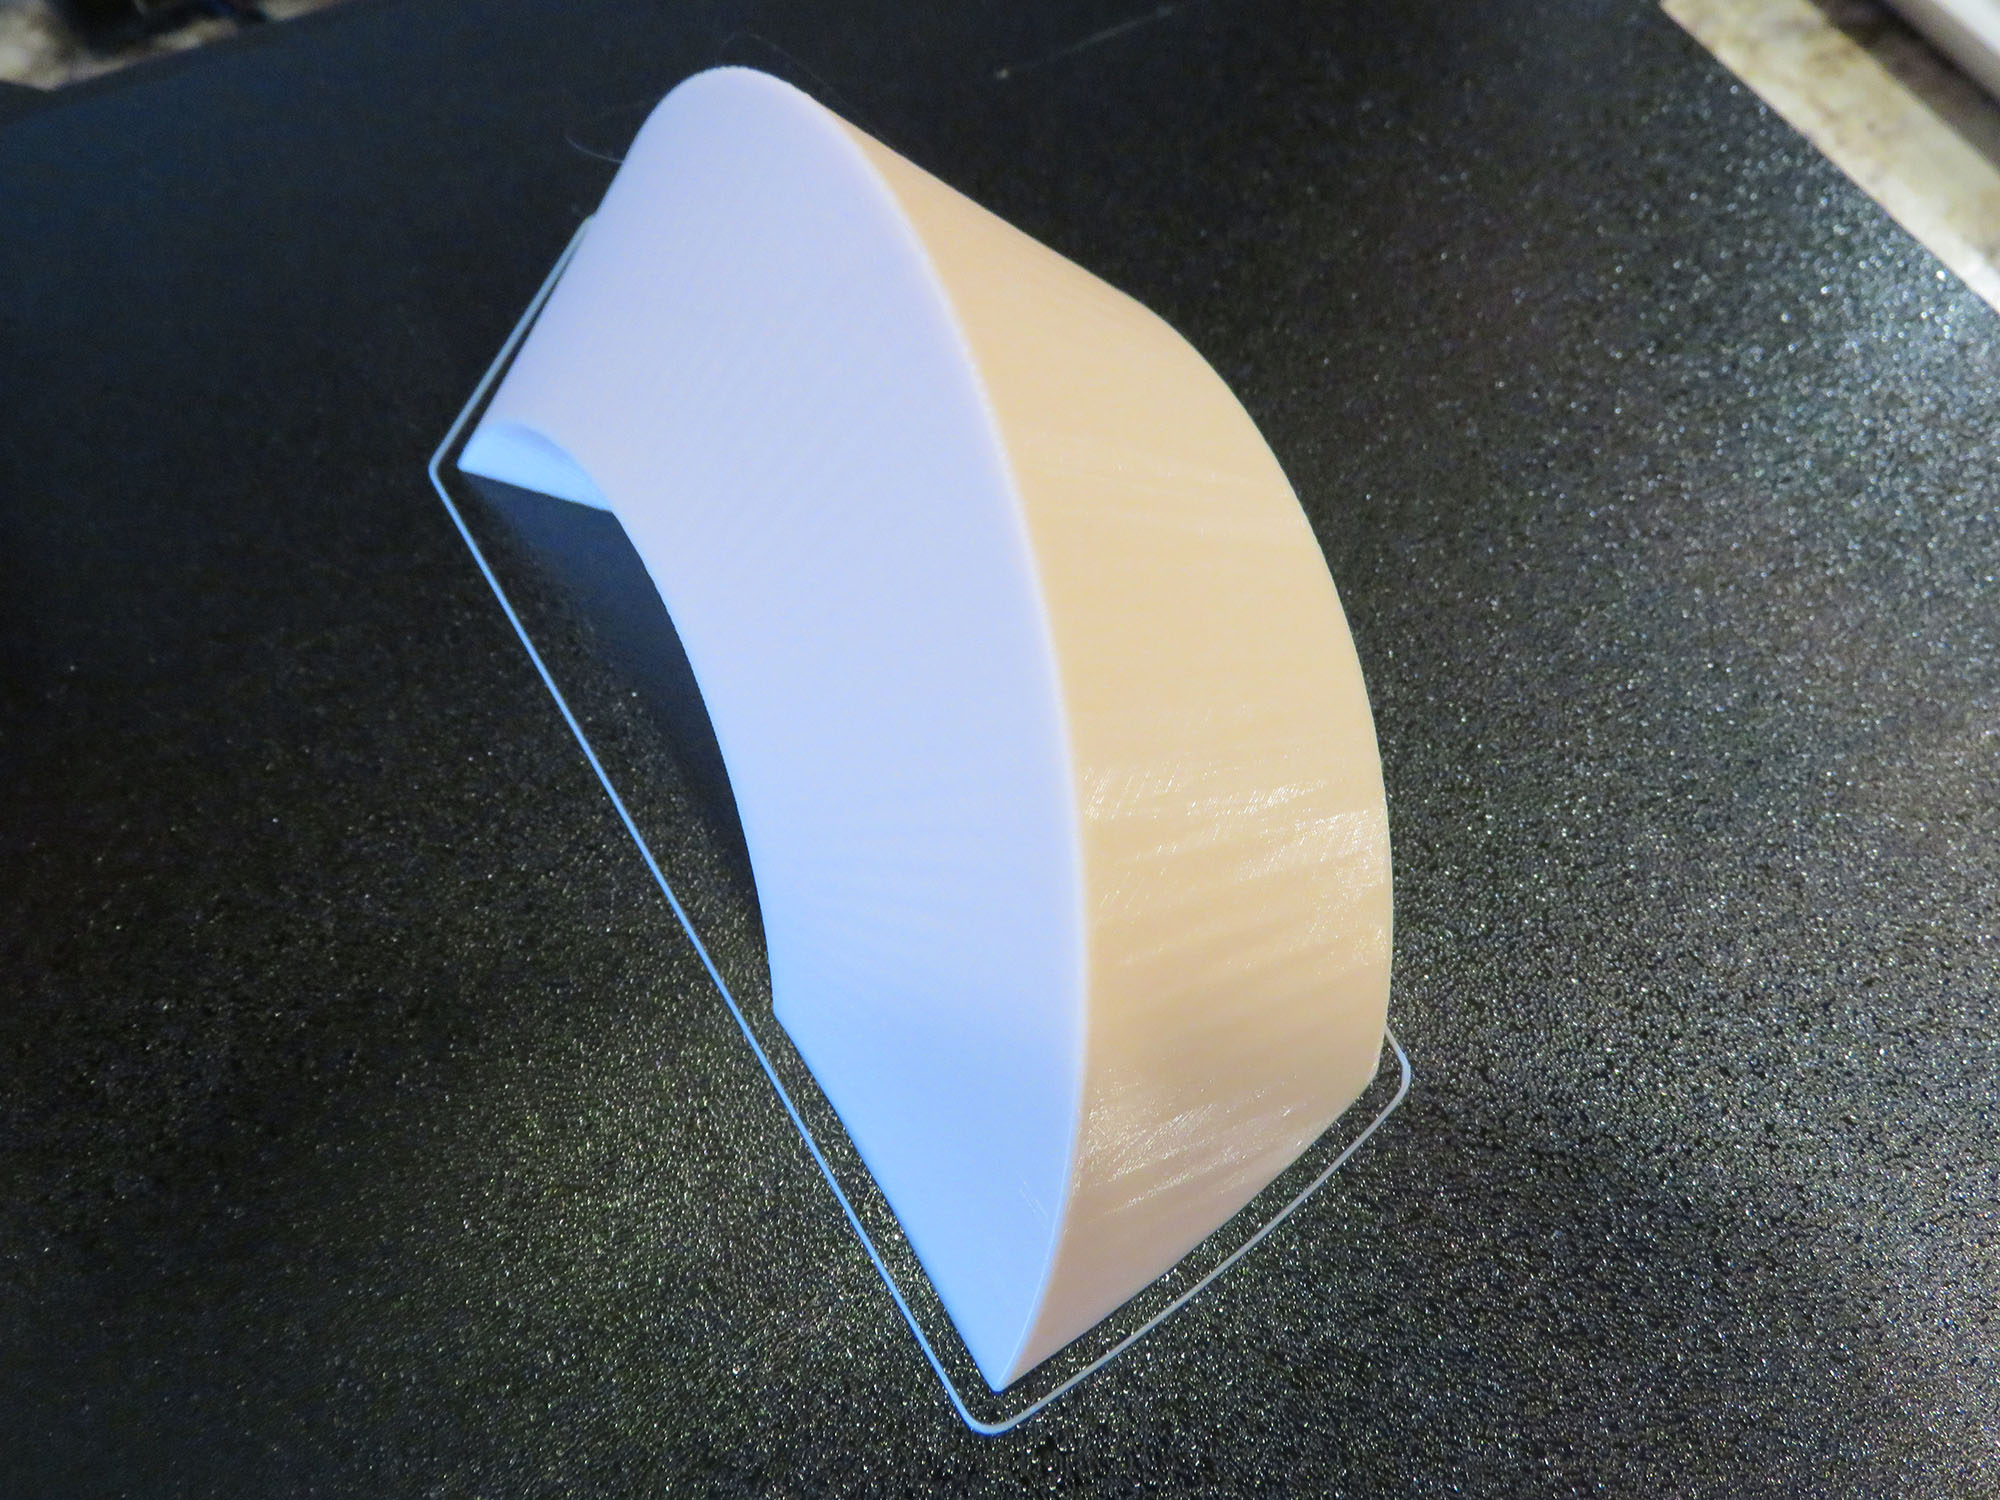
Absolutely zero artifacts. Seam was set to rear, which forced it to be on the rear crease rather than hopping around front to back based on 20th digit precision choices.
RE: How to avoid these hollow lines (underextrusion?)
TBH - in better light there are a few defects at the seam, more than I see on my general prints by far, and worse. I'm printing another copy, this time with the base open so I can see the carnage inside. Pretty sure it will be ugly. I haven't seen as many spider webs on my extruder as that print made in ages.
That the artifacts are on the model vertices, and not the seams everywhere, points at a model problem. But 3D-Builder passed it as clean.
RE: How to avoid these hollow lines (underextrusion?)
Thanks. Your defects are elsewhere because the seam is not at the same place. My seam is at sharpest corners (there is no "back" on my object nor really a top or a bottom once it has been printed in full, so it's difficult to choose the seam to be visible, I choose to hide it on the edge).
The 3D repair programs like 3D-Builder, the manifold detector in Cura, Autodesk Netfabb, etc… they all see no issue with the model.
But you're right, like me the defects you get are in the seam AND at the sharp vertices. Maybe I have to play with max print/travel resolution in the slicer.
RE: How to avoid these hollow lines (underextrusion?)
I printed it this morning using a basic pla , as you didn't supply a 3mf with your settings I used my normal ones which like Tim also has seams on the rear. My print came out better than Tim's actually, I have a few bumps at the rear near the top where the edge angle becomes more extreme but I think that is due to the cooling not being quite as good at the rear when it gets that high, and again like Tim they correspond to where your triangle verts meet and the seam is also placed. Basically sharper angles, less cooling and seam start/end position.
After reading Tim's post about printing one without bottoms I just took a hacksaw and cut it in half as I couldn't be bothered to print another lol. Mine is as smooth inside as it is on the outside. In fact there artefacts for the seam , slight though they are on the outside are not visible inside. Its really clean in there.
I think you are right and that long travel moves where the filament has time to leak out more are causing you to basically miss the start of the perimeters. I have seen similar where I've been printing several single walled cylindrical objects. The first one in a row ends up being useless as theres a gap all the way up from missing filament. The rest print fine and they are the same model so it can only be from the extruder moving from the last in order back to the first. Seems to happen more for me when I have a 0.6 nozzle fitted.
RE: How to avoid these hollow lines (underextrusion?)
Thanks guys. I really appreciate the efforts you've put in to help me. I will continue tinkering with settings
RE: How to avoid these hollow lines (underextrusion?)
@neophyl - yeah, using my cheapest of cheap filament. But those holes aren't even at seams - which is especially weird. As for the inside, the layers inside look a bit odd, examples of the bulge problem galore - but - nothing to write home about.
@flux_capacitor
I fixed it...
Want to know how?
I just printed the external perimeters first. Problem solved.
RE: How to avoid these hollow lines (underextrusion?)
@tim-2
Yeah! I'll try that 🙂
RE: How to avoid these hollow lines (underextrusion?)
@flux_capacitor
Actually - it did NOT solve the issue 100% - but improved it to be unnoticable unless looking closely. But, as stated before, these gaps are not on the seam - rather - they are 1 mm to 3 mm away from the seam. I can't explain that offset.
I am trying ALIGNED - the preview looks like it actually gets seams where they are desired - on the creases.
RE: How to avoid these hollow lines (underextrusion?)
The small acute angles of the vertices seem to play a role but I don't understand how.
RE: How to avoid these hollow lines (underextrusion?)
I went back and looked at the REAR seam placement in preview - my assumption all seams were on the ridge was wrong. I've slicced again but with all seams aligned. The preview shows the seam is now fully on the crease. The print is starting, and I'll have my last attempt done in a couple hours.
RE: How to avoid these hollow lines (underextrusion?)
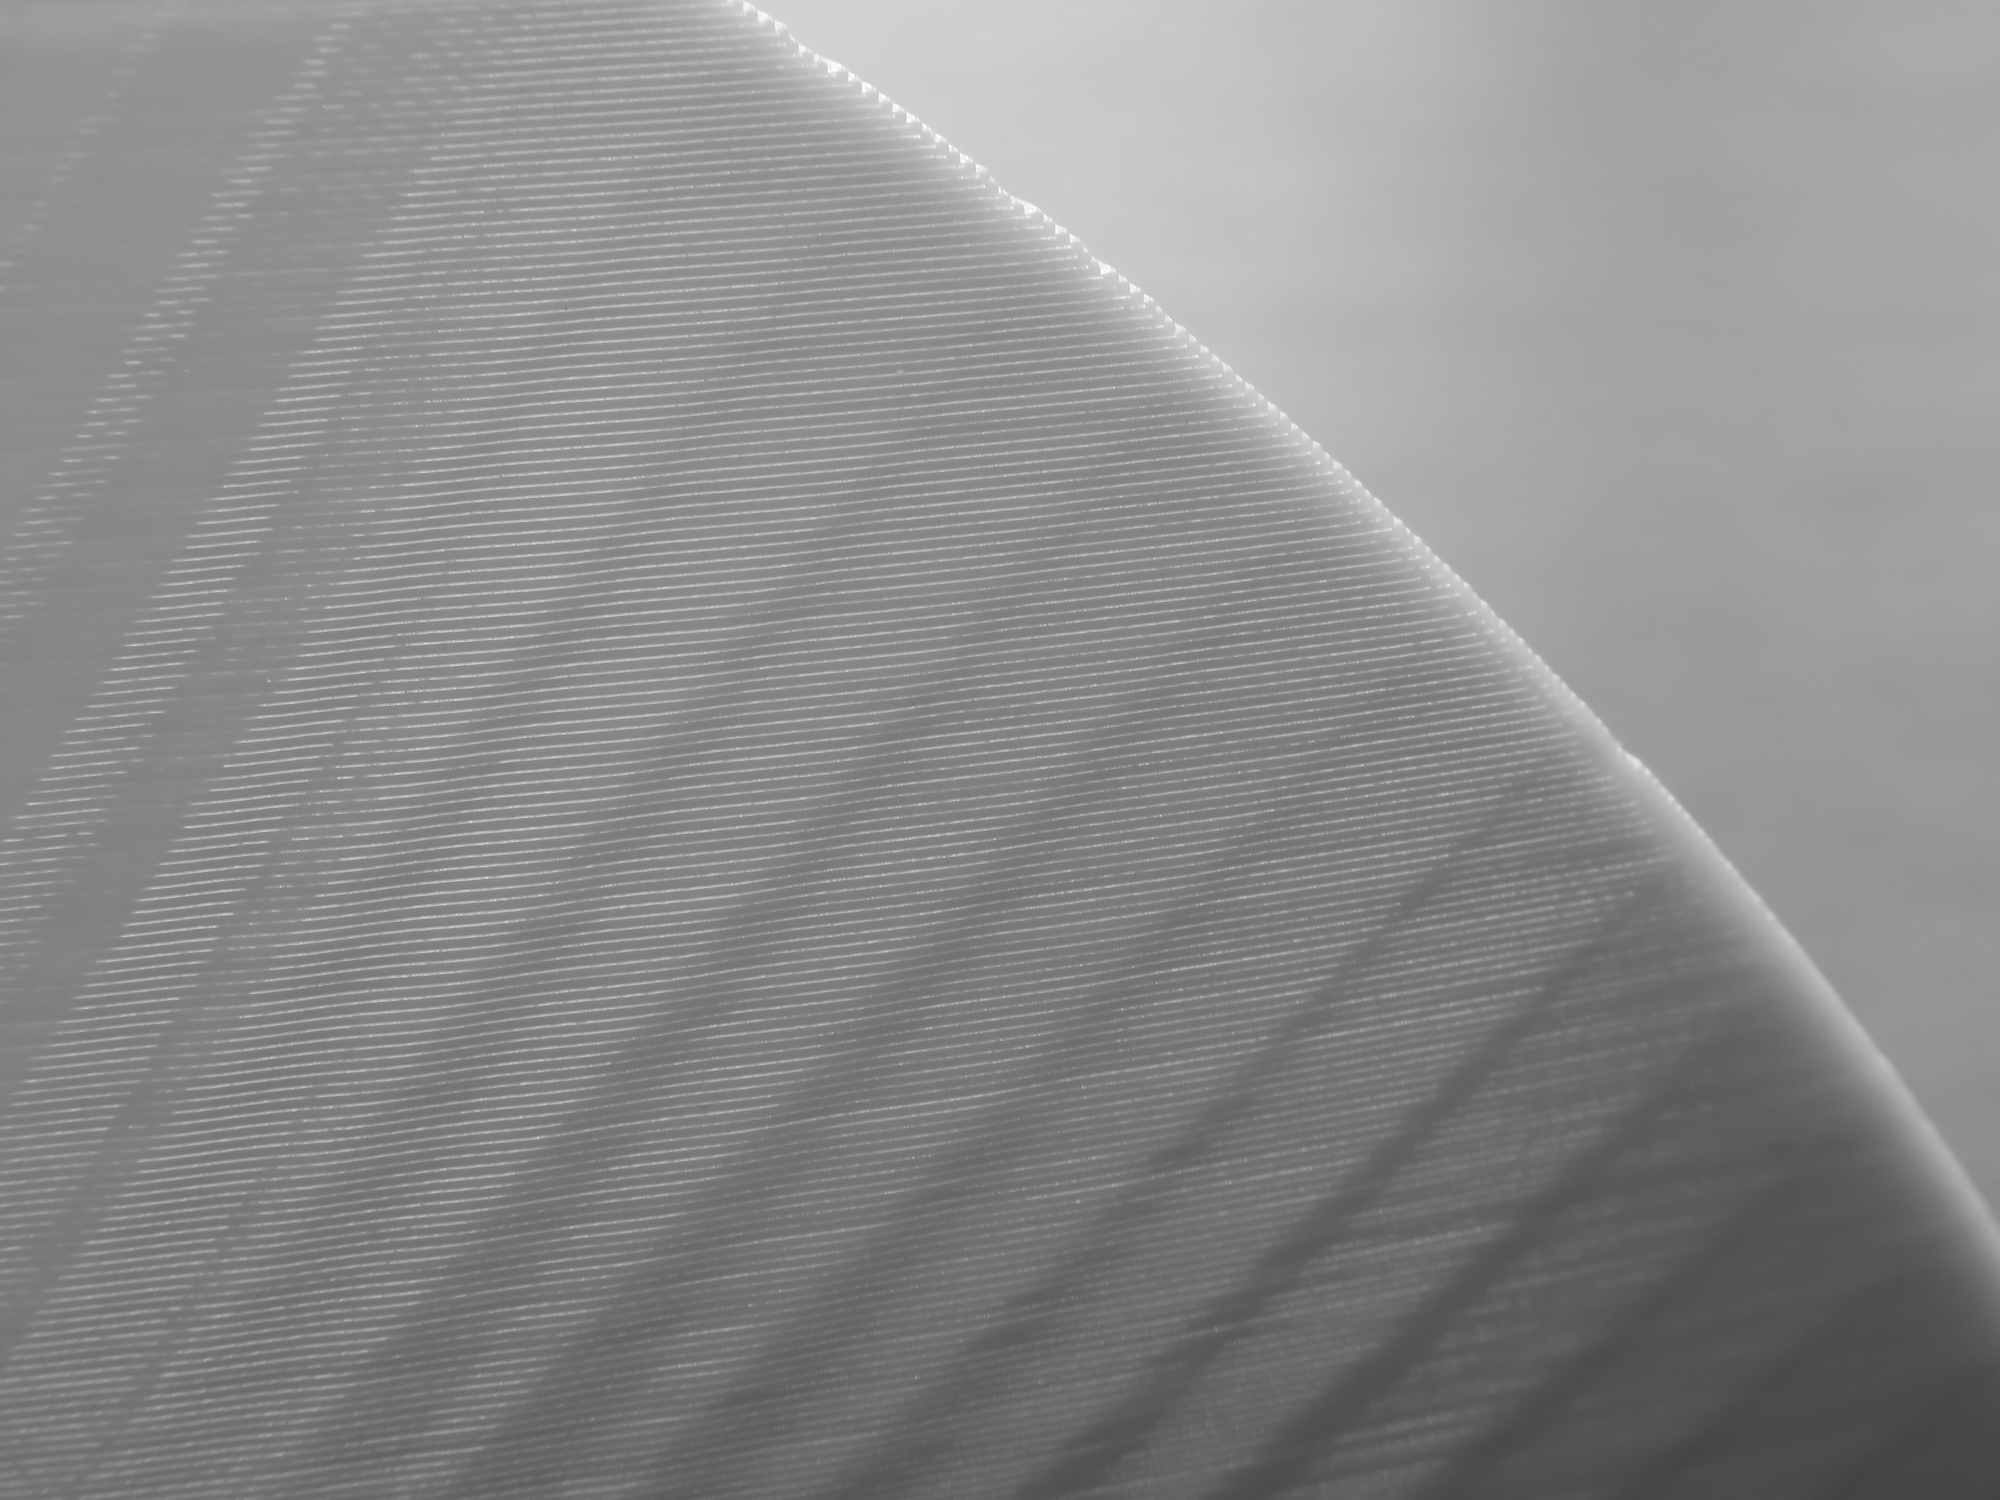
The ALIGNED seam test is done. And, as expected, when the seams are on the crease, the sides appear without holes or gaps.
This doesn't answer the original question, but affirms the seam quality is suspect. I can't explain on my samples why most of the seams are nearly flawless - yet 6 repeatedly fail with much larger gaps than there should be. Of note is these 6 are quite close to the vertex of the part model triangles. And in all cases it is these same six, regardless of seam preference.
I may try one last test - but add 0.1 mm using the XY comp - to rule out any "narrow wall" effect during slicing. It might be these surfaces are too thin and turning into voids during slice or even during print (like an extrude 0.001 command that gets ignored because it is lower than some internal multiplier).
RE: How to avoid these hollow lines (underextrusion?)
When outer wall is not printed first, you get same small puncture defects as me, but you don't get the ugly hollow under-extruded lines that follow from them along the wall. Maybe because you have shorter travels (not diametrically opposed points to travel) and the filament does not leak as much as for my settings.
RE: How to avoid these hollow lines (underextrusion?)
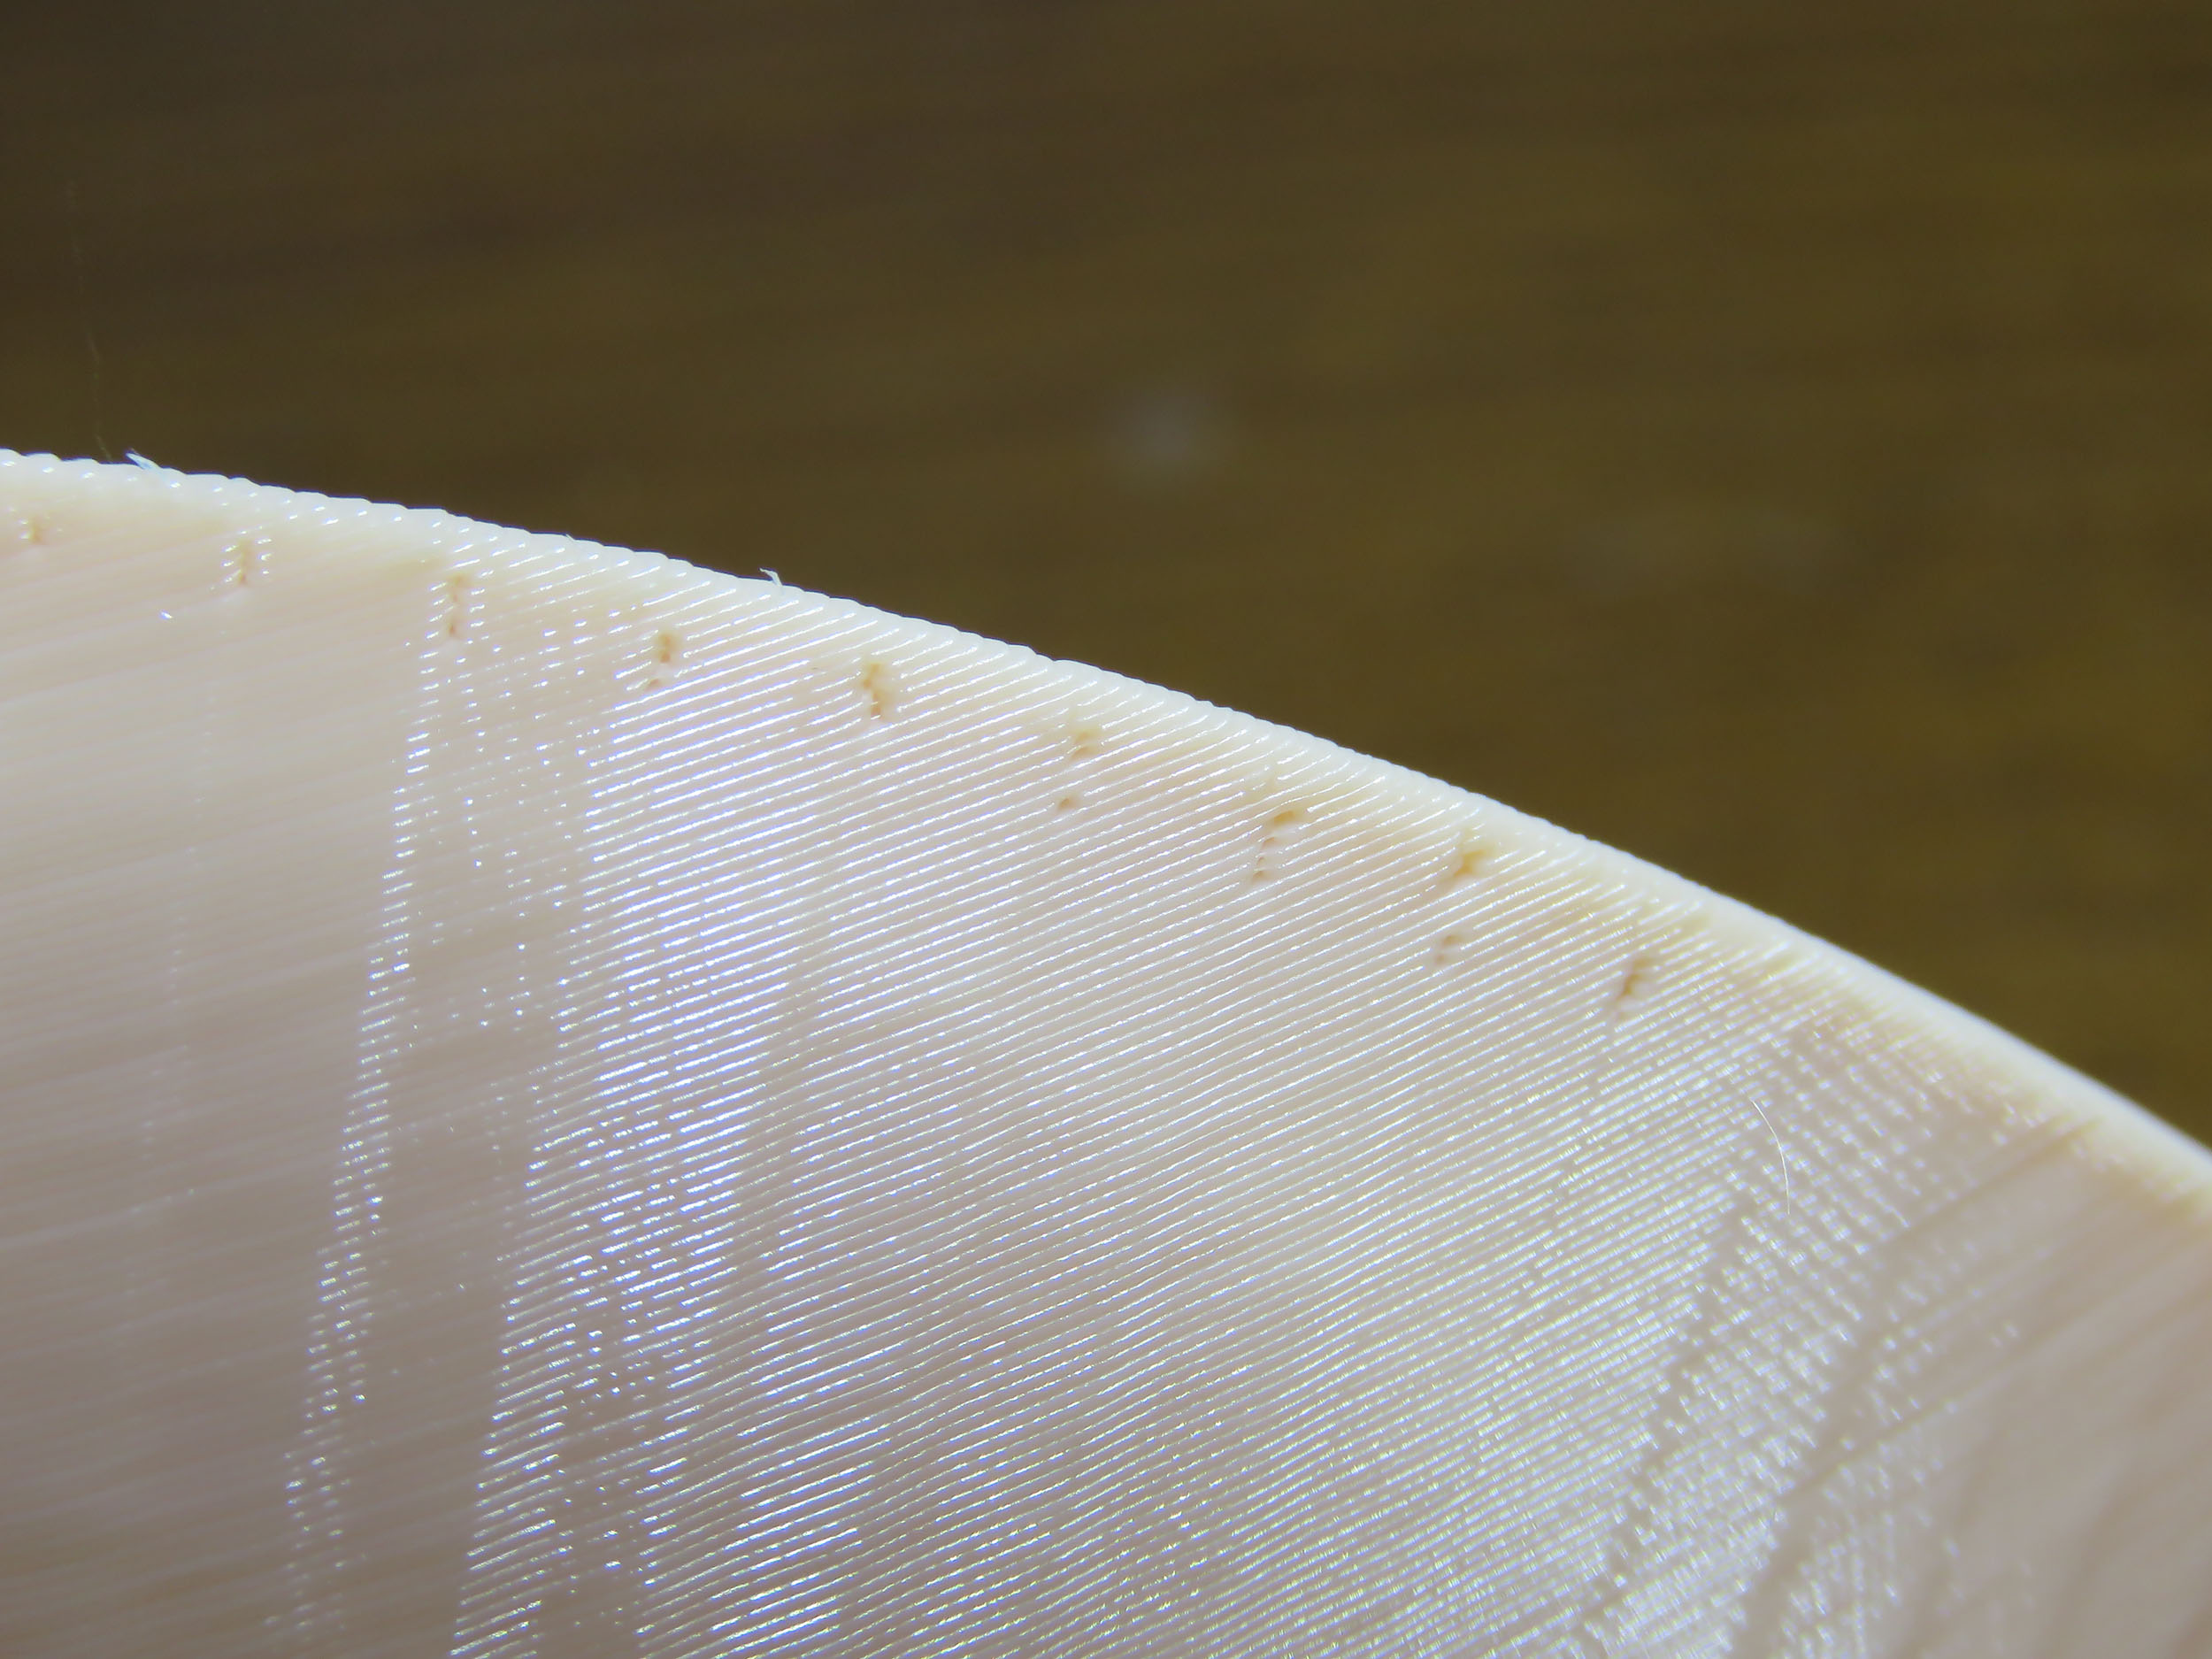
Here's the latest print - along with the worst of the batch.
It's the shape of the voids that is curious and implies to me there are missing surfaces, not gap issues.

RE: How to avoid these hollow lines (underextrusion?)
Adding thickness (XY comp) to the part had a visible effect in making the holes smaller. I'd go back to the model and have a serious close look at how the vertices of the smallest faces are being calculated/formed. And try to verify they actually connect to adjacent vertices.
The next test would be to play with Pslicer's resolution tool - but I'd too tired and probably used up more of my spare time on this than I should have ... lol. And I deleted my working file ... dooh.