Help with print artifacts
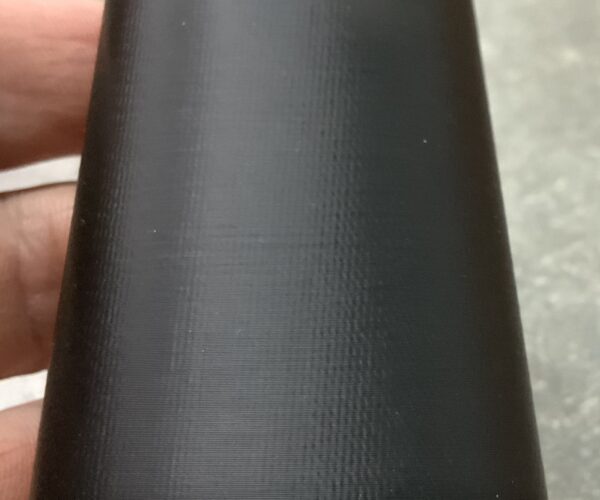
I keep having these weird print artifacts on a rather simple design and print. One side will print great:
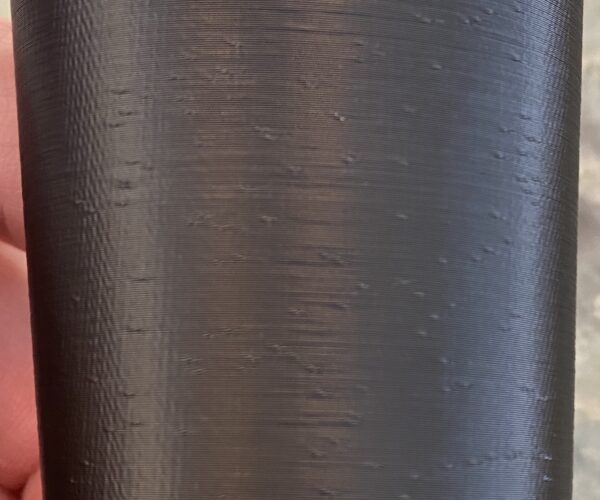
But the other side looks like this:
Does anyone know what could be causing this? I designed this part on Sharp3D and used Prusa Slicer, current version. I am printing with Prusament ASA on my MK3s with a Ruby .4 nozzle.
Thanks for the help!
Gregg
RE: Help with print artifacts
Speaking above my knowledge grade here.
Every time your printer finishes a layer, it has to move up to print the next layer.
On yours, this is occurring roughly the same place on each layer. This leaves an artifact.
You can tell PrusaSlicer to stagger this, so they don't all line up.
RE: Help with print artifacts
Thats the start/stop point of your external perimeter. It will show more on rounds parts and also when using solid color filament. Try using a transparent filament if you can. Also play with the setting "seam position" in the lower right corner of the photo attached.
RE: Help with print artifacts
@greg-k7
I’ll give that a try and report back. Would you set it to random? Would that move the seam around? These are throttle handles for an airplane, so I am looking for a professional finish. I am currently sanding the artifacts and then doing an acetone vapor treatment to make them look injection molded. I would think if those lines were scattered around they would sand easier.
Gregg
RE: Help with print artifacts
@gregg-g
I would try random first and see how that looks.
RE: Help with print artifacts
I printed with that setting to random, and it definitely worked, but instead of solid lines I have dots everywhere. This will work because I am sanding them, but it would be nice if there were a way to slice or print so that those would go away. Why can’t I get both sides to print like the first picture in this post? Any more ideas?
Thanks,
Gregg
RE: Help with print artifacts
Try using REAR or ALIGNED seams ... it's all a compromise. There are also tricks to clean up seams, but that's another discussion. Do some research,you'll find topics covering jerk, z-lift, linear correction, and other adjustments that combine to help make seams less visible.
RE: Help with print artifacts
@gregg-g
Do you have oozing (filament coming out) happening when the hot end is retracted and moving to next printing area?
RE: Help with print artifacts
I don’t seem to. The only time that I see ooze is when warming up. I’ve watched it print a bit but I’ve never noticed anything. What’s the fix if I do see ooze?
Thanks,
Gregg
RE: Help with print artifacts
@gregg-g
If the hot end temperature is good then retraction settings is a good place to start with oozing problems.


