First Layer Issue
Please convince me upgrading my printer to Mk3S wasn't a mistake. Once I did the upgrade and got everything dialed in I got about a dozen good prints of various sizes and shapes. Today it started leaving a fairly large blob at the beginning of the skirt and of each layer. I increased the suck back and that helped that. Now first layer looks like this, every time. What's up with the crap on the top line. Doesn't matter where I put it on the bed. Also if I let it go to the second layer the head will crash. Consistent for too many repeats. I even recreated the drawing from scratch to make sure nothing was up with the drawing.
Very frustrating. The printer is useless at this point and I have no clue where to even start.
RE: First Layer Issue
RE: First Layer Issue
I suspect you've got a few things going on. If you did a lot of work on the printer, it's very likely things have moved and a bit of cleanup is in order. Three distinct things I can see going on:
- Your bed could be cleaner. At least going by the pictures, there seems to be some build-up of crud on the PEI print surface that can interfere with adhesion. Poor adhesion will account for those extrusions coming loose and snagging on your 2nd layer.
- Your Live-Z may need to be re-calibrated. I do this every time I make a hardware change as the nozzle needs to be the correct distance from the print surface across the bed for good adhesion. Do Live-Z adjustment with a clean sheet to avoid chasing your tail.
- You may have some filament oozing from the nozzle at the start of your prints. This would account for those little strings stuck in the print at various places.
Here's a whole bunch of information to consider:
-
A dirty PEI print surface. Even if you don't think this is the cause, it's always a good idea to make sure your PEI surface is clean before trying any other fixes. If it's a smooth PEI sheet, take it to the kitchen sink and give it a good dunk with Dawn (original formula, no vinegar or hand softener variants) dishwashing soap or your local equivalent (e.g. Fairy in UK). Use a clean paper towel to clean it off, and another to dry it. Avoid using any sponge or cloth that has been in contact with grease. Above all else, avoid touching the PEI print surface. Once it's good and clean, you should be able to use 91%+ isopropyl alcohol between prints, 100% acetone when that fails , and another dunk when acetone fails. Worst-case, use a 3M 7445 ScotchBrite pad or equivalent on smooth PEI to give it a very light buff, but only infrequently. If you've got a textured powder-coated PEI print surface, the official instructions are to use 91%+ isopropyl alcohol on it only. Rumors persist that some have had good luck getting started with these sheets by giving them a wipe with 100% acetone and a dunk with Dawn. Either way, there's no real warranty on these sheets. YMMV.
-
If you have not already done so, try using Jeff Jordan's "Life Adjust" procedure for calibrating your Live-Z setting. It is much easier to use and understand than the on-board routine and much easier to make mid-print adjustments accurately with. In general, start high (less negative) and work lower (more negative) in large increments (e.g. 0.1mm) until the filament starts to stick on its own. When you've got your Live-Z setting adjusted properly, you should be able to gently rub the extruded lines on the PEI surface without dislodging them. Then start lowering (more negative) the level until there are no gaps between layers. You should not be able to peel the lines apart after printing, but the top should be regular.
RE: First Layer Issue
@bobstro
I very much appreciate all your advice. Gives me some things to look in to. However, I feel something has changed that I didn't change. After my S upgrade I got everything dialed in and everything was going well. I printed at least a dozen perfect parts with no issues. Then this started out of the blue. The Z calibrate print comes out quite good but I hear some chunking on some of the Y moves. You know, the sound you hear if the head is too low and the extruder kicks back because it can't push filament out the nozzle. But that isn't where the noise is coming from. I have a "propeller" on my extruder so I can see what it is doing and it isn't kicking back when I'm hearing the clunk. The deformed first layer happens at the same spot on the part no matter what part of the bed I print on so I don't think this is related to adhesion. I've been printing with this printer for 2 years and another 2 years before that on a clone. I have pretty much learned to know what I'm looking at when I have problems but this one isn't making any sense to me. How did I go from good prints to bad with no changes on anything. I hope something comes to light soon.
RE: First Layer Issue
Is it possible the extruder idler gear (in the door) is not seated properly? Check and see that it spins freely and look for filament flakes in the extruder. That's one of the areas you would have worked on during the upgrade. Also double check the filament feed path above the extruder.
RE: First Layer Issue
OK here we go on day 3 of this stupid little problem. Attached are some photos and here is a youtube link to a Z Cal job.
In the video you can clearly hear a clunk on an x to y turn on the left side of the print. This does not happen on a turn after a left to right line but it happens on every left x to y turn. It does not happen when printing the flag.
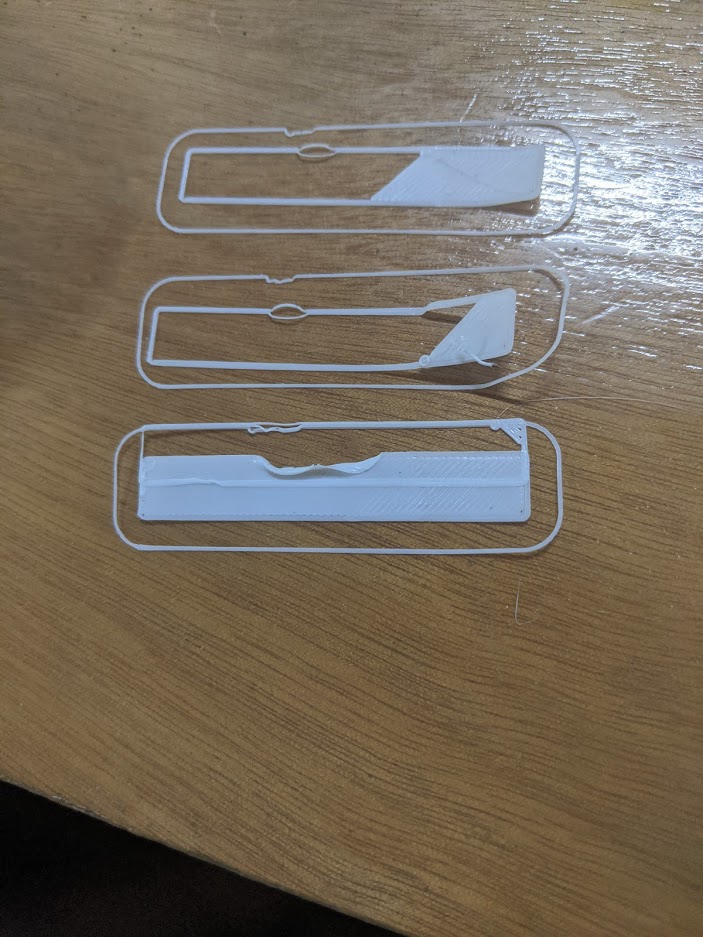
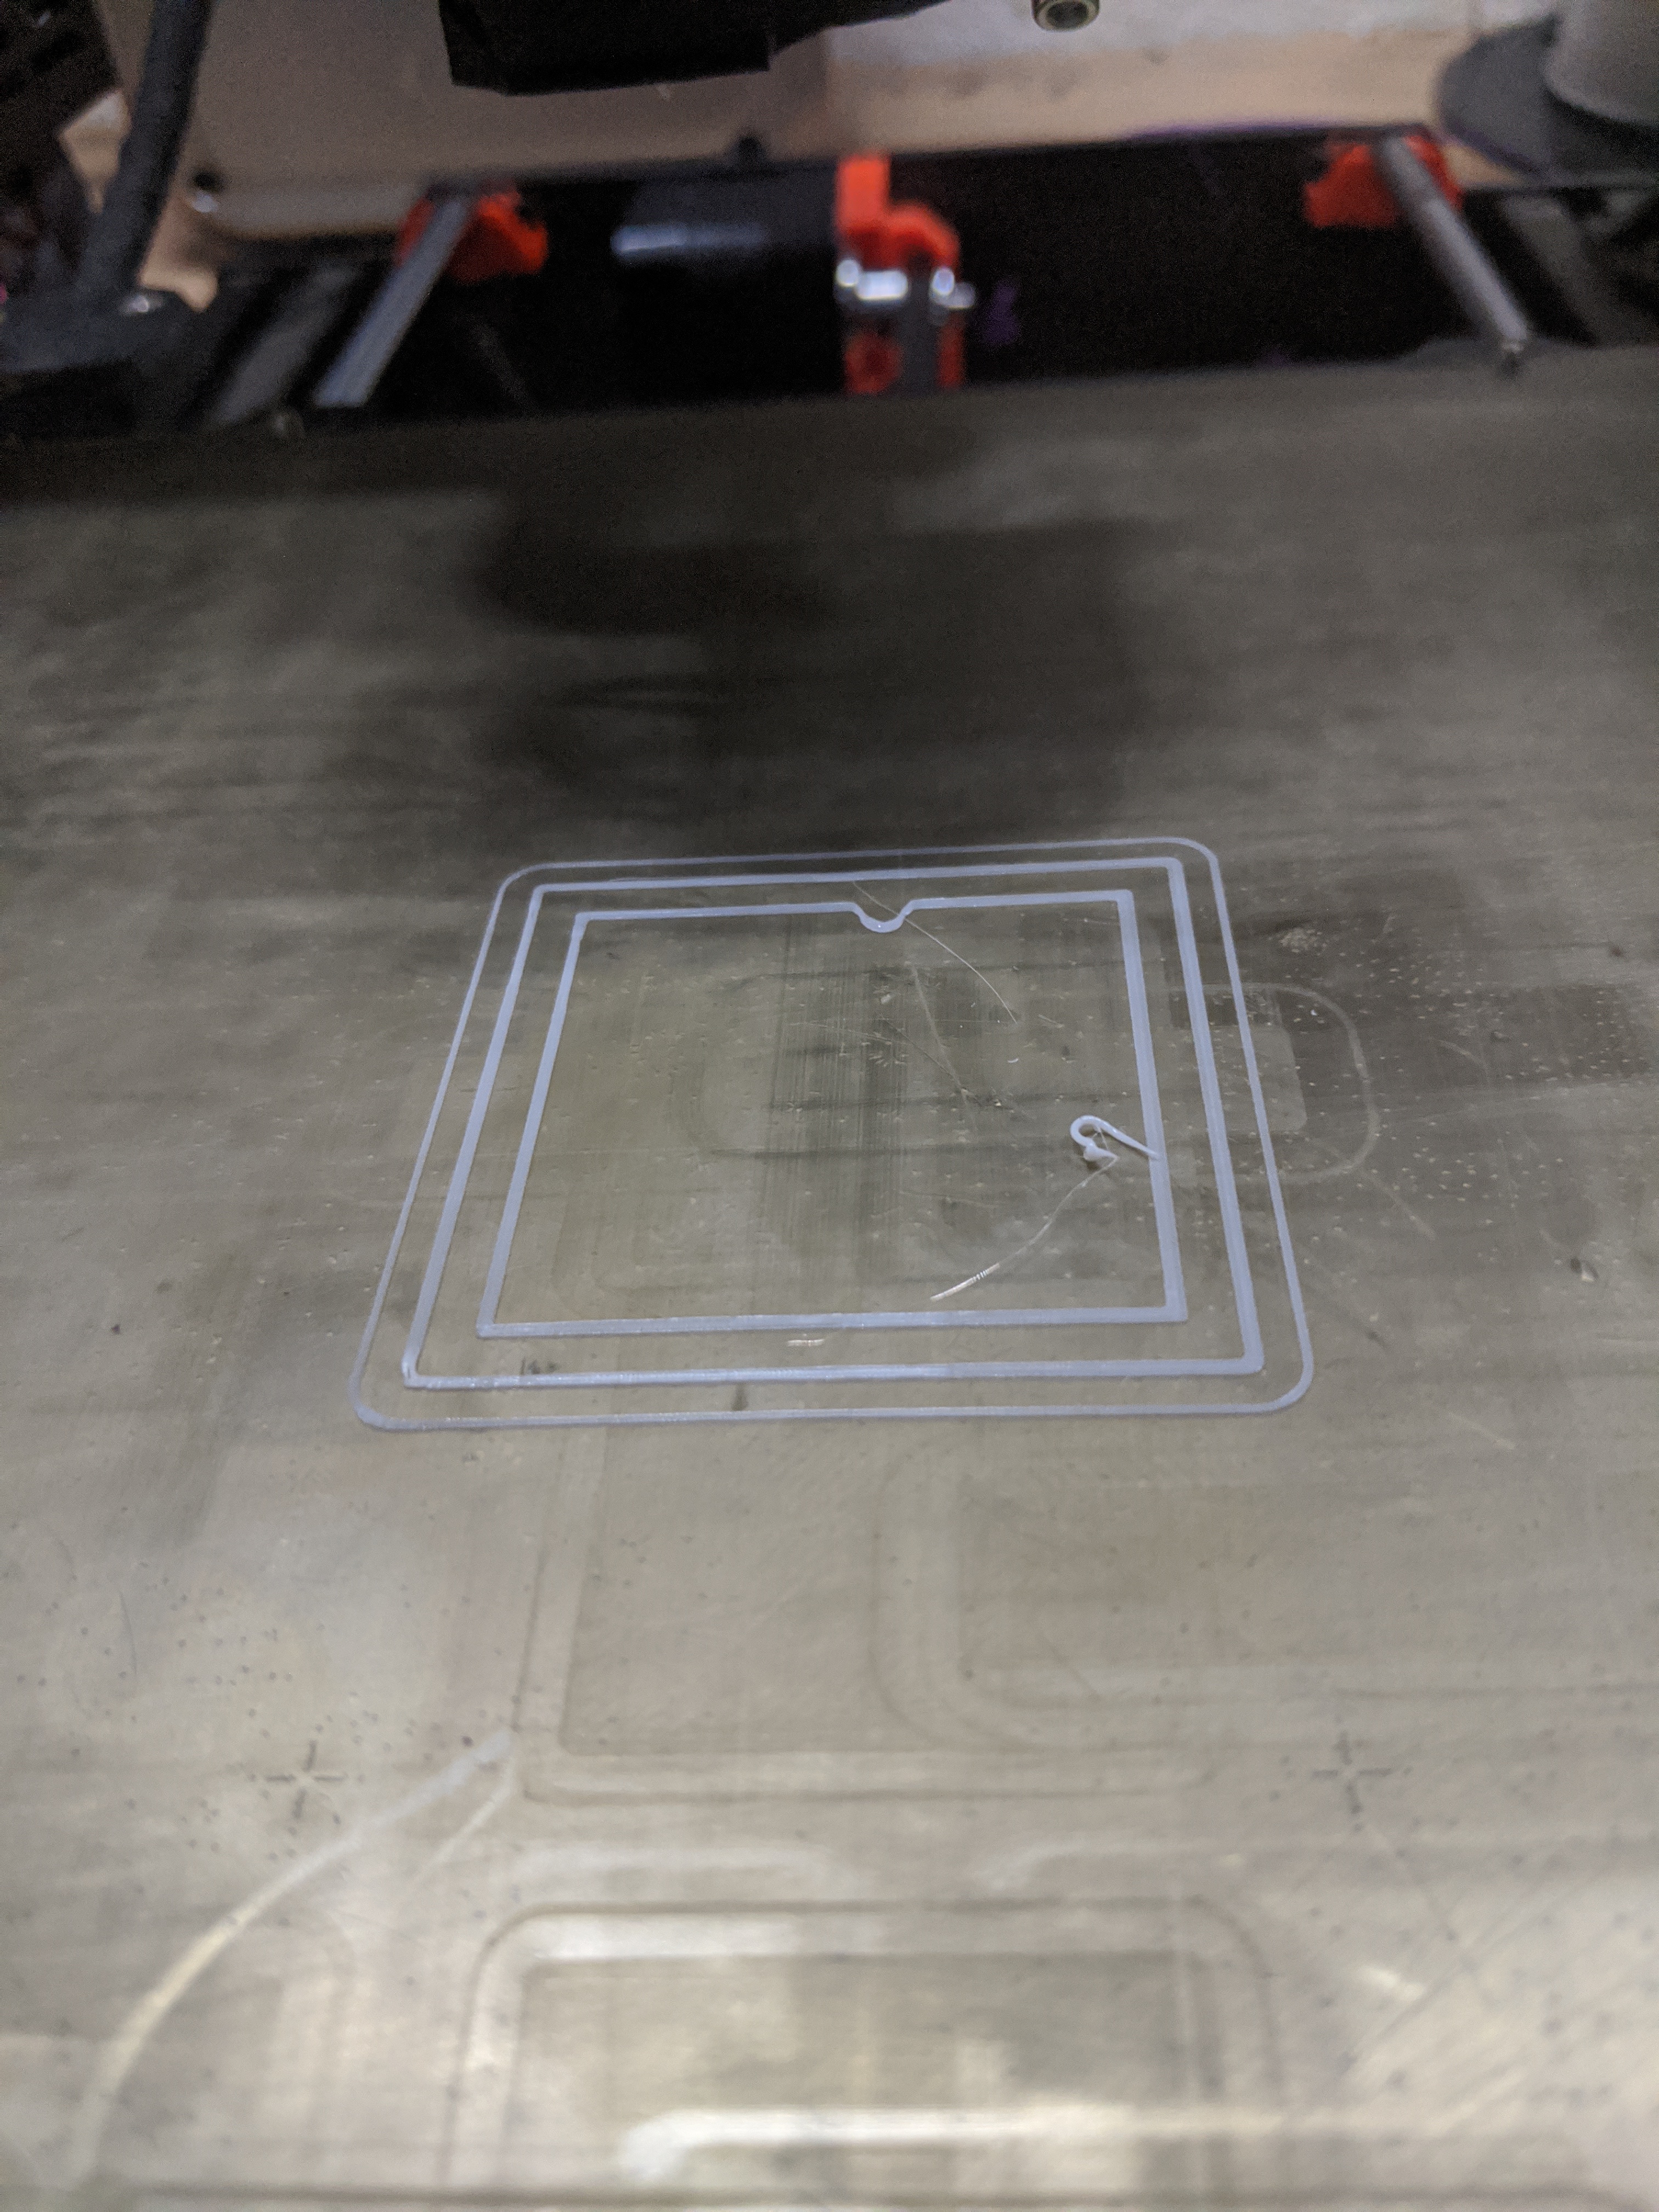
In the pictures you see that on any line printed right to left there is a deformation. It happens at the same place on every line in the cal print. On a regular part print job it happens on the top line which is always printing right to left. And the clunk is there on a left turn from right to left printing. If I let the print job keep going this clunk becomes more prevalent and eventually the head crashes, usually on the second layer.
On a regular print job it does not matter where I place the part on the bed, the result is the same. The deformation is always in the same place on the skirt and part.
Seems like the printer is doing what it is told to do so trying to figure out what this is all about. After my S upgrade and getting things dialed in I printed at least a dozen parts with no issue (see pics).
I'm stumped and don't know where to head with this. It is not an adhesion issue. I've done the z test with both PLA and PETG with exactly the same results and with the exception of the deformations the filament is well stuck to the bed.
Any ideas would be most appreciated. If I weren't already bald I'd be pulling my hair out right now.
Thanks...

RE: First Layer Issue
Little late to the party...
If you move the X and Y by hand is it smooth and consistent across?
If you watch the X and Y motor near the drive pulley while printing do you see smooth consistent motion or is it jumpy at times? Does it ever look like the belt is trying to come out of the pulley?
Have you check the 8mm rods on the X and Y to make sure they are smooth?
It's even harder to figure out where that clicking is coming from in the video. Very weird problem.
RE: First Layer Issue
@gkmakeit
Things seem smooth to me. I cleaned the rods, oiled the bearings. Also played with the belt tensioning to no avail. It's like it's being told to do this because no matter where I place the part on the bed the deformation shows up in the exact same place on the part. Different parts, same place. And it does it at the same place on every right to left line on the Z Cal routine. At this point I'm thinking something got corrupted in the firmware. I did reflash the firmware and went through the whole calibration routine but nothing changed.
I did back of the z height a big and it seemed to become less pronounced but then adhesion was not any good. I could actually see that I was too high so knew that wasn't going to be a solution but thought it might tell me something.
There is no obvious jumping or jittering when I'm printing and I've watched it very closely at the point of the issue and it looks rock solid.
Just very disgusted at this point and don't know what to do next except a trip to the dumpster.
Thanks for you response. I appreciate any and all advice and ideas.
Kim
RE: First Layer Issue
I may be totally off with this, as I haven't read all the posts before me but I watched your video and two things really stood out to me, the first, I think based on the sound of it, that the belt on your printers bed is way to tight. second I couldn't help but notice that the zip ties that hold the rods for your printer bed seem not to be tight enough at least the front ones that I can see in the video. I also thought I noticed a slip of the printers right side rod as I watched bed advance in the first forward movement in live Z adjustment in the video.
This is a picture of the zip ties on my printer.
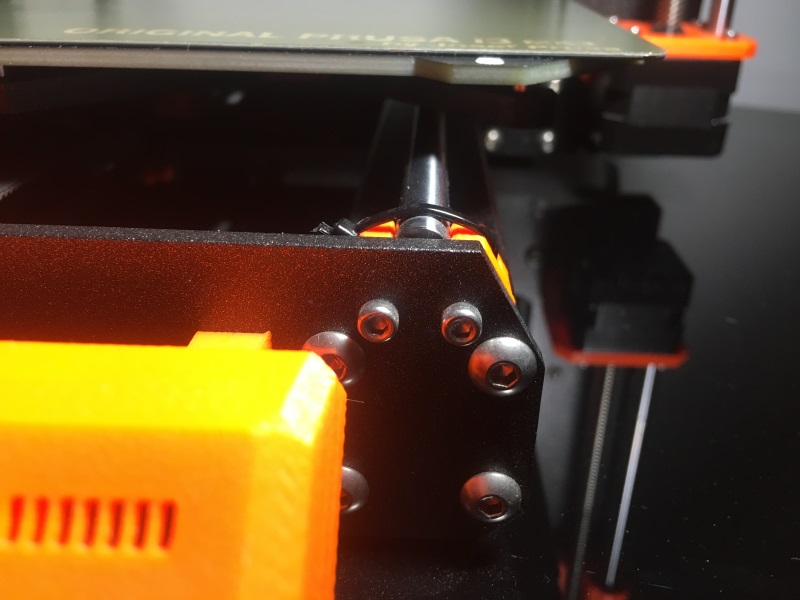
This is from your video of your printer.
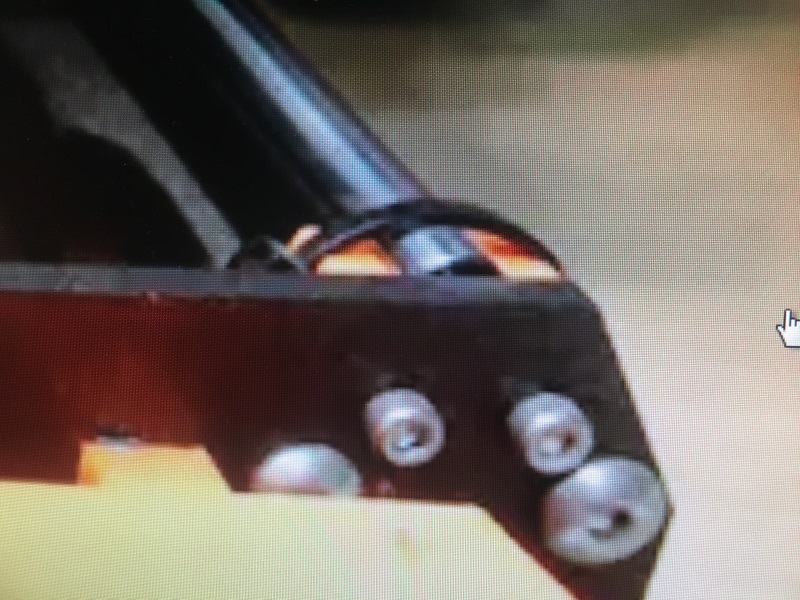
Note that it's got more of a rainbow appearance, this suggests to me that it's not tight enough, and it appears to me to be this way on both sides.
this could be the cause of your trouble. I would look at them, and if you think this is correct, use some of the extras that come with the kit and re-zip them tighter.
I don't have enough information about your belts to be sure, but I'm going to suggest looking at them and maybe consider adjusting the tension.
Dan
The Filament Whisperer
RE: First Layer Issue
@kim-b3
You want to send me the gcode of a part your having problems with and let me see what my printer does, who know?
What are the belt tension numbers does the printer who?
I don't know if you can in this forum, but if you DM me I will give you my email.
RE: First Layer Issue
Well everyone I certainly appreciate all the ideas and help. It's almost embarrassing to have to tell you all what the problem was. Turns out what was causing the deformation was the Pinda Sensor was hitting the filament on the bed. Now why I was able to get a bunch of good prints before this started happening is beyond me but that is what the problem was. I raised up the sensor a bit, re-calibrated, and all is good now. Only thing I can figure is I changed z height just enough to make the bead taller to get in the way of the sensor.
Another lesson in the school of hard knocks.
Thanks again everyone, your input was quite valuable and appreciated.
Kim
RE: First Layer Issue
@kim-b3
Glad it's solved!