Corners not filling, help!
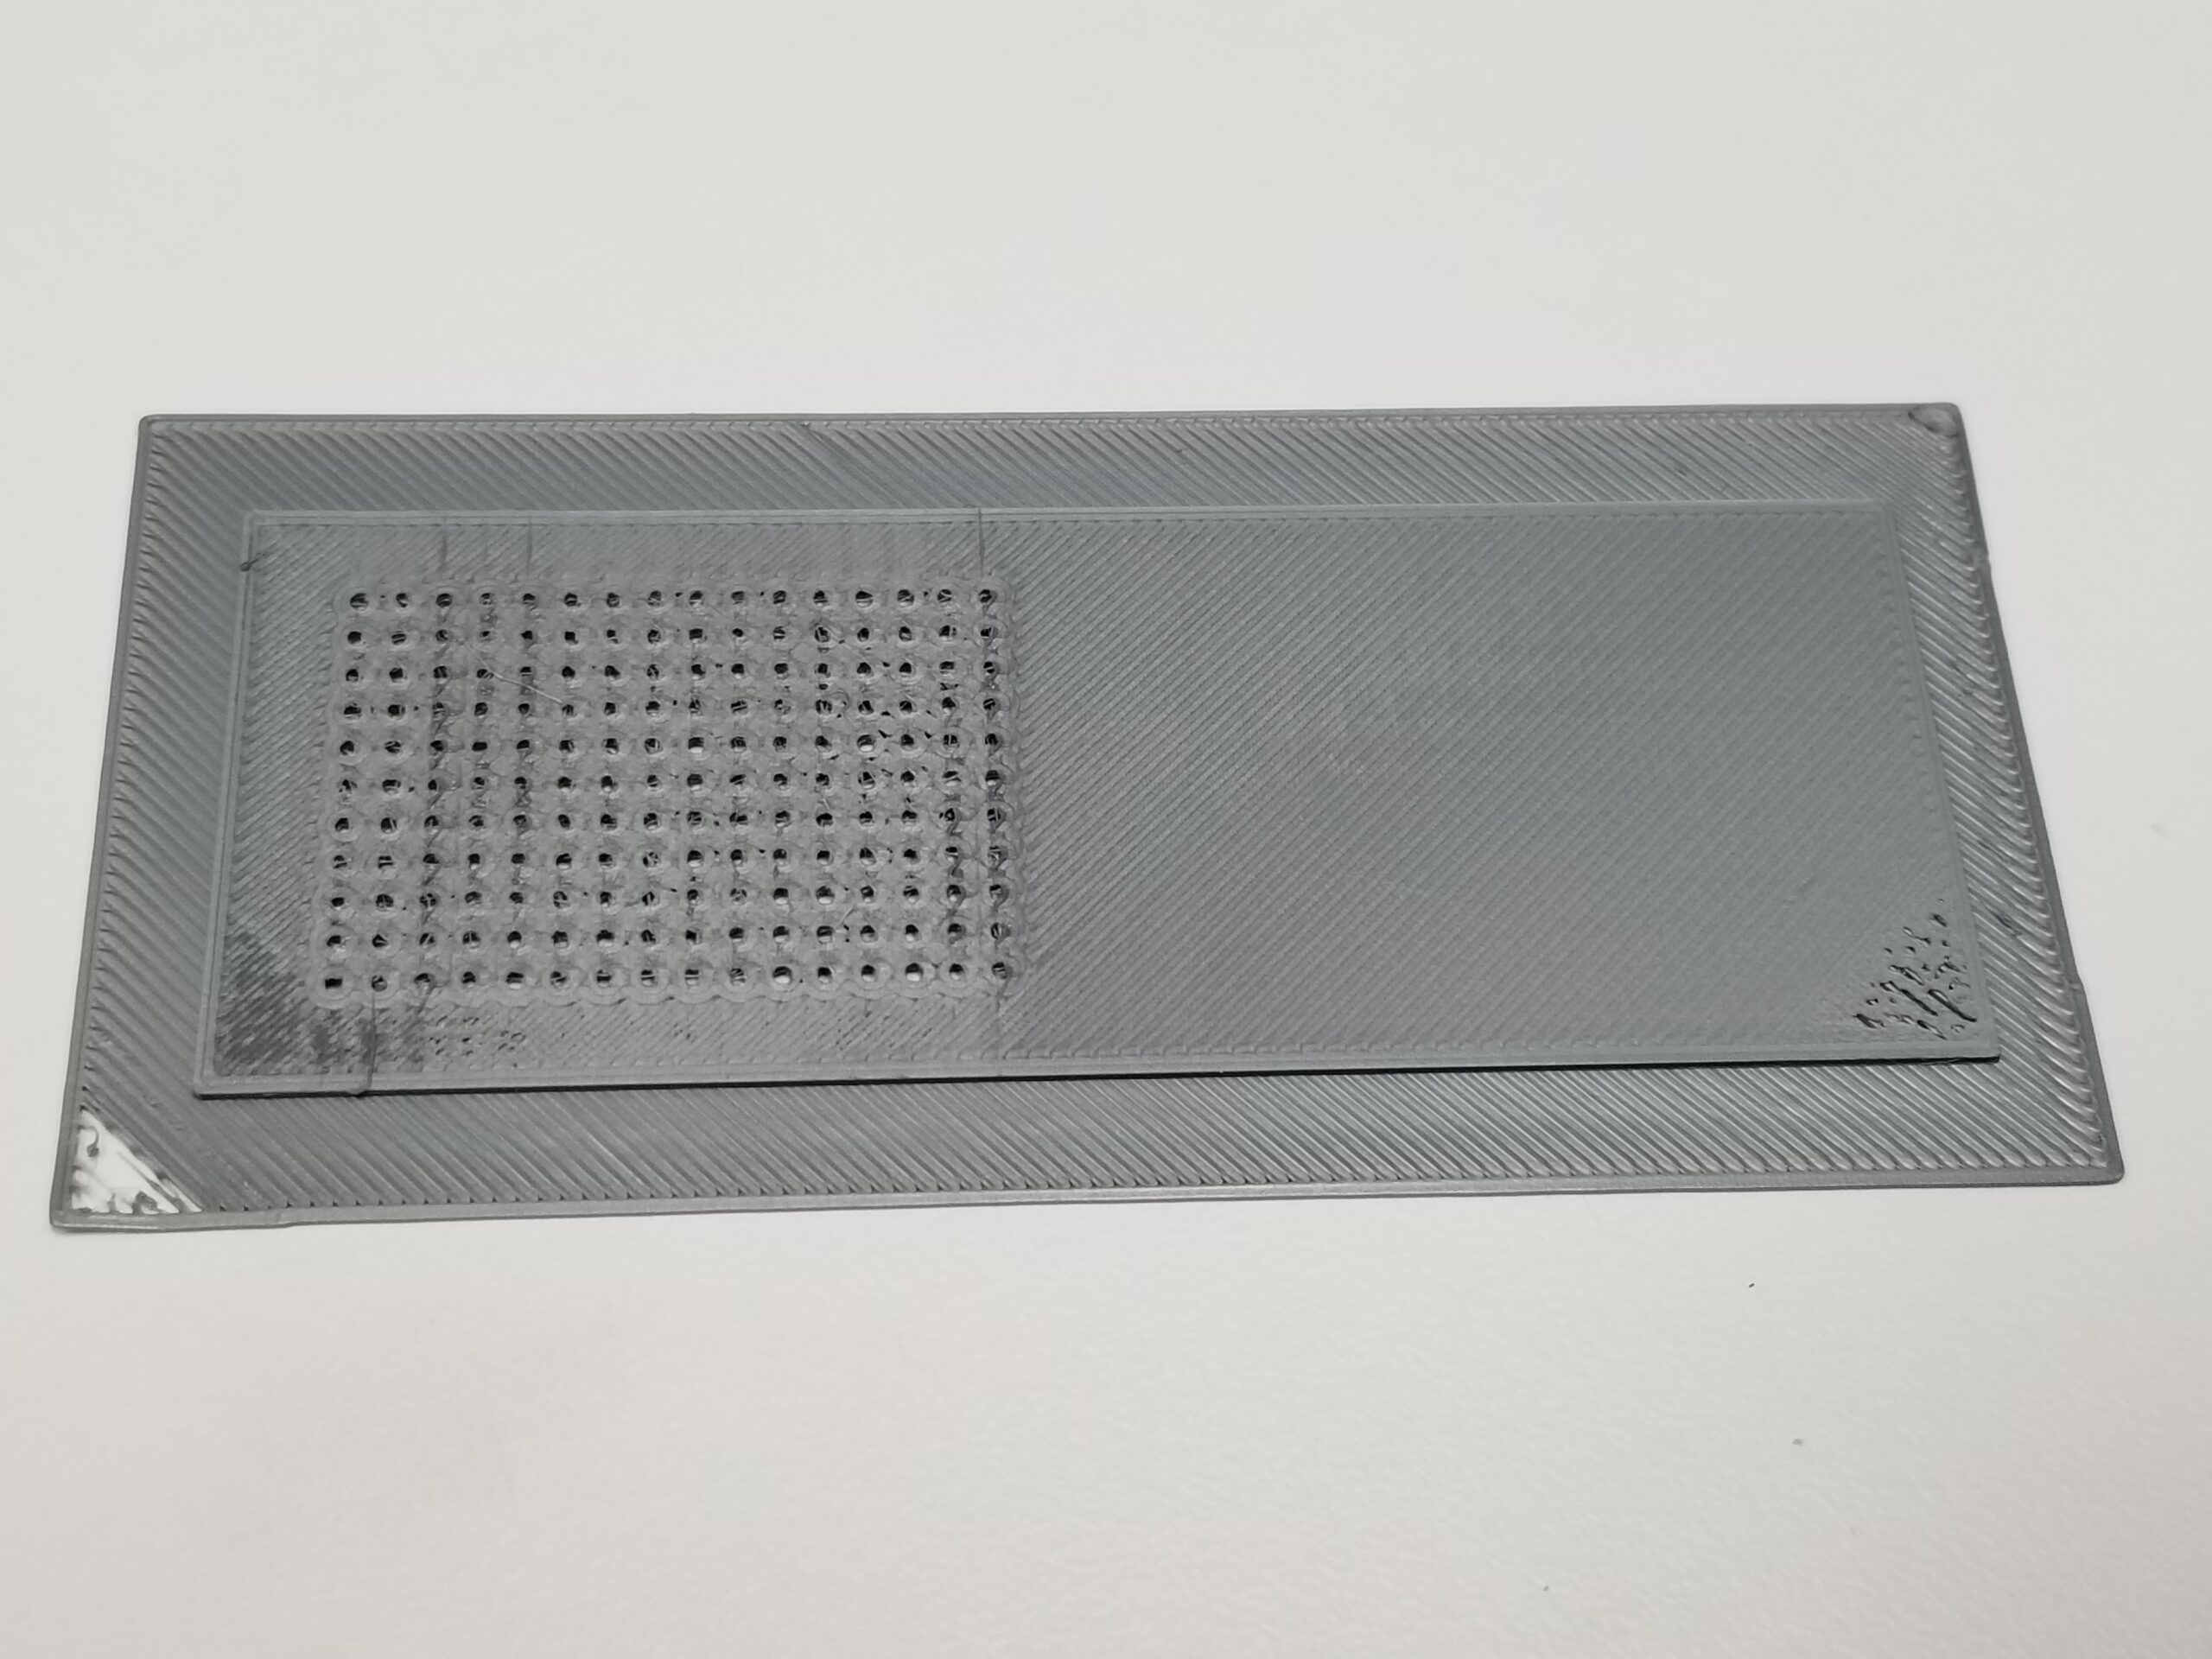
Hi all, first post here. I've been using my MK3S+ for a few months and it has been great. Recently, I've been trying to print a 1mm thick piece with small holes (1mm dia) but certain corners are not filling. I tried adding a brim via add objects (elephant feet) and it helped on the bottom but the top and brim itself still print poorly. Adhesion is good; it isn't lifting. I'm using PrusaSlicer 2.3.3.
Things I've tried: varying layer and first layer thicknesses (0.1 to 0.35), ironing, brim/no brim, printing two pieces at once but always the same problem corners.
Also, any advice for cleaner holes (better fill around the holes, especially first layer) would be appreciated. I have been going back with a small drill bit to clean them up after printing.
I attached a picture of one of the prints to show the poor fill on some corners. This print used 0.3 first layer height (I usually use 0.1mm) and ironing which seemed to make it the print worse in general. Thanks for any advice!
RE: Corners not filling, help!
Which filament are you printing?
If you are using the default 0.4mm nozzle go back to 0.2mm first layer, your setting suits at least a 0.6mm nozzle. Turn off the ironing, it will do no good until the basic object is sound.
1mm dia holes are tricky. Any elephant's foot on the first layer is likely to close them so enable compensation; later layers may print undersize, especially if the first layer is imperfect.
A better foundation might also improve later layers, let us know...
Have you been tweaking the extrusion multiplier? It looks a little uneven.
If you continue to have problems zip a .3mf project file and post it here, we may be able to diagnose something.
Cheerio,
Cheerio,
RE: Corners not filling, help!
Thank you for the fast response!
I knew there was something I forgot to include. I am using 1.75 Prusament PLA and the default 0.4mm nozzle.
Originally I was using no ironing and I also tried the 0.2mm first layer; I tried different first layers between 0.1 and 0.3mm. All of them had the same problem with the poor corner fill in those locations. I am manually creating the brim with objects rather than actual elephant feet or brim setting. I always do this to ensure good adhesion and uniform surface appearance for the actual object then cut the brim off. The holes have no interference due to the "brim object" only on the outside.
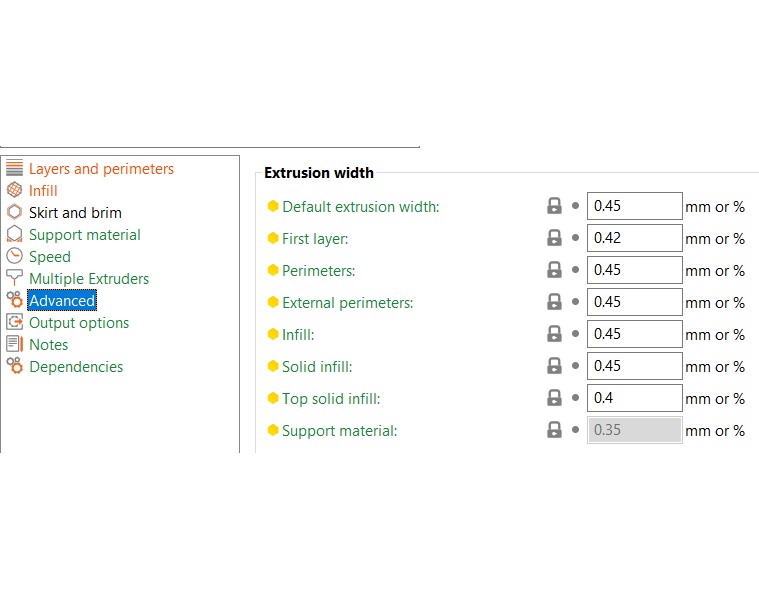
I'm not sure what the extrusion multiplier means, but interestingly I notice in the "advanced" settings in Slicer most of the "Extrusion Width" parameters are not set to defaults. I don't recall changing any of these... I attached a screenshot of those settings. I also attached a zipped .3mf file (or tried to). Thanks for your help!
Please post a ZIPPED up .3mf project file so we can see your settings as they pertain to the model in question .
Regards
Swiss_Cheese
The Filament Whisperer
I tried printing it with very cheap PLA, generic PLA profile, 0.2mm SPEED with reduced elephant's foot compensation, no ironing, 0.2mm first layer.
The perforations are too small and too close, there is only room for a single perimeter around each.

This means there are over a hundred tiny start points, so bed cleanliness is essential. Also make certain your first layer Z calibration is spot-on.
I suggest you revert to one of the default settings. If possible increase the spacing between the holes and preferably reduce the number and enlarge them. There is no need for any brim.
Cheerio,
@sti-guy
Apologies, this forum is extremely poorly implemented, and even worse since the "improvements" have been applied, I was unable to tell that you posted a file.
Regards
Swiss_Cheese
The Filament Whisperer
@sti-guy
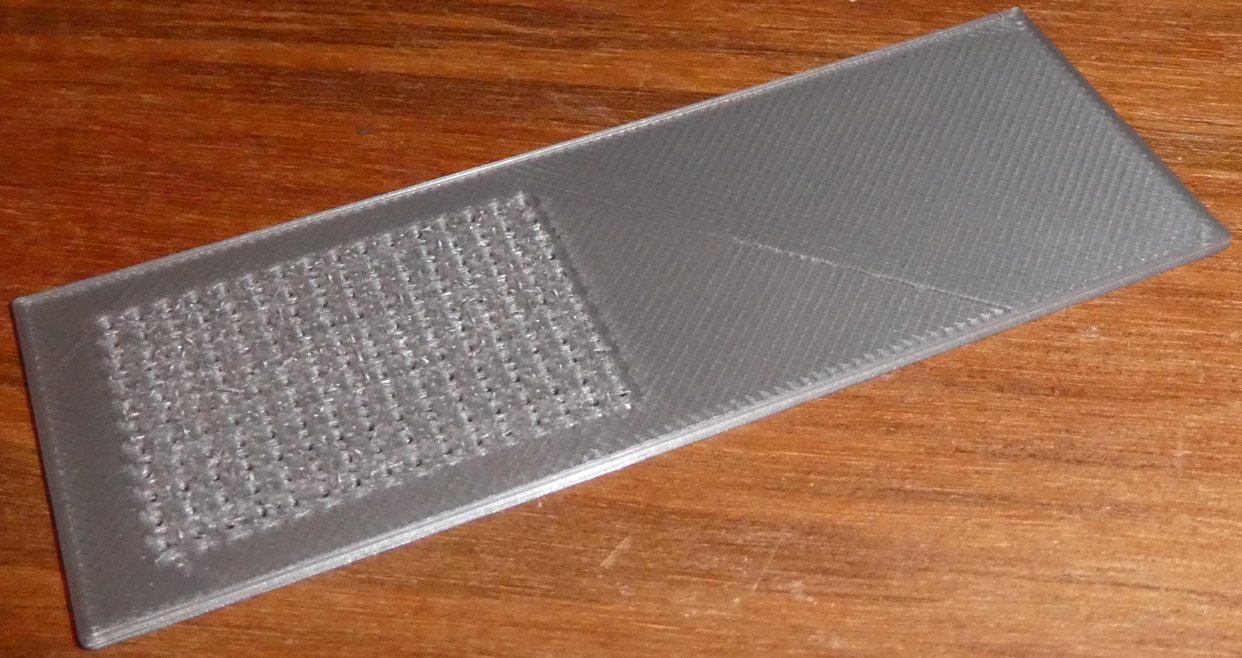
I printed your .3mf file two different ways, with a 0.4 nozzle, the first was mostly default settings @ 0.15 quality layer height, and perimeters and external perimeters set to 0.35, the result was reasonable however the holes that where supposed to be 1mm print at 0.49mm.
The result

I would suggest increasing the whole size to 2mm.
The second was printer with the same settings but printed with "External perimeters first", and "Avoid crossing perimeters" ticked for a somewhat improved result.
The wholes printed at 0.56 diameter however appear much cleaner.
The result

And a side by side comparison.
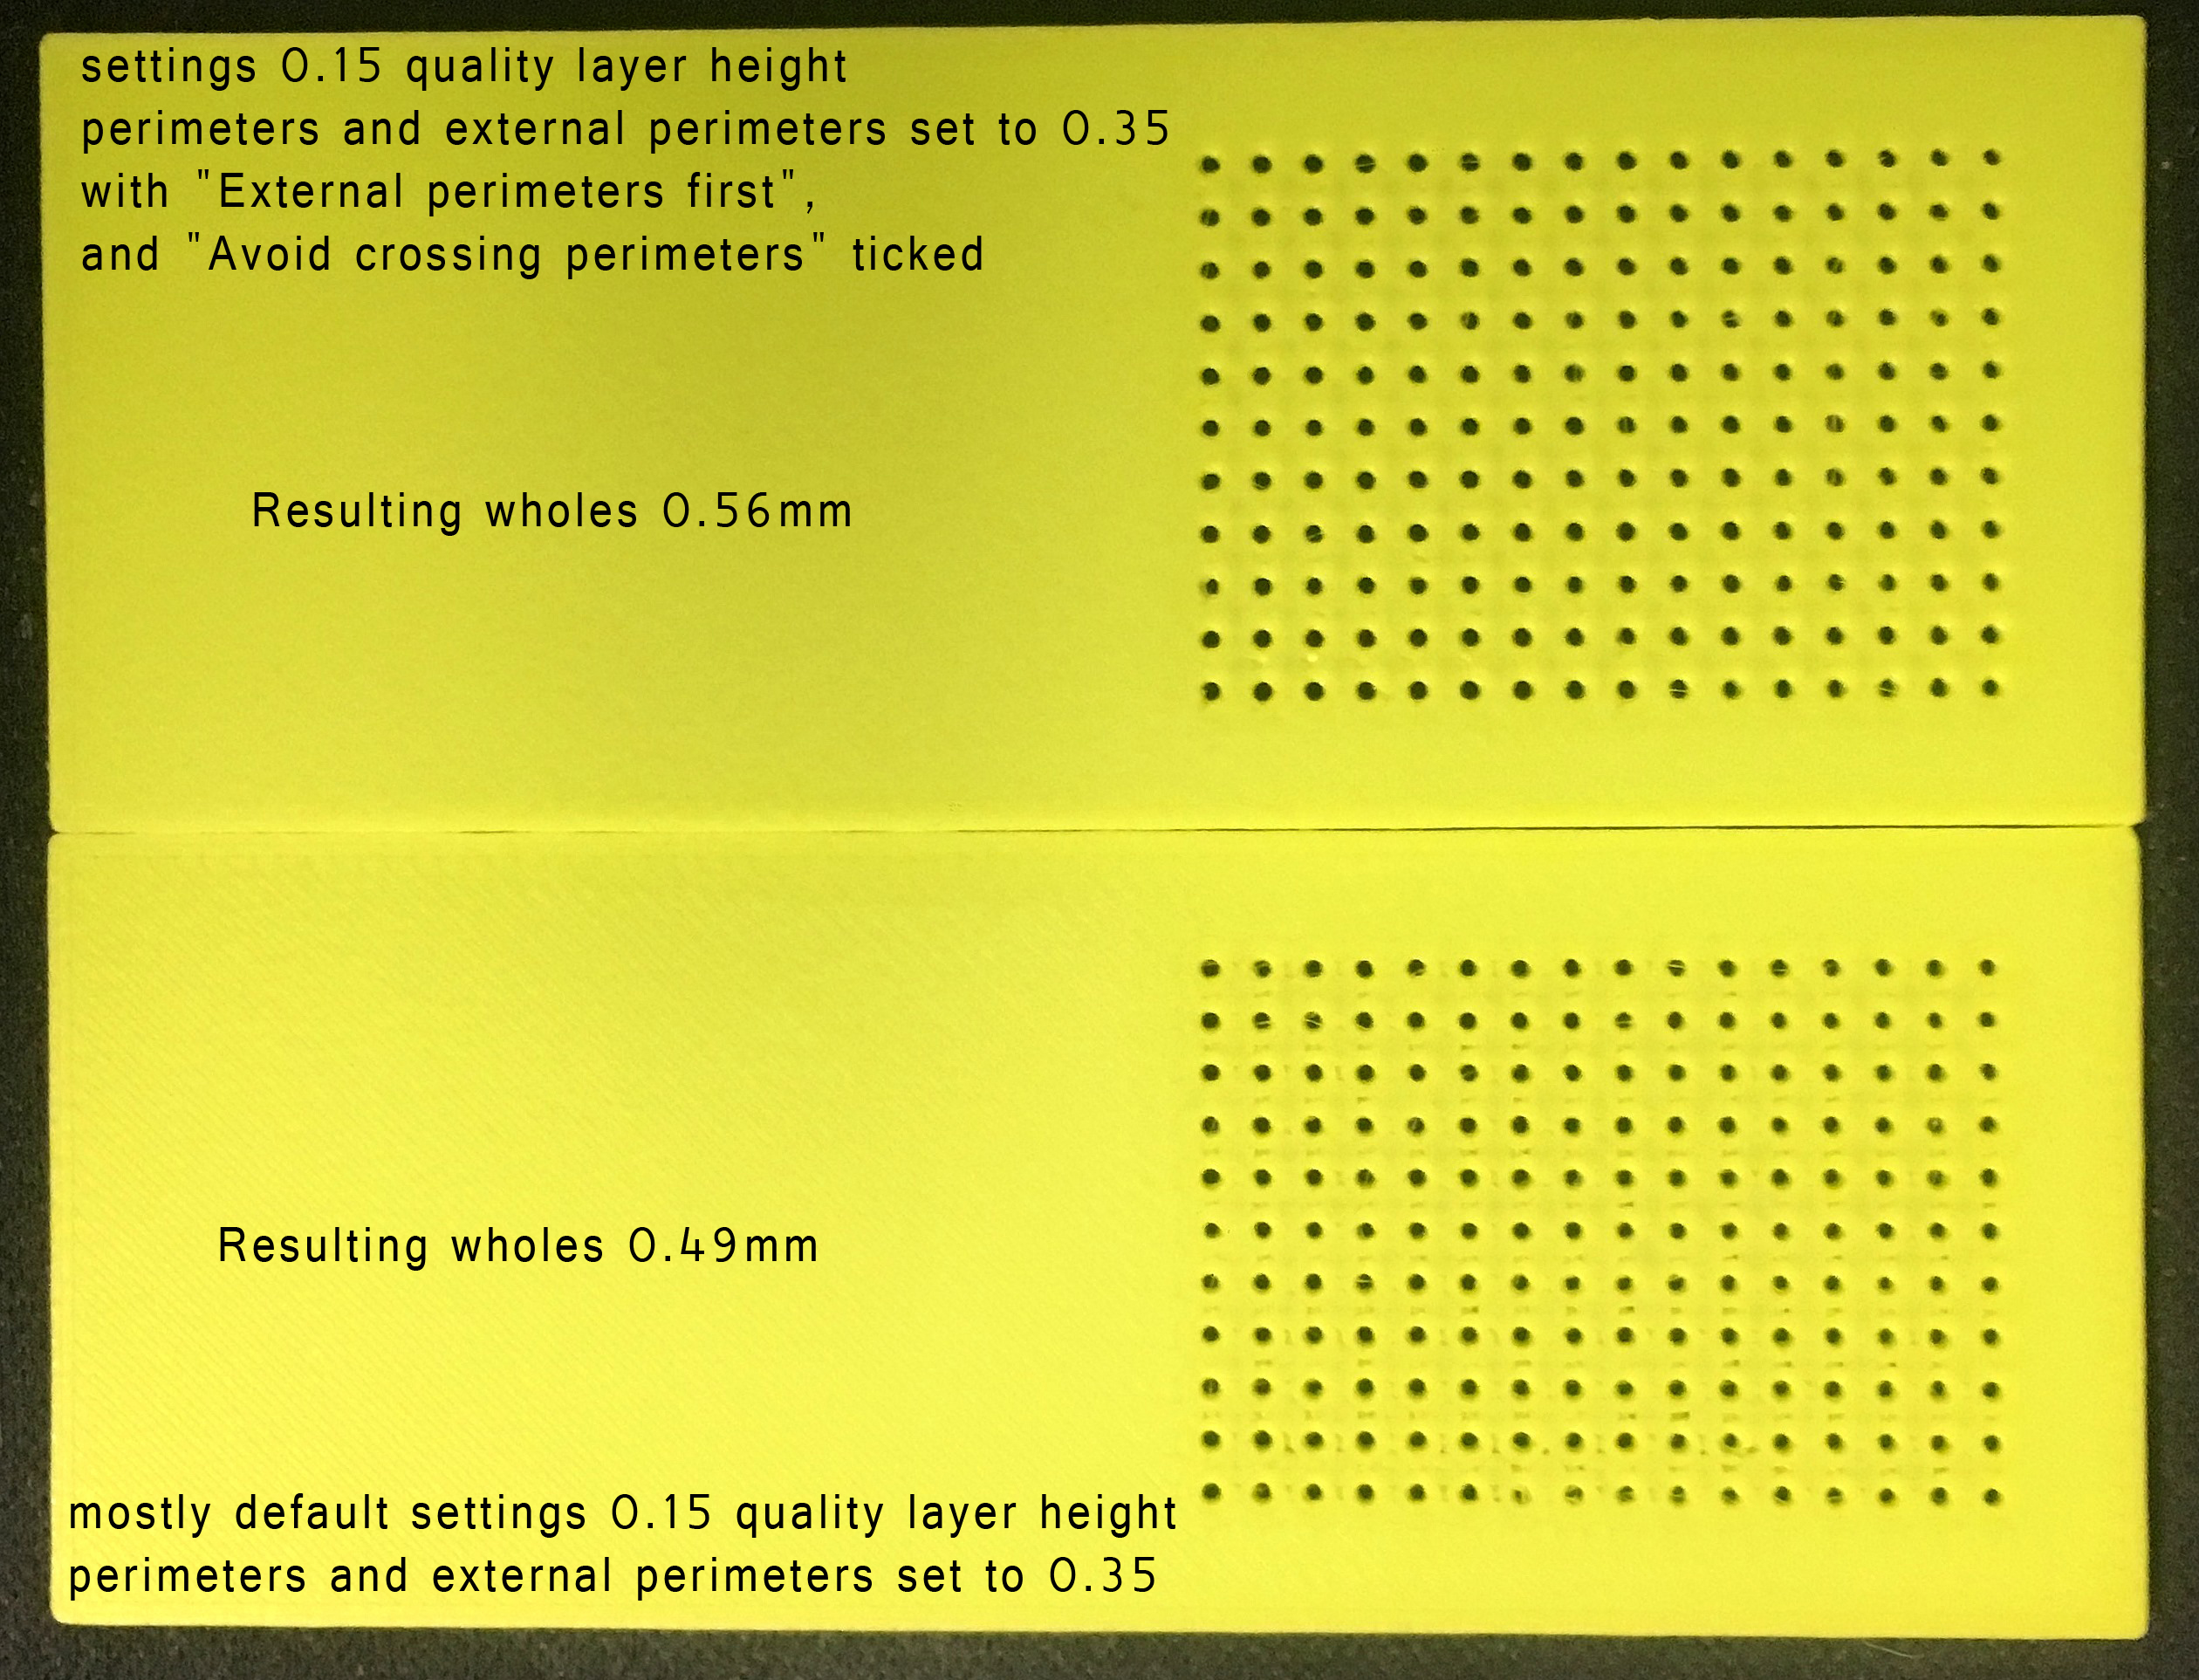
Recommendation, once more Make the wholes 2mm and try printing again, alternatively use a smaller nozzle 0.3 or0.25mm for example.
Good Luck
Swiss_Cheese
The Filament Whisperer
RE: Corners not filling, help!
This should entertain you guys. LOL
So, I didn't realize there were default settings in the drop down menu (i.e. your "0.15mm Quality" reference) so I went through every line on every menu and put the values all to default. I then went back and changed the ones you recommended. The result was a disaster as shown below to the point I stopped it, haha. Then I realized the drop down defaults, selected "0.1mm Detail", selected the boxes you recommended and am printing it now. It definitely looks better but the holes are "squishing" a bit first layer. I will try "0.15 Quality" depending on how this finishes. Who knew there were default settings all ready to go? I learned something. haha
Thank you all for your patience and help. I didn't expect you to actually print samples but it helps a ton!

More settings
Blob city. So, turns out each of the four tabs has it's own default settings. How 'bout that.
Restarted. Looking good so far. lol
Newtown's method at it's finest!
Your first layer Z looks too low, an unusual problem. Try revisiting your first layer calibration.
At the end of the calibration you are aiming to print a single layer *sheet*. It should be possible to peel it off in one and fold it without the threads seperating. If it breaks into lines it is too high, not squished enough. If it is a single sheet but with wavy lines or drag marks on it you are too low.
Cheerio,
@sti-guy
I believe Diem is correct about your first layer, and this should improve your result, if your interested I can post a .3mf file with the settings I used to test, after you get your first layer dialed in.
Let me know,
Swiss_Cheese
The Filament Whisperer
Update
Well, I've been trying this for a couple days. I recalibrated it including the first layer height. Comparing heights, the original height was best. I included pics below of top and bottom. The -1.47mm Z (left) brim had the threads completely separated, the original -1.55mm (right) were together and a nice sheet. Both still had the bad fill areas in the corners for some reason. Settings are default "0.10mm Detail" with "Avoid crossing perimeters" and "External parameters first" checked.
I'm really stumped here. Maybe I can try printing with your settings?


@sti-guy
you still appear to be having bed leveling issues, I would focus more on that for now.
Regards
Swiss_Cheese
The Filament Whisperer
Use a modifier to get a grid of small holes
For small repeating holes I like using a modifier - set the modifier in the area to have your holes, and then give the modifier zero top and bottom layers and let infill be what generates the hole pattern. The infill % determines the size of the holes. At 50% density, honeycomb infill and small 1mm circles are nearly indistinguishable, yet the honeycomb prints wonderfully with none of the round hole issues you are having.
Here's a round example - you could use this as a modifier and position it where you want holes - to illustrate the example
Modifier Idea
Thanks Dan, that's a great idea! That would actually work better for my end goal anyway. I am printing a couple big parts for a friend but when those finish tomorrow I will try your infill idea.
Any ideas for the corners not filling? I tried bed leveling and calibration and first layer height a couple times as swiss recommended and it didn't fix this issue. Watching it print it seems the extrusion is being blocked by the perimeter or not sticking in those locations.
Clean your Sheet
@sti-guy
Try cleaning the sheet with very hot water and dish washing liquid (with no additives) dry with clean paper towel, don't use IPA on the sheet accept in between prints and when you do use IPA use a Generous Amount, and don't touch the build surface with your fingers.
Regards
Swiss_Cheese
The Filament Whisperer