RE: Buldge when print reaches "solid" layers
@tim-m30
Can you speak anymore to the active controlling of Jerk/accel?
My settings have not changed from the firmware defaults but curious if that may make any difference. As stated before I get quality prints almost everywhere else, except with walled solid infill.
More interestingly, this occurs on whatever side faces the front. Of the printer most predominantly. So if I rotate 180, it 90 degrees the artifacting now shows on the rear or side of the print mostly. But a standard model prints just fine regardless of rotation. Its grows odder the more I think about.
RE: Buldge when print reaches "solid" layers
By active control I only mean manually setting it rather than using defaults. I set jerk and acceleration at around 25% default and it seemed to help. But the real trick was the realization of the cooling parameter slicer uses to slow print speeds when a layer takes less than X seconds to print. That step down in speed was one of the primary elements in the artifacts. Changing seam position was useful to limit directionality, too.
ps: it is worth reading the full github discussion; perhaps even the Facebook thread, too.
RE: Buldge when print reaches "solid" layers
[...] More interestingly, this occurs on whatever side faces the front. Of the printer most predominantly. So if I rotate 180, it 90 degrees the artifacting now shows on the rear or side of the print mostly.
Not sure I'm following what you're saying, but I'd be interested in seeing the result of dialing speeds way back (50%) using the front knob.
Distortion on face to front of printer will be impacted by jerk and acceleration on Y moves of the heavy bed. Try cutting those values in half in machine settings on the printer settings tab would be a good next step.
RE: Buldge when print reaches "solid" layers
Going back through the tests, I'm using the worst case 1.5mm object, and all of the methods I used to prevent a step are not affecting the 1.5 mm part. The only change that has an affect is to increase fan speed to 100% all the time. Even then, the part rotated 90 is NOT affected, and remains with the step. This harkens back to the physics of shrinking plastic.
Doing one more test varying the extruded perimeter dimensions, moving away from a default 0.42/0.45 ... but I have limited hope it will affect the results. Short or normalish widths (0.50 mm), I might try 0.75 for grins and giggles.
RE: Buldge when print reaches "solid" layers
So - I have fought the battle of the bulge again and all of my great ideas from the first battle are not so great after all. My latest tests are with a 1.5 mm wall, and about the cheapest PLA I can find, not quite like the first round where I was using better PLA. This cheap stuff prints okay, but seems subject to lower temp melt point and a bit more contraction/warp than the Prusament I used before.
Best effort this round is fan on high speed. If affects the "front" of the part, but the side of a part is unaffected (rotated part still has bulge). I'll assume it holds true the rear is also affected.
Even three perimeters and 25% hex infill had zero effect. Color me confused.
RE: Buldge when print reaches "solid" layers
Hi all,
New to this discussion, but I was having this exact problem. I should point out that anything I printed that was basically all infill with perimeters (such as figures, art repo, etc) came out unbelievably perfect. The only problem I was having was when I designed a box or enclosure with flat horizontals in it, as described in this thread.
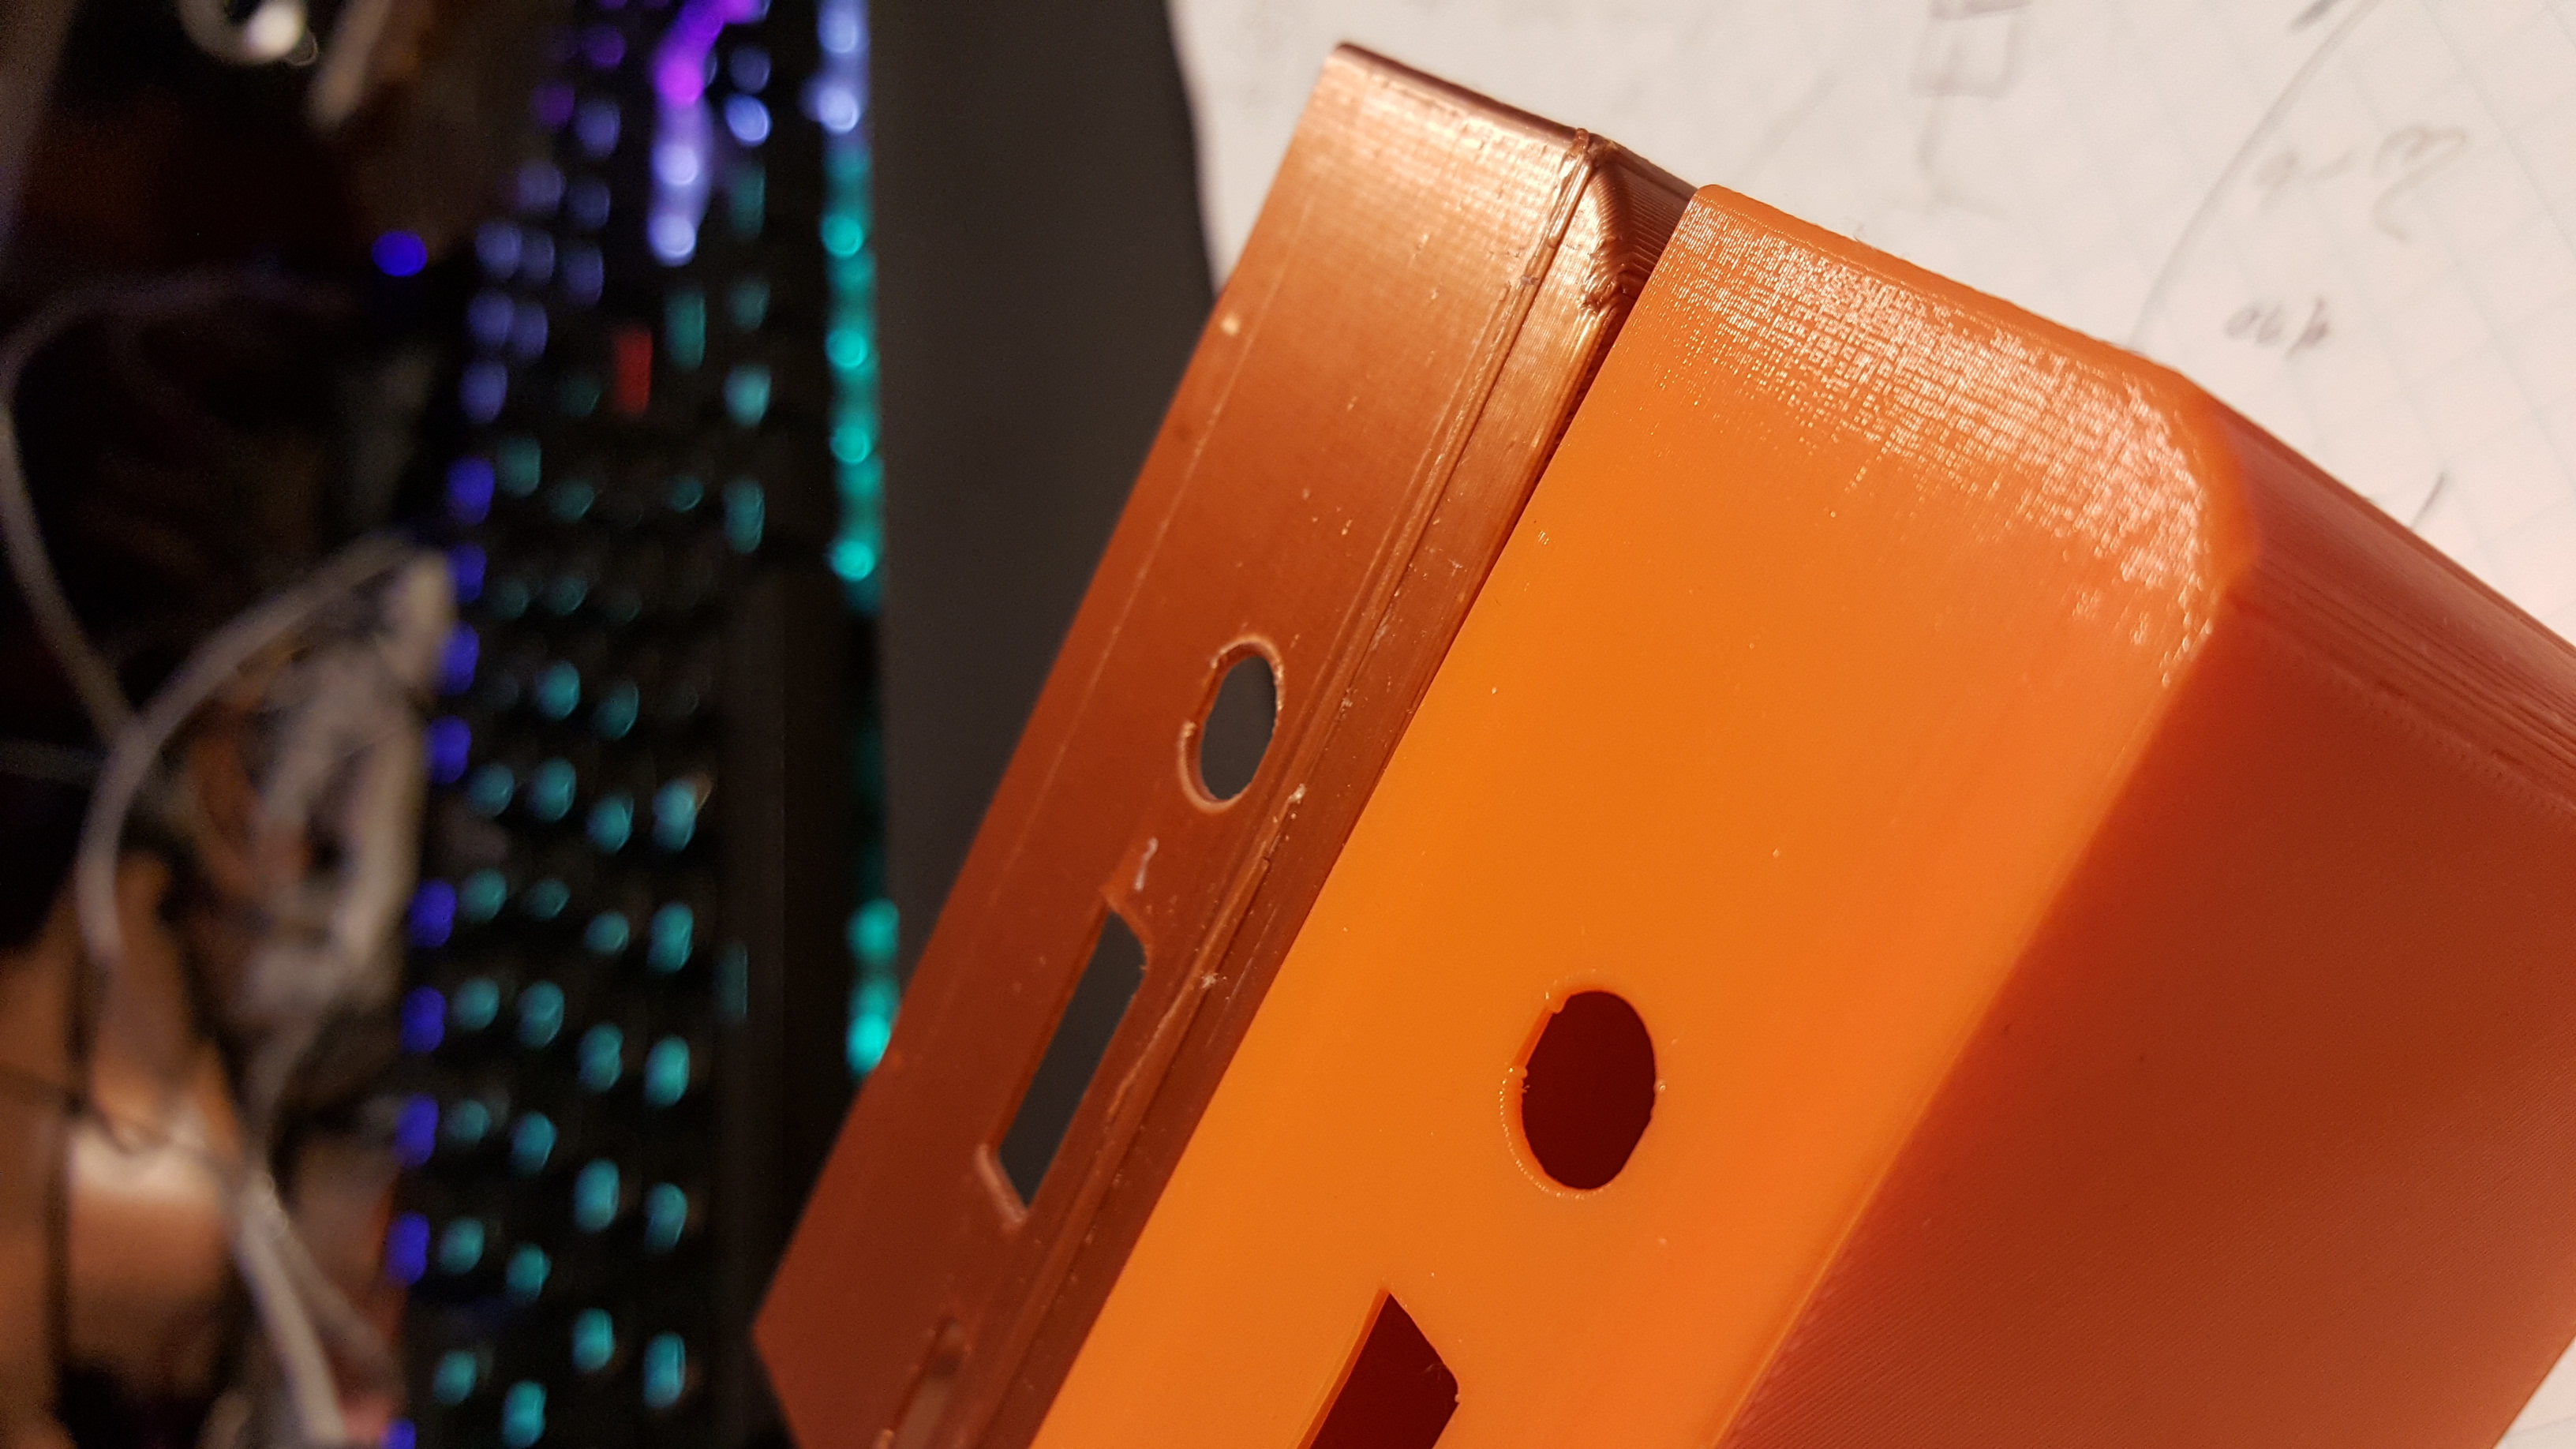
I took the default prusa profile and lowered the external perimeter speed to 20 and enabled detect thin walls and the result is shown below. An incredible difference. (Yes, the pic has two different color filaments, but you will have to take my word that I have literally printed dozens of items over the last few days and these are representative of the quality improvement. The improvements are really spectacular.
This is in PLA. Orange is obviously the adjusted version, and brown the out-of-the-box defaults. Interestingly If I print in PETG, things get even better!
.

RE: Buldge when print reaches "solid" layers
Your parts show signs of warp, where the part has lifted off the bed and compressed layers and result in a sputtered extrusion on the perimeters.
The upper line might be the bulge issue described here (and more deeply over on GitHub). Have you tried printing Bob's test pieces with your settings? It'd be interesting to see if your settings work.
RE: Buldge when print reaches "solid" layers
@tim-m30
Hi,
There was some warping present, no question. I have since added rafts and have printed warp free. The corners do get better but the relative bulge sizes remains the same.
The games changer for me was speed. external extrusions at 10mm/s and the problem is literally gone.
the model is from thingiverse: https://www.thingiverse.com/thing:2269086
I will try Bob's pieces tonight!
I also never mentioned my setup details. MK3S/MMU2S, latest firmware 3.8.1/1.0.6. All Hatchbox filament.
RE: Buldge when print reaches "solid" layers
Rafts are not the answer for these types of parts - the same thermal stresses apply with or without a raft. As a matter of fact, a raft might make warping worse. Improving bed adhesion is the best way to deal with lifting. And then, if you have great adhesion, then add some heat to the bed, or in extreme cases add brim tabs to the corners. The the part in question, it is so small I would not expect warping: it should easily stick to a clean bed without issues.
I'd try printing it, but I use Rpi4 ... lol.
RE: Buldge when print reaches "solid" layers
@tim-m30
oops, I incorrectly said rafts when I meant to say brim!
I am printing the sample parts now...
RE: Buldge when print reaches "solid" layers
Lots of printing the last few days, and a few interesting observations.
First of all, this is an annoying problem to understand!
Basically the only things that cleanup the bulging seem to be external perimeter speed. I played with all the settings described in this thread one at a time, but really didnt see any huge improvements.
Material also has a large impact, but I tried to concentrate on a hatchbox PLA for all of the prints in this discussion. Materials like PETG behave much better at the standard defaults, and ABS is as perfect as you can expect.
I started with the default 45mm/s speed for external perimeters. Proceeded to 20mm/s and then 15mm/s and noticed significant improvement with each step. I also printed Bobs sample prints (1.35mm) and noticed the same improvement steps. Then I printed down to 5mm/s with not much more improvement..
The most improvement came from using a different slicer. I used Cura 4.4 with the default profiles from the Prusa website. The prints with Cura are excellent with all the defaults including the max speeds in the profile. This got me thinking as to why this is, and I believe the artifacts are a result of a thermal issue someone described in this (or another) thread, i can't remember where.
Comparing the physical print characteristics between the PrusaSlicer and Cura I did notice what I believe is a major contributor to the bulge artifacts. PrusaSlicer draws the infill with a fixed pattern starting in one corner and moving to the other. Cura seems to bounce around never really concentrating on one area for long. I think we get a heat saturation effect in PrusaSlicer that effectively mushes the material out of place, almost like pushing a bead similar to metal welding. Cura's bouncing algorithm seems to avoid this.
Some pics below. The Cura print is hands-down the best of all.
The original brown print does have some warping which did not help, however i can'f find my reprint which had no warping but had the same artifacts. I think my cat dragged it off!

left to right: original (45mm/s), 20mm/s, 15mm/s, Cura (45mm/s)

left to right: original (45mm/s), 20mm/s

left to right: 15mm/s, Cura at 45mm/s.
Unfortunately, Cura doesnt seem to support my MMU2s directly so I will need to deal with that.
RE: Buldge when print reaches "solid" layers
[...] Basically the only things that cleanup the bulging seem to be external perimeter speed. I played with all the settings described in this thread one at a time, but really didnt see any huge improvements.
Slowing external perimeters is definitely a big part of the solution. I've settled on 25mm/s for good results.
Material also has a large impact, but I tried to concentrate on a hatchbox PLA for all of the prints in this discussion. Materials like PETG behave much better at the standard defaults, and ABS is as perfect as you can expect.
I'd add filament calibration to that as well. You need to create a profile for every filament type and brand that incorporates the actual measured and average filament diameter and extrusion multiplier calibration for consistent result. Since I've started doing this regularly, most of my issues with stringing, retraction and consistency have dropped considerably. When the printer extrudes close(r) to what the slicer expects it to extrude, results are much better.
The most improvement came from using a different slicer. I used Cura 4.4 with the default profiles from the Prusa website. The prints with Cura are excellent with all the defaults including the max speeds in the profile. This got me thinking as to why this is, and I believe the artifacts are a result of a thermal issue someone described in this (or another) thread, i can't remember where.
Before Team Prusa started making the big strides leading up to PrusaSlicer, I'd converted enthusiastically to Cura. It's a great slicer, though not without annoyances. The biggest disappointment has been their lack of volumetric rate limiting (PrusaSlicer's Max volumetric speed setting) which requires either setting speeds and hoping you don't over-run the hotend, or constraining top speeds for the worst-case flow scenario. As a result, I find PrusaSlicer is better suited to projects where I want to print big things with repeatable "machine shop" results. Cura is still nice for smaller, one-off "craftsman" prints.
Comparing the physical print characteristics between the PrusaSlicer and Cura I did notice what I believe is a major contributor to the bulge artifacts. PrusaSlicer draws the infill with a fixed pattern starting in one corner and moving to the other. Cura seems to bounce around never really concentrating on one area for long. I think we get a heat saturation effect in PrusaSlicer that effectively mushes the material out of place, almost like pushing a bead similar to metal welding. Cura's bouncing algorithm seems to avoid this.
A lot will depend on specific settings. I've often seen complaints that PrusaSlicer is "inefficient" when doing something similar to what you've described, so this may be a damned-if-you-do, damned-if-y0u-don't scenario. I recall that avoiding movements over parts played a big part in the final print paths. I'm finally going to be home for a stretch this week, so will try to spend some time with the test pieces with Cura again. I did some basic testing with PrusaSlicer, Cura & Simplify 3D (see previous photos) and all seemed to have some issues using pretty standard settings.
RE: Buldge when print reaches "solid" layers
I've been playing with turning Detect Thin Walls on and off, and I'm finding I will be using it turned on for most of my future prints, regardless of whether or not I think it has thin walls. Prints simply look better when it is enabled, and bulges have more or less disappeared with - as far as I can tell - no consequences. I can print normally and fast and produce parts that use to bulge without issue.
RE: Buldge when print reaches "solid" layers
Ah, that may explain some of my results. I always use detect thin walls on my Quality settings, so was getting that benefit. I don't find there to be any significant performance hit when leaving it enabled.
RE: Buldge when print reaches "solid" layers
I tried the thin wall setting as well. It did make a difference in print quality, but certainly not as much as using a different slicer.
I also went back and reprinted a bunch on prints that gave me trouble in the past, and surprise! all the weird artifacts disappeared when I sliced with Cura.
I'm not a betting man, but there is something in PrusaSlicer that just isn't obvious causing this problem. I wish I could find it but no luck so far.
I will post some pics of the comparison prints shortly, but my wife has me in "get the house ready for Thanksgiving" mode at the moment!
RE: Buldge when print reaches "solid" layers
I've been having the same types of bulges in my prints corresponding to the shifts from infill to solid layers. Was there anymore information about this issue? Did you find any other solutions?
RE: Buldge when print reaches "solid" layers
I've been having the same types of bulges in my prints corresponding to the shifts from infill to solid layers. Was there anymore information about this issue? Did you find any other solutions?
In my experience:
- Slow down external perimeter speeds. 20-25mm/s seems effective.
- Add a perimeter if possible.
- Calibrate the extrusion multiplier for each filament.
RE: Buldge when print reaches "solid" layers
Honestly, the problem seems to be the perfect storm between thickness, geometry, and slicing method. In my case i changed the geometry ever so slightly (in the form of wall thickness) and that resulted in a different slice. The problems all but disappeared.
If I cant get PrusaSlicer to do what I want I use Cura which almost always completely removes the issues, but its harder to use with my MMU2.
RE: Buldge when print reaches "solid" layers
[...] If I cant get PrusaSlicer to do what I want I use Cura which almost always completely removes the issues, but its harder to use with my MMU2.
Have you tried knocking 5-10% off the extrusion multiplier in PrusaSlicer?
RE: Buldge when print reaches "solid" layers
@bobstro
Thank you, I'll work with that and see what changes I get.