Re: Buldge when print reaches "solid" layers
I see this problem, just like everyone else.
What happens if you manually edit the gcode to keep feedrate the same rather than changing.
Probably would need to also edit the extruder move distance to match feedrate.
That is a significant feedrate change and could definitely alter how the extruder matches nozzle motion.
Re: Buldge when print reaches "solid" layers
My last photo showed a matching feedrate above and below the line. On my printer, only change was texture. But I'm not suffering bulges since I went tight on my belts (months) - at least on these current examples. I have one test piece I'll eventual rerun - the large Printer Test; it had some towers that were very susceptible to bugling.
If it were only the speed change, there's no need for manual edits; change a couple simple settings is all. But the issue is only exacerbated by the speed settings; the problem is elsewhere. My thinking has always been mechanical - belt tension, frame flex, etc.
Need a Mk3 volunteer who has the issue to run a gcode for me, before and after a serious belt tightening.
Re: Buldge when print reaches "solid" layers
I couldn't read all posts but I've seen in the original post that the part was designed in Fusion 360. I have the same problems in parts that I design in Fusion 360, are you all using this as well? Seems related.
Re: Buldge when print reaches "solid" layers
Did the test yesterday with my BEAR mod MK2.5. No issue, no bulge. Latest Slic3r version with standard Prusa profiles and Chris's pretty PLA settings.
Maybe a little bit underextrusion 😕
Thomas
Re: Buldge when print reaches "solid" layers
I planned to update my findings this Weekend after taking some Pictures and with some further testings. But now I can't wait to join this vivid discussion:
I redesigned my test piece so it looks like the paint Sketch I added (don't laugh):
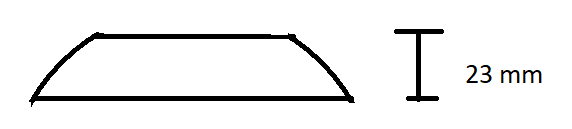
I always printed 0.2mm Quality Settings except for infill=15% and grid.
This is freaking me out as I can't see why the properties (solid rectilinear vs 15% grid) of the first few layers can affect the buldge Happening a few layers above: it should be the exact same Situation: a Change from grid infill to solid infill.
I don't have the time to really put this into perspective with the other findings, I want to Point out that I have a buldge even when there is (should be) no Change at the Perimeter at all.
Things I want to do:
PS: My Computer tries to apply German Capitalization which I apology for.
PPS: I asked Prusa Support. Their Suggestion to do a factory reset didn't solve the Problem.
Re: Buldge when print reaches "solid" layers
Layers with solid infill have different thermal expansion / contraction properties; if only because there is more thermal mass when printing. That's bound to have some effect. But printing speed is an obvious factor in that the extruder may not be linear under all print conditions. And a change from 100% speed down to 20% speed is major, and what Slic3r does with small layers.
I just dropped my last test into the printer ... 45 minutes. But it includes bridge correction and top infill correction (trying to get all surfaces as pretty as the sides and bottom -- seems trick is printing this Mystic Brown very slow).
After this, I am going back to the large printer test piece with towers. That was the most noticeable layer variation part I have.
Re: Buldge when print reaches "solid" layers
Very glad to see this topic is encouraging a lively discussion and that at least a few moderators are looking at it as well.
I am printing Bobstro's test bench for comparative purposes and will post pics of that shortly.
Nicolai - I have a lot of test attempts and thinking and pics to post just like you but want to jump back in to the discussion as well. I have tried fill angle and object orientation and it has had some impact (both improvement slightly but also in just a change in the way the bulge presents). I have looked and played with gcode quite a bit for my problem and have not seen any issue with slicing (not that I couldn't have missed something).
neracht - I use Designspark Mechanical (part of Spaceclaim) and I have a bulge issue
Ken - super glad to see you commenting. I have been reading your posts on squaring and parallel / planar issues and have been wondering if those are related to my bulge issue. That is where I'm headed.
Tim - I have taken your belt tensioning suggestions to heart and will be really trying to ratchet those up shortly just to see. I do wonder if that could also be correlated to Ken's ideas on squaring and perhaps frame rigidity. Your tensioning has been one of the only success stories I've seen anywhere on the web on this issue (and nicolai's minus 30% overlap)
I too have thought extensively about the thermal expansion characteristics of solid infill, Tim, and went to the length of coding pauses after every layer to allow for more cooling. However, I eventually printed a test object where I included a 2 loop skirt that went as high as the object. The "bulge" anomaly presented on BOTH the skirt and the object with no reduction of the bulge on the object. For my problem at least, this seems to remove cooling/thermal characteristics etc, as well as resonance and even nozzle pressure as a primary culprit. Does anyone have thoughts regarding that? I may be looking at it wrong.
Forgive my relative ignorance in what has been previously discussed in this topic - but your test above almost seems like it is a bug in slicing that is bumping out those layers a bit; perhaps it's incorrectly compensating for the infill overlap percentage? Has someone tried a gcode visualizer to see if the tool path is exhibiting the same bump?
Re: Buldge when print reaches "solid" layers
For my test objects at least (I'm not the OP but pics in Apple Green are mine), I have looked extensively at the tool path in Slic3r and have also analyzed the gcode and I saw no deviations at all from what I would expect. I don't think it is a slic3r issue for me at least. Certainly that was one of the things I thought a possibility.
Re: Buldge when print reaches "solid" layers
Forgive my relative ignorance in what has been previously discussed in this topic - but your test above almost seems like it is a bug in slicing that is bumping out those layers a bit; perhaps it's incorrectly compensating for the infill overlap percentage? Has someone tried a gcode visualizer to see if the tool path is exhibiting the same bump?
The slice is fine in all cases. I've done a manual look-n-see and on the same linear portions the extrusion gcodes match. Yet the actual plastic is different. It's machine variation. By the way, my printer isn't really exhibiting the issue nearly as much as others are reporting..
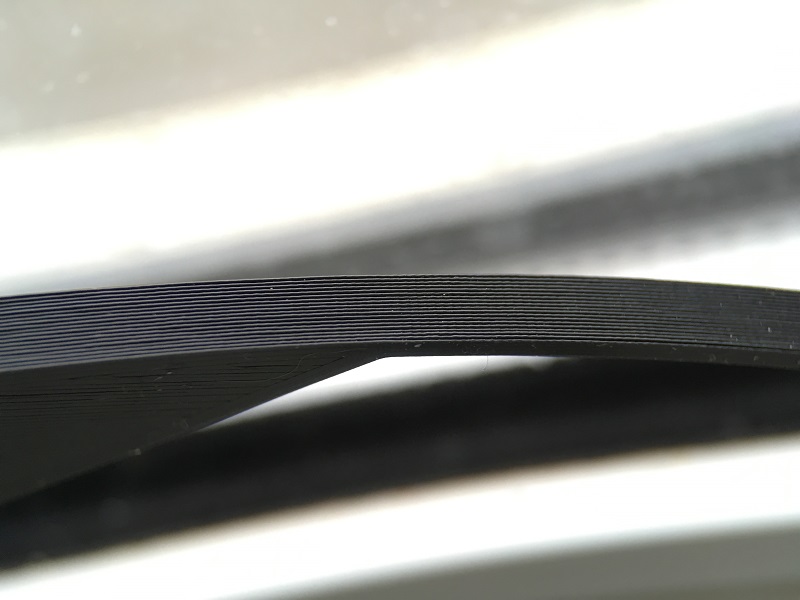
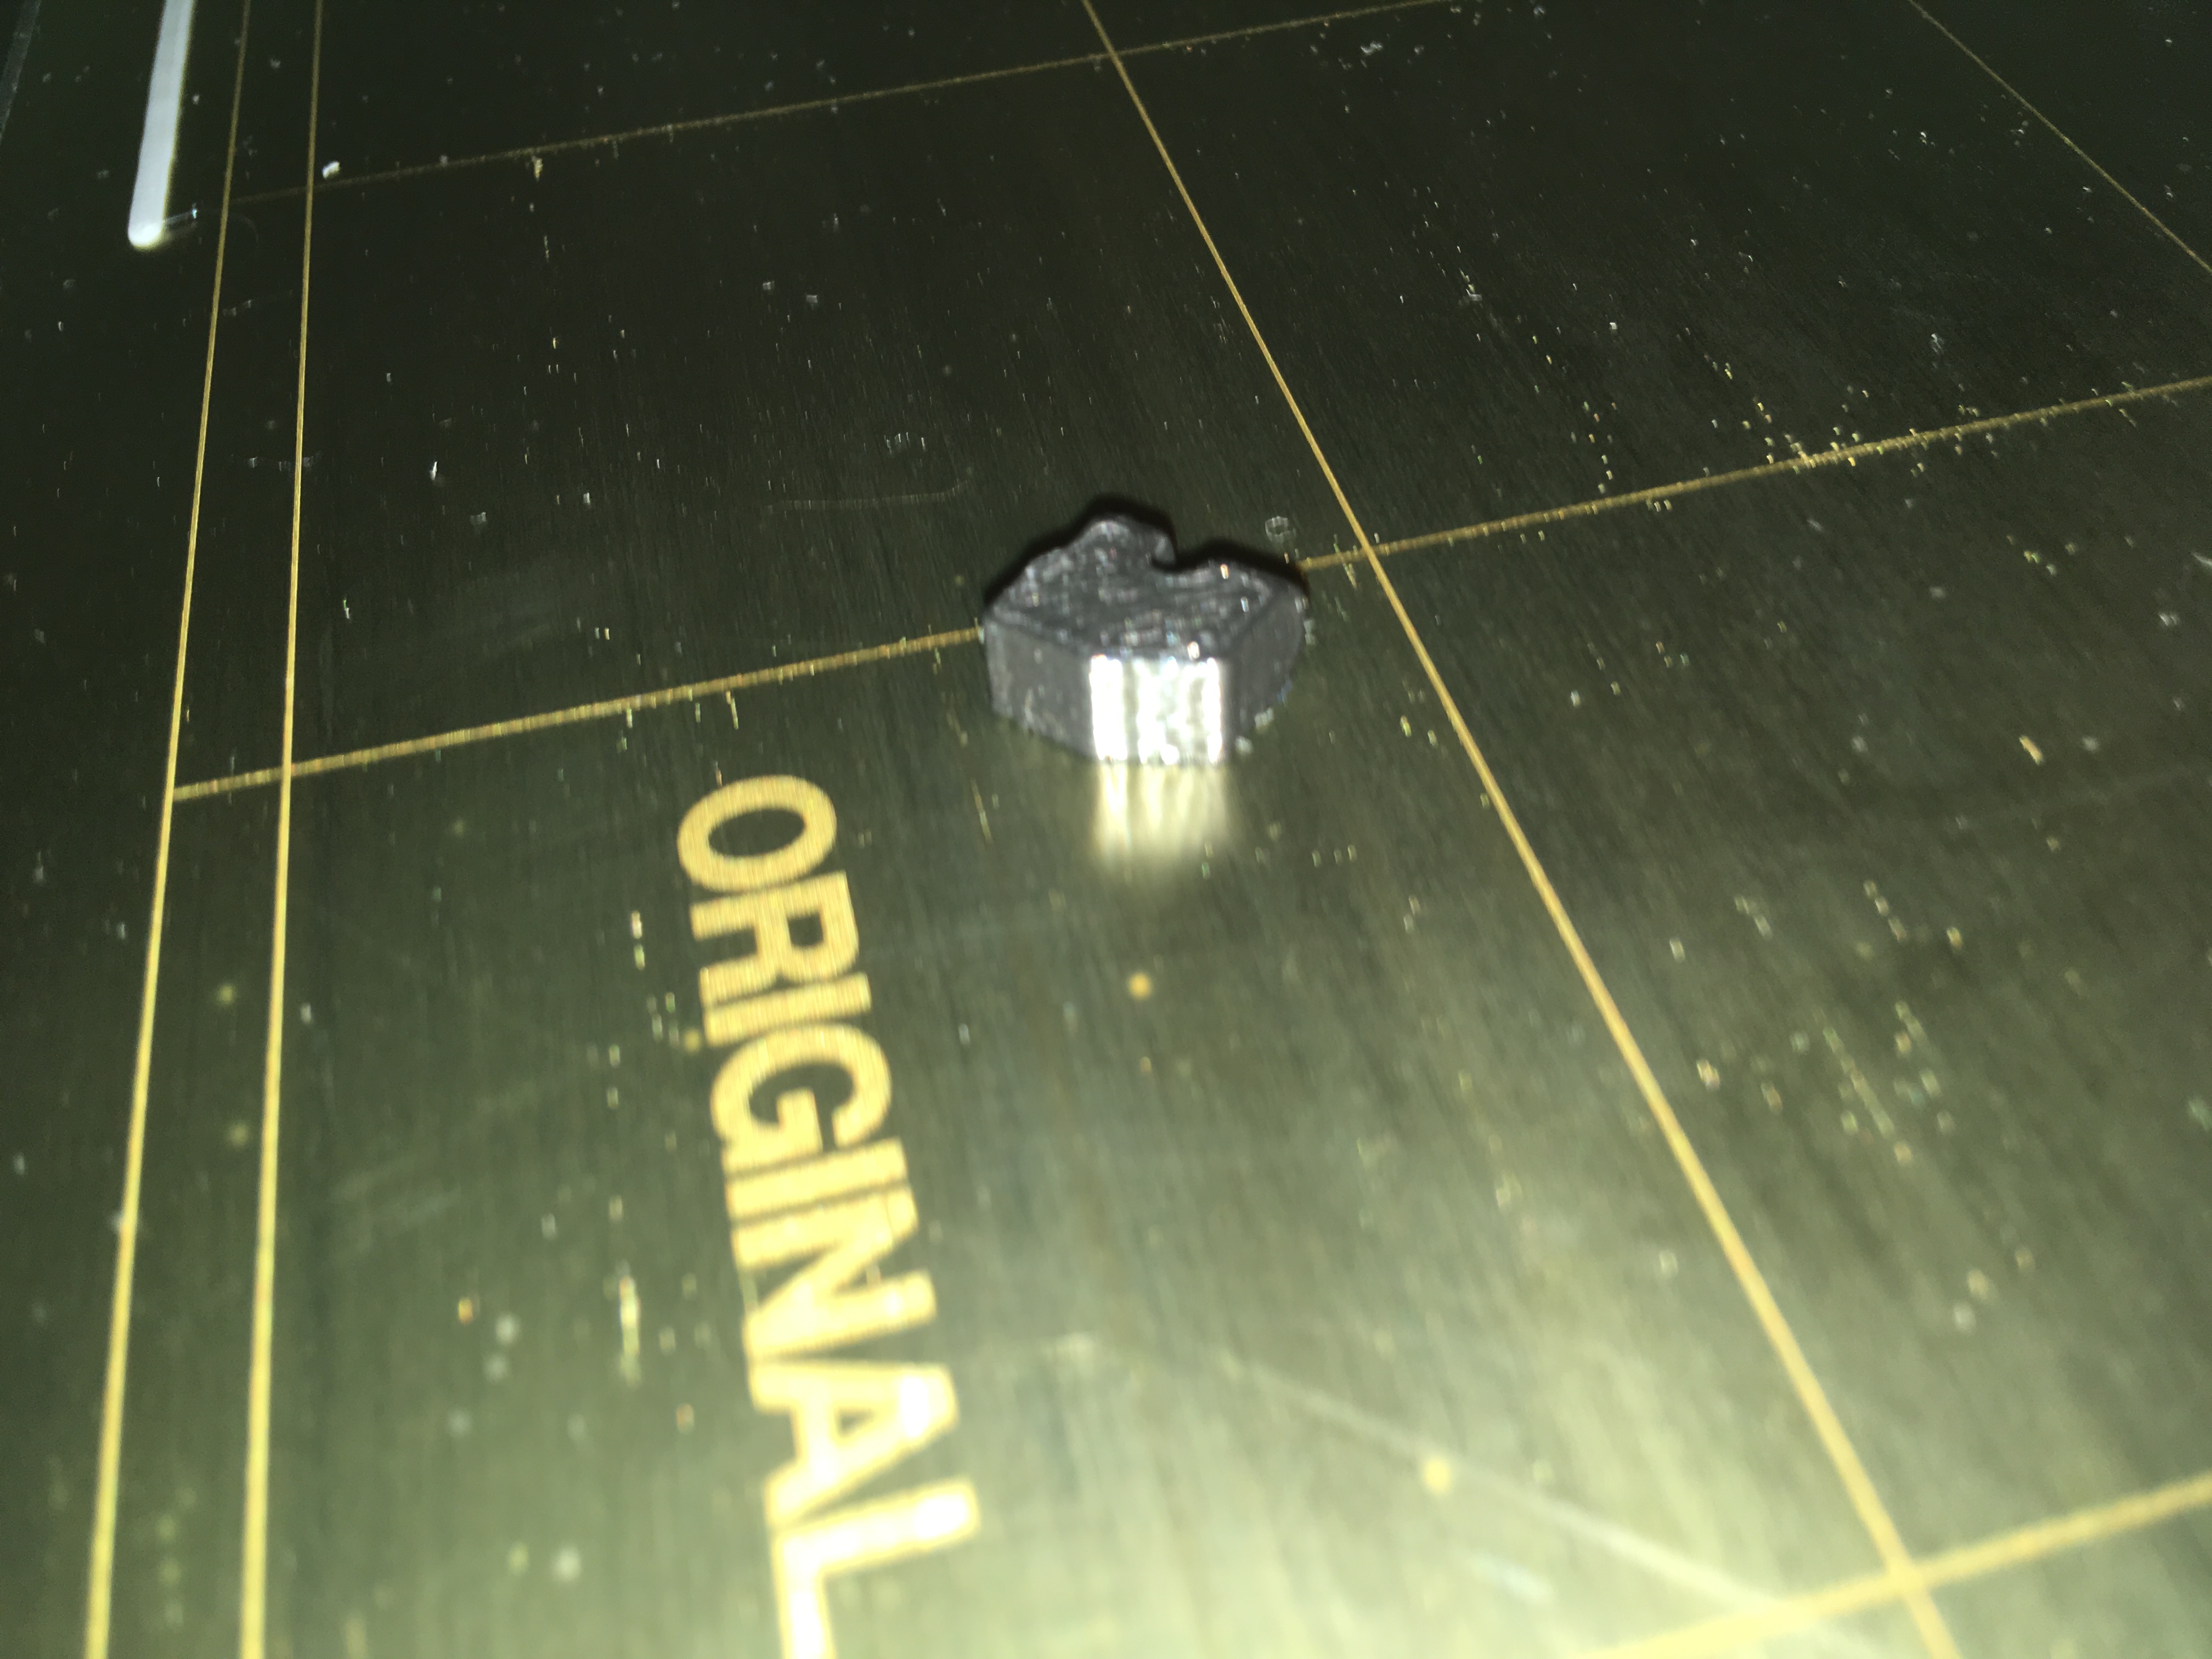
My most recent test I've changed the seam parameters (to random) and it has virtually removed any traces of the variation. Only one place where I can see any variation - at the junction of the top of the hole. And I have to be really picky to point it out.
What has me baffled at this point is why the top of the hole is simply not bridging well. Seems even with bridge detection and ultra slow print speeds, the printer is doing some really weird crap. Detection is giving similar results to printing the area at full speed... and at this point I think full speed looks better ... lol.
Re: Buldge when print reaches "solid" layers
[...] I am printing Bobstro's test bench for comparative purposes and will post pics of that shortly.
I hope you read this before you've started. I've attached 2 revised test pieces to this post. I extended the walls and added curved surfaces to slow down the layer prints to higher than the default 20 seconds trigger for slowdown in the Prusa profiles. The attached STLs provide 1.5mm (not even multiple) and 1.8mm (even multiple) wall thicknesses to test changes in results using the default 0.45mm extrusion width for a 0.40mm nozzle.
Edit: I'm getting some hopefully useful results.
Results using Prusa FAST 0.20mm layer heights with varying wall thickness
Here are 2 parts printed with identical print, filament and printer settings:
One part has a 1.5mm (uneven multiple of 0.45mm) protruding upper layer, the other a 1.8mm (even multiple of 0.45mm) upper layer

Differences in external walls are readily visible:


This one surprised me. These are the same 1.5 and 1.8mm parts printed using the Prusa defaults, but with the 1.5mm part printed with a Max volumetric speed of 1, slowing the entire print down to a constant speed. The part with a 1.8mm wall still printed more evenly, even at fast speed.

And another I'm not 100% sure on. This is the same part with the 1.5mm thick wall printed using the Prusa defaults (top) and my 0.20mm profile (bottom), both at full speed:

A bit more of a 602 showcase than intended. I'll update with more results as they complete.
Re: Buldge when print reaches "solid" layers
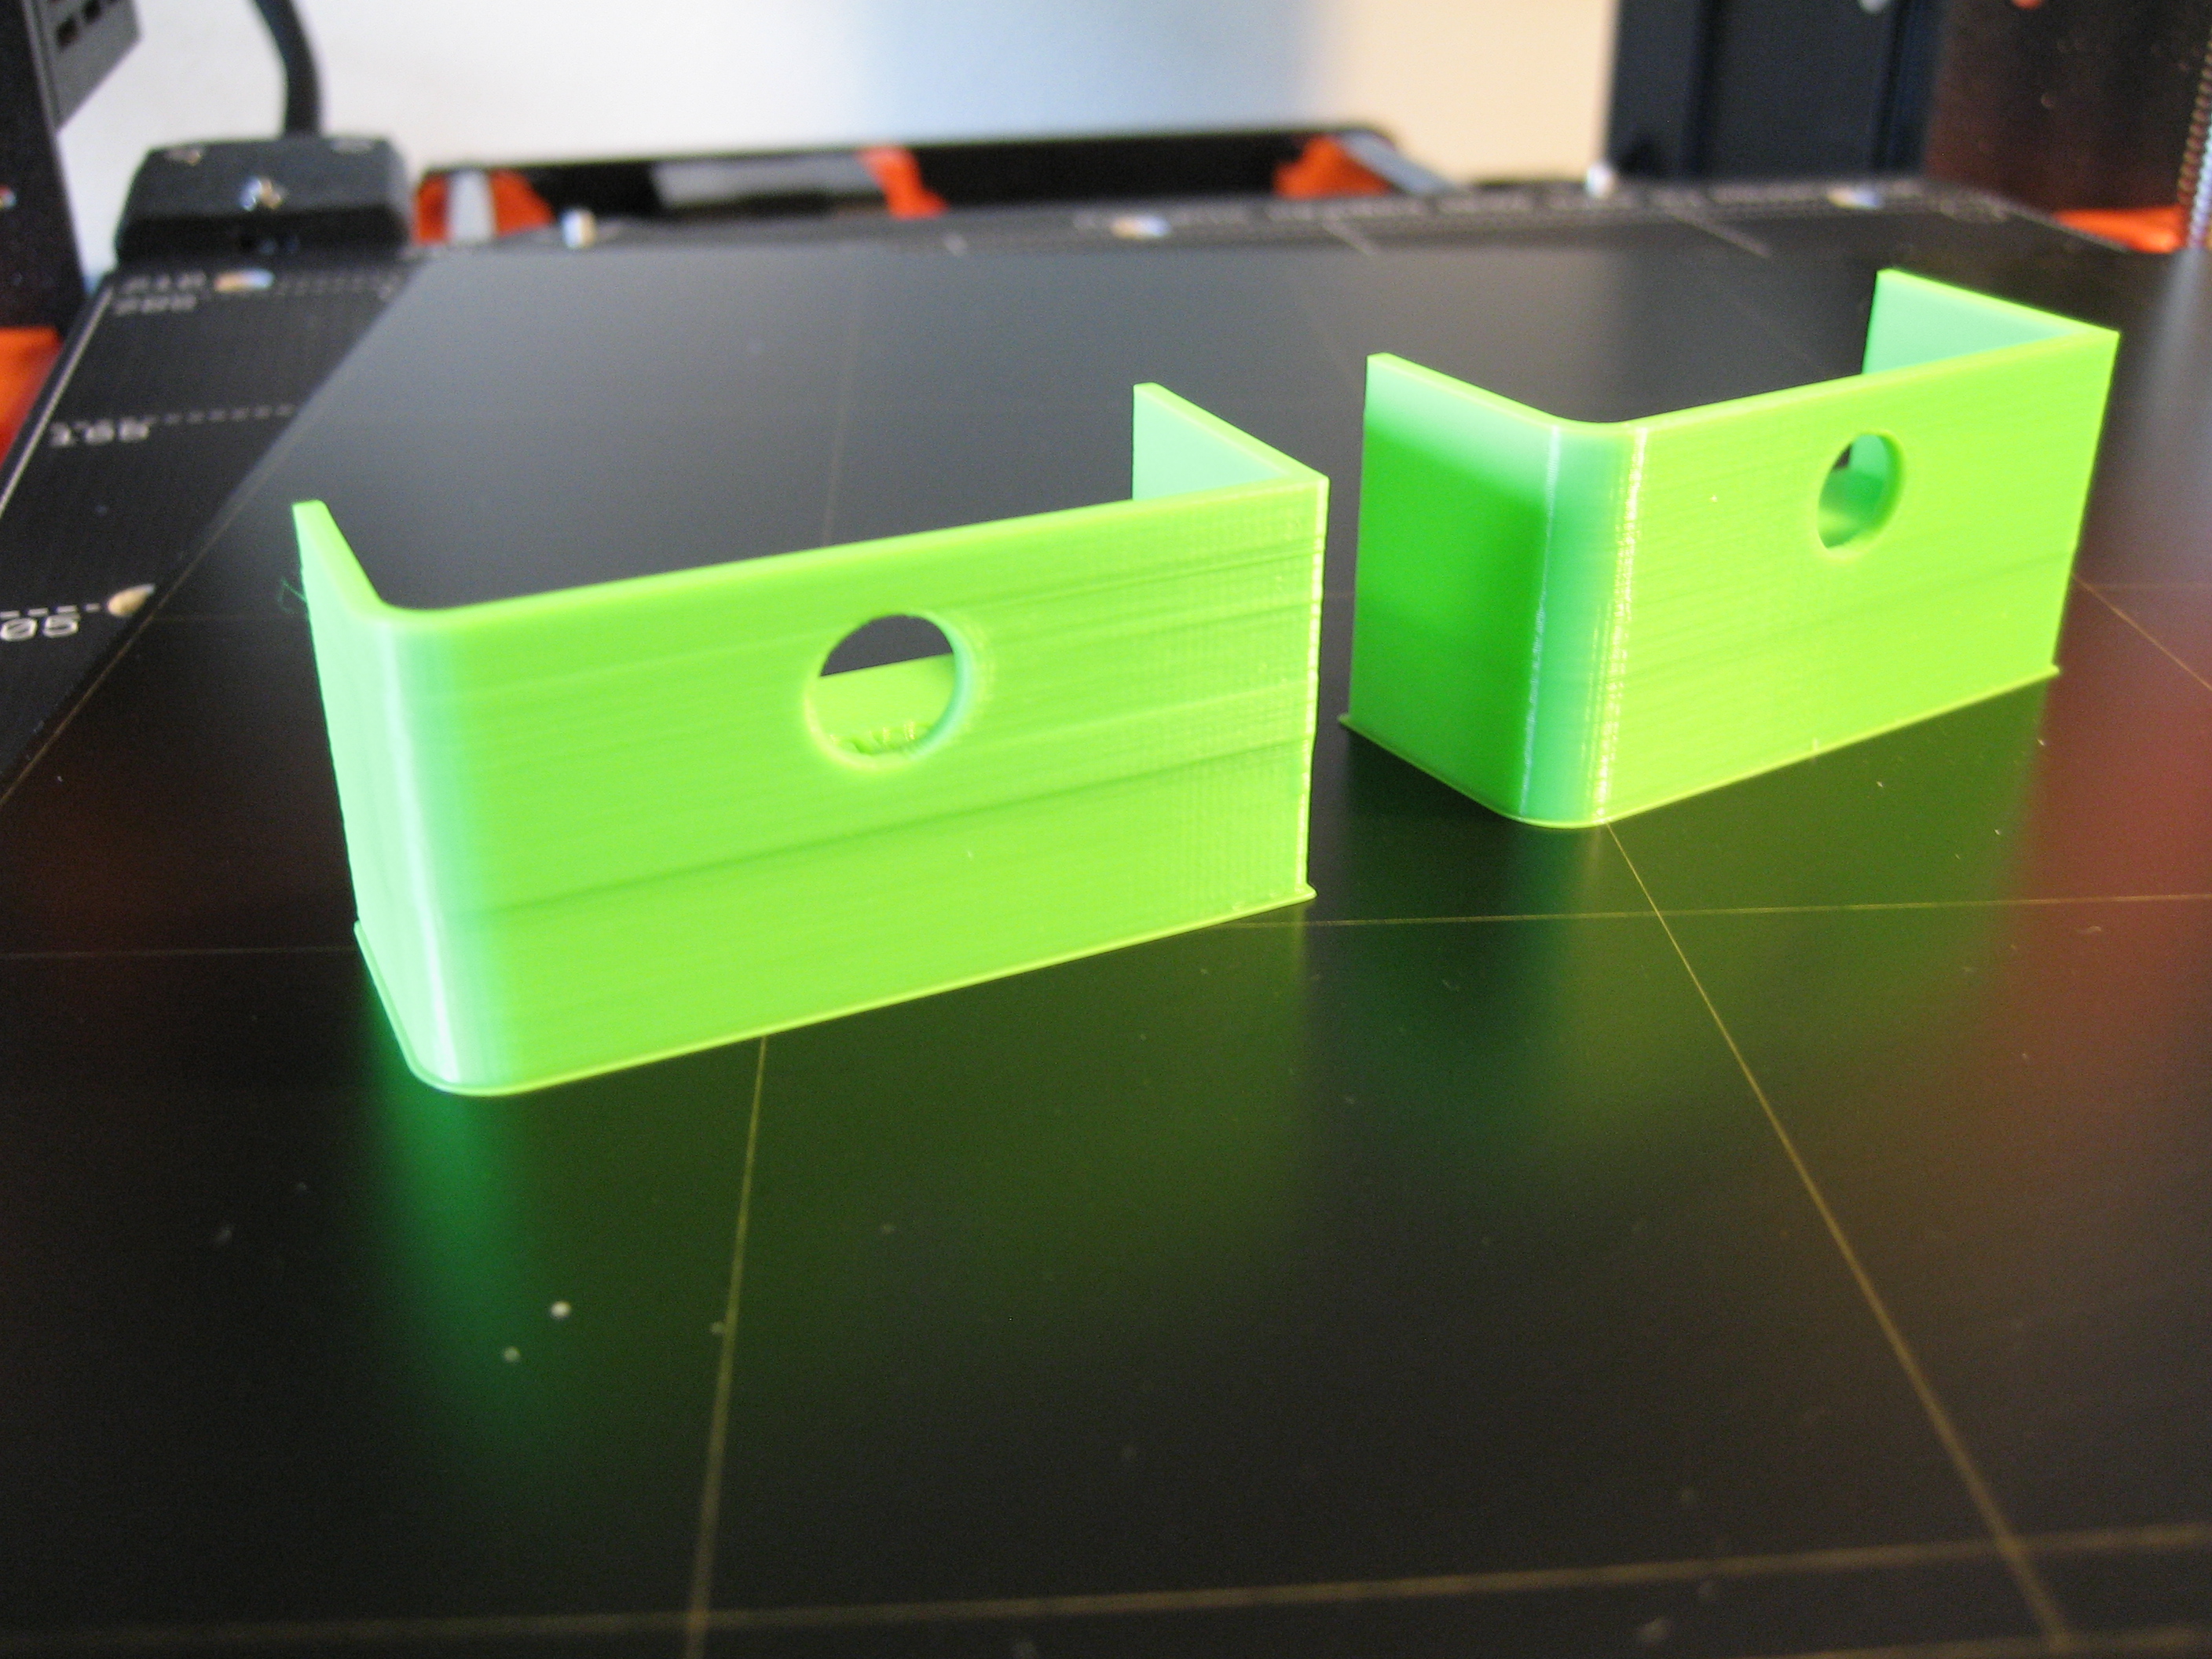
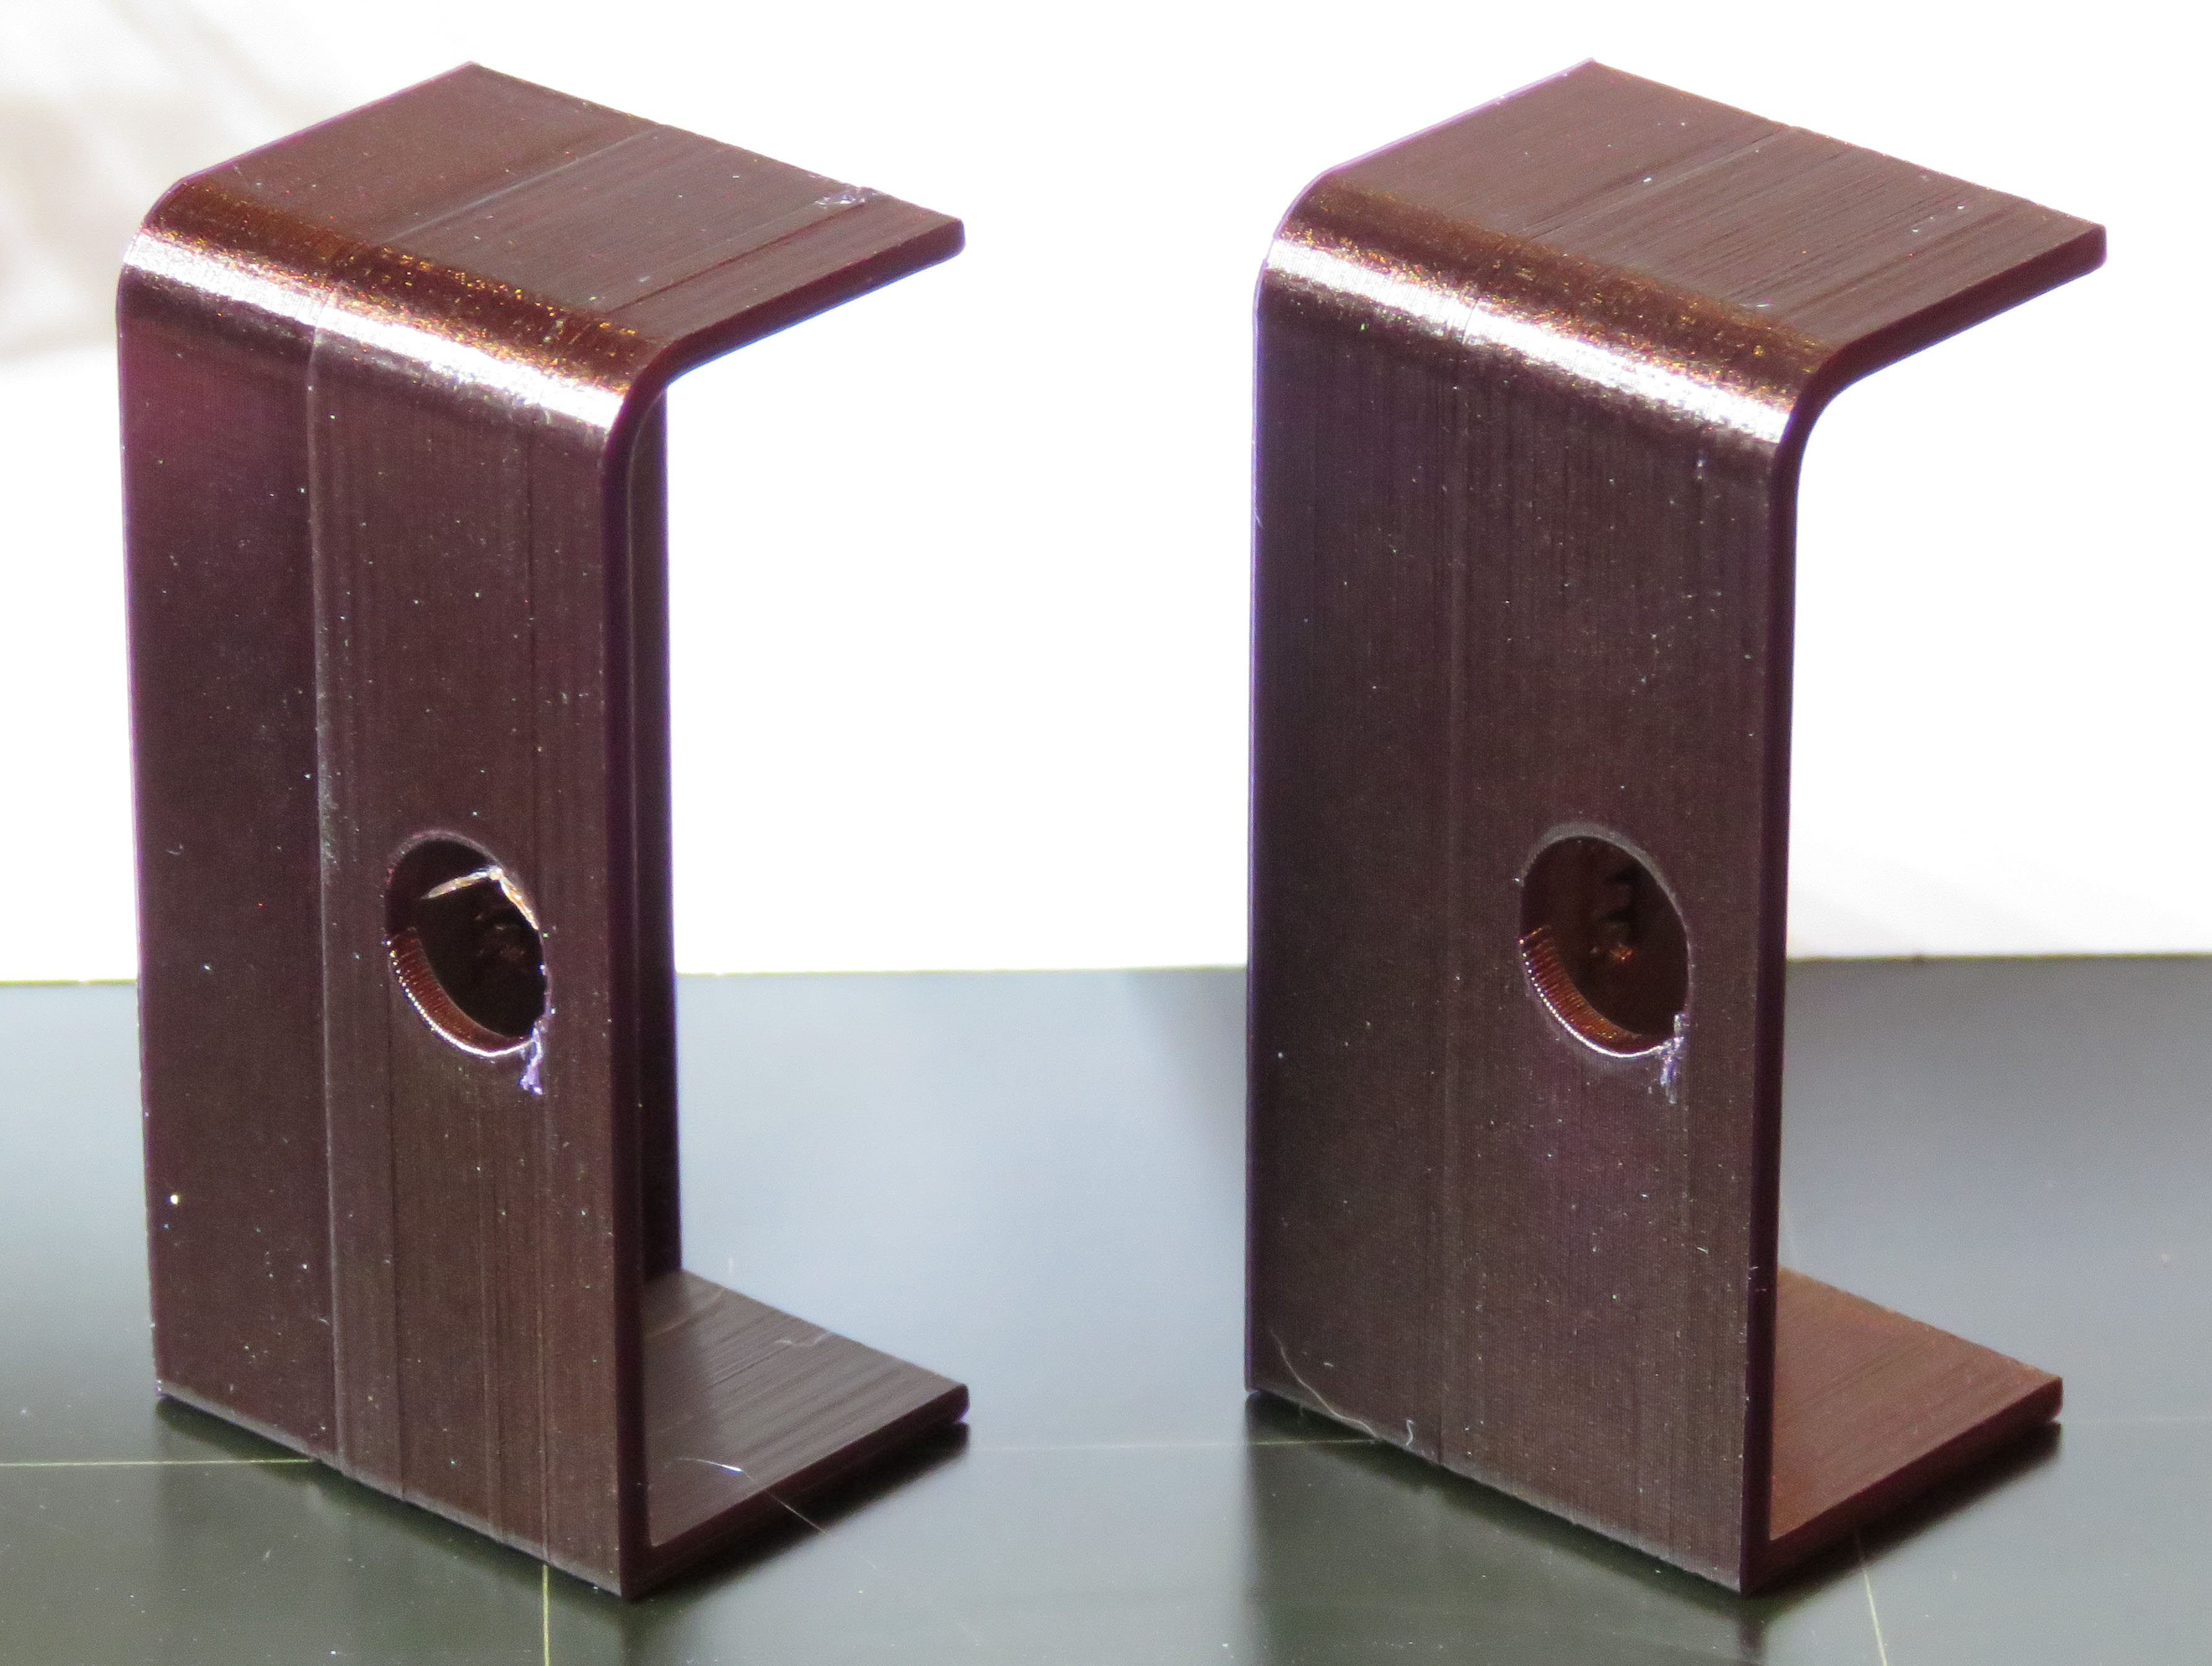
OK, I printed both sets of tests (I had started prior to your revisions Bobstro). On the most recent 1.5mm vs 1.8mm the picture is not the best but definitely the 1.8mm on the right (I used 0.15 layers with 0.45 extrusion on a 0.40 nozzle) is far superior to the 1.5mm. That should be of great help to people having this issue after the transition to the "wall" section.
I guess I have a fundamental question in regards to what the issue is. I think we have at least 2 issues we are dealing with. The issue I have been concerned with is for a "bulge" that presents itself PRIOR TO the transition to a raised section. I have not printed any thin walled objects like this one and I certainly see that having a multiple of extrusion width seems to help immensely.
My question is who is having issues with a bulge prior to the transition (ie on the solid flat layers) and who has been having an issue post the transition. And I guess in particular nicolai since he had some thin walled objects but also some pictures that looked to me to be a bulge prior to transition.
As an example, here are your original tests Bobstro, the one on the left is with 3 top layers and the one on the right is with 7 top layers (more solid layers cause more problems for me typically). I know the pictures are not great but you can see where the lines are.
Those lines are at the top layers of the larger shelf of the object PRIOR to transition to the wall AND the first layer after transition. That is consistent with my problem. It is always the last few layers of a solid flat area and the first AND only first layer after the transition if I am printing perimeters first. If I print perimeters last then the problem presents only for the solid flat surface perimeters.
Should I be starting a separate thread? Looking for advice on decorum as well as to how to efficiently attack the problem.
Thanks guys
Re: Buldge when print reaches "solid" layers
I vote for keeping this discussion in one thread for ease-of-reference unless we determine we're dealing with different causes.
I'm going to generate a model with 1.35mm walls to confirm it's even multiples of nozzle width and not just thicker walls accounting for the difference. My thinking at this point is that designing a part for the needs of FFF printing yields the biggest returns. What we do in a slicer is limited to approximation.
Re: Buldge when print reaches "solid" layers
I agree: one thread is best.
I've been printing the tests and not seeing anything noteworthy in my results, certainly no usual or odd bulges; until this last set. Coincidentally, and for no apparent reason, Slic3r PE decided to update my profiles. I know I didn't press OK ... but it happened. Now I am seeing the bulges in both new parts: 1.8 and 1.5 walls. But not really bulges as much as simple steps in dimension from the interface upwards, the 1.8 step as noticeable as the 1.5 step.
I went back and found what I hope were my old profiles... and reprinting the two new tests. More photos in the morning.
Here are the prints with defaults. 1.5 (l) and 1.8 (r). The ridge on the 1.8 is nearly as large as the ridge on the 1.5; lighting is hiding it.
Re: Buldge when print reaches "solid" layers
Prints using my old profile: detectable corner differences during top infill on 1.8 mm part; obvious directional texture differences on 1.5 mm part. Parts printed at the same time, same slice, etc.

Re: Buldge when print reaches "solid" layers
I've added a 2.0mm test piece to the suite (see attached update archive). I'm not 100% sure this addresses the OPs issues, but it's been educational.
Here are the tests printed using the Prusa default 0.20mm FAST, generic PLA and Original Mk3 profiles from left to right at 2.00, 1.80, 1.50 and 1.35mm:

Contrary to my expectations, a wall thickness exactly corresponding to extrusion widths didn't matter much. At 1.35mm (3 X 4.5mm extrusion width) I see very much the same distortion as at 1.50mm. At 1.80mm (4 X 4.5mm extrusion width) it looks good, but it looks equally as good at 2.00mm.
The same prints using my tuned filament settings looked better at all thicknesses, although I've got some distortion in the curved surface that I need to figure out. I'm printing out the 1.35mm and 2.00mm pieces now and will post an update.

My current thinking is that thicker walls allow smoother printing with less precise calibration. More precise filament calibration (diameter, extrusion multiplier, diameter and temp) look better with thinner walls. There's still a slight shift where the inner surface stops, but it's not as pronounced.
In short: I'd suggest OP try increasing wall thicknesses to 1.8mm if possible to see if the issue goes away. Additional filament tuning may help as well.
Re: Buldge when print reaches "solid" layers
I've been getting the most bulgy results with the Prusa profiles, and far less with mine. I haven't had any loss of my profiles after an update, but I'm keeping backups. You should be able locate all your previous settings in the snapshot directory.
I've been printing the tests and not seeing anything noteworthy in my results, certainly no usual or odd bulges; until this last set. Coincidentally, and for no apparent reason, Slic3r PE decided to update my profiles. I know I didn't press OK ... but it happened. Now I am seeing the bulges in both new parts: 1.8 and 1.5 walls. But not really bulges as much as simple steps in dimension from the interface upwards, the 1.8 step as noticeable as the 1.5 step.
Here are the prints with defaults. 1.5 (l) and 1.8 (r). The ridge on the 1.8 is nearly as large as the ridge on the 1.5; lighting is hiding it.
Are you using the Prusa FAST print, filament and printer profiles? I've noticed the effects are far smoother using my settings with tuned filament settings (diameter, extrusion multiplier, Linear Advance and temp).
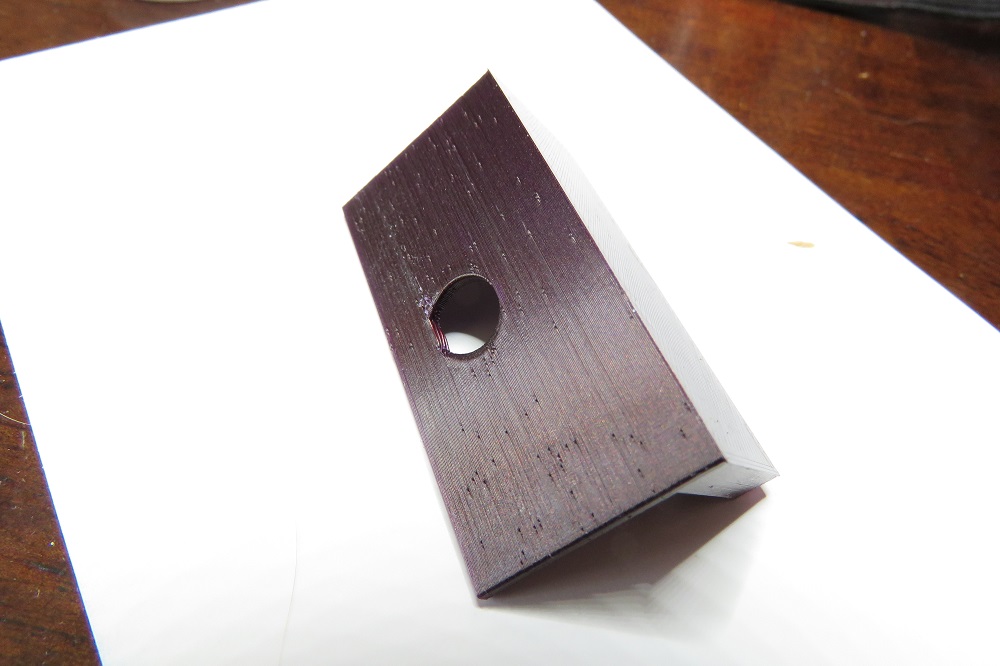
Love that purple-brown by the way!
Re: Buldge when print reaches "solid" layers
[...] My question is who is having issues with a bulge prior to the transition (ie on the solid flat layers) and who has been having an issue post the transition. And I guess in particular nicolai since he had some thin walled objects but also some pictures that looked to me to be a bulge prior to transition.
My current thinking is that thicker walls will look better with less calibration, notably filament calibration. Thinner walls will benefit from filament tuning (diameter, Linear Advance, extrusion multiplier and temp). However, I'm getting some odd corner distortions with tuned settings, so I'm not 100% convinced yet. This has been an educational exercise!
I also want to test to see if filleting those internal corners where the ledge meets the external wall has any effect. I think I'm learning as much about designing parts for FFF printing as actual printing.
Re: Buldge when print reaches "solid" layers
Are you using the Prusa FAST print, filament and printer profiles? I've noticed the effects are far smoother using my settings with tuned filament settings (diameter, extrusion multiplier, Linear Advance and temp).
Love that purple-brown by the way!
The Mystic Brown only looks good when printed at ice forming extrusion rates.
Photos in my post by tim.m30 » Sat Mar 16, 2019 12:00 am were stock "new profile" settings ...
The last set of photos is my test profile; but it's pretty much based on default Prusa PLA and 0.15 ,mm layers. I've just slowed things down to sub-ludicrous and turned off the layer timer to ensure a nice surface sheen in an attempt to keep all perimeters printing at the same speed. I've also slowed base jerk and acceleration to reduce ghosting so weird steps in a layer become more visible.
Re: Buldge when print reaches "solid" layers
I joined Bobstro's test with two alterations:
First I changed the wall thickness to 1,67 mm (it's more sophisticated than multiplying the nozzle diameter: https://mattshub.com/2018/12/01/demystifying-thin-walls/ - that's why slic3r PE recommends 1,67 mm for 4 perimeters/0.2mm layer height:
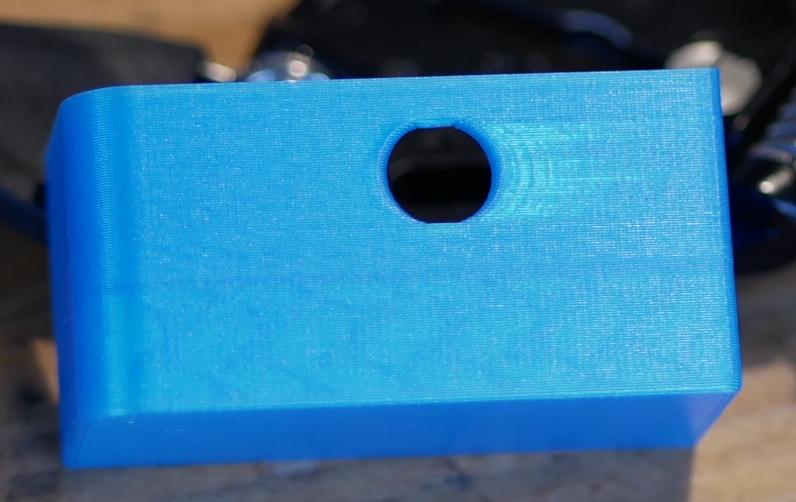
The shot isn't perfect, but I'm quite happy with the print - buldges at all, only this texture that looks like ghosting and a little smaller corner I didn't notice, but on the picture. You can see the top solid layers as well as the infill pattern as the Prusament azure blue is semi transparent.
Then we have the same object with 2,2 mm thickness:
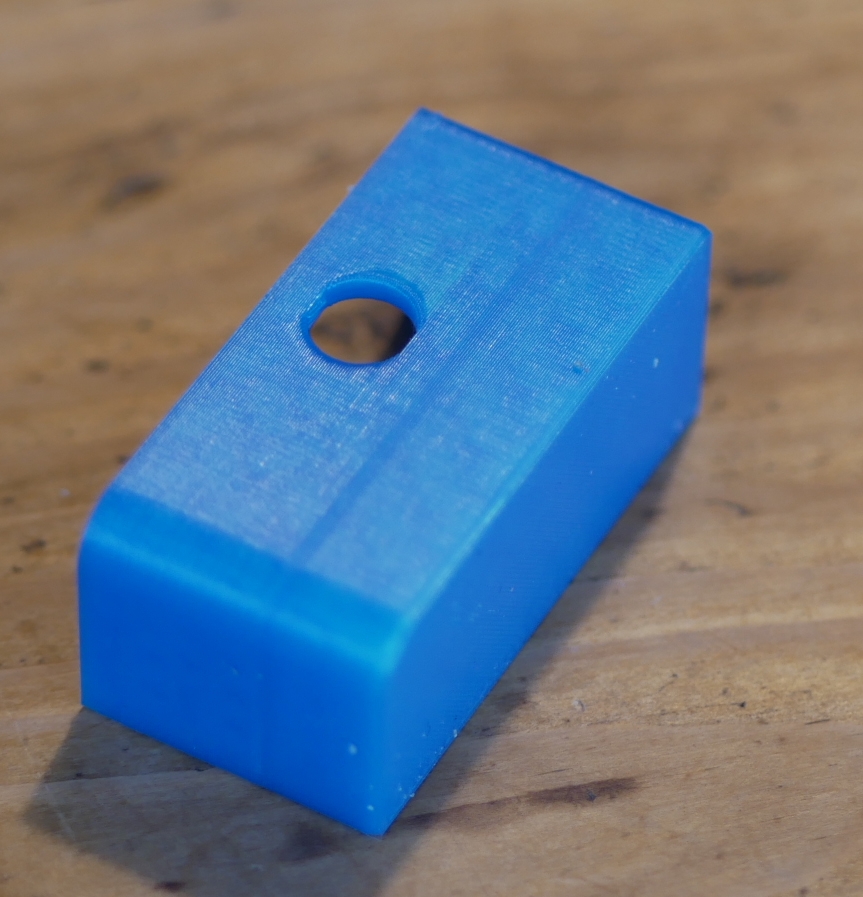
Same here, but without the ghosting.
I also printed a higher version of my test design (10 mm to the top solid, this time with bottom layers) and it worked just fine.
Print settings: 0.2 mm prusa quality settings (latest version), except for a tiny bit of elephant foot compensation and seam position=aligned.
What did I learn? I'm not quite sure, I guess quality filament does make a difference. Seam position could explain part of the different texturesBut again there are dozen of prints to print in order to disconfirm any theory - which I will do when I really have to.
Thanks a lot and happy printing!