Odd artifact, maybe related to mesh leveling?
First of all--for those that do--Merry Christmas!
A couple of weeks ago I assembled my first 3D printer, an orange Prusa i3 MK3 with a smooth PEI springsteel plate. My first print was one of the cable strain reliefs that went missing from the kit, and that print worked really well. (I later found the original, it was stuck inside a cavity in the door for the controller board.) I am now maybe a third into my first spool of PLA, and have many colors of PLA and PETG on their way (thanks, Amazon!)
My printer tells me axes are perpendicular, and I have found a Z offset of -1.060 seems to be about right. I'm seeing a printing artifact that I think might be related to the mesh leveling. Specifically, the prints seem to have a slight dip or divot anywhere they cross lines parallel to the X axis, at the three Y coordinates used for the mesh leveling. If one uses the order of the mesh probes, there is a line that goes left to right through points 1,2,3, another line that goes left to right through 6,5,4, and a third line that goes left to right through 7,8,9. I get dips through 1,2,3 and 6,5,4... I have not tried printing through 7,8,9 yet.
If I am printing something small enough that I can place it to miss all three of those lines on the bed, then it prints great.
If I print a larger object that crosses one of those lines, I get a divot or dip anywhere it crosses that line. If I place the part somewhat differently, the divot or dip occurs in a different location on the part, the same location on the printer bed.
I've checked the heat plate and the spring steel, and do not see any contamination or material trapped between them. The springsteel feels smooth to the touch... I cannot feel any hump there, but I can feel the divot on the part.
I'm currently printing a medium hoop that is (essentially rectangular cross section 5mm wide and 3mm tall) maybe 11cm in diameter, at largely 0.1 presets in Slic3r Prusa Edition. I am using the stock 0.040 nozzle. On a first layer height of 0.2, the observed dip gets so close to the bed that I get no PLA deposited along the line that connects the three middle mesh points, left to right 6,5,4. Subsequent layers are lower in that area also, persisting to completion at 3mm tall.
In the closeup picture attached, the pink line represents where the 6,5,4 line was when printed, and I've tried to highlight the divot by drawing a green line. The other picture shows in pink the approximate position of the problem lines (not my actual printer).
The layers preview in the Slic3r software doesn't show anything unusual. It shows a continuous extrusion through that path.
The region where the dip occurs is at least 2-3mm wide in the Y direction,and does not get smaller as the object builds up. In other words, I don't think it is only a first-layer problem, because thirty layers later I still get a dip about the same size that I can see, feel, and measure with a cheap caliper. If it was only a first layer problem, I would think it it should be invisible thirty layers later.
Away from those specific problem areas, the print is uniform and predictable. Any ideas what to check?
Re: Odd artifact, maybe related to mesh leveling?
Something to check, are the screw-heads for the bed below the surface of the MK52 heated PCB?
The spots you're pointing to are where the 9 fasteners that hold the plate to the Y carriage are secured below the removable spring-steel build-surface.
Re: Odd artifact, maybe related to mesh leveling?
Good suggestion, but all nine are secure and recessed below the heated surface, to varying degrees. See pic of number 6

.
Re: Odd artifact, maybe related to mesh leveling?
I'm dreadfully confused.
You're saying the build-plate is smooth to the touch...
You say on the .2 first layer you can see that the nozzle is restricted at this point, if that's the case, *what* is changing...
Presumably you aren't seeing the Z motors index...and the only other thing that correlates to the nozzle to bed distance would be your smooth rods.
There's not going to be a "hump" in your smooth rods like that...
Does this happen on the included gcodes?
Re: Odd artifact, maybe related to mesh leveling?
this is a short duration disturbance, if it were between the build plate and the heatbed, I would expect it to be over a greater distance. because the steel sheet would soften the deformation, and the effect would dissapear on higher layers.
this looks like something is kicking the heatbed up, which would show on every layer..
run a print like the one shown, and rest your fingers lightly on the heatbed, as the extruder passes the points of interest.
I expect you will feel a rise in the heatbed as the extruder passes the affected point...
then all you need to do is identify what is causing the rise.,
Do the heatbed screws protrude below the Y axis?
the gap from the Y frame, to the main frame, front frame and rear frame is very small, however if the screws were colliding with the frames, I would expect the divots to be offset from the mounting screw lines, for example, when the extruder is near screws 6,5,4, all screws are well away from the frame parts... and there is little else to touch...
so I would expect any effect from protruding screws to show about 45mm in front of the middle screws because of the offset between the main frame and the nozzle.
If your ring was centred on the build plate when printed then if the screws were lifting the model as they passed under the nozzle I would expect the affected portion of the circle to be perpendicular to the line of screws, however your picture shows affected part of the ring to be at an angle to the screw line... which could occur if the screws touched the main frame, behind the nozzle...
however if the model is not centred, this factor could be a red herring,
the front y axis smooth rod retaining zip ties have the heads tucked down out of the way. are the rear zip tie 'heads' (locking blocks) also tucked down out of the way?
there is a small possibility that the extruder is kicking down to cause the defect, but the extruder doesn't know where the screws are... so how would it be able to co ordinate with the screws.
good luck Joan
I try to make safe suggestions,You should understand the context and ensure you are happy that they are safe before attempting to apply my suggestions, what you do, is YOUR responsibility. Location Halifax UK
Re: Odd artifact, maybe related to mesh leveling?
Hi lee.o, I am sorry for any confusion I may have caused, that was not my intent. Bare heated bed is smooth to the touch, and appears straight when sighted. Removable springsteel surface is smooth to the touch on both sides, and appears straight when sighted. Mounting screws are definitely below surface of headed bed.
I never printed the included gcodes... didn't have interest in their geometry. Let me know if you think printing one of them might produce useful debugging data.
I initially suspected the Z motors were indexing down, but I haven't figured out a way to tell for sure... I'm printing a vase right now and my fingers are not sensitive enough to feel the leadscrew rotating. The LCD doesn't update the Z position rapidly enough to show short moves like this, e.g. retractions are hit or miss too.
The next time I print that hoop, I'm going to look for some wooden clothespins to clamp on the leadscrews to see if they move. But I was thinking about it, and even if the meshing calculation was messed up, it doesn't explain an artifact over such a short distance. There are only nine measured mesh points, so any meshing correction must occur over a fairly large distance. So I'm thinking mechanical as much more likely than firmware or software.
Artifacts were observed with firmware 3.5.0-something. Perusing the Prusa site I now see there is a 3.5.1 available, I'll try updating that next.
joan.t the artifact is correlated to positions along the Y axis. My hoop/ring as posted was NOT centered on the build plate (red herring); I placed two in diagonally opposite corners, so the artifact as pictured is consistent with the 6,5,4 line and that is why it is not perpendicular to the ring. I agree with your expectation that if it was something clamped between bed and plate, it would occur over a larger distance.
I am not certain that the artifact positions along the Y axis match directly with the probed locations. There is definitely one near the front, and one near mid-Y.
Good suggestions on searching for a rise in the heatbed, when this vase finishes I'll try them. Hard to see on the vase, but it looks like it has the same artifact going up the side, at least 3cm.
I think my zip ties on the Y rods are properly positioned and trimmed. One front

and one rear

pictured, do these look okay? The other side of each is similar. Also, when I seated the Y rods they made that satisfying thunk as they clicked into position; the zip ties merely hold them in place. I tightened the Y rod holders after zip ties were in place and with the Y carriage near that end.
Re: Odd artifact, maybe related to mesh leveling? (User error in assembly)
joan.t was right, I was able to feel the bed kick up while printing. Oddly, it occurred at different locations when the bed was moving positive Y vs. moving negative Y.
I tried moving the bed manually with the control panel, and heard a very faint clicking sound like something was binding. But over the noise of the stepper, and having to twirl the knob frantically to get full Y travel, I couldn't tell exactly where or what it was.
Unplugged, I tried moving the bed forward and back, but the poles of the stepper made it really hard to tell what was going on.
So I flipped the printer onto the power supply side, and detached the Y motor from the frame to drop the belt free. Moving the table back and forth, it had distinct binding points along the travel that were not there when I first built it. I was quite sure the Y axis moved very freely.
I investigated a little more, and found that the U-bolts holding the linear bearings in place were just colliding with zip ties that I used to secure the control panel ribbon cables to the extrusions after mechanical assembly was complete. This forced the bed up as it traveled over the zip tie. I'm pretty sure they did not interfere when I first installed them, but perhaps they bowed up over time. Or they had interference all along that I never really noticed until I started trying to make precision parts to fit together.
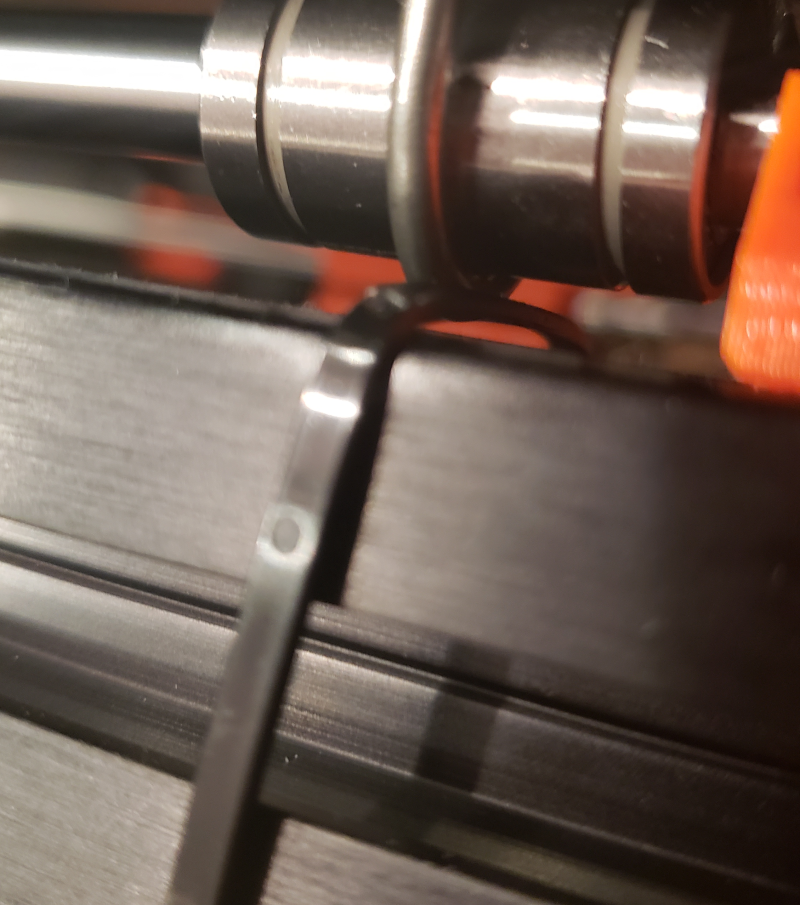
The front artifact 1,2,3 was due to the front linear bearing U bolt hitting the front zip tie, pictured above. The middle artifact 6,5,4 was the rear U bolt hitting the rear tie (which was just forward of the vertical frame). There was another middle artifact when the front U bolt hit the rear tie. There was no artifact in 7,8,9. The zip ties moved a little with each impact, so the site of the interference moved slightly on each pass too. This also explains why the binding points and artifacts were not in the same place depending on which way the Y bed was traveling.
So the short version is, I made an error when I zip-tied the ribbon cables in place to the extrusions. Don't do that. 😀
Re: Odd artifact, maybe related to mesh leveling?
Glad I could help. Would never have guessed additional zip ties.. .
Bed attachment Screw locations were a red herring after all. :D... Just a co incidence
Good luck with your future models.
Joan
I try to make safe suggestions,You should understand the context and ensure you are happy that they are safe before attempting to apply my suggestions, what you do, is YOUR responsibility. Location Halifax UK
Re: Odd artifact, maybe related to mesh leveling?
if a few of these were included in the kit and instructions on where to place them this sort of interference could be eliminated. those illustrated at the bottom are 19 mm X 19mm and cost retail $8 for 100. including shipping... they are sold in many different sizes. tossing a few in with the zip ties would not affect the costs on the kit for Prusa
and of course there are many variations of these on Thingverse if you just need a few to print
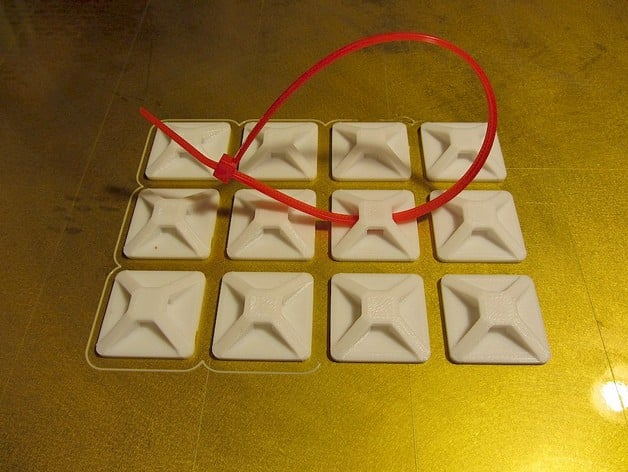
https://www.thingiverse.com/thing:1800896
and you can scale them to the size you need and if they are to be held by foam tape or screws or superglue. designs for all can be found on line
Re: Odd artifact, maybe related to mesh leveling?
The objects in the post above are called 'sticky-backs' in the electrical trade around here. Having been in that business for decades, I can tell you that the 'sticky' part is one of life's great lies, right up there with 'one size fits all' and 'the check's in the mail.'
With careful surface preparation, they will stick for a while, but can be depended upon to pop loose at some point in the future. Best look into a way to secure them in place with screws if you depend on them for something besides making a job look good until you get your tools out of the building.
Re: Odd artifact, maybe related to mesh leveling?
surface prep and super glue perhaps? I have high strength double sided tape that I use in the machine shop to aid in fixturing sometims but You are correct I have no idea how that foam centre tape would do over time (the stuff I use it is thin with no foam centre which seems to be the way the zip tie things are attached if they don't use mechanical fastening).
yet I grab old inkjet and laser printers and xerox machines at the dump from time to time and strip them of useable parts and I see these used inside the larger office copy machines with foam centre double sided tape and I have to run a blade through the foam layer in the centre of the tape to get them off so there do seem to be different grades of this sort of product
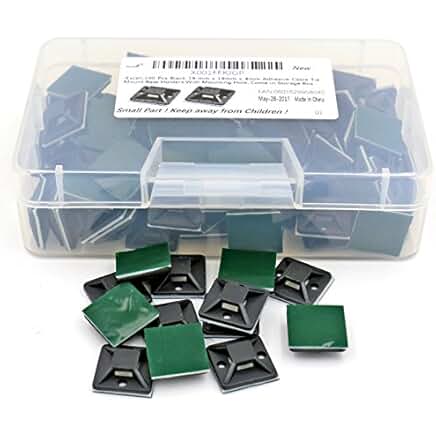
for the illustration above I just grabbed the first Amazon version I saw with a 19x19mm size and have no idea if the tape it uses is any good so I guess like anything else it comes down to the quality of the individual brand.