Photo
A couple of those might be low or it is an optical illusion.
--------------------
Chuck H
3D Printer Review Blog
2¢
ok, so i did the adhesion test, last thing for today. hope this is a good result and some information comes out of it 🙂
Those look pretty good. Give 'em a poke to verify it's sticking well. It's always tricky looking at pics, but you've definitely got the hard part done. Look at those bits where some has come up to make sure nothing's dragging or lifting. You can always get things a little better, but you now should have a good idea of what "good adhesion" looks like on the PEI sheet. Don't settle for less!
@Swiss_Cheese
I'm trying to learn how to fine tune the settings to print the fillets better. To test I got the fillet chamfer test cube from Makers Muse. I have been playing around with the settings and printed several versions but still not happy with the results. This is what my most recent settings looked like:
@asemer
I'd like to help but, there are so many settings I cant see, my recommendations would be very limited relative to the specific model , would you be willing to post a .3mf or perhaps if you don't what to post here you can contact me in private, either way is fine by me.
All that said, your external perimeters need to overlap a bit or they will not be able to achieve the angle your showing in the image, the way to start this would be to lower your first layer to something like 0.1 then adjust the layer heights after that to a height that allows for the external perimeters to continue to overlap until the angle of the print achieves something around the 60 degree mark. using lower layer heights in conjunction with wider extrusion widths is the way to do this. 0.6 is probably to much relative to the image shown. there is actually a lot more but its easier to show then just tell.
If you can post a .3mf I will provide an example. It's best if we are using the same model.
Regards
Swiss_Cheese
The Filament Whisperer
RE: It's a demo of underside chamfers versus fillets
I'm trying to learn how to fine tune the settings to print the fillets better. To test I got the fillet chamfer test cube from Makers Muse. I have been playing around with the settings and printed several versions but still not happy with the results.
Do keep in mind, the purpose of that test print is precisely to demonstrate why underside fillets are difficult and why chamfers are preferred. You can get an underside fillet looking "good" but a chamfer under the same conditions will usually look "better".

your 2cents
@bobstro
Thanks for clarifying. Adhesion was good i'd say, the middle disc did not come off easily at all, the support lines needed some scraping too, but could be removed more easily.
So now that i sort of confirmed that adhesion is not the main cause of my initial problem, what would be the next steps to find the cause? I think that fillet/radius test piece could be a possible trial? Like originally stated, i get bad overhang quality (i think it starts to get bad way before 45°) and the horrible curling on bridges that results in the part getting nozzle-slammed and lifted from the bed.
Analytical view: Since i am satisfied with overall print quality, bed leveling and adhesion, that leaves following causes for the bad curling: Filament quality, temperature/drafts of the environment, print settings (also temperature, speed, maybe extrusion settings?) Would you agree? On which area should i work on next?
@cwbullet
regarding if some lines were low, in reality they looked quite homogenous to me, so almost all would have to be low. Might have been the lighting? But i definitely had little noses where the nozzle lifted off to start the next square.
removal.
@bobstro
Thanks for clarifying. Adhesion was good i'd say, the middle disc did not come off easily at all, the support lines needed some scraping too, but could be removed more easily.
So now that i sort of confirmed that adhesion is not the main cause of my initial problem, what would be the next steps to find the cause? I think that fillet/radius test piece could be a possible trial? Like originally stated, i get bad overhang quality (i think it starts to get bad way before 45°) and the horrible curling on bridges that results in the part getting nozzle-slammed and lifted from the bed.
Analytical view: Since i am satisfied with overall print quality, bed leveling and adhesion, that leaves following causes for the bad curling: Filament quality, temperature/drafts of the environment, print settings (also temperature, speed, maybe extrusion settings?) Would you agree? On which area should i work on next?
@cwbullet
regarding if some lines were low, in reality they looked quite homogenous to me, so almost all would have to be low. Might have been the lighting? But i definitely had little noses where the nozzle lifted off to start the next square.
It was probably the lighting. You know more being there and being able to see it in 3d and rotate to get better lighting. If you did have trouble removing one part, it might be a tad low in that section. You can raise your Z like 0.005 and see if that improves.
--------------------
Chuck H
3D Printer Review Blog
rising z
@cwbullet
You got a point there. When i calibrated Z with Jeffs 75x75 tiles, I iterated from -1.185 to -1.200 with good adhesion and only little difference in perceived quality. In the end i kept -1.200 because i like round numbers and thought: "more squish, more adhesion". But i have in the back of my mind that i also could go back up by 0.005 to 0.010 without losing much. I can also run some 75x75 squares again and take detailed pics for you to inspect. thanks!
Go slow and focus on one problem at a time
[...] Adhesion was good i'd say, the middle disc did not come off easily at all, the support lines needed some scraping too, but could be removed more easily.
I think your adhesion is pretty solid at this point.
So now that i sort of confirmed that adhesion is not the main cause of my initial problem, what would be the next steps to find the cause?
Did you do any cooling testing per @swiss_cheese's suggestion? Does one side of the print look worse than the other? Does rotating the part on the bed make a difference? If so, that often indicates a cooling problem.
I would suggest chasing one problem at a time and avoid "challenge prints" like the Maker's Muse fillet/chamfer test. Those are meant to show the worst-case and are good "final exam", but you want to prepare to print those. The first thing I'd do (sorry if this is a repeat) is calibrate my extrusion multiplier. Any of these problems are going to be made worse by even slight over-extrusion.
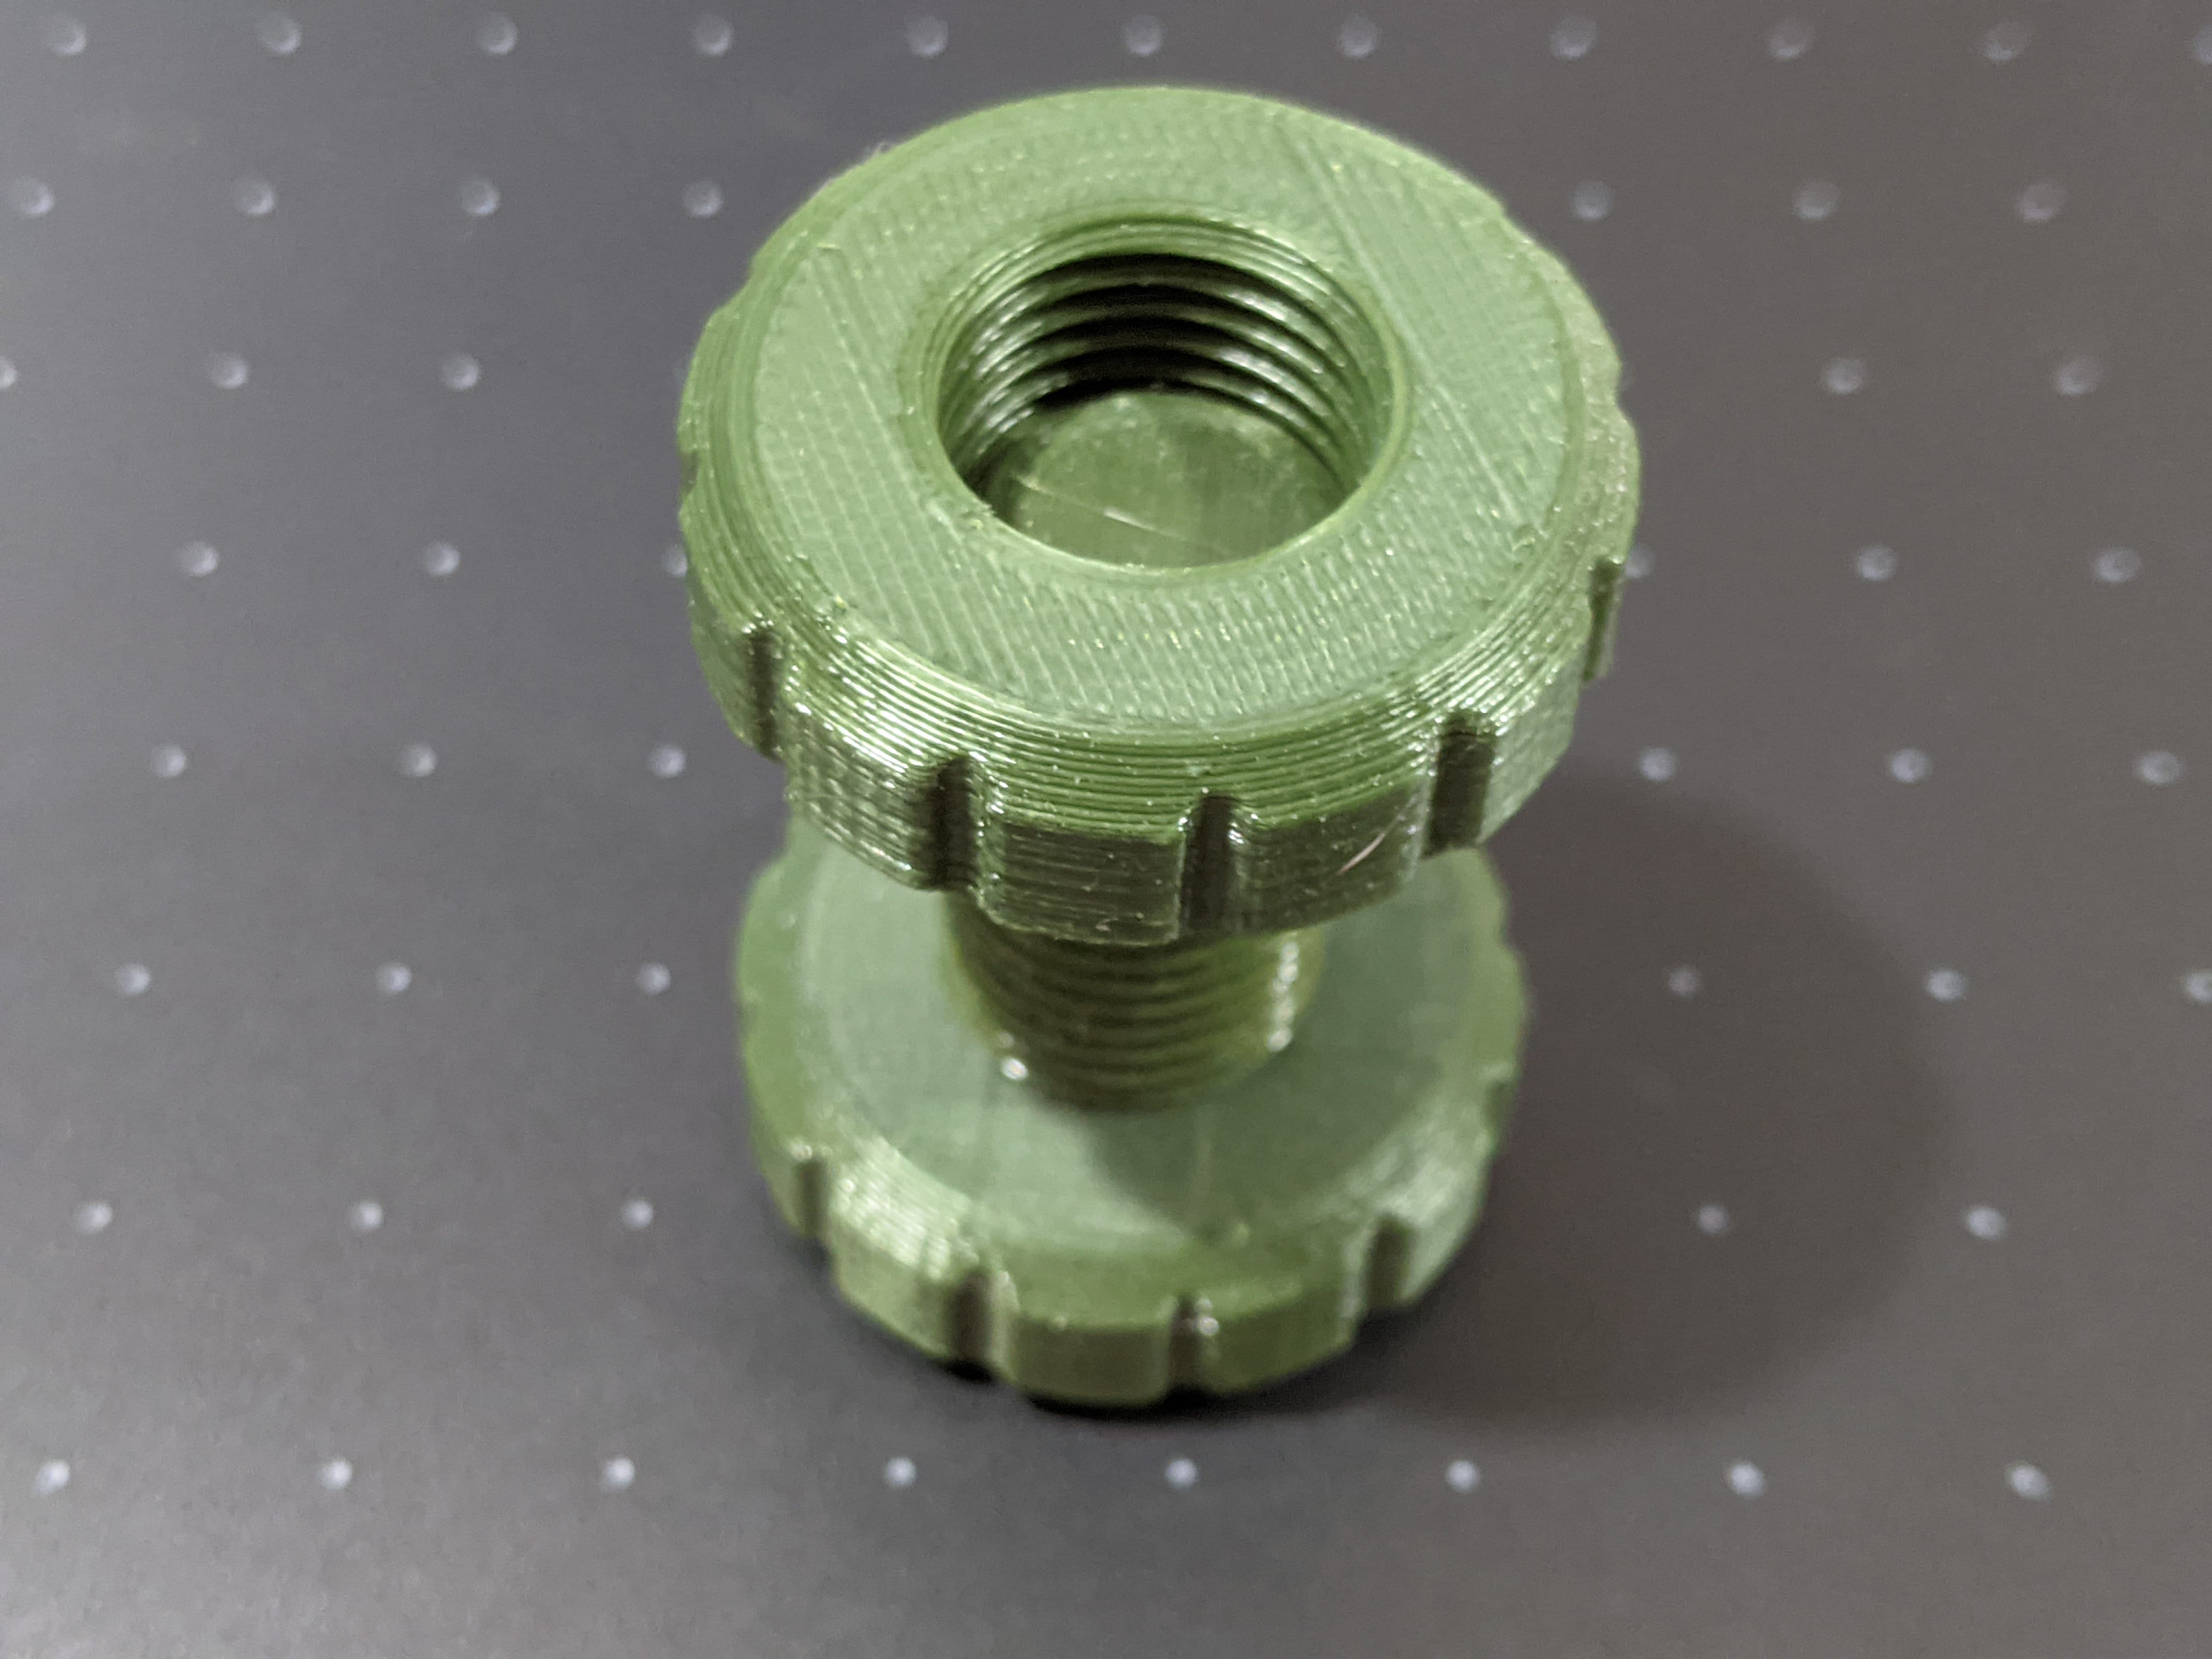
I'd ignore the underside fillets for now -- those are known to be problematic -- and focus on that screw print. Find a small, quick-to-print test to work with since you're going to want to make many iterations. The Prusa Mk3 is perfectly capable of printing very good threads. Here's a little 20mm nut & bolt set I whipped up in Fusion 360 using default thread settings. I did not increase tolerance or make any other adjustments to accommodate printing on the Mk3. The nut spins freely with a flick of my finger:
Things I've found impact threads:
- Calibrate extrusion multiplier (always)
- Temperature (use reduced temp if possible, or increase cooling -- depends on filament and strength requirements though)
- Reduce layer height
- Increase extrusion width
- Reduce speeds (particularly for inside nut threads)
I think that fillet/radius test piece could be a possible trial? Like originally stated, i get bad overhang quality (i think it starts to get bad way before 45°) and the horrible curling on bridges that results in the part getting nozzle-slammed and lifted from the bed.
If the part is lifting into the path of the nozzle, inspect the underside to see if it's lifting. Larger parts will tend to warp. Now that you know your bed adhesion is not a problem, you might want to try a brim or "mouse ears" on lift-prone parts of the print to help hold it down. Adhesion boosters can help in some cases, though I don't find them necessary on the Prusa PEI. Again, focus on ONE THING (either undersides or bad bridging) at a time for fastest results.
Analytical view: Since i am satisfied with overall print quality, bed leveling and adhesion, that leaves following causes for the bad curling: Filament quality, temperature/drafts of the environment, print settings (also temperature, speed, maybe extrusion settings?) Would you agree? On which area should i work on next?
Are you printing in unusual ambient conditions? Enclosures are problematic with PLA in hot temperatures. Are you sure your filament has not absorbed moisture? That will cause filament to behave badly and could account for some of the results in your 1st set of pics.
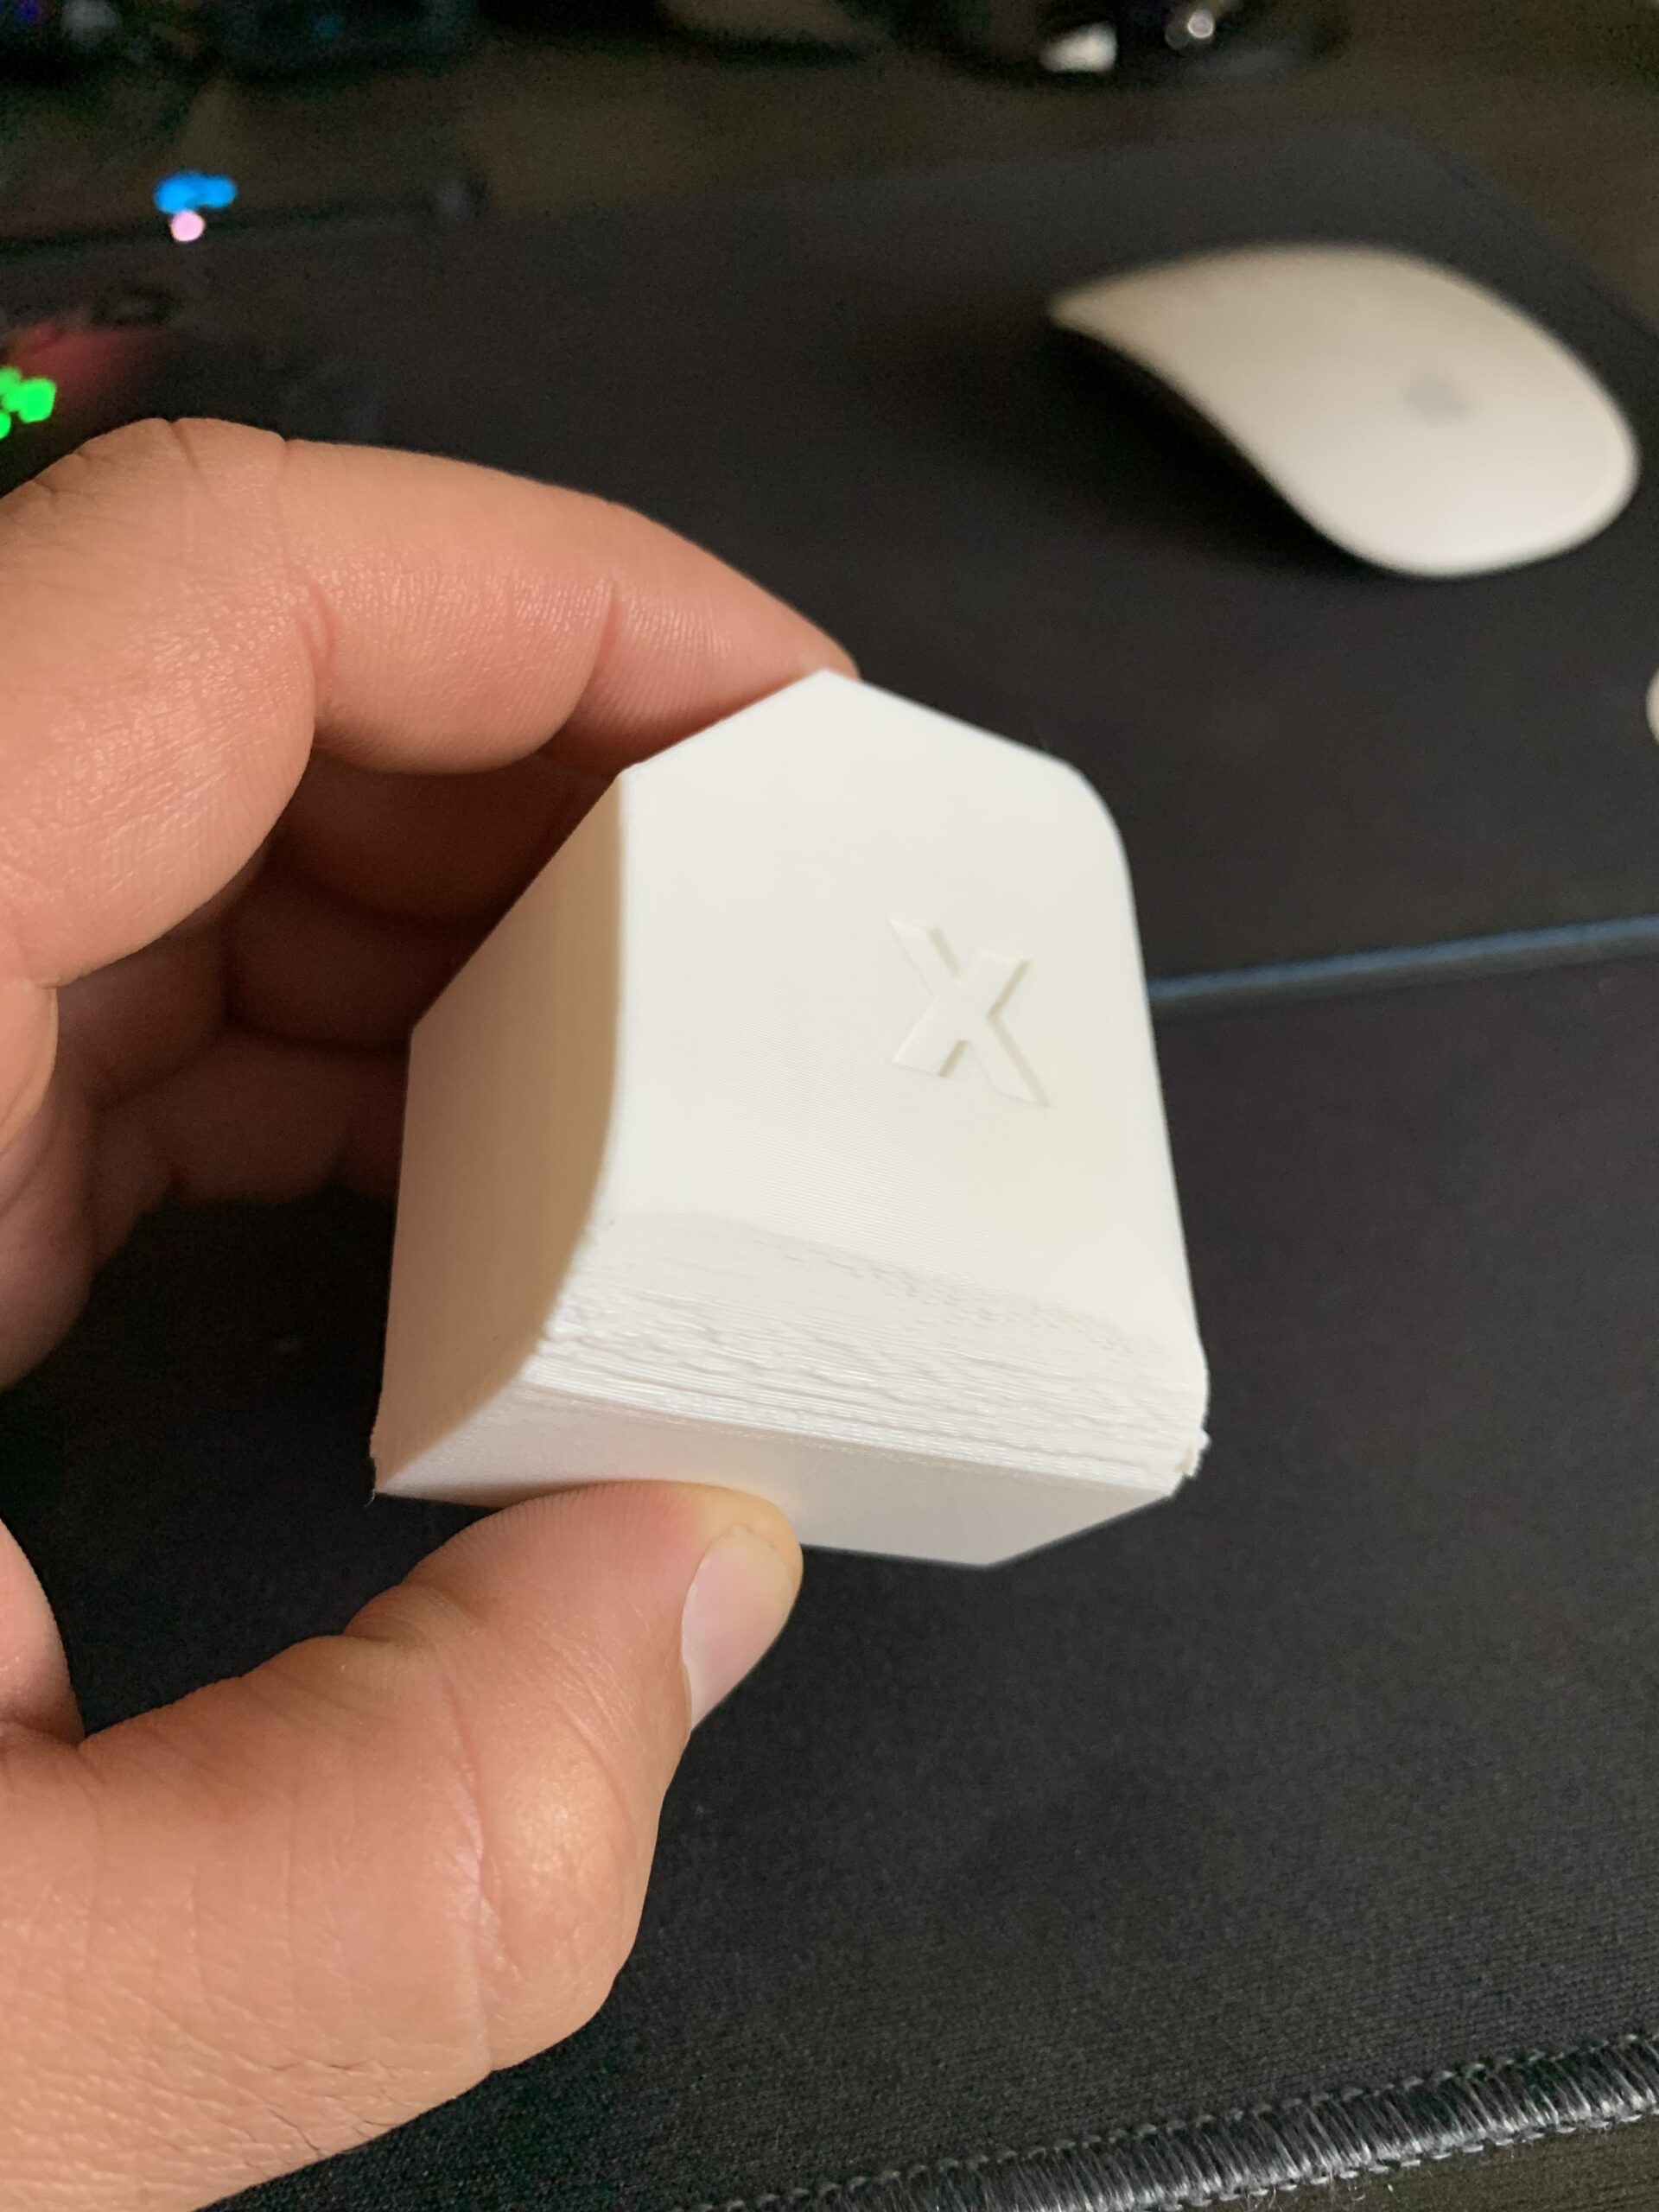
Again, I'd focus on some of the simpler tests until you're happy with those results, then try more complicated prints. The Make benchmarks are handy and fast to print. A small XYZ cube is a quick test of print quality. This version even adds chamfers.
@swiss_cheese @bobstro
Sorry for the late response I've had to put things on hold for a bit. Here is the project file for the filet test and some pictures of the results. I'm also not getting good results on the chamfer side which leads me to believe I'm doing something wrong. Basically I added a height range modifier from 0 - 3mm and you can see the rest of the settings in the file.