Switched from standard grey PRUSA filament to "Gentlemen's Gray" and now print failures
I've been using my PRUSA for over six months, always using the standard grey PLA filament from PRUSA. No problems. Lots and lots of great prints.
I was running out of that filament and wanted to order more, but PRUSA was out of stock for it, so I ordered the PRUSA "Gentlemen's Grey" filament, since color doesn't really matter to me. When the printer finally ran out of the standard grey I loaded in the Gentlemen's Grey and it just wouldn't stick to the bed. I went through all the calibration routines and the prints still wouldn't stick. Plus all sorts of blobs of filament. I cleaned the print bed just like I always have, but that didn't improve the prints. Still not sticking properly and still lots of blobs.
I ran the First Layer Calibration and cranked the print head way down so it LOOKED like it was nice and close to the print bed and printing good lines but even with that the test lines that it was printing would get pulled off the bed as the print head moved. And, as before, lots of blobs of filament.
Is there something different about the consistency of Gentlemen's Grey compared to the normal grey filament? Did I just get a bad batch (I purchased FOUR rolls!) ?
Best Answer by rogerinhawaii:
AND THE ANSWER IS .... ACETONE !!!
OK, I finally have my printer printing successfully, with the prints properly sticking to the print bed. How? By refreshing the print bed with acetone. I wasn't aware of the need to do that, must have missed that in the user manual. I kept searching around on the Internet and came across a video about using the PRUSA, explained my situation to the video creator and he asked, "Have you refreshed the print bed lately?" And I said, "What?" and said "Acetone" and I said "Acetone?" and he said "Yup, you need to refresh the print bed every once in a while. Cleaning it with isopropyl alcohol once in a while is not enough, you really need to get it super clean with acetone about once a month". So I did. And now the prints are sticking just like old times and everything is honky-dory.
RE: Switched from standard grey PRUSA filament to "Gentlemen's Gray" and now print failures
Posts some photos of the first layers and print failures.
--------------------
Chuck H
3D Printer Review Blog
RE: Switched from standard grey PRUSA filament to "Gentlemen's Gray" and now print failures
At the point when I ran out of the filament that I had been using (the exact same kind of PRUSA filament that comes with the kit, i.e. the standard grey filament) I loaded my newly purchased PRUSA "Gentlemen's grey filament. I didn't make any other changes. I did not do any calibrations. I just changed the filament.
I then did a print of an object that I have successfully printed several times before, when I was printing with the standard grey filament, but now was printing with the Gentlemen's Grey filament. And this is what I got. I stopped the print as soon as it beamce obvious that it was really messing up...
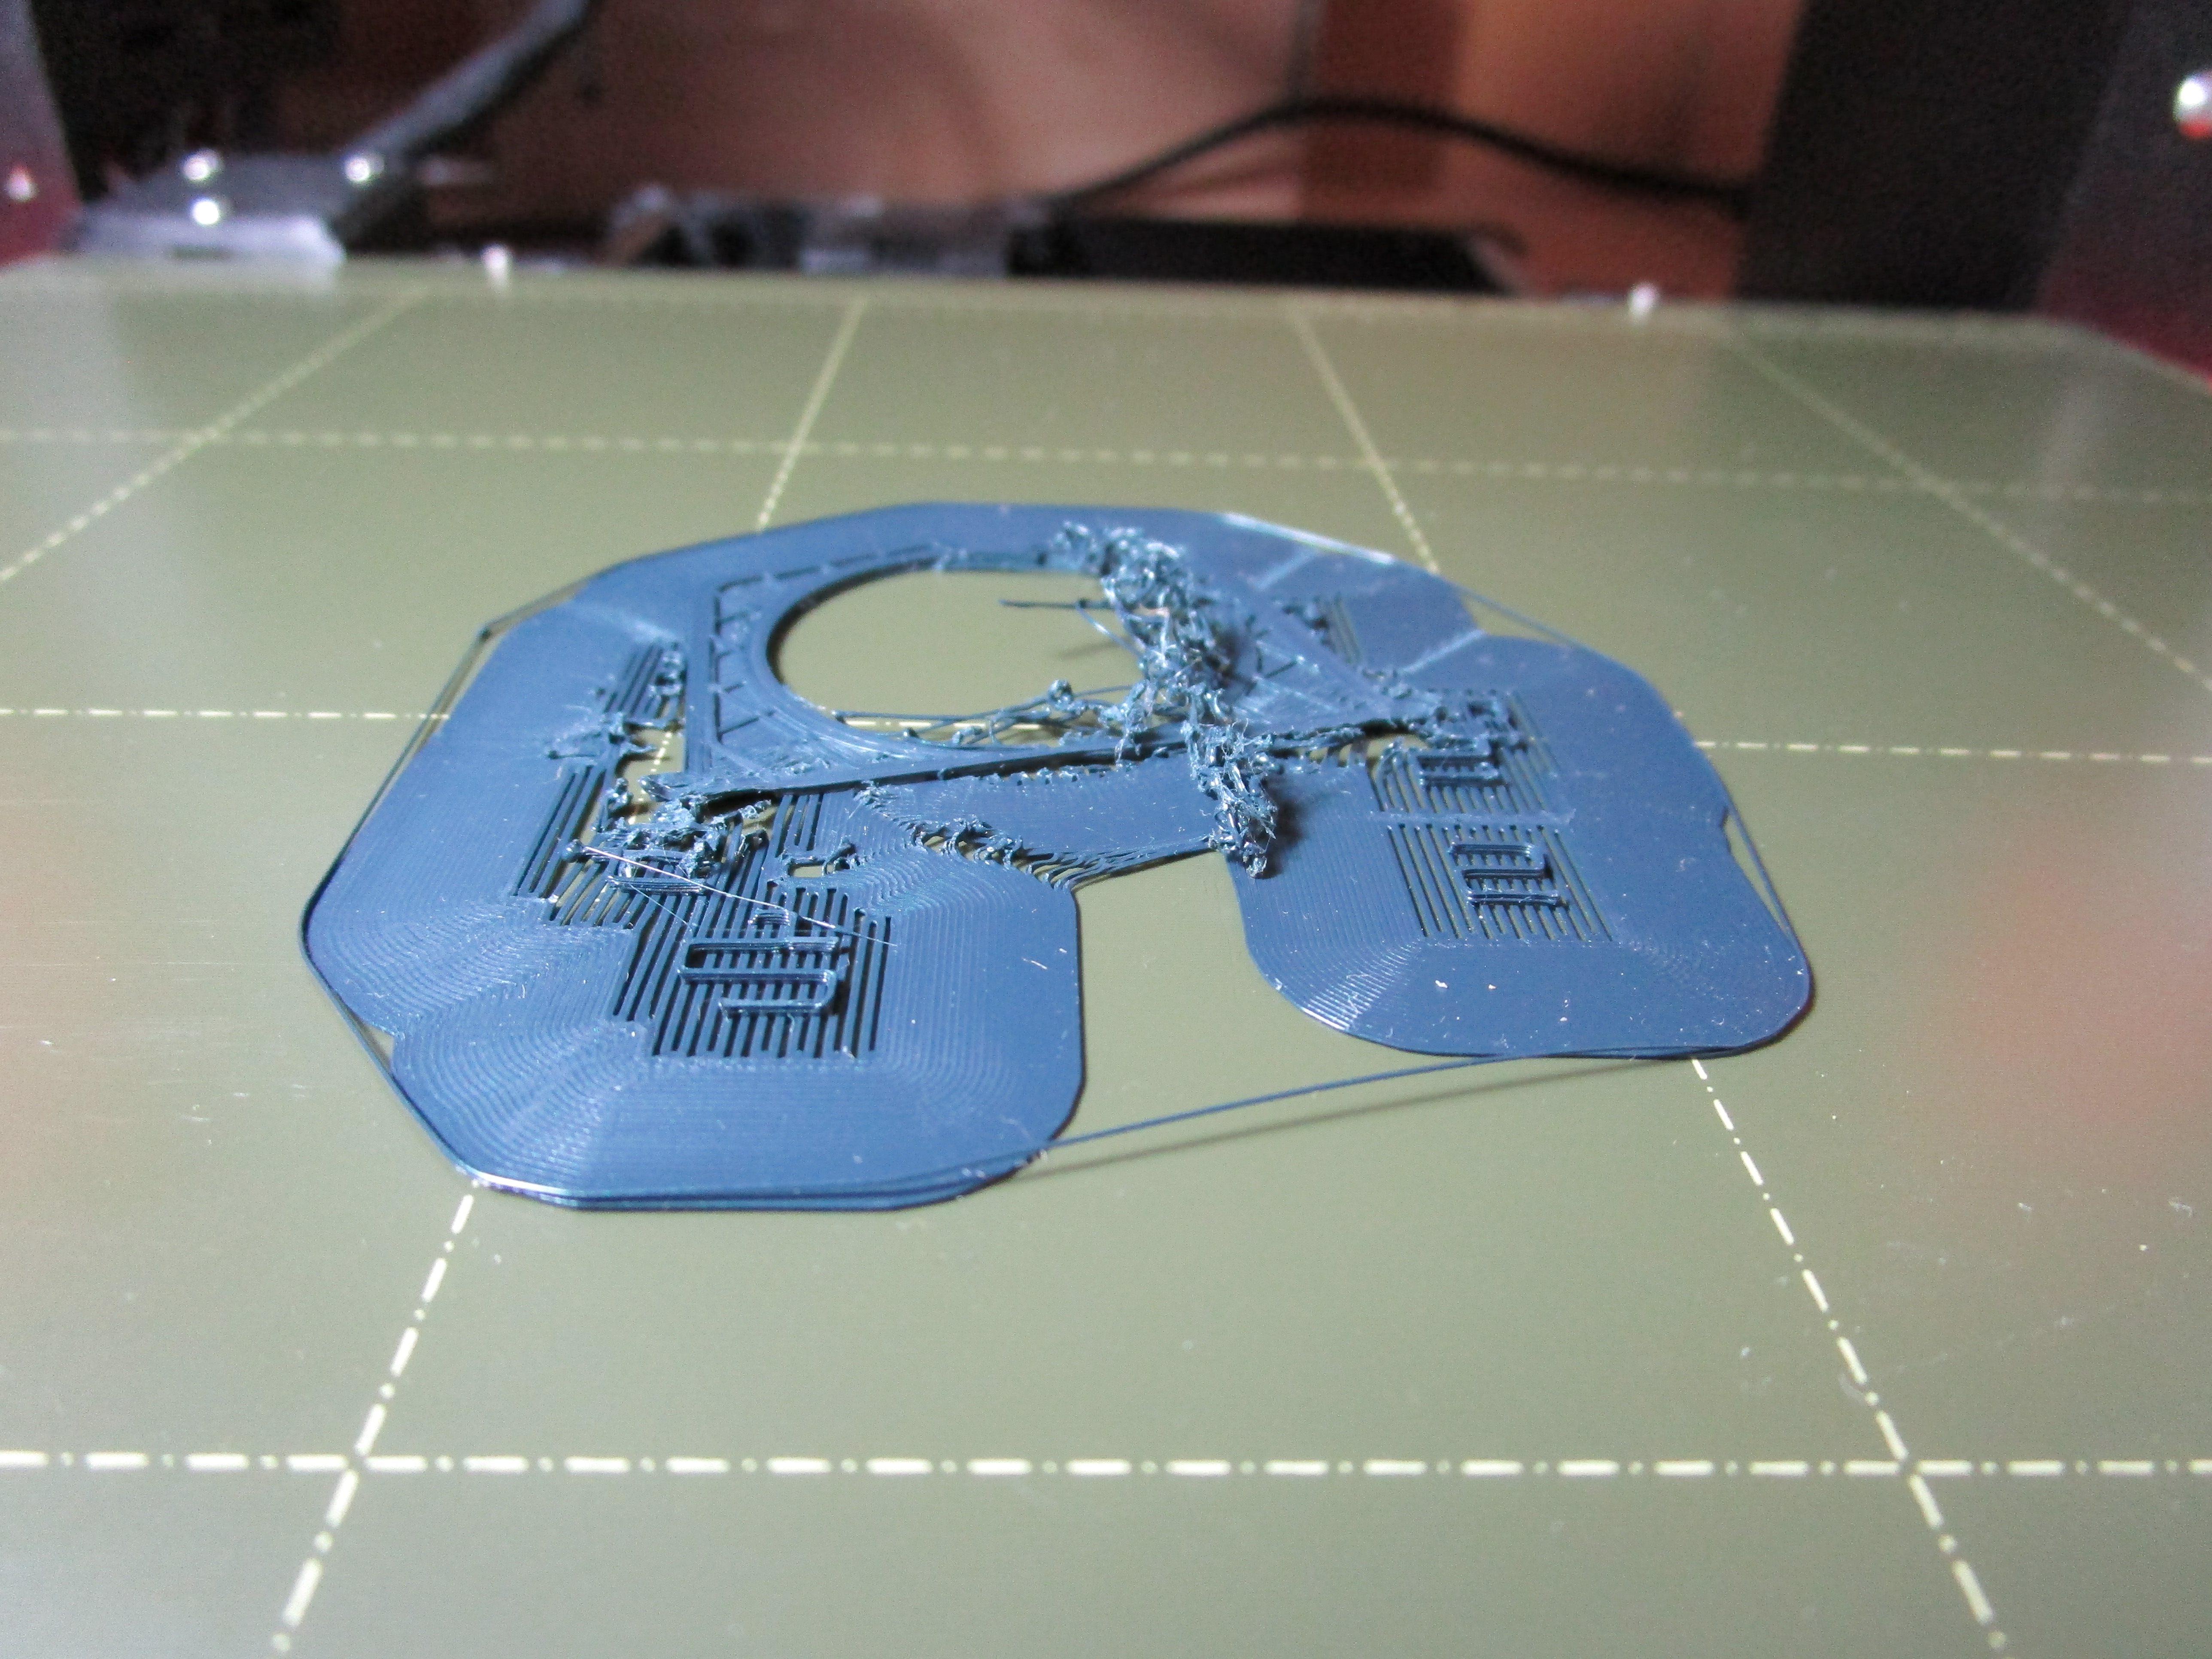
I cleaned the bed and tried a different part, again one that had been successfully printed numerous times previously with the standard grey filament, but now printing with the Gentlemen's Grey. Again, another failed print...

That one was just several completely flat objects, just 3 mm in height. And at one point the print head snagged on something and pulled the whole thing off the print bed.
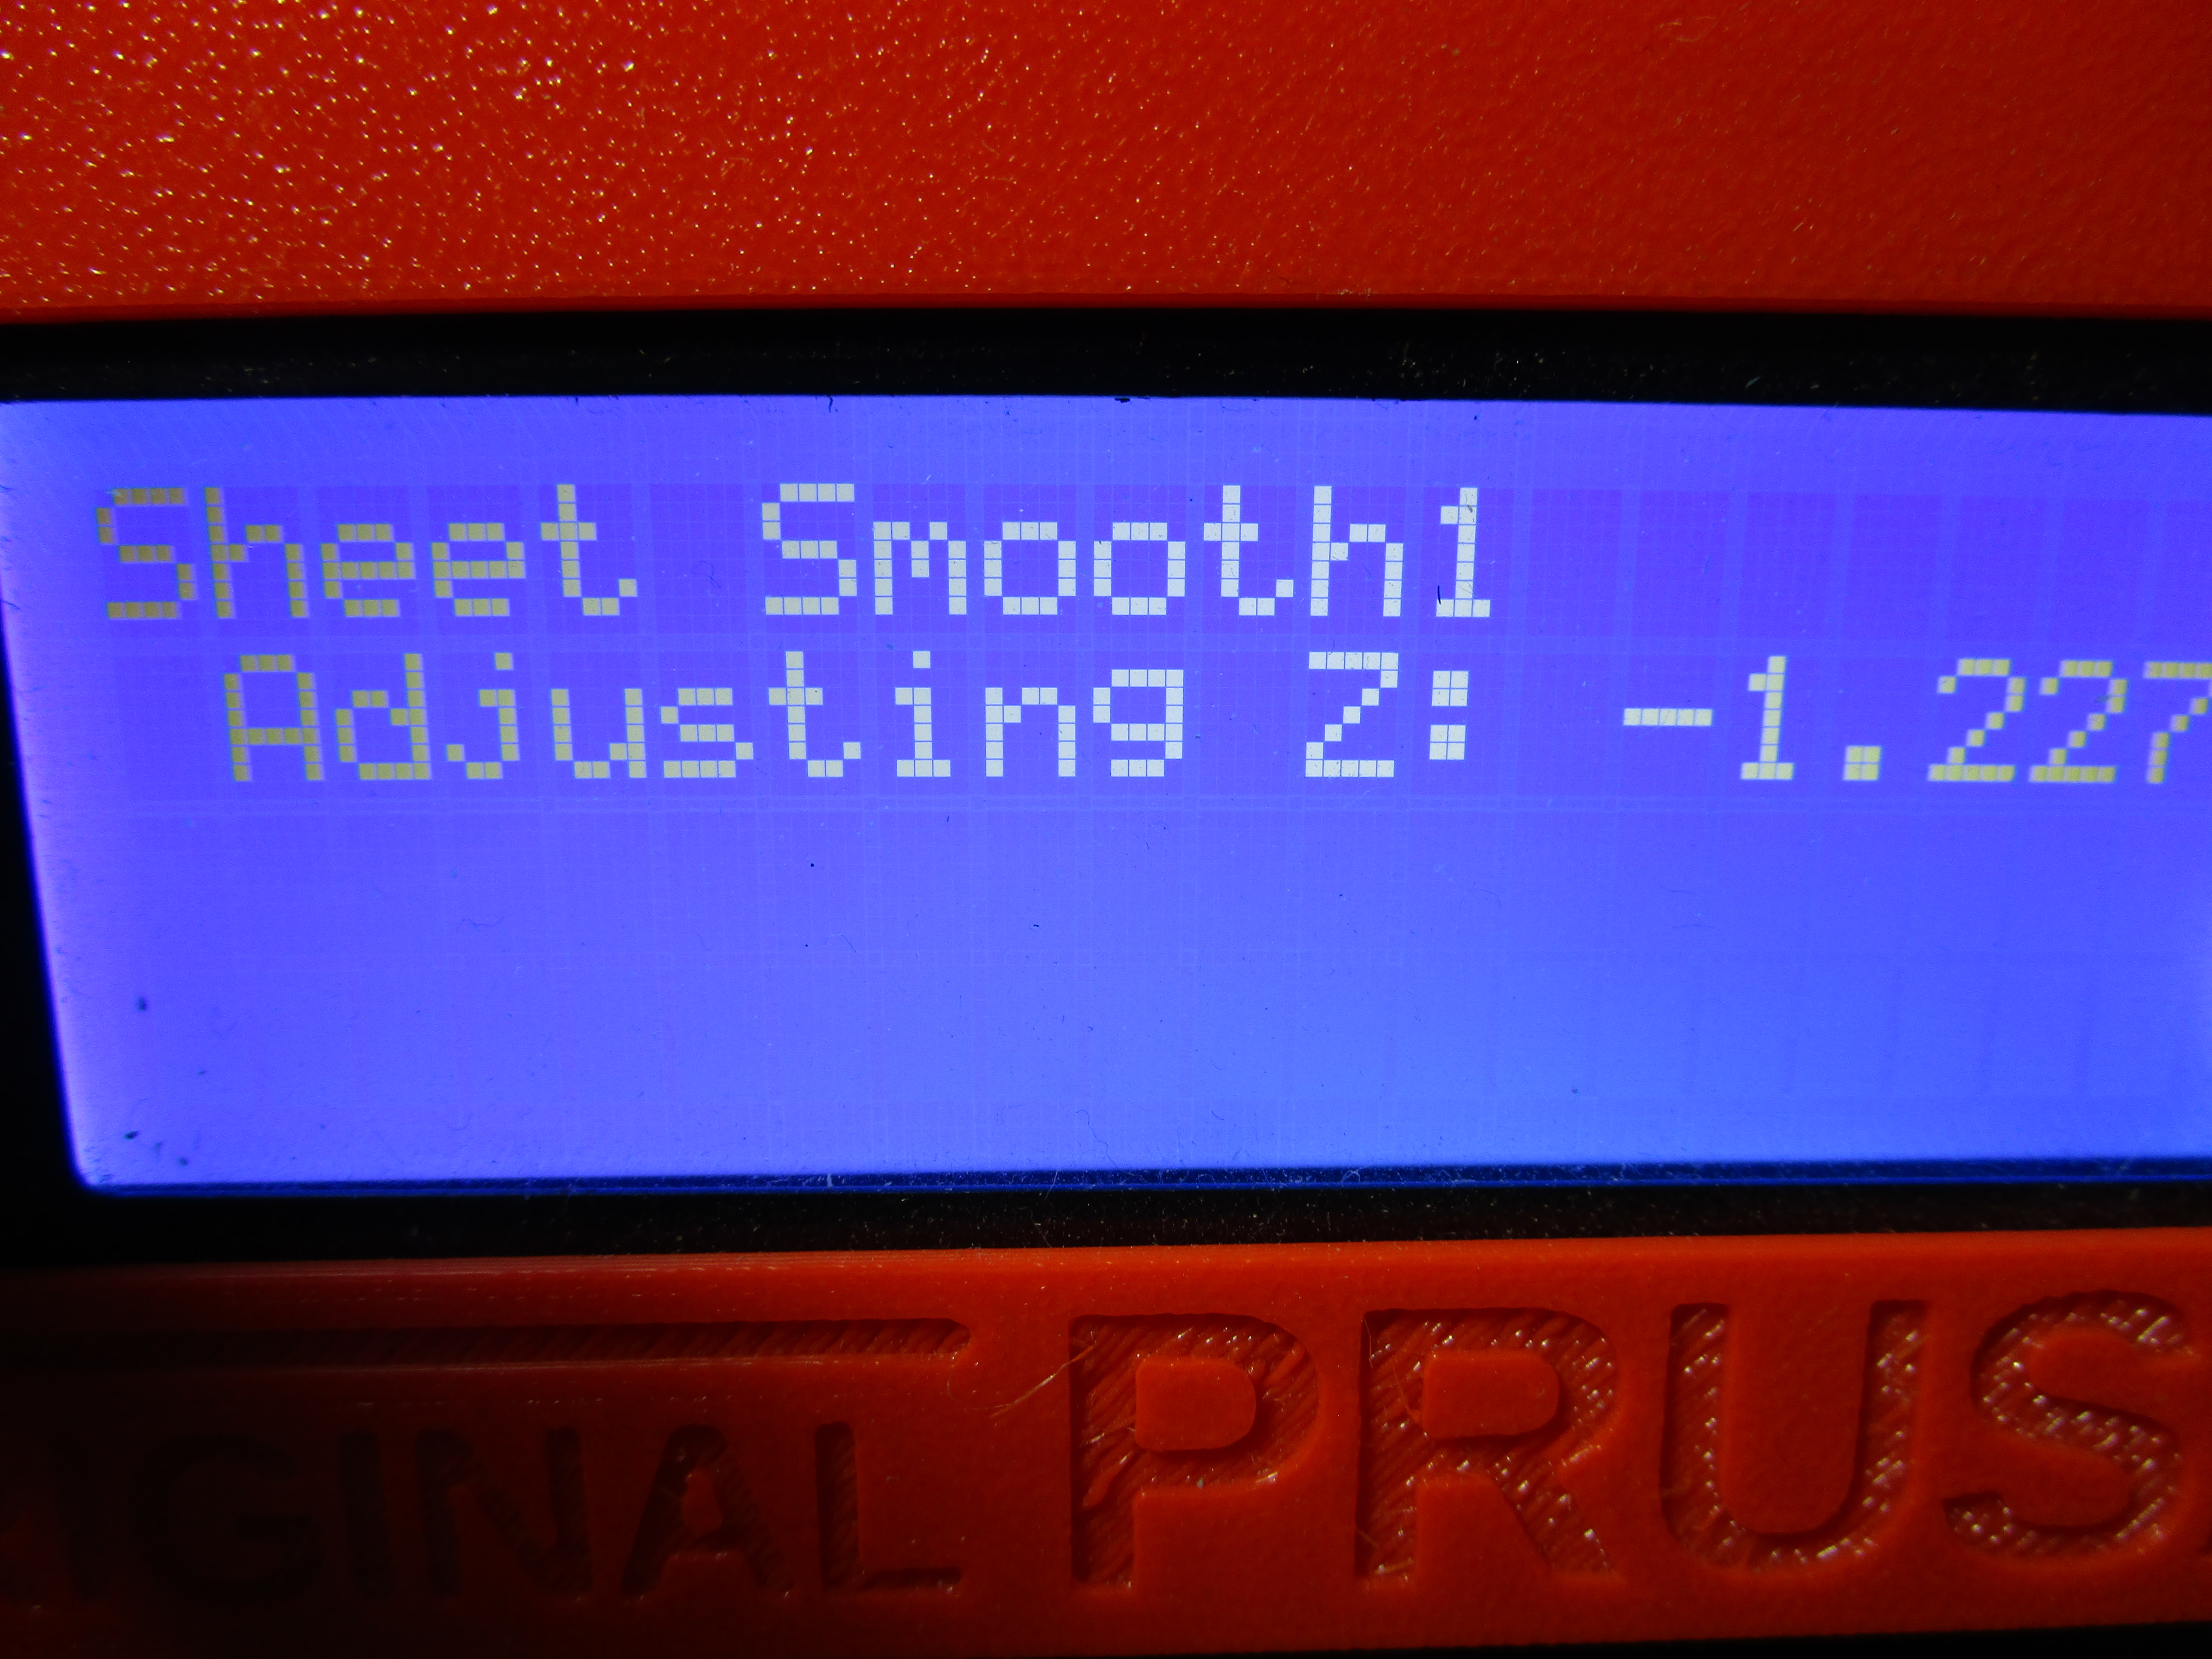
I cleaned the bed but this time also did a an XYZ Calibration and a First Print operation. I watched the print head and the lines of filament that it was laying down very carefully and adjusted Z height as it went along. Initially the head was way too high and just dropping the filament onto the bed, but over time I adjusted it so that it seemed to be properly laying down a good line of filament right on the bed, as it had been doing for months prior. I had to adjust it all the way down to -1.227, which seemed excessive. I was afraid to go any further for hear of impinging on the bed itself.
I did another First Print and here's what the initial line of print looked like:
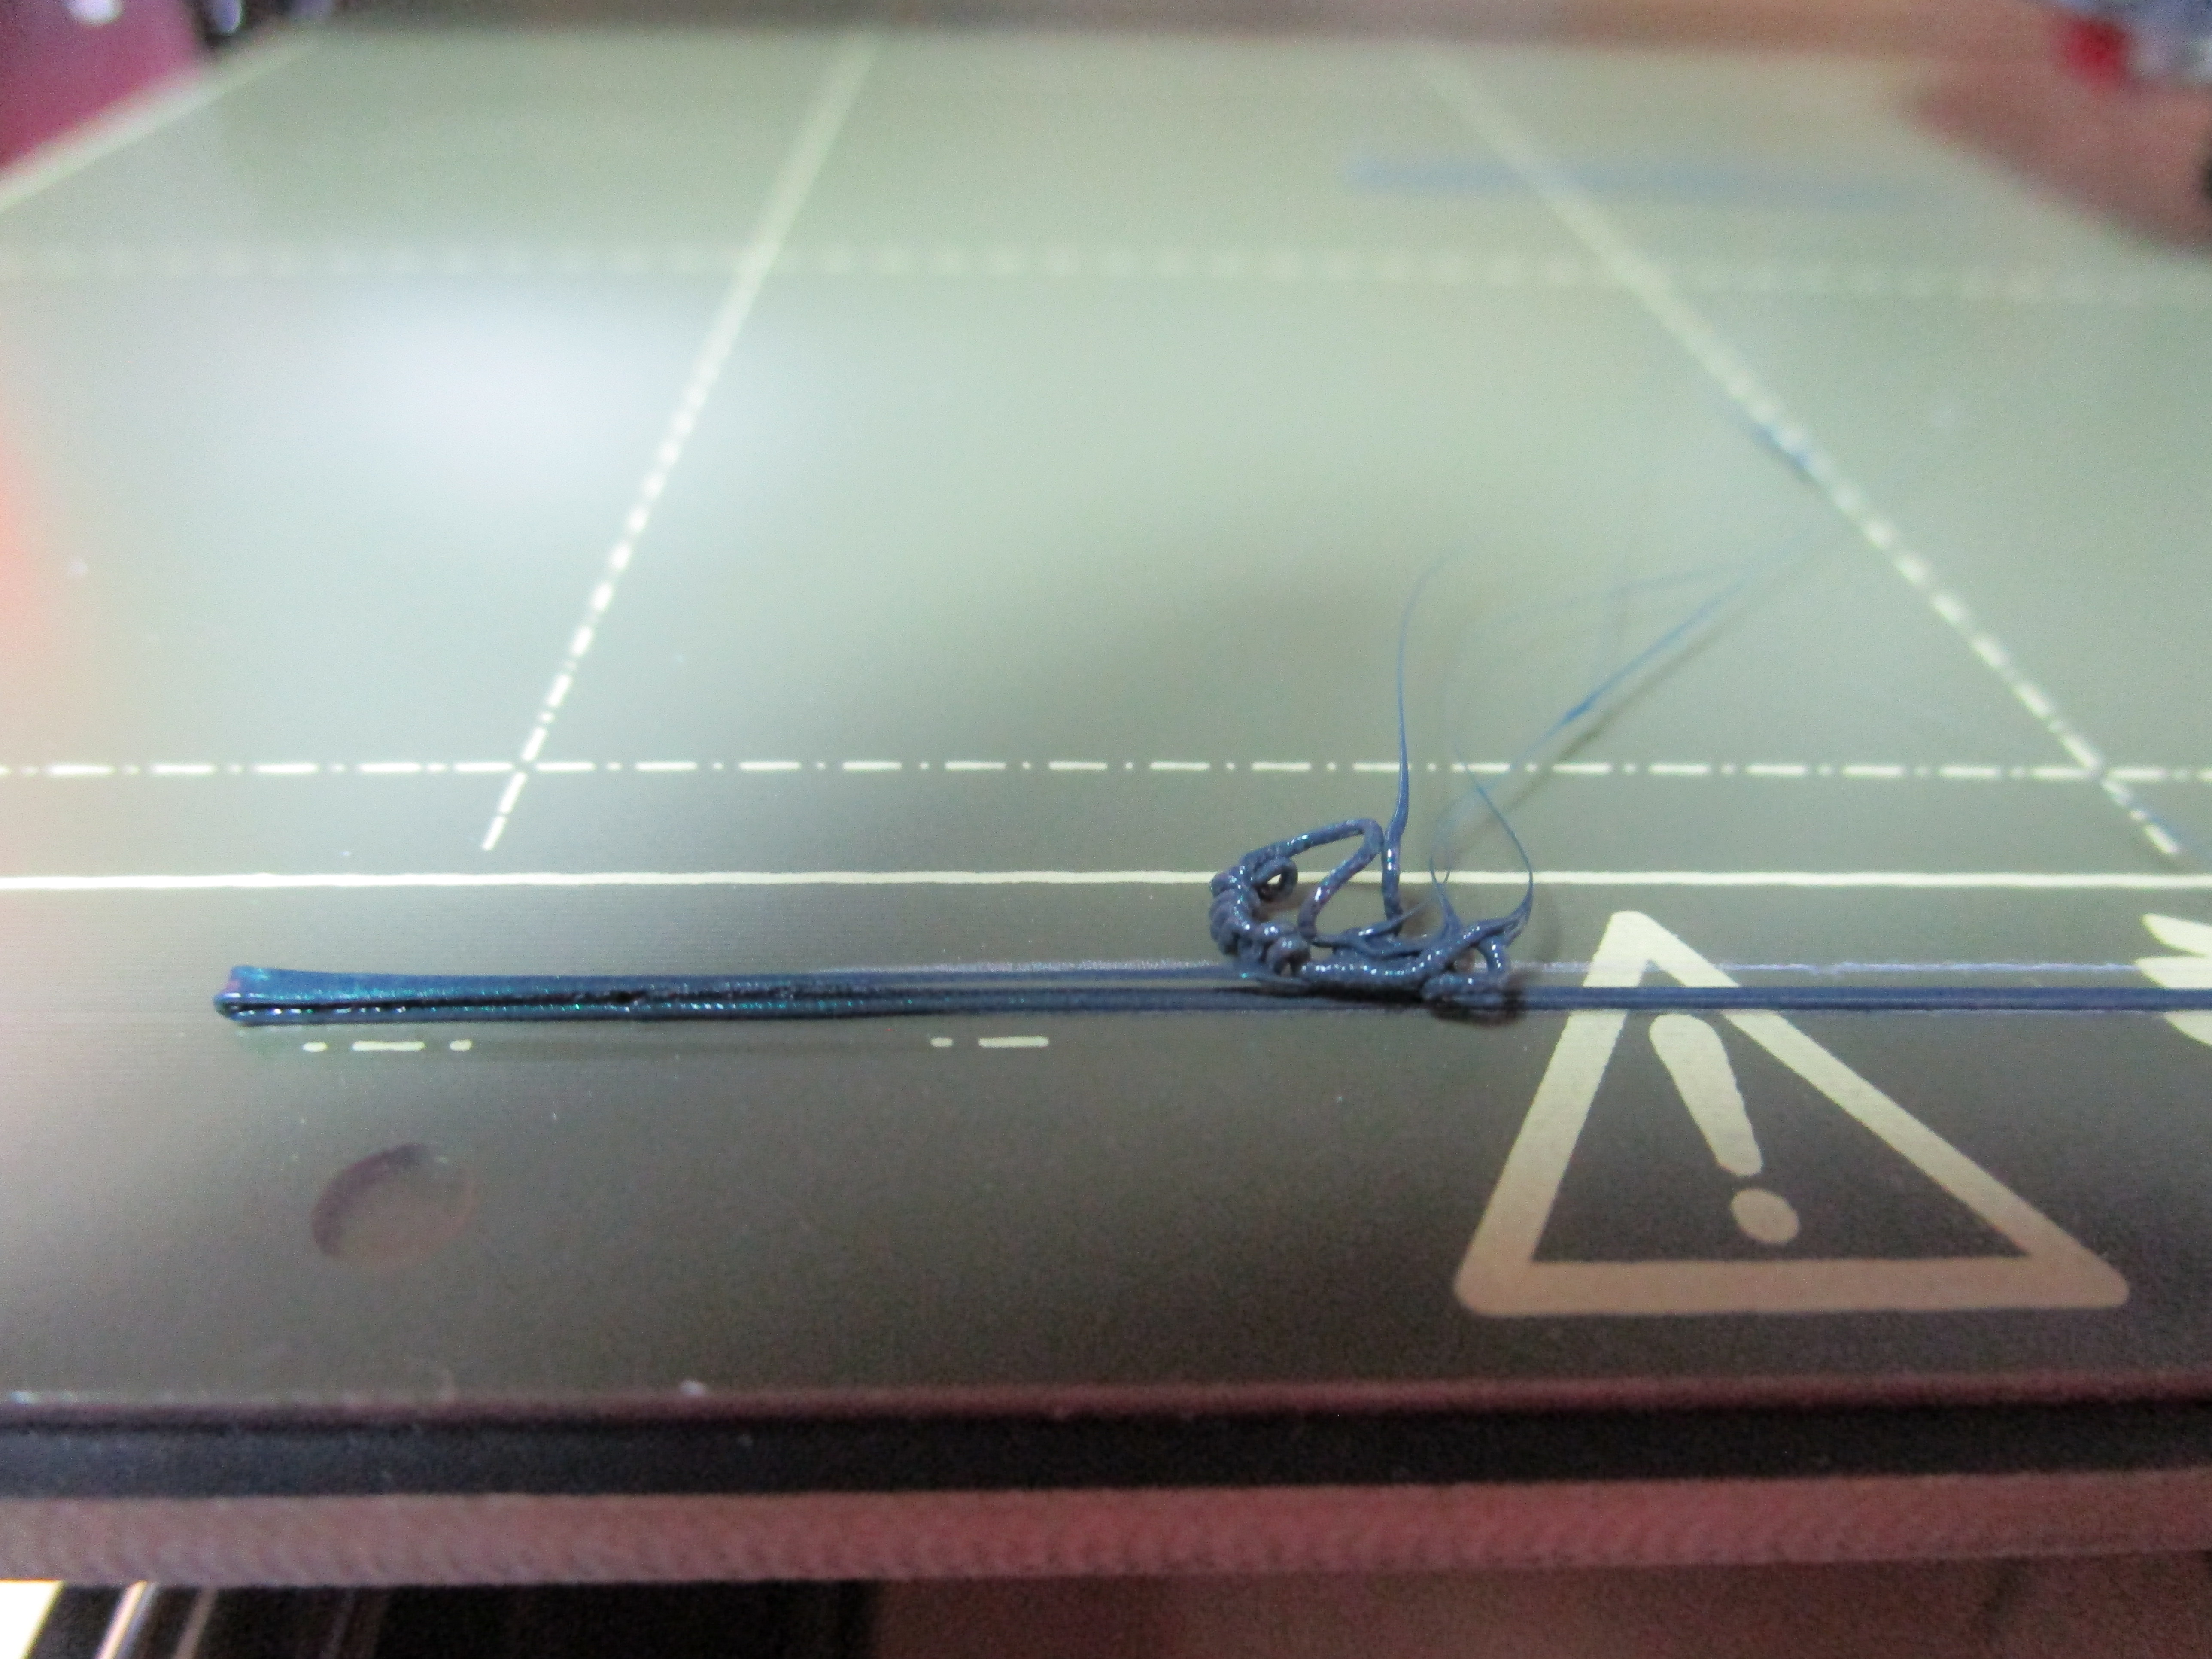
This is what it looked like after the entire First Print was completed. Some of the lines are firmly attached to the bed, others not attached at all.

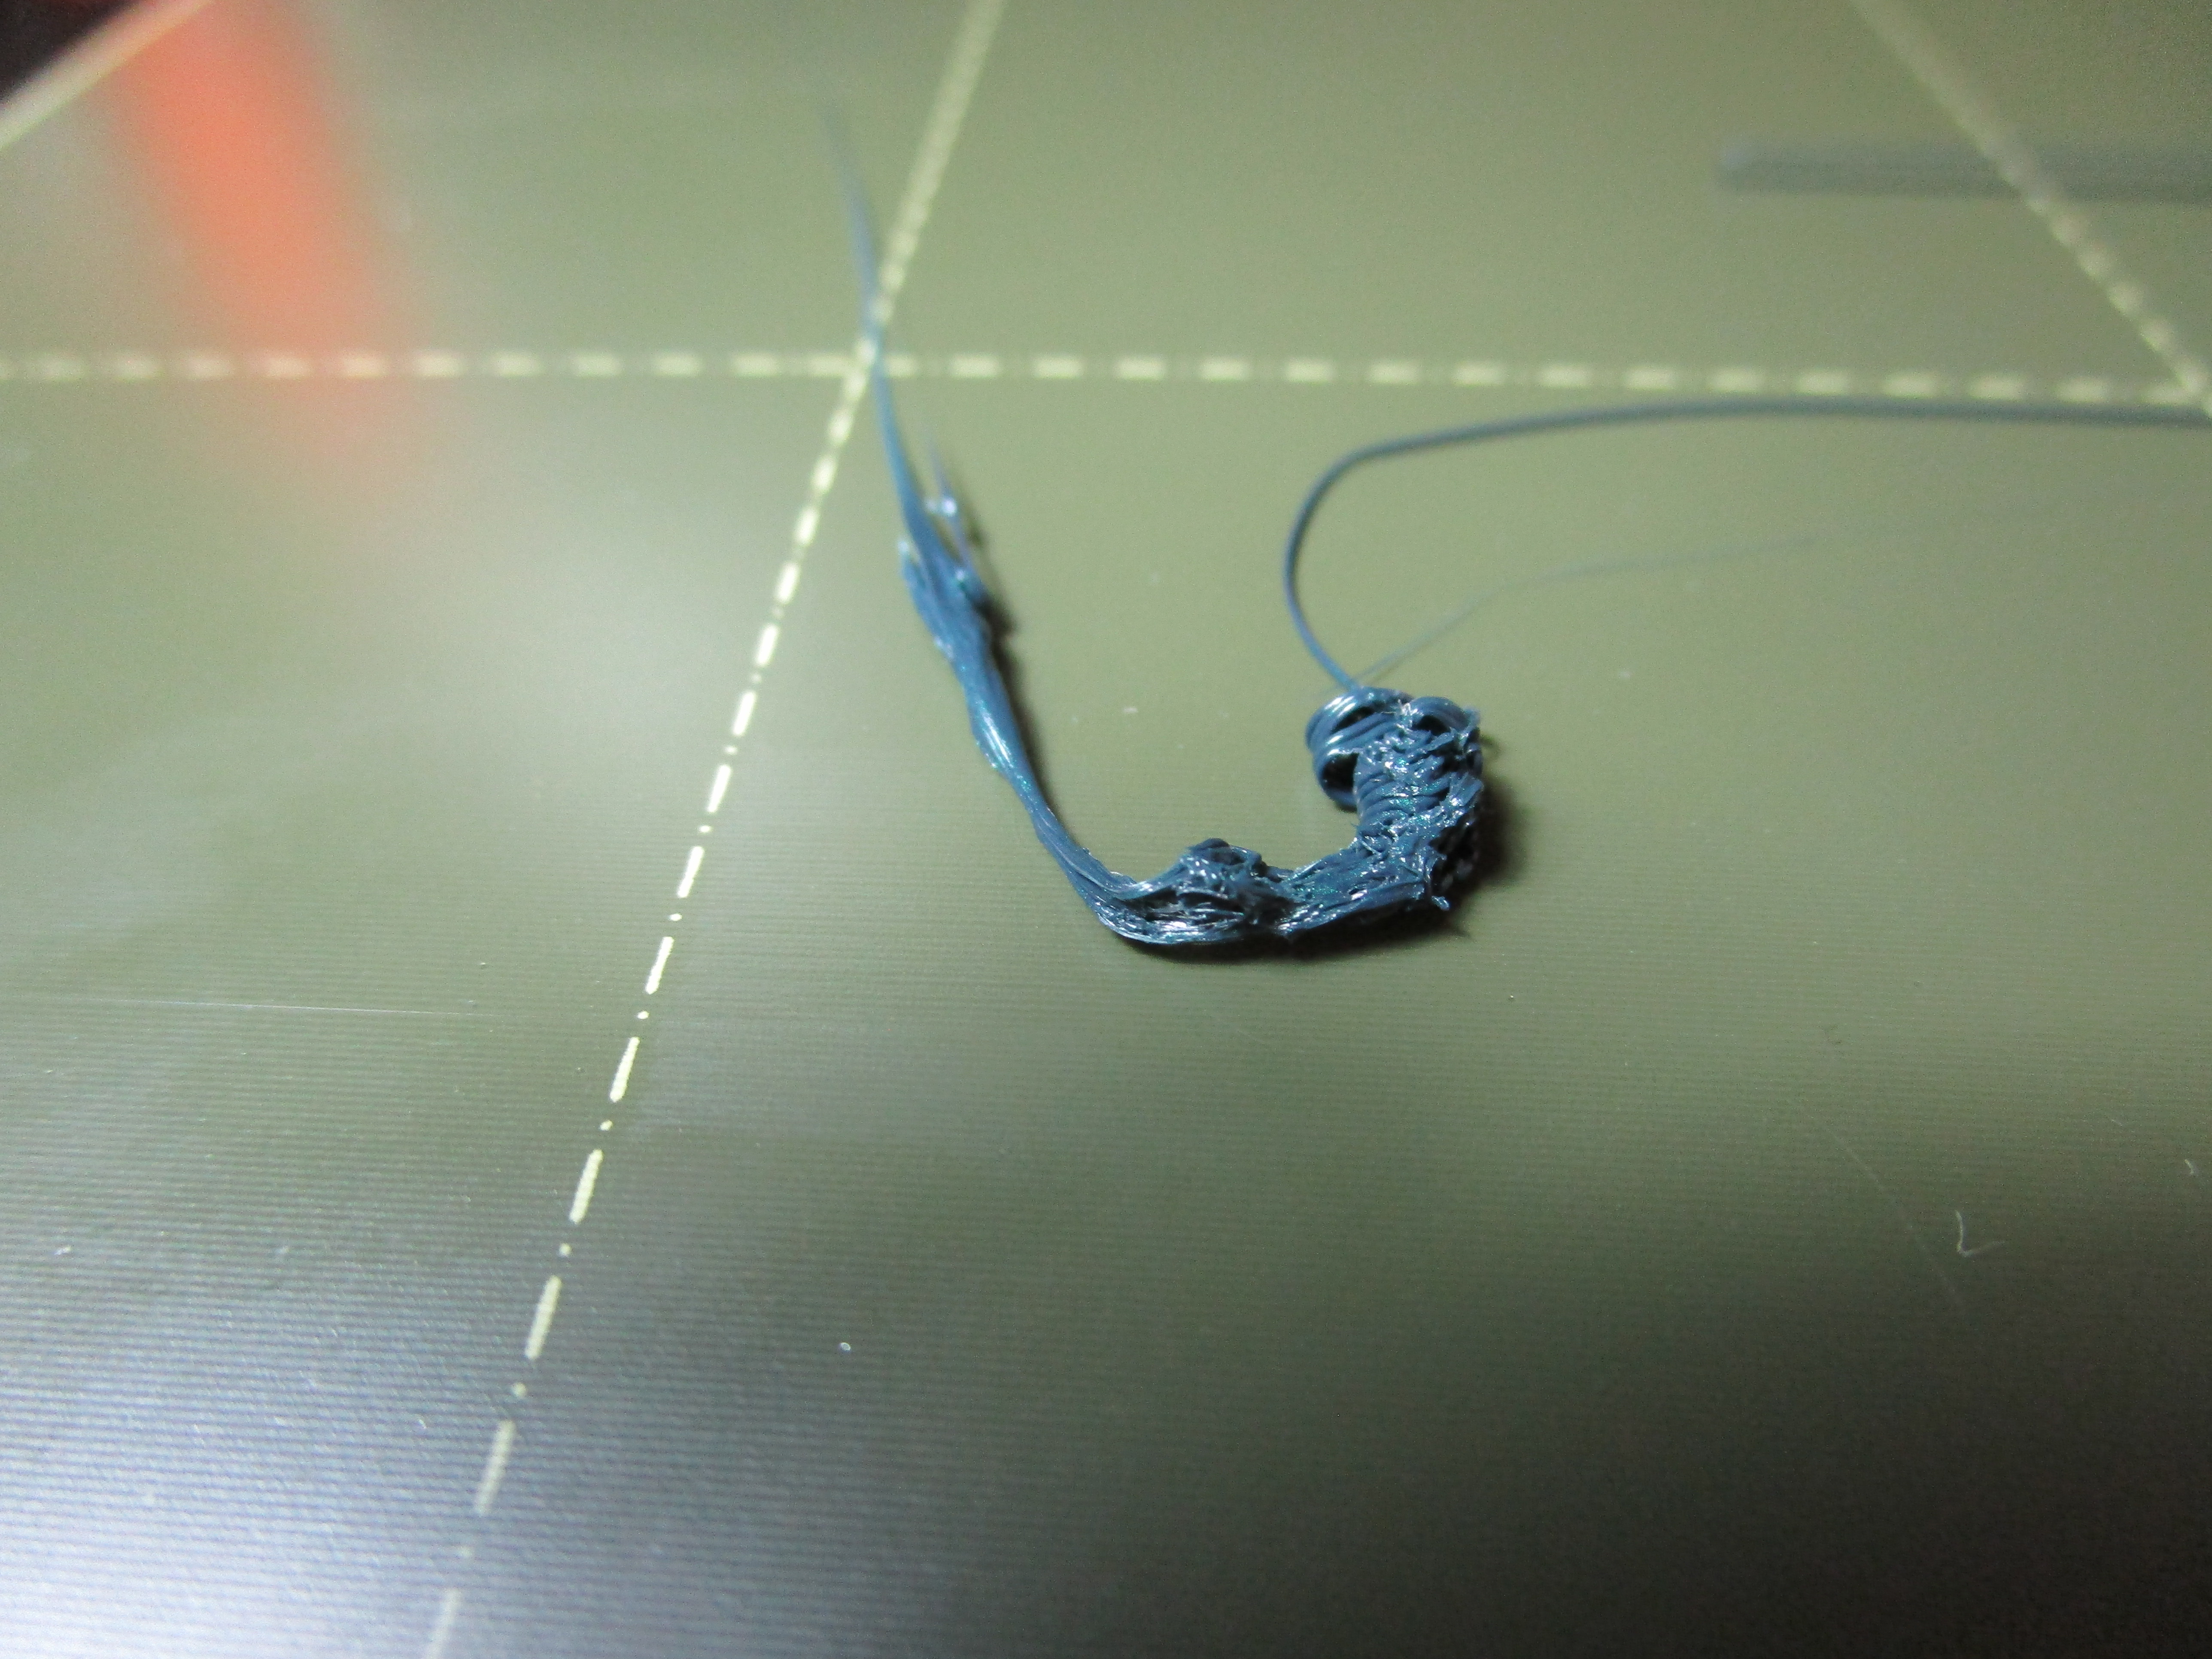
The final part of the First Print, where it goes back and forth and prints basically a square of filament looked like this, just a huge blob of filament all stuck together:
And after all those failed prints, here's what the print head looks like, with filament all messy on the nozzle:

RE: Switched from standard grey PRUSA filament to "Gentlemen's Gray" and now print failures
When you clean the PEI bed, does that include a wash in warm water and dish wash soap?
IPA alone has a hard time removing finger grease and on the first photos it could look like this is the problem.
Have a look at my models on Printables.com 😉
RE: Switched from standard grey PRUSA filament to "Gentlemen's Gray" and now print failures
@area51
I clean it with isopropyl alcohol after each use, as I have done for the entire time I've had it. This is the ONLY time I've encountered this problem and ONLY while using this particular filament. If fingerprints or a lack of washing with soap and water were a problem then this would have happened long ago.
RE: Switched from standard grey PRUSA filament to "Gentlemen's Gray" and now print failures
@area51
I tried, as you suggested, washing it with warm water and dish soap. I then tried doing the First Layer Calibration and that came out "just OK". I adjusted the head down just a little more than previously and it was a bit better. I then tried printing one of my models and it, once again, messed up doing the first layer of it, as you can see here. Each line ought to be right up against the others, but there are numerous gaps. In addition some of it is lifting up off of the print bed even as it's being laid down. The print head looks to be at an appropriate height, with the filament going down nicely onto the bed, but then it sometimes lifts up later.

RE: Switched from standard grey PRUSA filament to "Gentlemen's Gray" and now print failures
Hi there,
I might be wrong here, but if that is your first layer it is pretty high.
What method do you use for the first layer calibration? In case you use the inbuild one I would recommend rather using Jeff Jordan's method here: https://forum.prusa3d.com/forum/original-prusa-i3-mk3s-mk3-assembly-and-first-prints-troubleshooting/life-adjust-z-my-way/
I don't know why Josef and the team are not simply referring everybody to this thread.
Secondly it looks like your bed is not really level, at least from the pics you posted.
Did you get the kit and built it yourself? Then you should probably check the alignment of the Y-axis extrusions. It also helps to switch to the 7x7 mesh bed levelling (again no idea why this isn't standard).
Apologies if I may sound obnoxious, but the water for the wash needs to be really hot, as in barely able to touch it. After the good scrub give the sheet a extensive rinse, again with HOT water. And then don't touch the surface, just grab it at the edges (remember the old vinyl records?) and dry it with a paper towel.
Use IPA sparingly if at all. It has the tendency to help spreading oils nicely over the surface of the sheet.
My best guess as to why this has happened when you changed the filament is that this is simply a coincidence.
hth
Hansjoerg
RE: Switched from standard grey PRUSA filament to "Gentlemen's Gray" and now print failures
@h-waibel
Concur - too high. Some filaments can be pretty tolerant to an incorrect Z, PETG is not.
--------------------
Chuck H
3D Printer Review Blog
RE: Switched from standard grey PRUSA filament to "Gentlemen's Gray" and now print failures
I'm still not getting satisfactory results. I've cleaned and cleaned and cleaned the bed and it does no good. The filament still doesn't reliably stick. I've cranked the print head down (via the First Layer process) as far as I feel I can safely do without impinging on the bed itself.And no luck.
When it's printing and momentarily lifts the print head up in order to move to another location the filament often sticks to the print head and the line of filament that was just laid down gets lifted up off the print bed.
Also, when I start a print and the head and bed are heating up the filament oozes out of the print head. It then goes to lay down that first test strip and sometimes the oozed glob of filament gets essentially scraped off of the print head, but other times, not. And that means that the glob of filament comes loose sometime later as it's trying to print the actual object. And of course that makes a mess of the print, leaves a hard glob of filament, and the print head invariably subsequently catches on the hard glob and further ruins the print.
I seriously think that this is simply a bad batch of filament, that it's just not as sticky as it's supposed to be.
I have FOUR rolls of this filament and so far have only opened one of them to use, the one that is consistently failing. I'm hesitant to open another and give IT a try, but maybe that's what I need to do.
I'm also reaching out to my local MakerSpace to see if anyone has some filament that I can try, to see if it really is a case of bad roll of PRUSA filament or it's something else that I just haven't figured out. It's hard to imagine that this problem cropped up at precisely the time that I ran out of my prior filament and am using this new filament (both of which are from PRUSA).
RE: Switched from standard grey PRUSA filament to "Gentlemen's Gray" and now print failures
Just to confirm, you used the Jeff Jordan calibration squares and not the inbuilt live-z adjustment process?
Either way, print a square and post a picture on the other thread. A lot of extremely helpful people are monitoring it and are better suited to help with z-adjust than me. But what you describe regarding lifting on retraction and poor first layer adhesion still sounds very much like too high a z-adjust to me. If you follow the above approach -z-height adjustment is definitely not a matter of "feeling" safe but of incremental approach towards the proper height.
To potentially fix your problems at the beginning of the print there are some modified startup routines floating around. I copied this one from bobstro here on the forum (thanks again mate):
; Last updated 20191117
M300 S40 P10 ; chirp
M862.3 P "[printer_model]" ; printer model check
M862.1 P[nozzle_diameter] ; nozzle diameter check
M115 U3.7.2 ; tell printer latest fw version
M117 Initializing
; Set coordinate modes
G90 ; use absolute coordinates
M83 ; extruder relative mode
; Reset speed and extrusion rates
M200 D0 ; disable volumetric e
M220 S100 ; reset speed
M221 S{if layer_height >= 0.32}90{else}100{endif} ; compensate for thick layer heights
; Set initial warmup temps
M117 Nozzle preheat
M104 S160 ; set extruder no-ooze temp
M140 S{max(first_layer_bed_temperature[0],75)} ; set bed PINDA warmup temp
; Nozzle warmup before home to avoid driving hardened ooze into PEI surface
M109 S160 ; wait for extruder no-ooze warmup temp before mesh bed leveling, cool hot PINDA
M300 S40 P10 ; chirp
; Home
M117 Homing
G28 W ; home all without mesh bed level
; Present bed for final cleaning
G0 Z3; Raise nozzle before move
G0 X125 Y180 F10200; Move nozzle to PINDA warming position
G0 Z0.15 F10200; Lower nozzle to PINDA warming position
; Wait for PINDA warmup
M117 PINDA warmup
M860 S35 ; wait for PINDA temp to stabilize
M140 S[first_layer_bed_temperature] ; set target bed temp
G0 Z3; Raise nozzle before move
M300 S40 P10 ; chirp
; Mesh bed leveling
M117 Mesh bed leveling
G80 ; mesh bed leveling
M117 Saving results
G81 ; save mesh leveling results
; Final warmup routine
M117 Final warmup
G0 Z5; Raise nozzle to avoid denting bed while nozzle heats
M140 S[first_layer_bed_temperature] ; set bed final temp
M104 S[first_layer_temperature] ; set extruder final temp
M109 S[first_layer_temperature] ; wait for extruder final temp
M190 S[first_layer_bed_temperature] ; wait for bed final temp
M300 S40 P10 ; chirp
; Prime line routine
M117 Printing prime line
G0 Z0.15 ; Restore nozzle position - (thanks tim.m30)
M900 K0; Disable Linear Advance for prime line
G92 E0.0 ; reset extrusion distance
G1 Y-3.0 F1000.0 ; go outside print area
G1 E2 F1000 ; de-retract and push ooze
G1 X20.0 E6 F1000.0 ; fat 20mm intro line @ 0.30
G1 X60.0 E3.2 F1000.0 ; thin +40mm intro line @ 0.08
G1 X100.0 E6 F1000.0 ; fat +40mm intro line @ 0.15
G1 E-0.8 F3000; retract to avoid stringing
G1 X99.5 E0 F1000.0 ; -0.5mm wipe action to avoid string
G1 X110.0 E0 F1000.0 ; +10mm intro line @ 0.00
G1 E0.6 F1500; de-retract
G92 E0.0 ; reset extrusion distance
; Final print adjustments
M117 Preparing to print
M300 S40 P10 ; chirp
M117 Print in progress
M221 S{if layer_height<0.075}100{else}95{endif}
This replaces the complete start G-code in the printer section of the slicer. It contains everything that was there originally plus the additional commands for the modified start up routine.Not only does it warm up the PINDA it also has slightly different settings for the extruder position during final warm up and for the intro line. It fixed the blob problems I had when switching from PLA to PET-G.
once again hth
Hansjoerg
RE: Switched from standard grey PRUSA filament to "Gentlemen's Gray" and now print failures
AND THE ANSWER IS .... ACETONE !!!
OK, I finally have my printer printing successfully, with the prints properly sticking to the print bed. How? By refreshing the print bed with acetone. I wasn't aware of the need to do that, must have missed that in the user manual. I kept searching around on the Internet and came across a video about using the PRUSA, explained my situation to the video creator and he asked, "Have you refreshed the print bed lately?" And I said, "What?" and said "Acetone" and I said "Acetone?" and he said "Yup, you need to refresh the print bed every once in a while. Cleaning it with isopropyl alcohol once in a while is not enough, you really need to get it super clean with acetone about once a month". So I did. And now the prints are sticking just like old times and everything is honky-dory.
RE: Switched from standard grey PRUSA filament to "Gentlemen's Gray" and now print failures
I'm thinking that, along with the various warnings already printed on the print bed ("CAUTION, HOT! DON'T TOUCH!") they should consider adding something like, "Clean with isopropyl alcohol after every few prints, refresh with acetone once a month".
RE: Switched from standard grey PRUSA filament to "Gentlemen's Gray" and now print failures
Having the same issue here, starting to think this filament is utter crap. I've been using much cheaper filaments without issues but this one is simply unusable. Almost a third of the roll is gone in failed prints. I'll save you all the different settings I tried because it just doesn't make sense that a brand new Prusament roll is unable to be printed successfully on an MK3s MMUS with the Prusament PLA settings provided in PruseSlic3r when most other cheaper filaments do with a generic profile. Something IS wrong with that color!
RE: Switched from standard grey PRUSA filament to "Gentlemen's Gray" and now print failures
Ok, so after a deep acetone wash (thanks for the tip!) and turning the heat bed to 70C, I finally got through a print. But seriously, this is PLA we're talking about. Having to push the bed to 70C is unreal. This filament is serious pain to get to stick to the bed. Be aware.
RE: Switched from standard grey PRUSA filament to "Gentlemen's Gray" and now print failures
I'd be cautious of using acetone often on the sheets, see this post here:
I got my printer at the start of lockdown and didn't have any alcohol. I just clean my smooth sheet with dish soap and plenty of hot water and then pop it vertically on a radiator to dry. I make sure I don't touch the surface and can run several prints without repeat cleaning. Since it works I've stuck with this method.
I print Prusa PLA, PETG and ABS all fine, when I try the roll of Prusament Pineapple yellow its hopeless. Initially I adjusted the Live Z to be higher than I use on other filaments and it works fine for say 10 to 20 layers then is a mess. I haven't had the inclination yet to try and get it working but I think it is under extruding. If you search the internet there are various reports of people with similar problems. Some of the Prusament colours are very nice but I'm put off trying more if I have to spend a lot of time to get a PLA working.
RE: Switched from standard grey PRUSA filament to "Gentlemen's Gray" and now print failures
I swear there is variation between PLA filaments, from brand to brand and even from color to color within brands.
I haven't found one yet that absolutely refuses to stick or print, but for an example, I had a spool of Hatchbox brown PLA a while back that was troublesome. What did the trick was to slow down the first layer, as when it would round a corner doing the skirt or the outside of the print, it would pull the printed filament off the plate in the direction of travel. I determined that it was something with the filament by simply unloading the Hatchbox brown and loading the stock Prusa silver-gray, which stuck fine. Only variable was the filament.
I figure the cohesion of that particular filament was greater, thus causing the pull-away.
At first I manually slowed things down, a lot, using the control knob, until the first layer was done, then resuming print speed, as the adhesion from layer to layer was good. For later prints with that filament I adjusted the first layer speed in PS and Cura.
Speaking of Cura, at least with the version I've been using and the included presets, the first layer speed is much too high, and can cause this as well. I've copied as best I can the speeds and related settings from PS to Cura. Cura also has (at least with what I have) lower default temperatures for PLA, and I adjusted those as well.
RE: Switched from standard grey PRUSA filament to "Gentlemen's Gray" and now print failures
@lize
You're right, I was reluctant to use acetone and in almost 3 years now, I've never had to use any on my build sheets. This prusament is the first that required such a treatment to get the first layer to stick. I too had printed with many different kind of filaments ABS, PETG, PLA even Nylon and I've always been able to get them to stick to the build plate (even sometimes too much with PETG). That's why I have great doubt on this prusament. Also tried it in my Raise3D and it's not working either where most others are sticking and producing proper results.
Prusa is putting a lot of effort in getting their prusament to a high quality standard in terms of mechanical properties (they're raising the bar, Kudos for that). But maybe a little less there and a bit more on the printability would be great. What is a filament worth if it's not sticking to the bed... well nothing if you ask me.
RE: Switched from standard grey PRUSA filament to "Gentlemen's Gray" and now print failures
@simplexify
I have used acetone about 4 times. I have 8 Mk3S and 4 minis (3 with one coming tomorrow). I have been printing for over 3 years so that is not bad for 3 years.
--------------------
Chuck H
3D Printer Review Blog
RE: Switched from standard grey PRUSA filament to "Gentlemen's Gray" and now print failures
I did some good old fashioned google research a while back and I recall that acetone can break down PEI over a period of 24 hours of immersion. The greater issue is brittleness that can occur with repeated application. There was one incident I can recall here where someone mistakenly understood they should apply acetone regularly and had his sheet break up after a year. Acetone (the stuff in nail polish remover) is not a powerful solvent. It's not going to melt the PEI if you leave it on for a few seconds. It's great for getting off oxidation and built-up filament. Just be sensible, realize the fumes are flammable and use it with appropriate ventilation. I use it once every few months on my March 2018 smooth PEI sheet as needed and have only had good results. Otherwise, a good wash with Dawn is ideal for everyday prep.
RE: Switched from standard grey PRUSA filament to "Gentlemen's Gray" and now print failures
@bobstro
A sensible response that makes sense.
--------------------
Chuck H
3D Printer Review Blog