Print Analysis: Prusa logo from SD Card
Love to get feedback on my first print on my kit - things to adjust, fix, etc. I bought the powder coated plate. Everything stock.


RE: Print Analysis: Prusa logo from SD Card
It would be more useful to us if you print off the 2" calibration square you use to set Z with.
No point looking at other objects until your Z is correct.
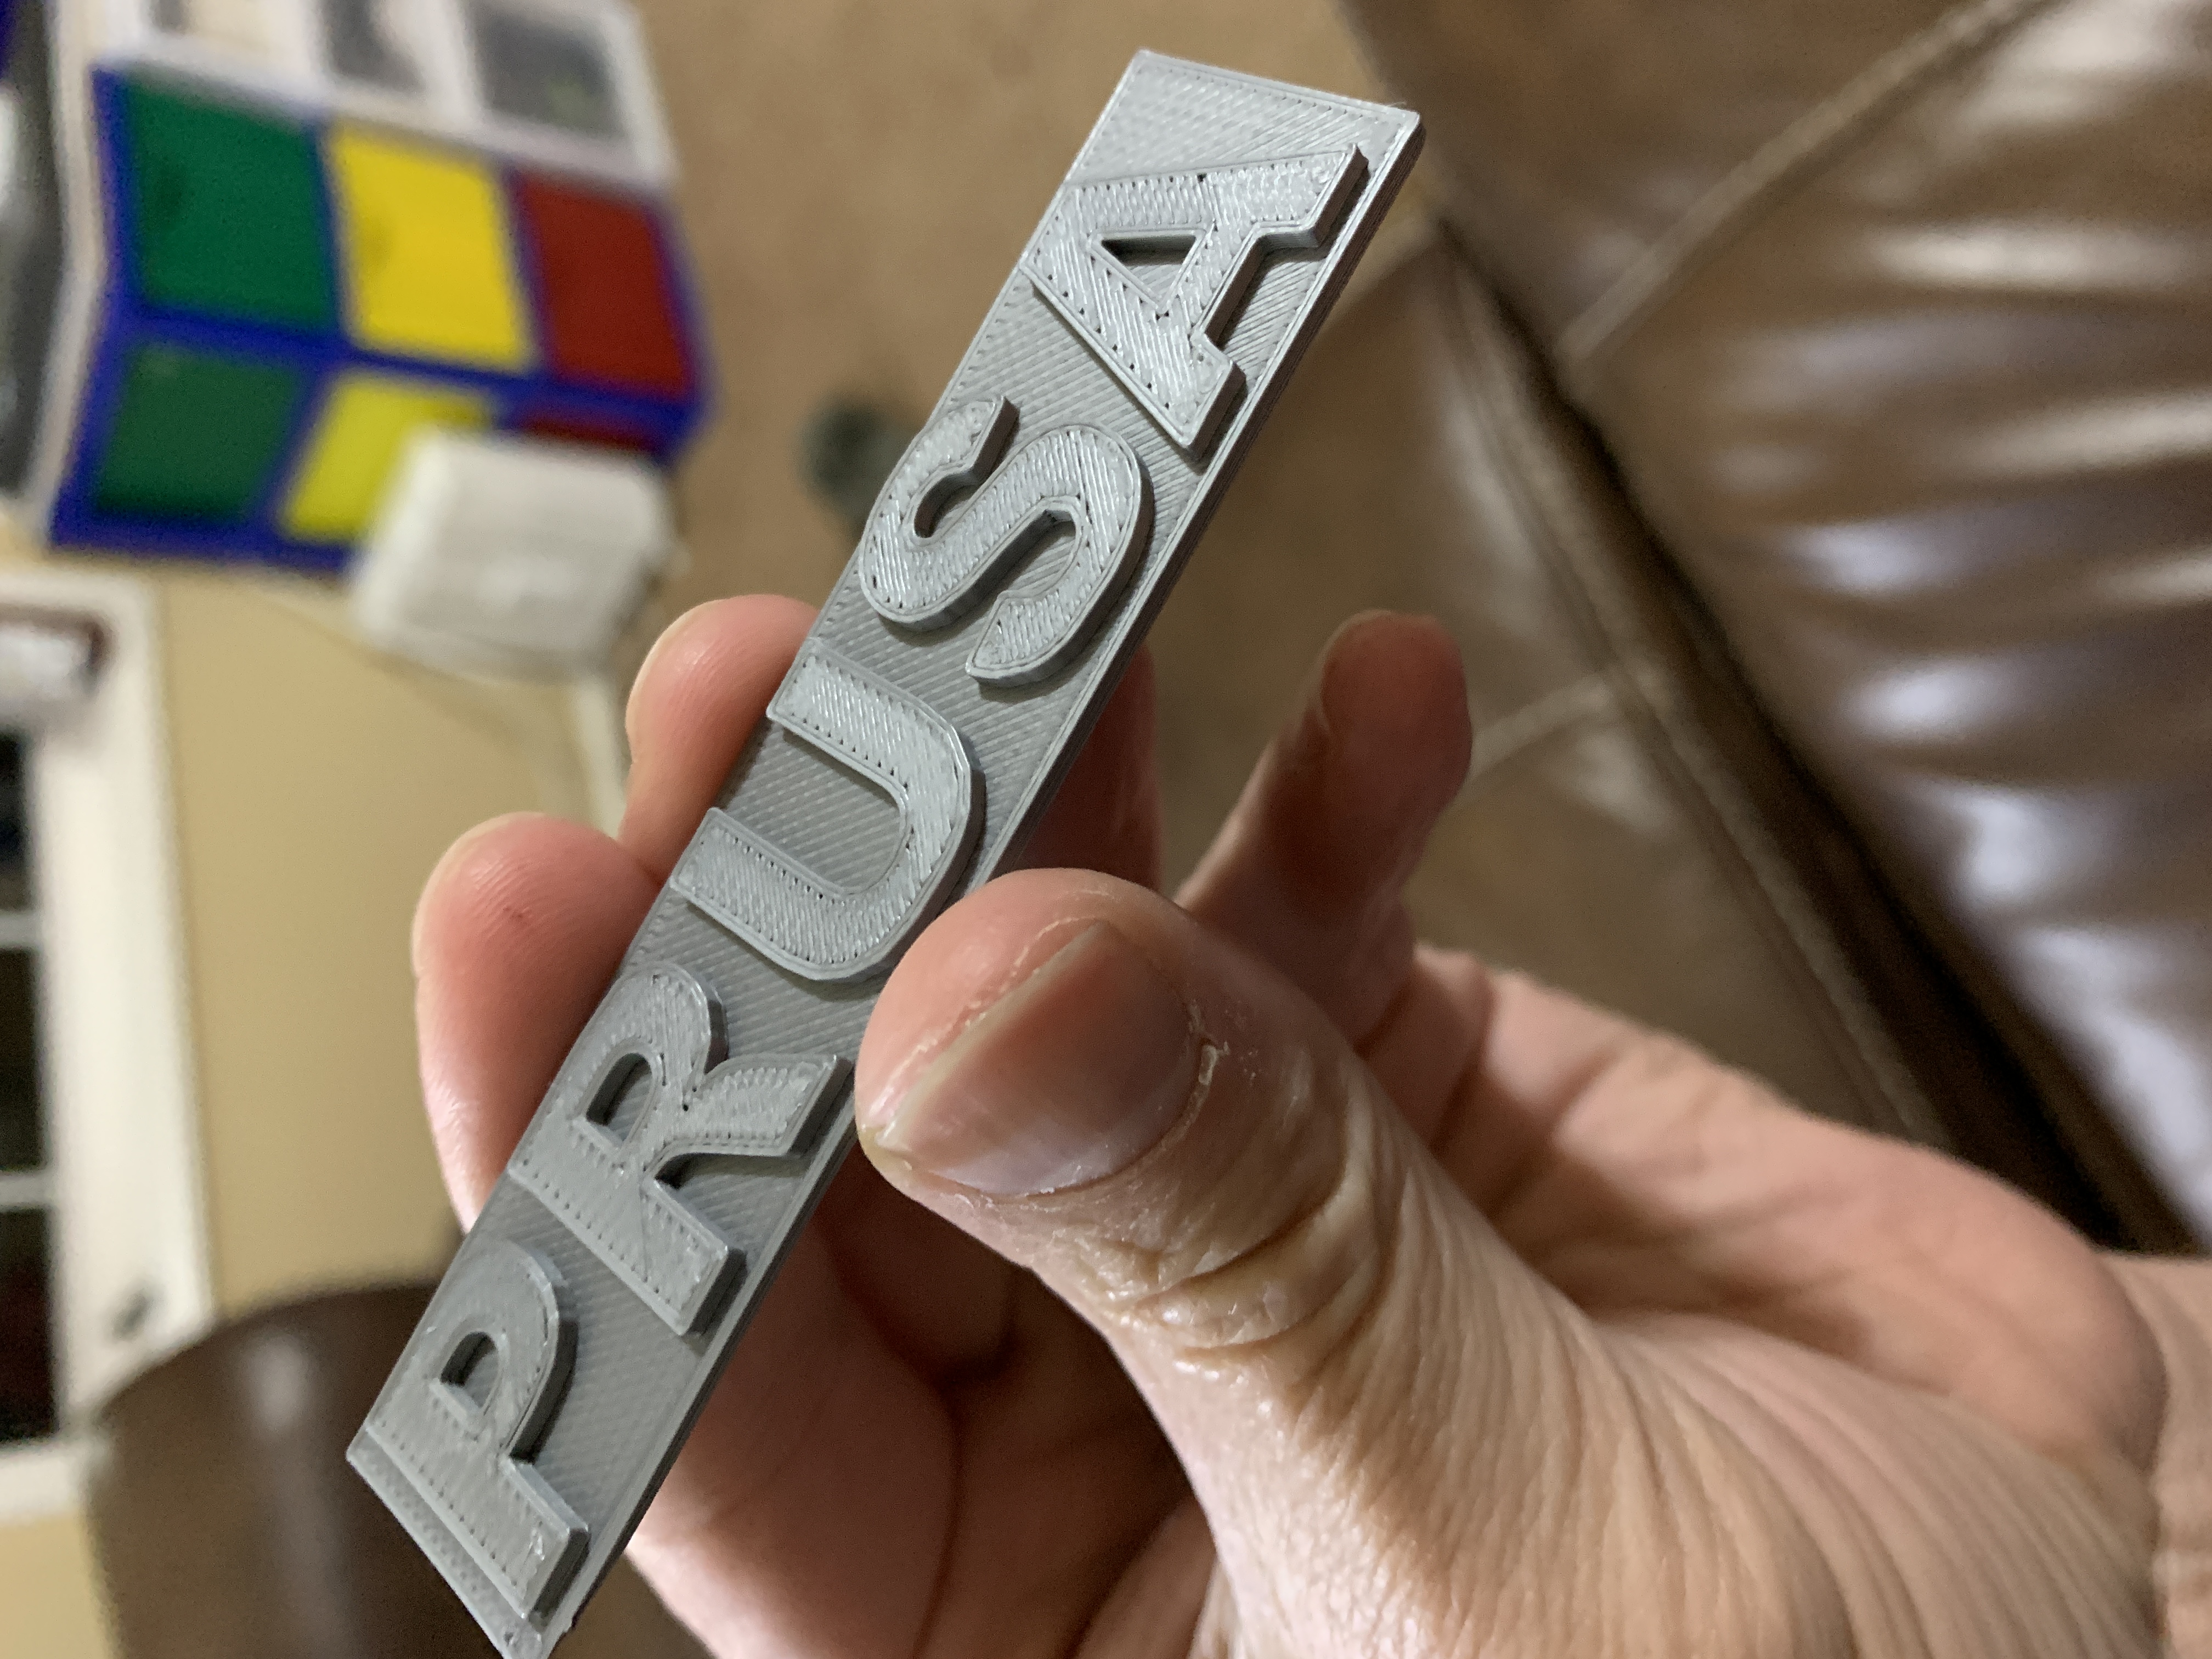
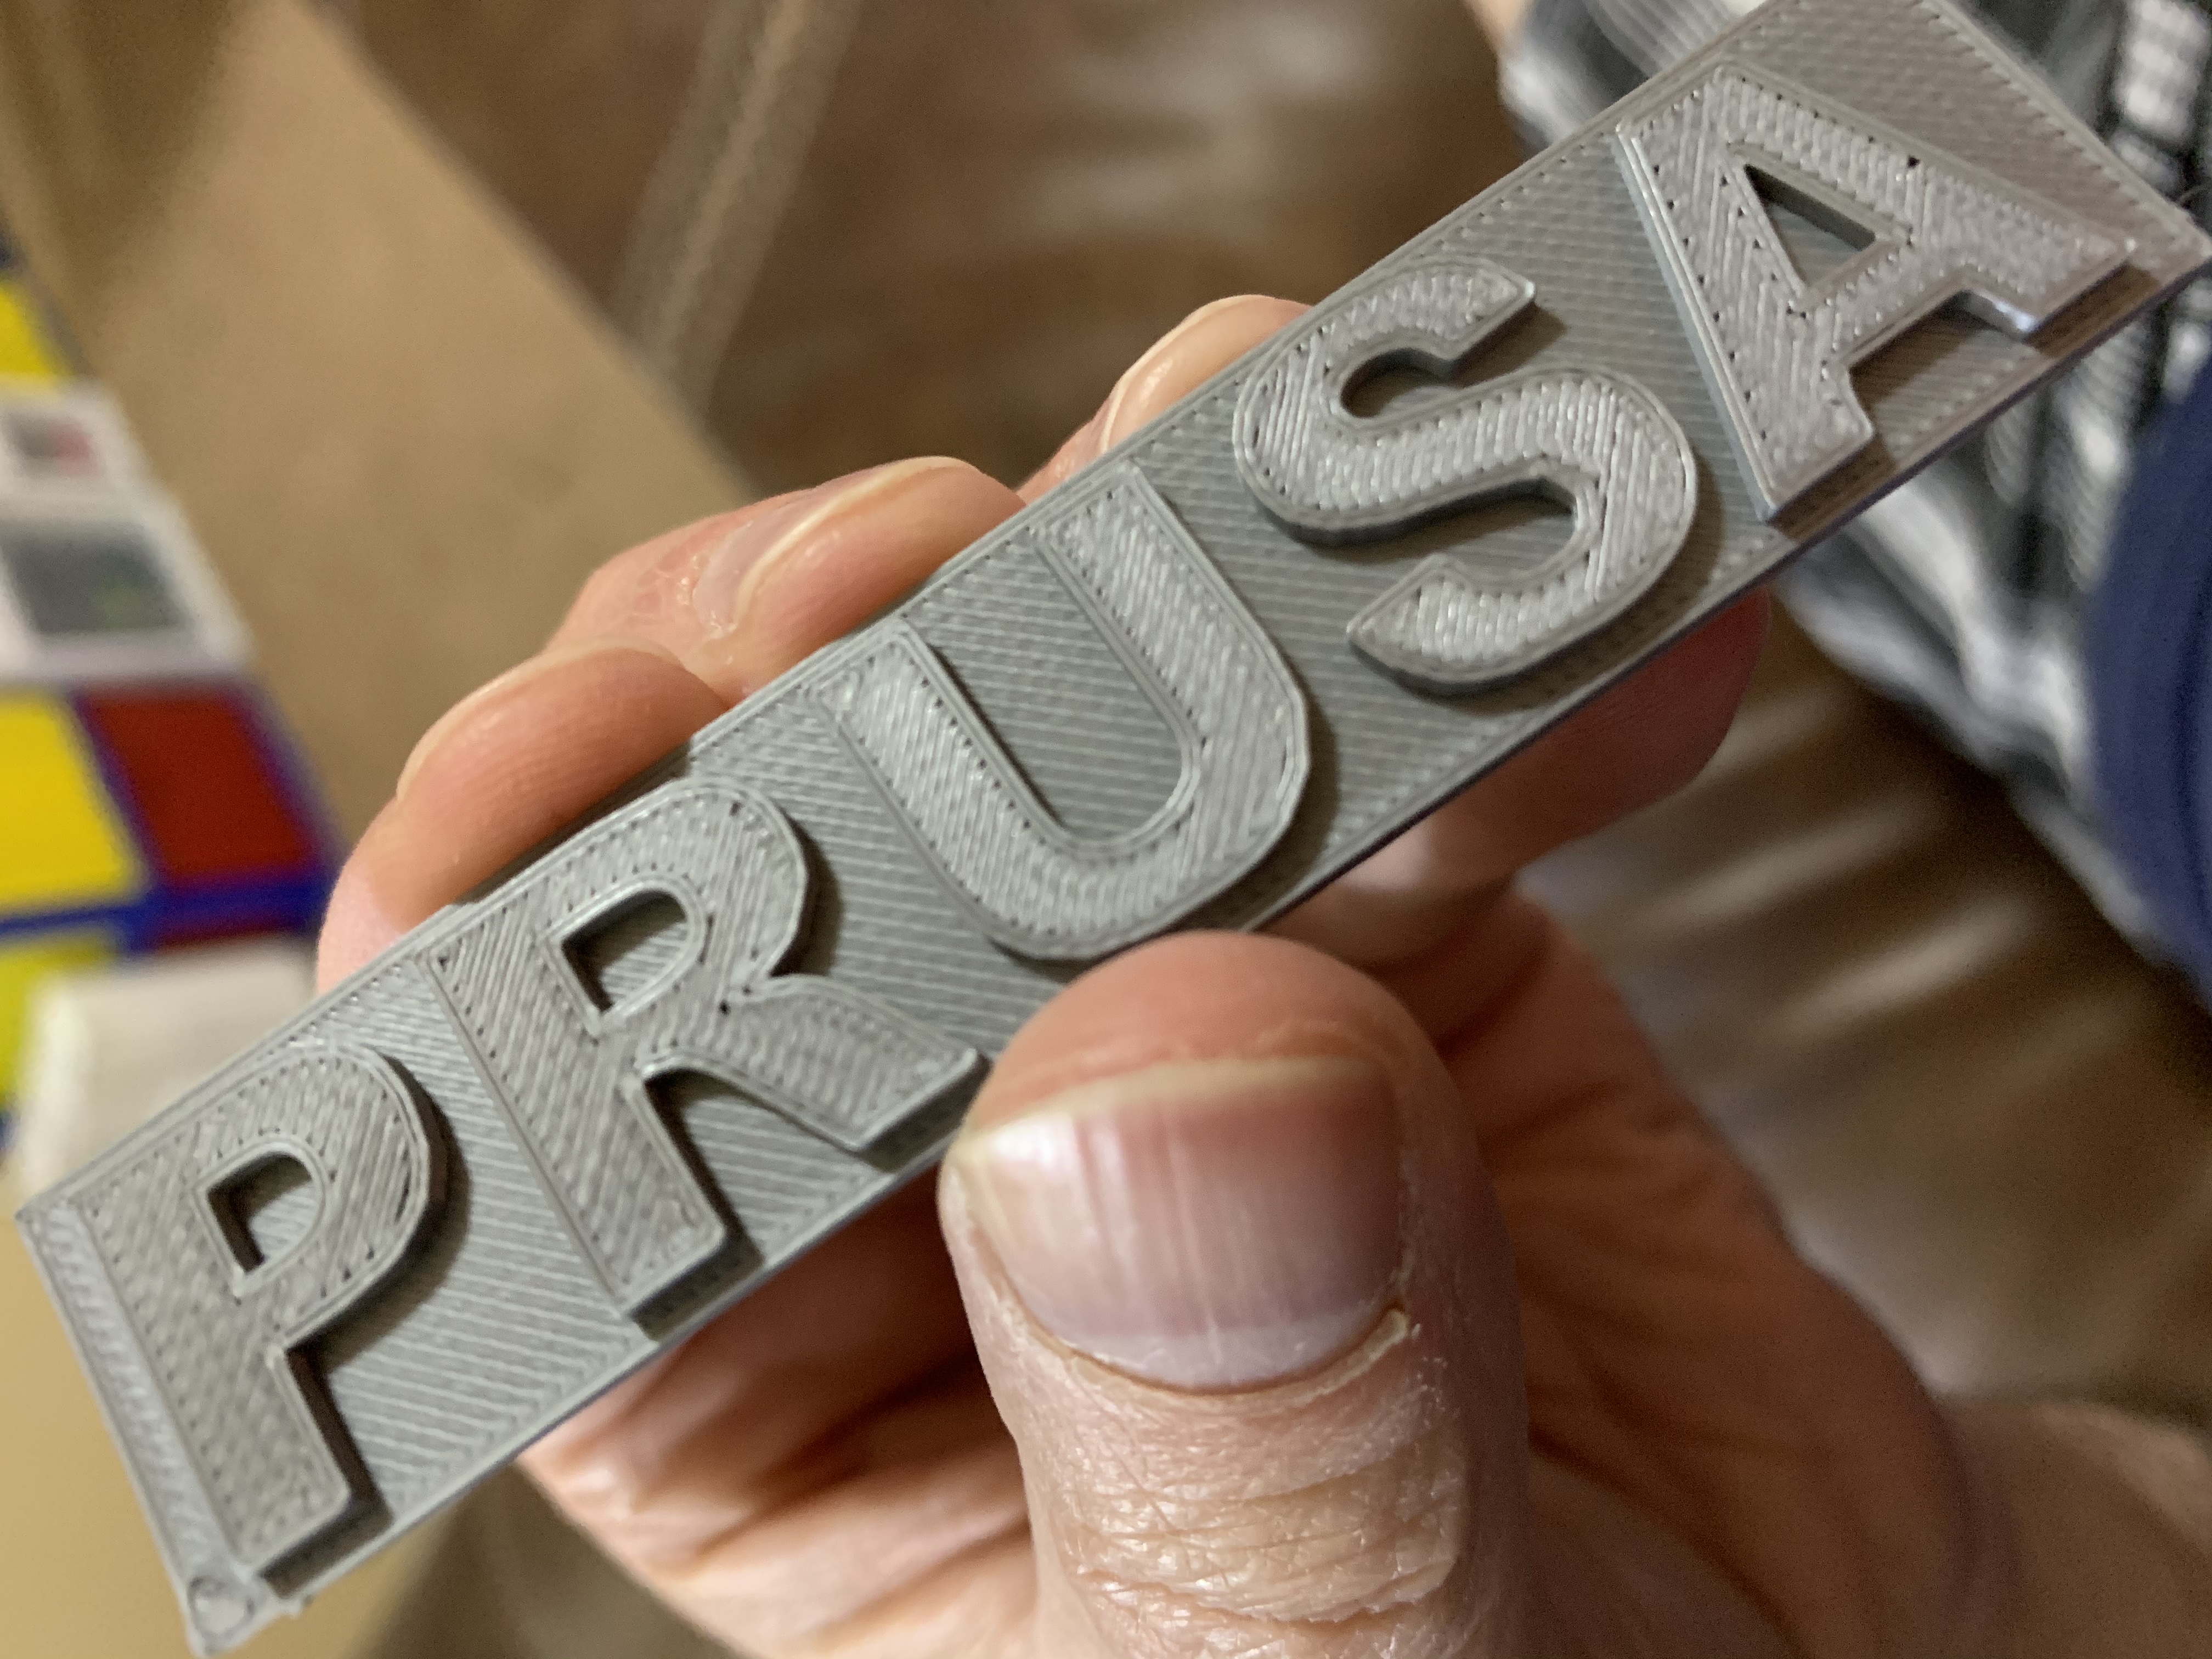
Your logo shows one corner lifting. That might be the way you cleaned the plate (Detergent and water?) or it might be Z.
RE: Print Analysis: Prusa logo from SD Card
In addition to fixing your adhesion issue, you might try (with Expert mode enabled):
- Adjust your top infill extrusion width under Print Settings->Advanced->Top solid infill to your exact nozzle size or slightly smaller. This will reduce the width of lines on the top-most layer and possibly allow more even filling in of the top surfaces.
- Tweak Print Settings->Advanced->Overlap->Infill/perimeters overlap up very slightly to help with those gaps at the right of the P and R.
- Disable Printer Settings->Extruder 1->Retraction->Wipe while retracting to get rid of the squish in the bottom-left corner and on letters. Note that this may lead to stringing if you don't have your extrusion multiplier calibrated and are over-extruding a bit.
What we can see of the bottom layer looks pretty good. Give the print sheet a good clean and avoid touching the print area after cleaning to avoid adhesion issues. Congrats!
RE: Print Analysis: Prusa logo from SD Card
Thank you to both Robert and Bobstro for both encouraging me and chastising me. With your help, you words encouraged me to do the following:
* I did order a smooth spring metal because no matter how hard I scrub (soap, water, alcohol) I have trouble with things sticking. I gotta find some rubber gloves for the alcohol.
* I ordered 99% IPA - you can't find it local very easily - at least not easily in Austin, TX.
* I found the PRUSA blog article(s) about the top things to look at.
* I think my X-belt was loose. I think my Y-screws needed some tightening - wasn't perfectly square on the
* I printed some more tests - especially benchy which told me some things to work on - it fell over - so sticking... again.
* I printed a big flat surface and adjusted Z until the lines looked nice. I'm too old and slow to do much on that fast zig-zag test I think..
Anyway, this is trickier than it looks, but I'm having fun. Thanks again.