Newbie printing the treefrog, but it loses it's leg!
Can anyone identify the problem with this print?
My first layer tests all went well. My Live Z is set at -1.000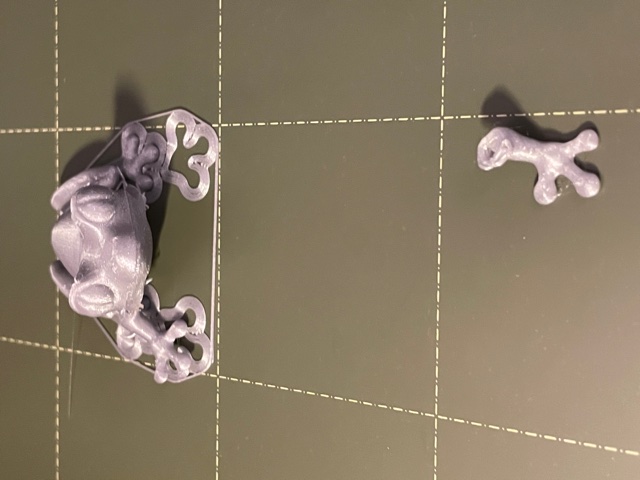

Best Answer by bobstro:
There are likely 2 things going on with your print.
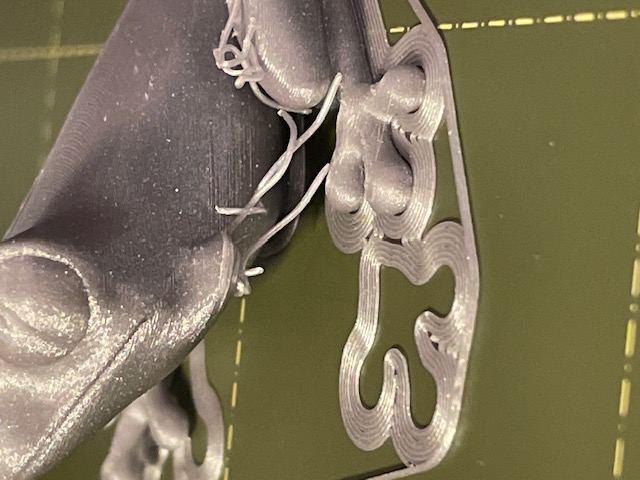
- Your Live-Z adjustment is a bit high. The lines in the brim should form a solid structure with few if any gaps. Try adjusting your Live-Z a bit lower (make it more negative). I'd go about 0.06mm lower to start.
- Your bed may need some cleaning. If there's the least amount of grease on the PEI, your part can partially dislodge.
Either of these can contribute to adhesion which will allow the print to wobble as the nozzle passes over it, often resulting in missing limbs and other problems. If that leg came loose, it wobbled and a good bond wasn't formed between it and the body.
Here's a big info dump on these issues...
-
A dirty PEI print surface. Even if you don't think this is the cause, it's always a good idea to make sure your PEI surface is clean before trying any other fixes. If it's a smooth PEI sheet, take it to the kitchen sink and give it a good dunk with Dawn (original formula, no vinegar or hand softener variants) dishwashing soap or your local equivalent (e.g. Fairy in UK). Use a clean paper towel to clean it off, and another to dry it. Avoid using any sponge or cloth that has been in contact with grease. Above all else, avoid touching the PEI print surface. Once it's good and clean, you should be able to use 91%+ isopropyl alcohol between prints, 100% acetone when that fails , and another dunk when acetone fails. Worst-case, use a 3M 7445 ScotchBrite pad or equivalent on smooth PEI to give it a very light buff, but only infrequently. If you've got a textured powder-coated PEI print surface, the official instructions are to use 91%+ isopropyl alcohol on it only. Rumors persist that some tribes deep in the jungle have had good luck getting started with these sheets by giving them a wipe with 100% acetone and a dunk with Dawn. Either way, there's no real warranty on these sheets. YMMV.
-
If you have not already done so, try using Jeff Jordan's "Life Adjust" procedure for calibrating your Live-Z setting. It is much easier to use and understand than the on-board routine and much easier to make mid-print adjustments accurately with. In general, start high (less negative) and work lower (more negative) in large increments (e.g. 0.1mm) until the filament starts to stick on its own. When you've got your Live-Z setting adjusted properly, you should be able to gently rub the extruded lines on the PEI surface without dislodging them. Then start lowering (more negative) the level until there are no gaps between layers. You should not be able to peel the lines apart after printing, but the top should be regular.
RE: Newbie printing the treefrog, but it loses it's leg!
Hi @gina'
Like you, I'm a newbie too, but have been getting a lot of printing hours under my belt over the last two weeks. 😉
I had exactly the same problem with the treefrog on my first couple of prints. It appear the foot came loose from the PEI sheet during the print. I wasn't exactly sure why, but guessed the print surface, as shipped from Prusa, wasn't as clean as it should have been. So I cleaned it thoroughly with soap and water, followed by several strong scrubs with alcohol wipes. Since then, I've had no issues.
For what it's worth, since the first few days, I've been printing primarily in PETG and using Windex as a cleaning/separation agent and everything has been great. Switching back to PLA has been fine, just cleaning with alcohol before every PLA print.
For the most part, I've been printing in PETG after my first few PLA projects.
RE: Newbie printing the treefrog, but it loses it's leg!
Wow, I had a lot of typos and left over fragments in that post. I tried to go back an clean it up a bit, but apparently I can no longer edit my own post. I've done that successfully in the past -- does anyone know the restrictions that prevent re-edits sometimes?
RE: Newbie printing the treefrog, but it loses it's leg!
There is time limit, about 5 minutes I believe. It's really dumb.
RE: Newbie printing the treefrog, but it loses it's leg!
There are likely 2 things going on with your print.
- Your Live-Z adjustment is a bit high. The lines in the brim should form a solid structure with few if any gaps. Try adjusting your Live-Z a bit lower (make it more negative). I'd go about 0.06mm lower to start.
- Your bed may need some cleaning. If there's the least amount of grease on the PEI, your part can partially dislodge.
Either of these can contribute to adhesion which will allow the print to wobble as the nozzle passes over it, often resulting in missing limbs and other problems. If that leg came loose, it wobbled and a good bond wasn't formed between it and the body.
Here's a big info dump on these issues...
-
A dirty PEI print surface. Even if you don't think this is the cause, it's always a good idea to make sure your PEI surface is clean before trying any other fixes. If it's a smooth PEI sheet, take it to the kitchen sink and give it a good dunk with Dawn (original formula, no vinegar or hand softener variants) dishwashing soap or your local equivalent (e.g. Fairy in UK). Use a clean paper towel to clean it off, and another to dry it. Avoid using any sponge or cloth that has been in contact with grease. Above all else, avoid touching the PEI print surface. Once it's good and clean, you should be able to use 91%+ isopropyl alcohol between prints, 100% acetone when that fails , and another dunk when acetone fails. Worst-case, use a 3M 7445 ScotchBrite pad or equivalent on smooth PEI to give it a very light buff, but only infrequently. If you've got a textured powder-coated PEI print surface, the official instructions are to use 91%+ isopropyl alcohol on it only. Rumors persist that some tribes deep in the jungle have had good luck getting started with these sheets by giving them a wipe with 100% acetone and a dunk with Dawn. Either way, there's no real warranty on these sheets. YMMV.
-
If you have not already done so, try using Jeff Jordan's "Life Adjust" procedure for calibrating your Live-Z setting. It is much easier to use and understand than the on-board routine and much easier to make mid-print adjustments accurately with. In general, start high (less negative) and work lower (more negative) in large increments (e.g. 0.1mm) until the filament starts to stick on its own. When you've got your Live-Z setting adjusted properly, you should be able to gently rub the extruded lines on the PEI surface without dislodging them. Then start lowering (more negative) the level until there are no gaps between layers. You should not be able to peel the lines apart after printing, but the top should be regular.
RE: Newbie printing the treefrog, but it loses it's leg!
There is time limit, about 5 minutes I believe. It's really dumb.
It's unfortunately required to avoid spam. Spammers would post legitimate-seeming posts, then come back weeks or months later and fill them with spam links. I do wish they'd open it up to hours at least.
RE: Newbie printing the treefrog, but it loses it's leg!
@bobstro
That was an incredible answer. I will follow your advice.
Thank you.
RE: Newbie printing the treefrog, but it loses it's leg!
Hi Graz,
Did you slice the print yourself?
It looks like the Brim has printed with a tiny gap separating it from the Frog Model,
this is often caused by the Elephant's foot compensation settinf which is set at 0.2mm by default
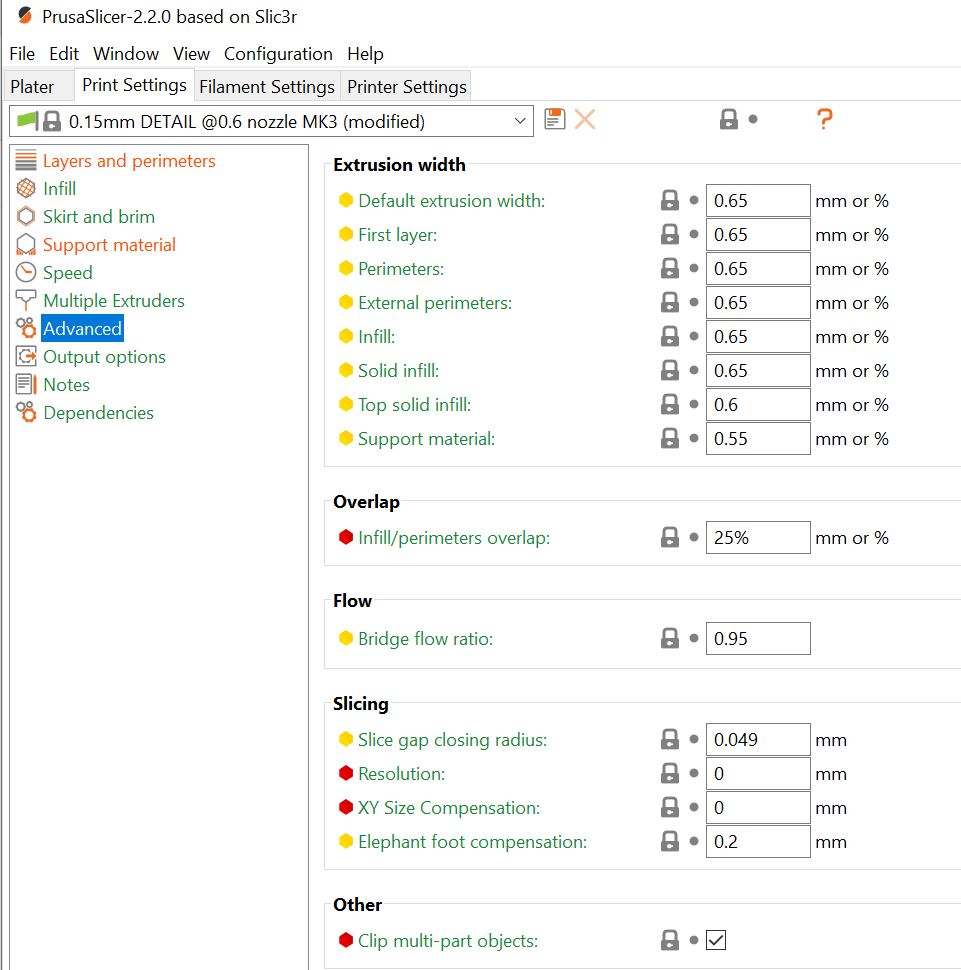
Note, it is an intermediate mode setting
regards Joan
I try to make safe suggestions,You should understand the context and ensure you are happy that they are safe before attempting to apply my suggestions, what you do, is YOUR responsibility. Location Halifax UK
RE: Newbie printing the treefrog, but it loses it's leg!
@joantabb
No I didn't slice this myself.
RE: Newbie printing the treefrog, but it loses it's leg!
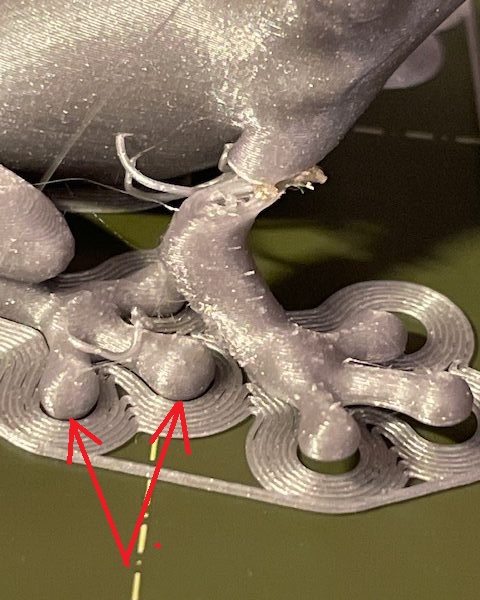
Oooohhhh ! wonder if I am seeing things or whoever did the slice, missed the issue....
In your picture, there appears to be a tiny gap between the frog model and the brim
in this picture I sliced the treefrog with default settings and the gap is difficult to picture so I have looked from below the build plate in this picture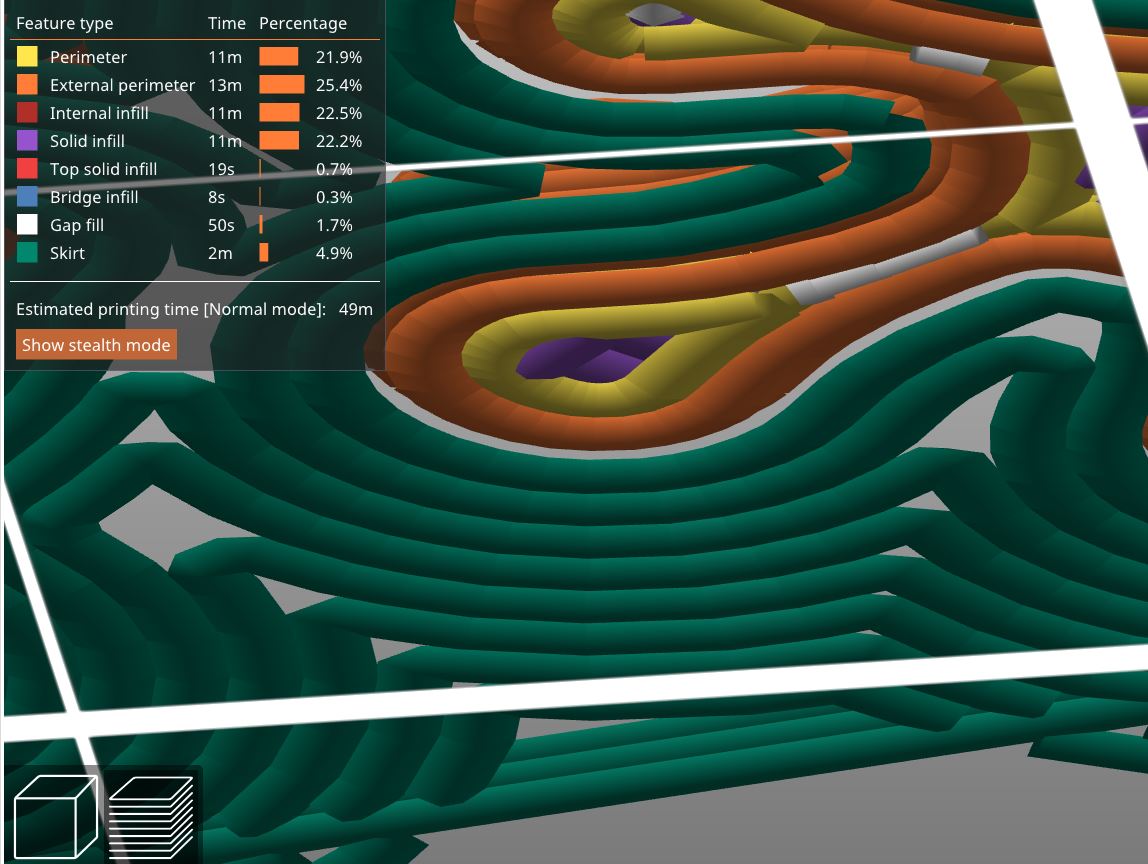
and then I changed the elephants foot setting from 0.2mm to 0.00 mm and as you can see below, the gap seems to have gone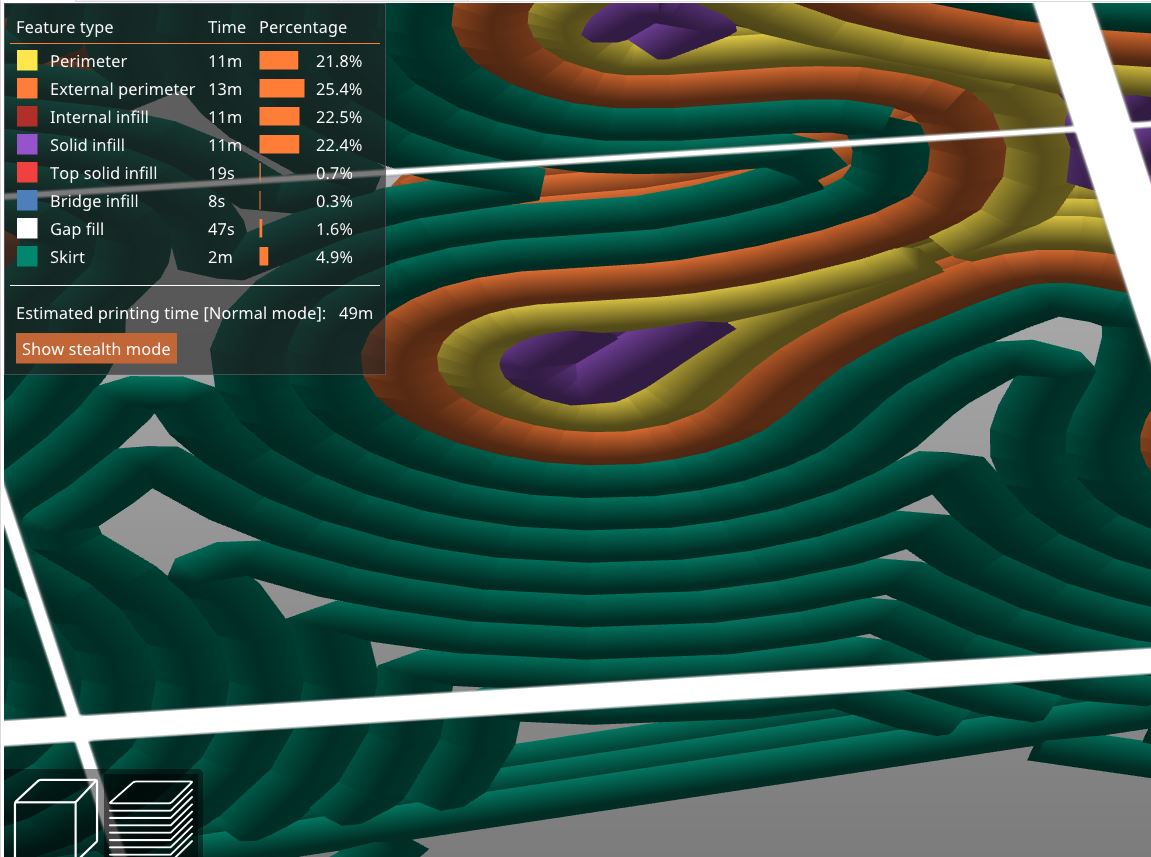
as you can see, changing the elephants foot setting seemed to close up the gap.
so the chances are, once you sort your first layer adhesion, you could probably have printed the frog without the brim... 🙂
regards Joan
I try to make safe suggestions,You should understand the context and ensure you are happy that they are safe before attempting to apply my suggestions, what you do, is YOUR responsibility. Location Halifax UK