Thanks
Thanks man this has helped a lot.
calibration
hi,
you should use a micrometer to correctly measure that OR as i saw you are doing, like me, printing half piece in a certain height then the other half to a +/- quote, you should cut it in half diagonally and use only the last part of the vernier caliper (points) to measure the inner part of the triangle you got. The square sides (borders) suffer of extruder multiplier issue (if you haven't calibrated the extruder multiplier you can have more material on the last bit of the line).
cheers
Hello jeff. I've posted some questions here https://forum.prusa3d.com/forum/original-prusa-i3-mk3s-mk3-assembly-and-first-prints-troubleshooting/troubleshooting-first-layer-bed-leveling/ and someone shared this test file from yours. That's really great.
Re: life adjust Z - my way UPDATE?
Hi Jeff,
I'm very interested in trying your calibration procedure but it seems like the gcode files and many of the pictures are missing now. Do you have an updated version of the process and instructions?
Thanks in advance,
Dylan
re files
I don't know why the zip is missing from the original post, but I uploaded my copy recently. You can find it on page 42 near the bottom.
Mk3S+,SL1S
Re:re files
Thanks!
I don't know why the zip is missing from the original post, but I uploaded my copy recently. You can find it on page 42 near the bottom.
hope
I don't know why the zip is missing from the original post
I've sent OP a message hoping OP will see it (last time online July) and upload the files again.
It appears the forum deletes files from an old post.
I checked this post no longer ago and the files were still there.
I share this post with anyone having Live-Z problems
RE: life adjust Z - my way
What happen to the attachments for this? Looks like they were removed?
Well someone reposted it here on pg42:
https://forum.prusa3d.com/forum/postid/515068/
RE: life adjust Z - my way
Could someone explain in detail how I'm supposed to use these optimally? I get that they are designed to dial a Live-Z sweetspot. What I'm unclear about is what I'm seeing with the printed results.
I have printed two so far, one at the same height all the way across (-1550), and one where I adjusted from -1550 to -1540. In both cases, the right hand side was relatively smooth and bonded (though rougher and thinner in the right bottom corner), and at a certain point on the left side it became loose and in unconnected strands. The -1550-only version was thinner on the right side and the stranding occurred farther to the left, meaning more of the surface was bonded.
Is this intentional? If so, what is it telling me, what information is being delivered by the different regions of the print and what should I be doing to adjust for that sweet spot?
I'm quite new to all of this. So any insight is greatly appreciated.
Thanks in advance.
RE: life adjust Z - my way
Please post pix of your results.
Mk3S+,SL1S
Could someone explain in detail how I'm supposed to use these optimally? I get that they are designed to dial a Live-Z sweetspot. What I'm unclear about is what I'm seeing with the printed results.
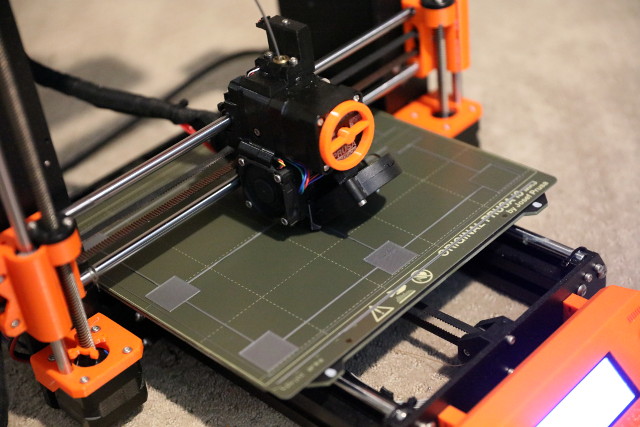
What I recommend is to use one of the test prints (below) that has a grid of square patches.
This will tell you two important things needed to get your Z calibration 'dialed in' for consistent prints.
First, you can set the overall Z calibration number for the best performance in the center of the build plate. For smooth sheets, I always tune for the best 'squish' as illustrated many times in the Prusa documents. Too high, its more of a rounded bead that often times will not adhere properly. Too low, it's too flat. You should have a nice oval profile to the bead.
For the textured sheets, I'm now in the habit of tuning to the point that the 'brush strokes' just disappear into the texture when the bottom of the test print is viewed.
When the center is the way it should be, inspect the outer squares and make note if the left or right side is too high/low and also if the front/rear is too high/low. If needed, you can then go back into the front panel and adjust the left/right and/or front/rear to get the extremities of the build plate dialed in as well.
There may be a bit of an iterative 'rinse-repeat' process to get both the center and the extremities all set to their optimum.
Once you get it set, you should get consistent first layers on prints both small and large.
RE: life adjust Z - my way
Two next to each other. Then -1550-1540 at midpoint version. Then -1550-only.


RE: life adjust Z - my way
Thanks for posting the pix. Which printer is this and was it factory assembled or assembled by you?
Mk3S+,SL1S
RE: life adjust Z - my way
Prusa Mini + that was factory assemble. Though I have broken some parts down for cleaning.
RE: life adjust Z - my way
It looks like your nozzle is a bit too high. I don't know enough about the mini as I don't own one. You might want to lower your nozzle or lower the height of your sensor. See https://help.prusa3d.com/en/guide/height-adjustment-of-m-i-n-d-a-superpinda-sensor-mini-_154547
Mk3S+,SL1S
RE:
Could someone explain in detail how I'm supposed to use these optimally? I get that they are designed to dial a Live-Z sweetspot. What I'm unclear about is what I'm seeing with the printed results.
I have printed two so far, one at the same height all the way across (-1550), and one where I adjusted from -1550 to -1540. In both cases, the right hand side was relatively smooth and bonded (though rougher and thinner in the right bottom corner), and at a certain point on the left side it became loose and in unconnected strands. The -1550-only version was thinner on the right side and the stranding occurred farther to the left, meaning more of the surface was bonded.
Is this intentional? If so, what is it telling me, what information is being delivered by the different regions of the print and what should I be doing to adjust for that sweet spot?
I'm quite new to all of this. So any insight is greatly appreciated.
Thanks in advance.
The purpose is to adjust the Live adjust Z axis. What I do for the square is I adjust the axis by increments of 0.05. Just as a reference, my Prusament PETG love to be at -1.35, but that would be different for everyone's printer due to build tolerances. Any case I let it print for 3/4 of an inch and switch the height. I typically go up first.. and I watch the print to see if it is getting better or worse. If I notice that it is get worse where the strands are not binding, then I go the opposite direction (starting -0.05 from the original start value). I always have a piece of paper to write notes of which segment is what. I think the mini box one people have shown would be better since it is easier to track.
Any case your prints are breaking apart? Then your too high. Go more negative/lower value. Usually I have 9 levels I test out before I get my sweet spot.
So if they split apart like strands it is likely too high. If it looks like it is being plowed, then it is too low. Don't forget to set the value back to the best one you figured out.. Also write it down as the value set only applies to the filament you use to do the adjustment. I do this adjustment for all my filaments.. even different colors from the same brand. There are slight variants.
Good luck with your adjustments.
RE: life adjust Z - my way
the first half looked great, except for the top left corner, and then it got really bad.
RE: life adjust Z - my way
Hi Jeff: Your attachment seemed to have been removed. I understand that that is a post from 2017. Is there a way I can get it?
Also, what do you mean when you said "when the diagonal of the square is reached"?
RE: life adjust Z - my way
Please ignore my previous post.
I found the files from a link in Muppet Labs with detailed explanation.
https://www.prusaprinters.org/prints/40729-parametric-bed-level-test-generator
RE: life adjust Z - my way
Look on page 42 of this thread near the bottom of the page.
Mk3S+,SL1S
RE: life adjust Z - my way
Thank you, Sylvia.