RE: life adjust Z - my way
New user - just discovered this - love it!
Many thanks!
Quentin
RE: life adjust Z - my way
This is pure gold, specially for a new 3D printing user
RE: life adjust Z - my way
Could use some minor assistance with getting my 1st layer right again. I have been using this center square calibration method since I put my mk3s together a little over a year ago. Got it printing great and after a few months my wife was irritated that the printer was in the kitchen on the breakfast table. I moved it to the garage and ever since about every other print of the same model has 1st layer issues.
When I calibrate with the center square, the problem isn't in the body of square, it is the initial perimeter layers that pull up occasionally. I usually have to watch the first several minutes to see if the pulled up perimeters cause the other parts of the 1st layer to not stick. Sometimes the print survives, the other times it catches and fails. Pictures are front and back of the same square.


RE: life adjust Z - my way
Als a newbie here! Thank you so much, especially Jeff and Joan. Wasnt able to print PETG and with this files, explanations and examples I was finally able to get now really nice prints out of it 🙂
RE: life adjust Z - my way
Hello jeff. I've posted some questions here https://forum.prusa3d.com/forum/original-prusa-i3-mk3s-mk3-assembly-and-first-prints-troubleshooting/troubleshooting-first-layer-bed-leveling/ and someone shared this test file from yours. That's really great.
However, I was curious if you could help me out debugging my printer. Right now, I have my Z leveling at -1.857, which I thought was perfect, after printing 10 squares of this one, varying from -1.840 and -1.940. What intrigues me is that, with -1.857, using a digital vernier calliper as you suggested, I only get .24mm. If I aligned the Z to be -1.840 (farther from the PEI sheet), it gets thinner and thinner, however I can see some gaps through the lines. If i put my finger on the back of it, I can see my fingers, and the print gets very fragile. On the other hand, as you said, if I drastically move Z to -1.900, I see it getting bigger, up to .30mm.
So, I don't know what's wrong, if I should lower the Z even more until I get .2mm, and ignore the gaps between the lines, and try to compensate them by changing something else in the printer, or if I should leave it at -1.857, with .24mm of thickness, and try to decrease this thickness by changing something else in the printer.
What I also did was, after printing I wrote up the number of the distance of Z level on top of the print with a whiteboard marker, and was doing some small straight lines (in first picture), and I noticed that, from -1.900 going into -1.857, it was getting smoother to write, I could feel better with the marker the surface getting flatter and flatter. That's why I stopped at -1.857. I'm posting some pictures here. If you can help me somehow, I'd appreciate very much.


Thank You Very Much
Thank you for the time and effort. I have had so much difficulty setting the z-axis until I found your contribution.
😀
HURRAY!!!
@joantabb and @jeffjordan, thank you!
Having struggled with bed adhesion on my last few print attempts, following Jeff's process and using the gcode Joan kindly put provided, my Mini+ is printing better than ever. I can't get over just how smooth my first layer is!
Glad we could help.
regards Joan
I try to make safe suggestions,You should understand the context and ensure you are happy that they are safe before attempting to apply my suggestions, what you do, is YOUR responsibility. Location Halifax UK
Re: life adjust Z - my way
I realize this is an old thread, but I'm new to the game.
Haven't had a chance to use the calibration gcode, but it sounds like a great tool. As soon as my current print finishes, I look forward to giving it a try.
I have a new MKS3+ and so far I've had trouble getting a clean first layer setup. Currently, my best value is -1.6. That seems a lot bigger than the amounts referenced in this thread. Is that unusual?
Z
nope, sounds good.
RE: life adjust Z - my way
-1.6 is well within the ballpark, depending on exactly where the Pinda is set.
Personally, I'm a fan of those multi-square Z calibration prints. They are much quicker than the full-plate test squares.
Using those it's very easy to get the basic Z calibration easily dialed in, as well as to check to see if you need any additional left/right or front/back adjustments as well.
For the smooth sheet, I tune for the best 'squish' appearance, and for the textured sheet I tune to the point just where the 'brush strokes' blend into the texture when viewed from the bottom of the test print.
unhappy with calibration squares - expectations too high
Kia ora calibration helpers,
unhappy me again 🙂
I got myself one of those famous satin sheets (thought it might make nice looking bottoms) and also a factory fresh spool of Prusament PLA Galaxy Black. Which of course meant dialling in the new sheet. Settings are the Prusament PLA defaults with no changes to the extrusion multiplier.
Unfortunately I don't get a satisfactory result...
The undersides all look smooth, with no visible lines. The contact with the perimeters is fine, no light shining through.
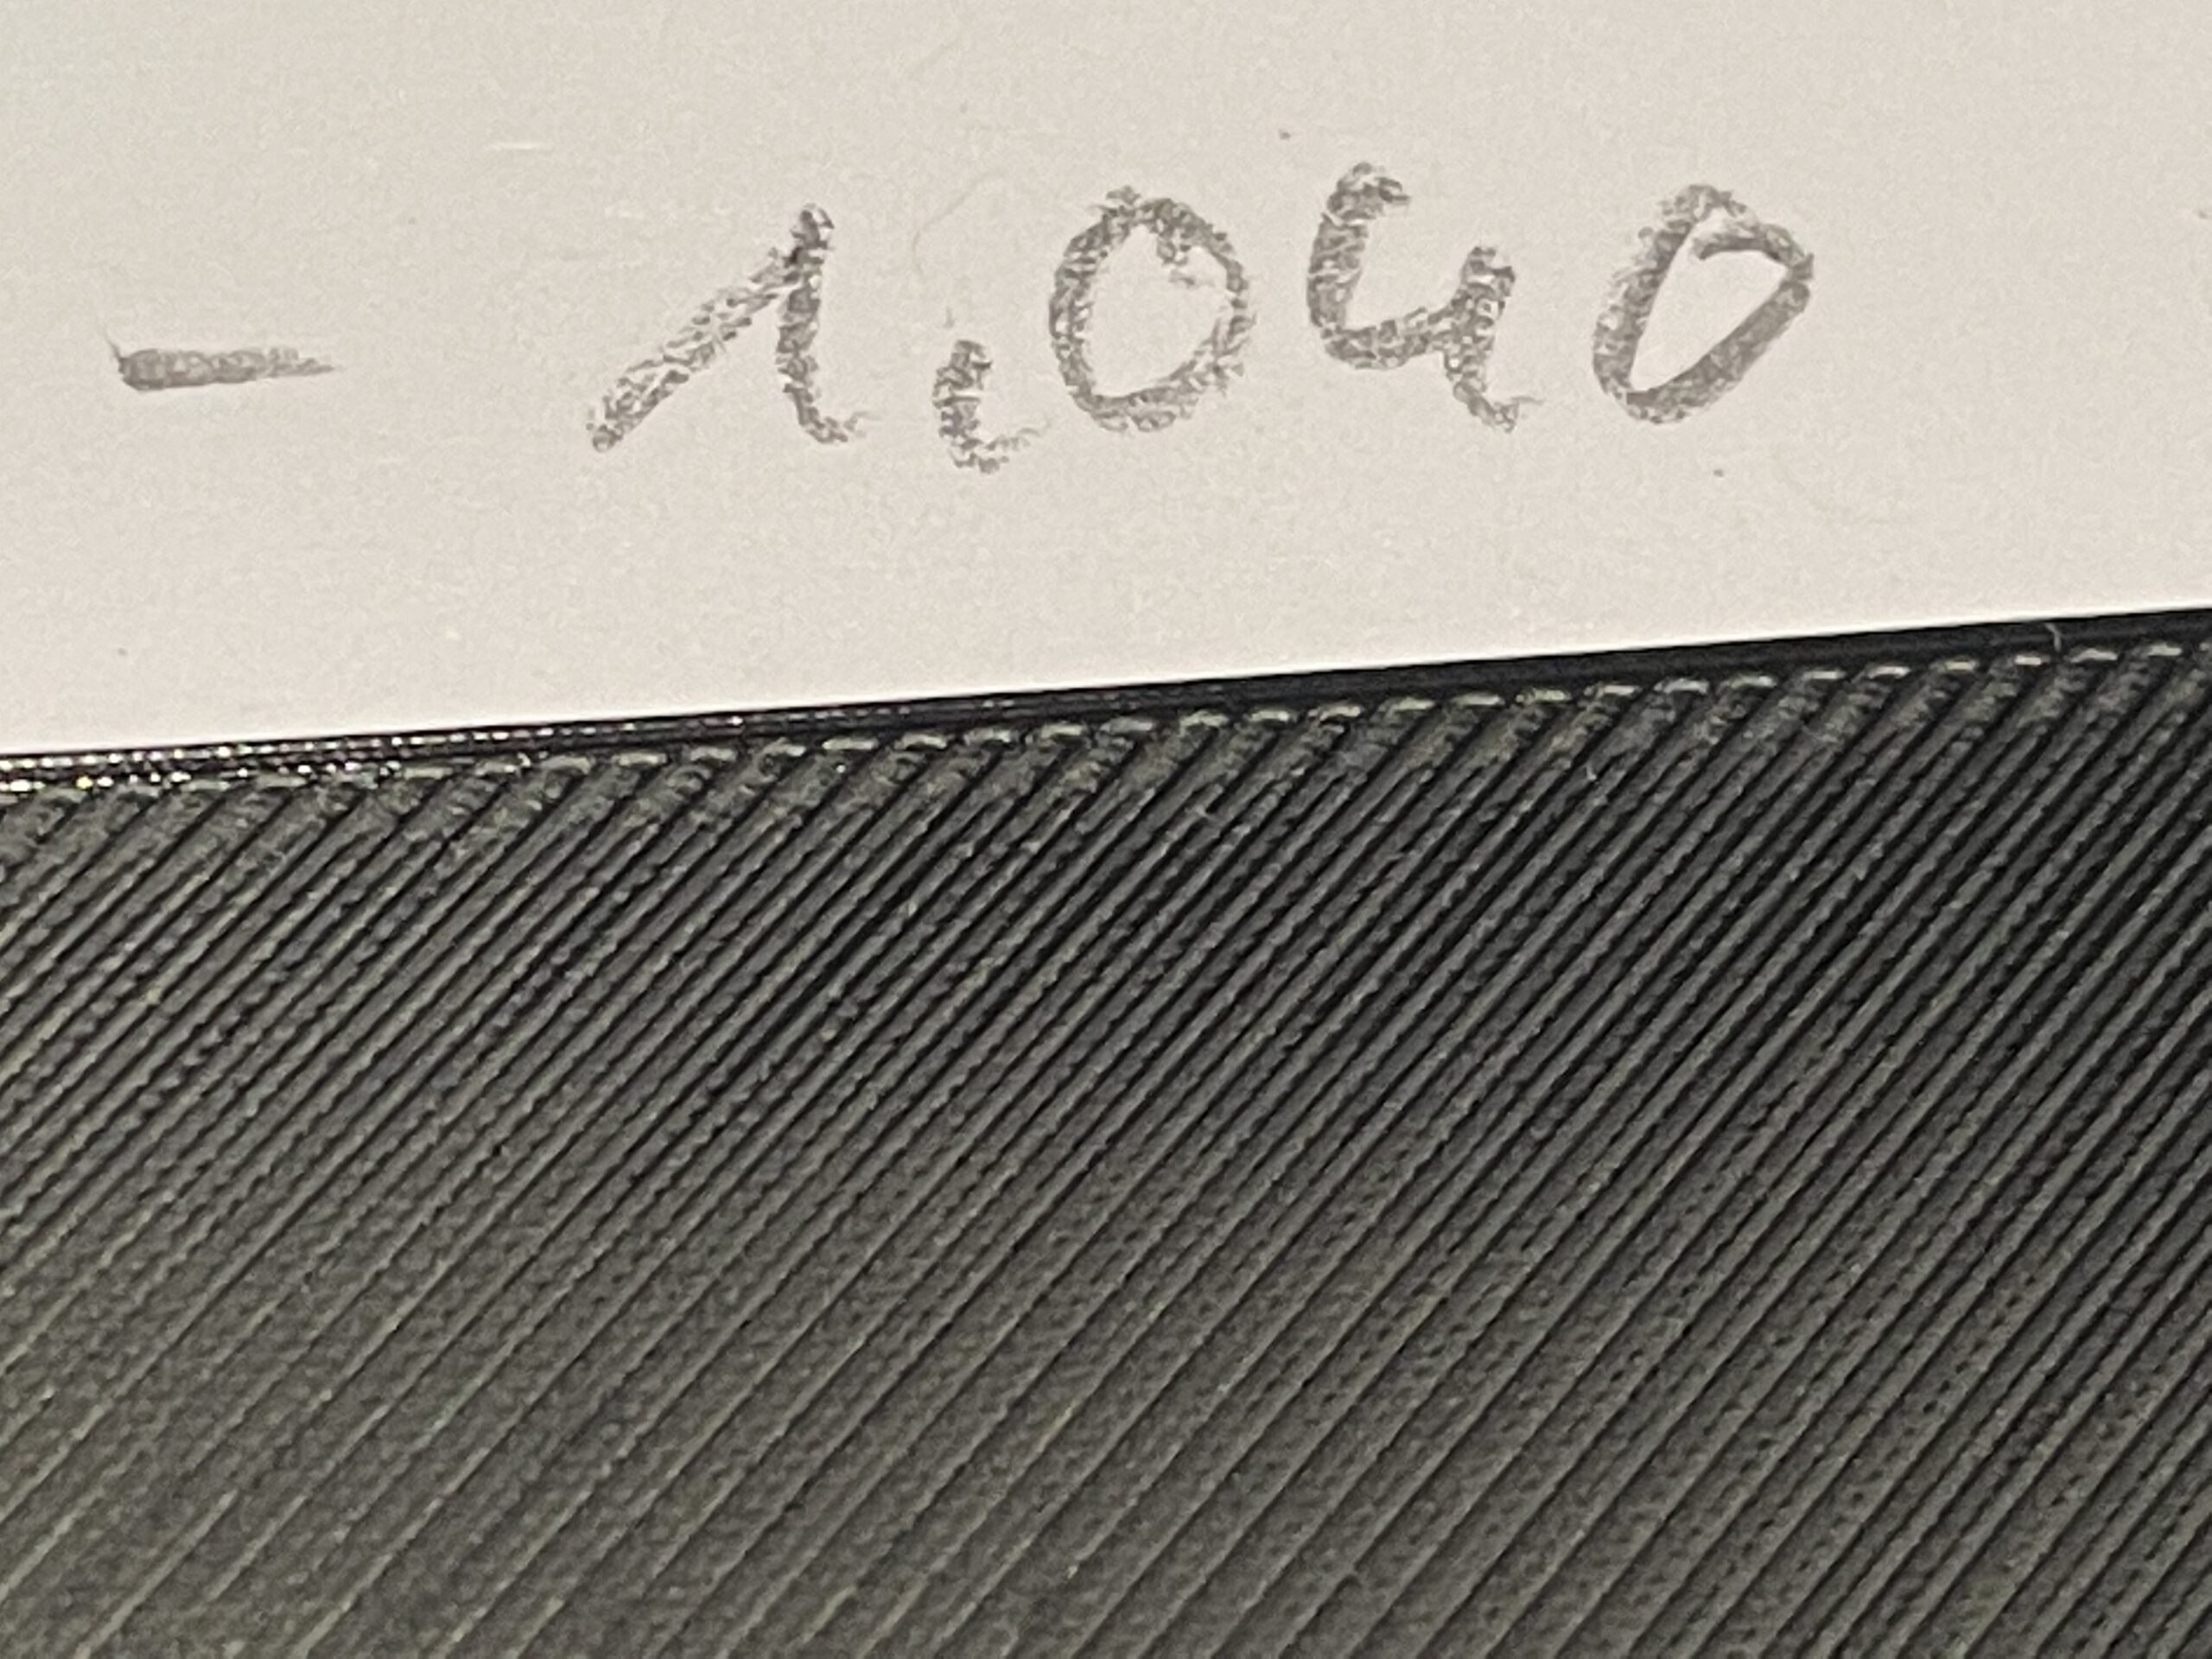
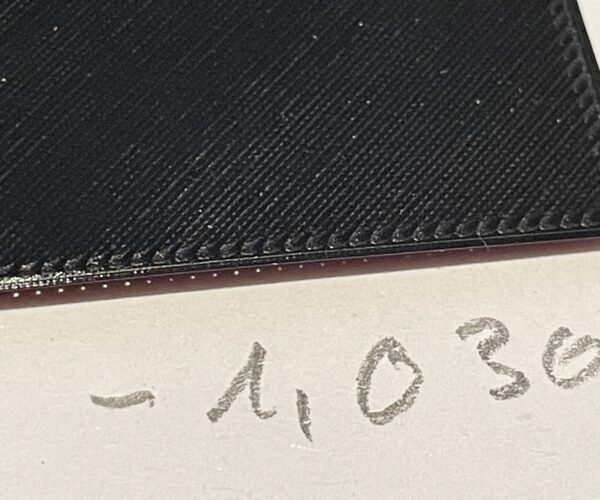
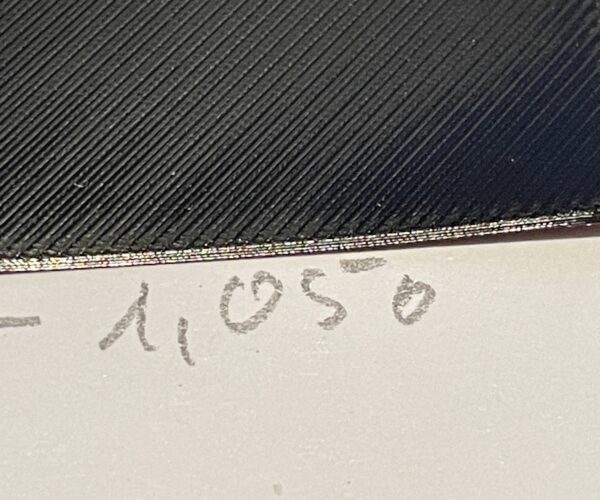
This is the overview of the last two squares. The starting point was -1.0. There the contact to the perimeter was lost and the strands came apart almost by looking at them. -1.075 is very rough and I deemed it too low.

My assumption was therefore that the sweet spot should be somewhere between -1.075 and -1.0, but the following trials didn't make me happy.


Am I going in the right direction? Am I expecting too much? Is my extrusion multiplier completely off?
As always thanks to everybody for their thoughts and time!
Hansjoerg
Pretty good
Those look to be improving. I can’t say that any of those first layers would disappoint me.
Why are you concerned?
Kia ora calibration helpers,
unhappy me again 🙂
I got myself one of those famous satin sheets (thought it might make nice looking bottoms) and also a factory fresh spool of Prusament PLA Galaxy Black. Which of course meant dialling in the new sheet. Settings are the Prusament PLA defaults with no changes to the extrusion multiplier.
Unfortunately I don't get a satisfactory result...
The undersides all look smooth, with no visible lines. The contact with the perimeters is fine, no light shining through.
This is the overview of the last two squares. The starting point was -1.0. There the contact to the perimeter was lost and the strands came apart almost by looking at them. -1.075 is very rough and I deemed it too low.
My assumption was therefore that the sweet spot should be somewhere between -1.075 and -1.0, but the following trials didn't make me happy.

Am I going in the right direction? Am I expecting too much? Is my extrusion multiplier completely off?
As always thanks to everybody for their thoughts and time!
Hansjoerg
--------------------
Chuck H
3D Printer Review Blog
obvious stranding
Hi Chuck,
I'm unhappy with the obvious stranding and the fact that the individual lines are so prominent. All surfaces feel quite rough to the touch. When scraping over the surface perpendicular to the lines there is distinct resistance and scraping noise. But as I said maybe I'm expecting too much.
Will do another try with -1.04 & -1.03 again tomorrow with 5 or 10 degrees hotter...
Cheers
Hansjoerg
test prints
Have you done test prints with these first layer tests? If the prints stick well to the surface, have a nice consistent bottom surface after the print, and print nicely with a good end result then that is probably what you should expect.
PETG
Hi all,
Back again with a n00b query.
Should I be looking for similar results when trying to set the Z on my Mini+ with PETG? Struggling to get the strings to merge. 🤔
Attachment Removed?
How do I get this file? It says the attachment was removed. I’m new to 3D printing and my calibration comes back fine but I’m having trouble getting my first layer to stick and then the nozzle is bumping the printing and sliding it around, so I know something’s off. I have a feeling it’s the nozzle height but I have no idea what to do to fix it.
Adjustment
Thank you! If I have to live adjust Z to more than -1.5 should I be physically moving my sensor higher?