RE: life adjust Z - my way
@joantabb
Hello,
I'm so happy I found the solution. The nylock bolts that hold the x carriage to the rails got a little bit loose after all of that printing. I took off the heat bed, retightened them and the prints are looking as good as ever. Set the Z value with 7x7 mesh bed leveling without any bed specific settings. This is the result:

As you can see, it's perfect if anybody was having the same problem, do this before doing the bed leveling stuff.
Although to be fair, Prusa does not include the tool for tightening down nuts with their kit, had to use my own tools for that, would really appreciate if you sent a nut tightener in the kit for other people.
RE: life adjust Z - my way
The timing of seeing this thread on the forum was fortuitous. I had just upgraded the hot end and extruder and was struggling to get things working again. I had begun to think maybe I'd made a huge mistake.
While the built-in mechanism for first layer Z adjustment is fine, this way really allowed me to dial in my machine and so far, my prints are coming out as well as they were before the upgrade. Hopefully now I can focus on leveraging the benefits of the improved hardware.
Aaron
RE: life adjust Z - my way
I had some troubles with PETG on the textured plate so I thought I'd share my experiences here:
- Make sure the bed is clean (my Prusament PETG is extremely picky on my not really level bed)
- Temperatures matter, keep that in mind. Printing hotter for me means I need to move my Z up slightly. I'd recommend sticking to the recommended value first before tinkering (240°C on first layer according to Prusa Slicer / Prusament PETG)
- Start high
This is important, I had exteme issues because I calibrated with PLA and was way too close when printing with PETG.
It looked okay on some parts of the bed while on others it ripped the first layer off like crazy.
Take your time and if you're not sure start dialing in the values above the sticking distance. - Take your time
I had to go do steps of about 0.02mm at a time, as my bed is nowhere near level (hello nylock mod soon™) my tolerance for a good first layer is about +/- 0.01mm. Go too high and it lifts off, go any lower and I get smears and blobs.
Hope this helps 😀
RE: life adjust Z - my way
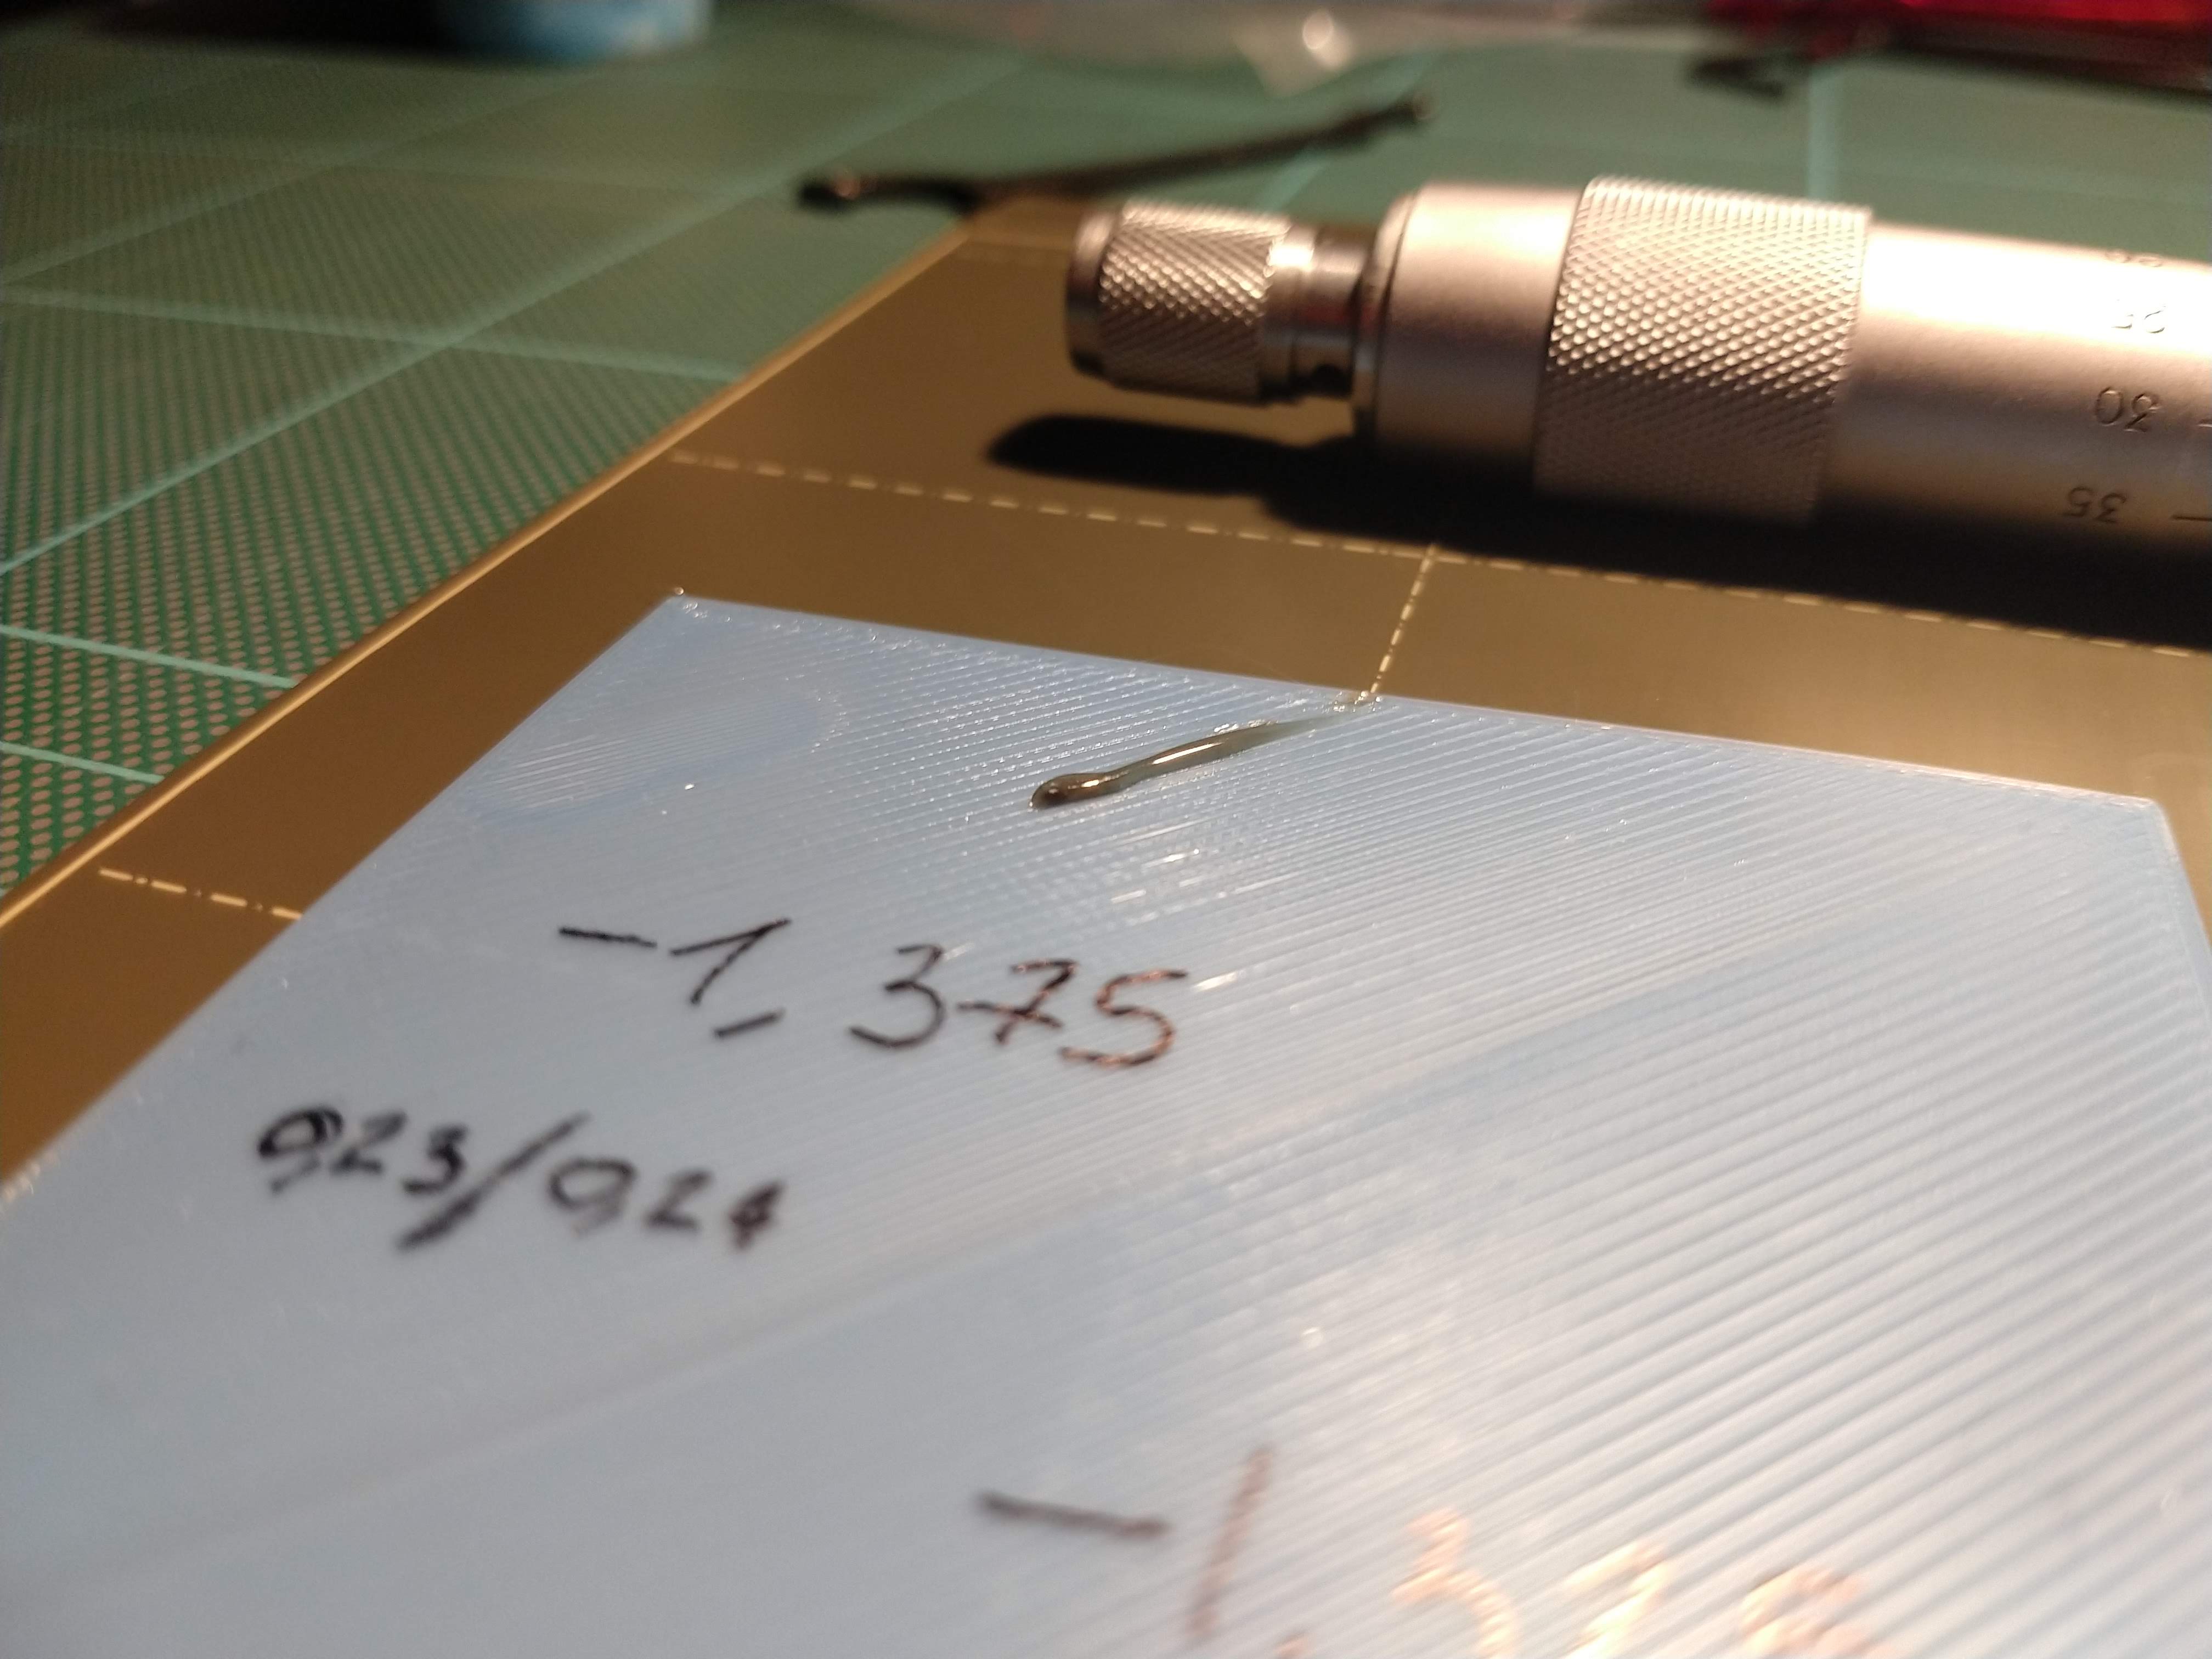
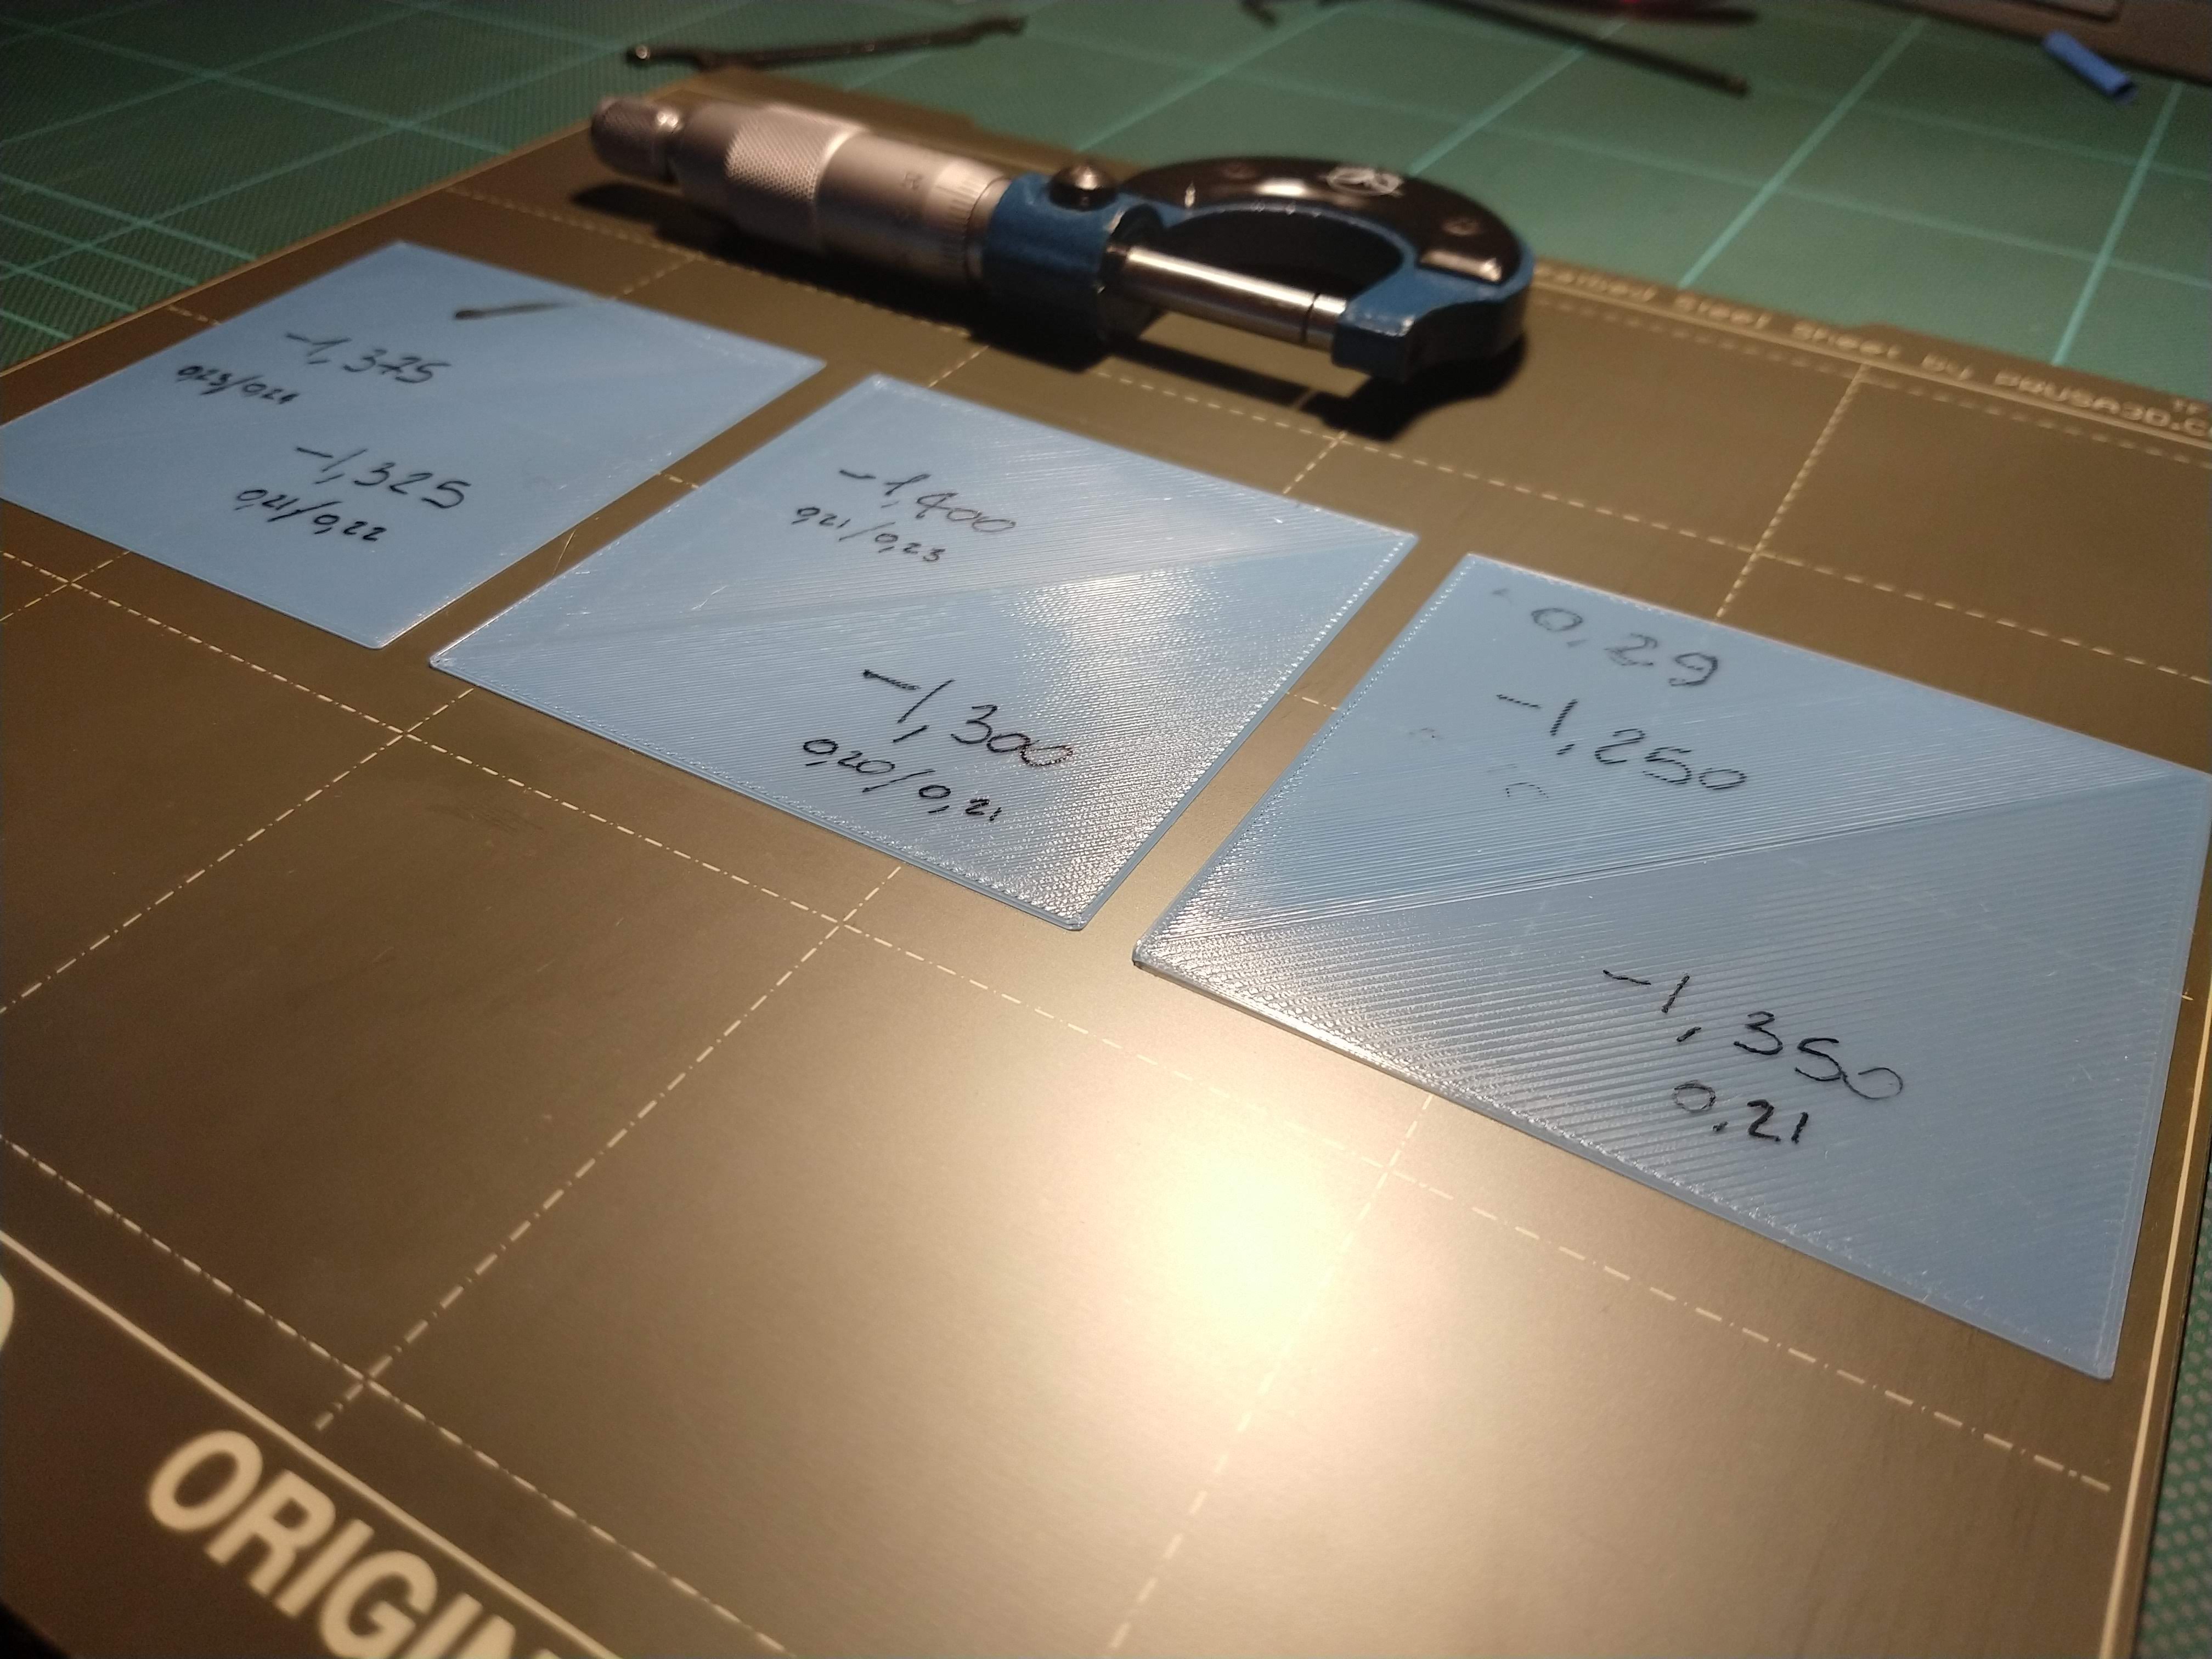
Hello everyone, in various places I found that you recommend this method to calibrate the first layer. I proceeded with this test but I don't understand which is better between -1.300 and -1.325 since both have a thickness (measured with the micrometer) of 0.20mm
PS: Sometimes during printing I find blobs falling on the surface (like the one in the picture) and I don't understand the cause. I cleaned the nozzle and did the cold pull, but nothing has changed.
Thanks for the support

RE: life adjust Z - my way
@baobots
Have you ever changed your nozzle ? The usual reason is that the nozzle is not tightened properly and so plastic works it’s way both up and down the threads and collects on top and bottom of the heat block where it then drips down onto the print. You have to do the job precisely to get a proper seal.
RE: life adjust Z - my way
@baobots
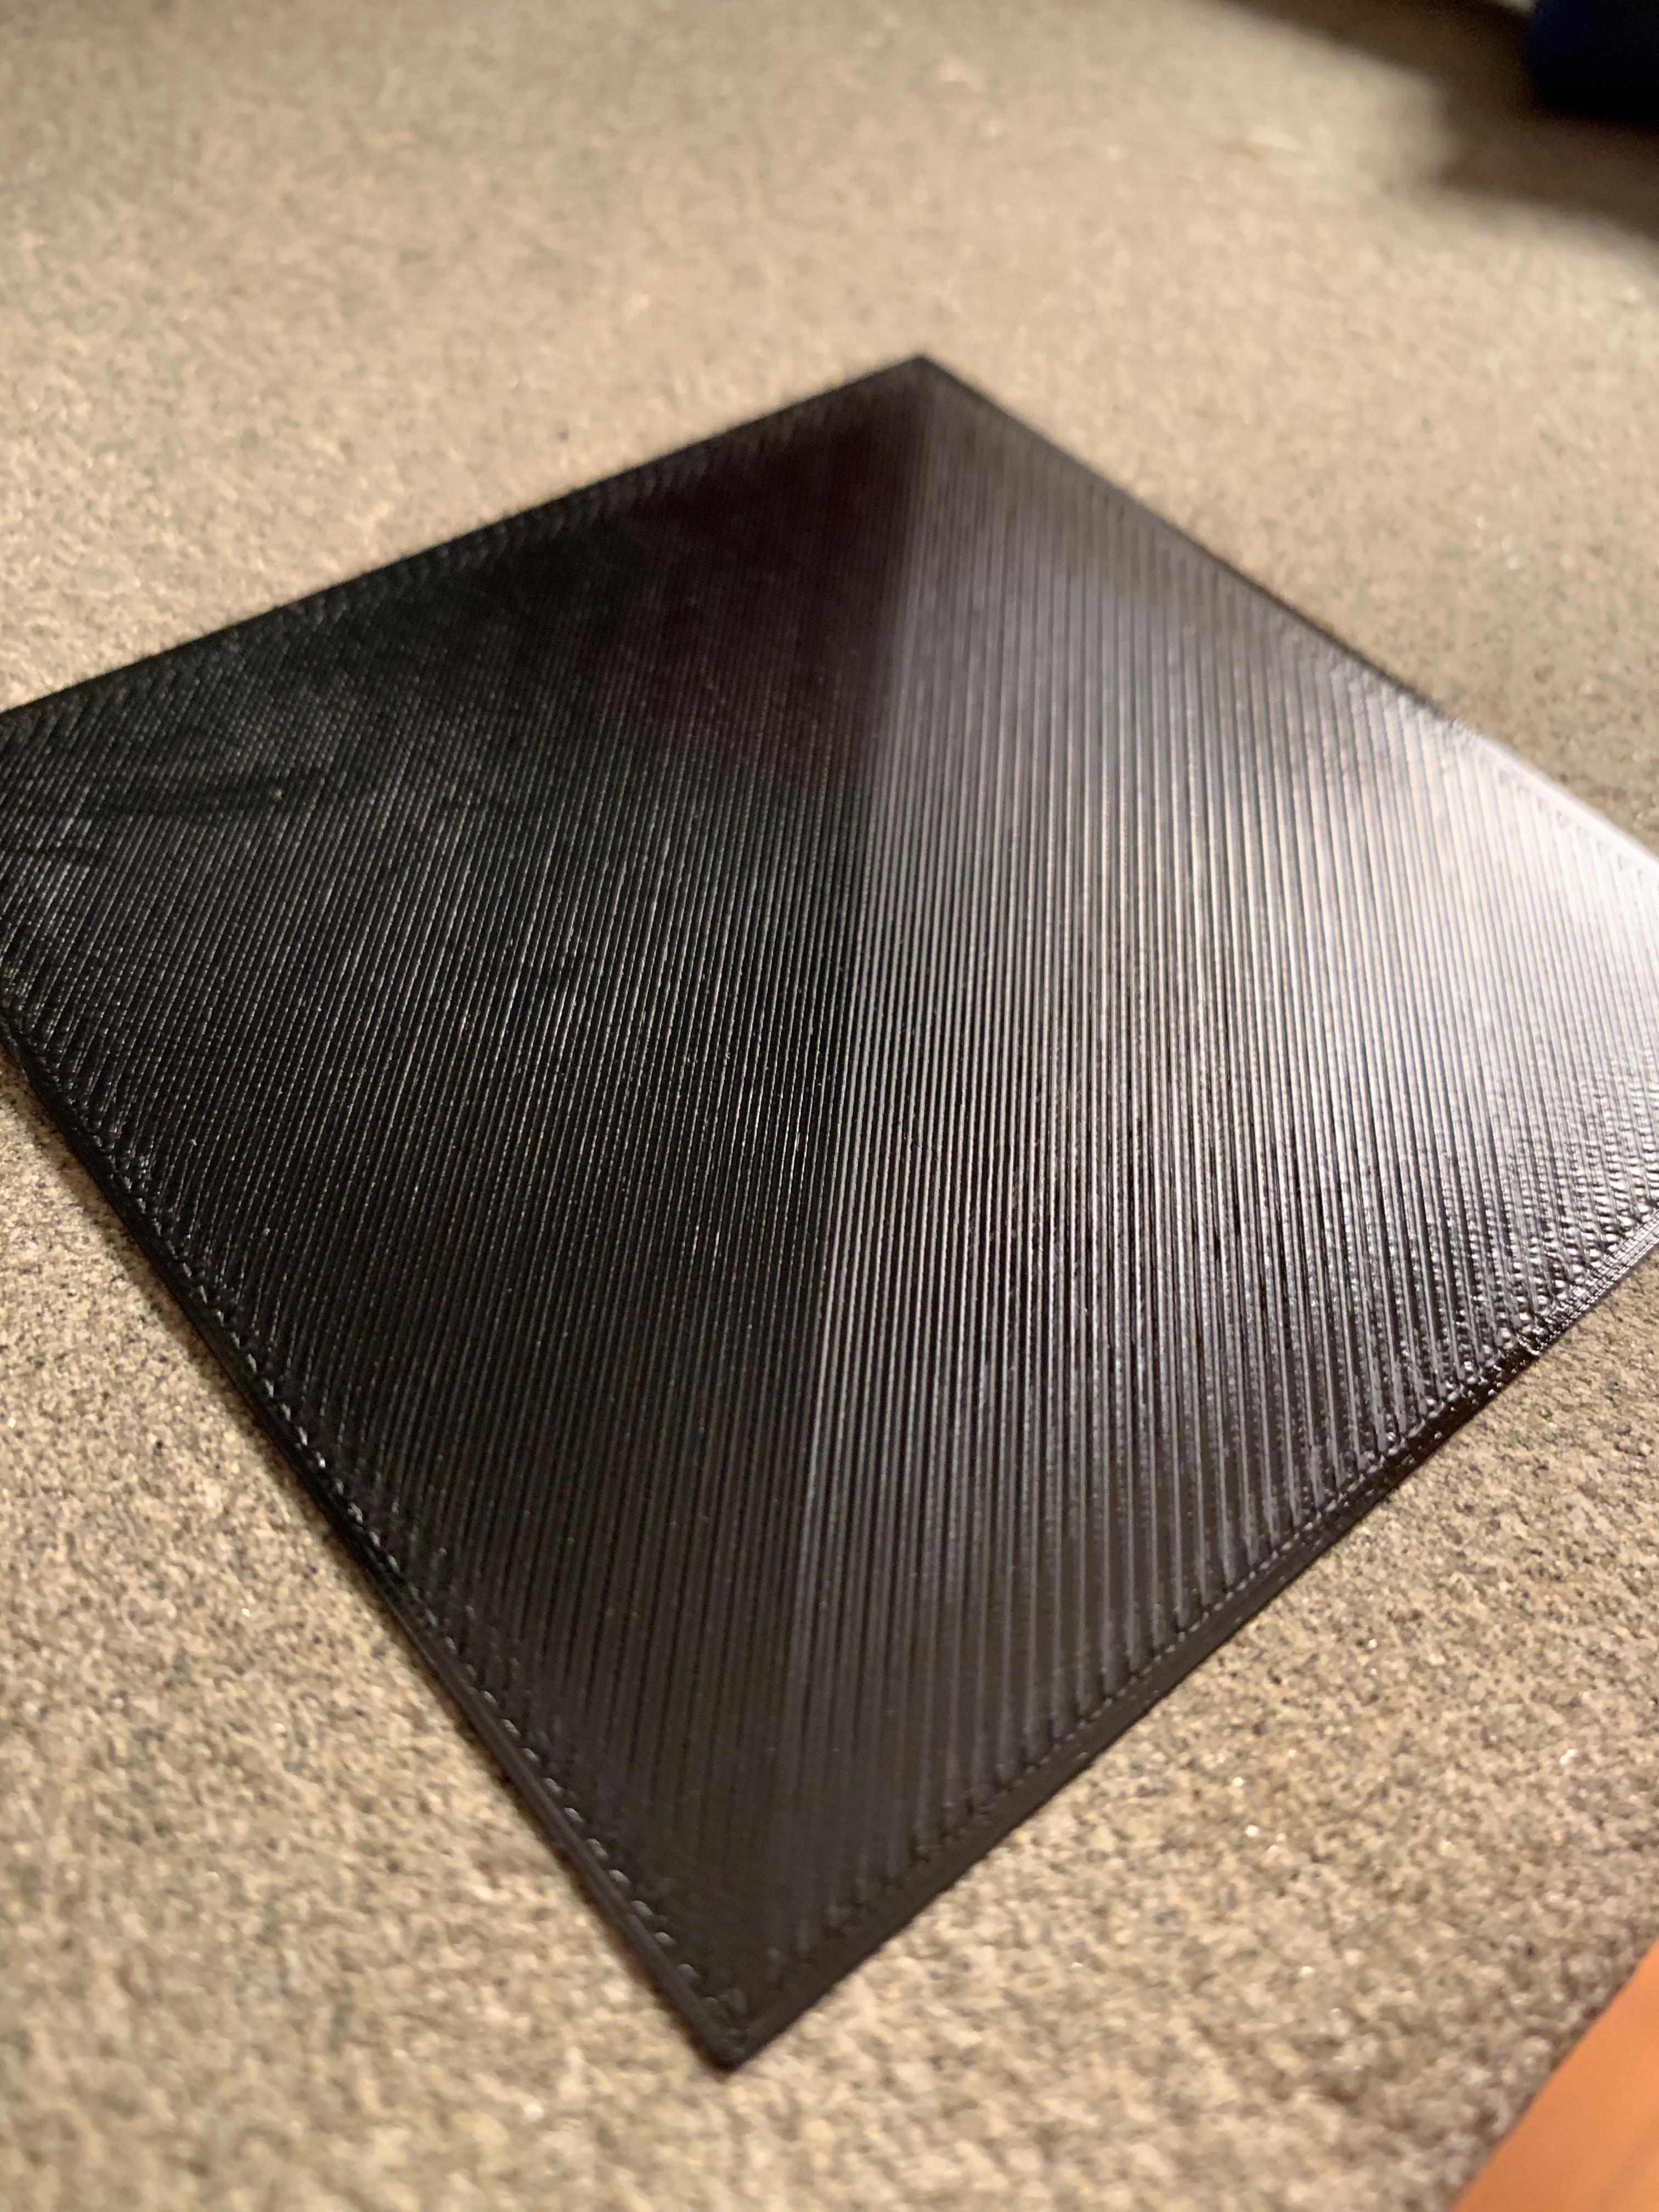
Hi Baobots, when you get very close to the ideal setting is is difficult to see the differences from the top, so turn the two samples over and have a look at the bottom.
if one liiks like a smooth sheet of fused plastic, and the other has tiny lines where the filament hasn't fully fused, or the lines start to look as if they are no longer straight, then the smooth bottom is the one to go with, tiny lines means the nozzle is a touch to high, distorted wiggly lines is the nozzle being too low.
regards Joan
I try to make safe suggestions,You should understand the context and ensure you are happy that they are safe before attempting to apply my suggestions, what you do, is YOUR responsibility. Location Halifax UK
RE: life adjust Z - my way
@matic-jurkovic
I found this wrench to be just the ticket for adjustment without removing the bed.
5.5 mm Wrench for Adjusting Y-axis Bearing U-bolts on Prusa MK2S by SubSite
Published on January 22, 2018
www.thingiverse.com/thing:2766241
RE: life adjust Z - my way
@joantabb
Thanks for the support, now I can see differences that I didn't see before. Definitely -1.300 is not good as it creates small holes along the edges and folding it marks along the lines. The version -1.375 is instead rough from the side above. Well, I think I'll use the one at -1.325 or -1.350 as they are full and smooth both above and below. Thank you so much again 🙂
@neophyl
You're really right, I didn't notice that the nozzle was badly fixed and the plastic was coming out from above. I'll try to close the nozzle better. Thank you for the tip 😉
Photos: -1.300 -1.325 -1.350


RE: life adjust Z - my way
@baobots
Not sure how accurate the printer actually is but you can try to see if there's a setting between .375 and .350 that does both sides well.
From my experience working with PETG and Nylon I usually tend to favor a higher setting as being to close can wreak all sorts of havoc with the PETG and Nylon I got (ripping perimeters off the bed and blobs of doom etc.).
PLA and similar seem to be way more forgiving so I created a seperate profile for "harder" materials.
RE: life adjust Z - my way
@baobots
if you look at my post on page 37 you can see clearly what is the correct height checking your prints against a strong light (check my pics)
you'll clearly see what's the correct layer height because it will show as uniformed plastic square with no gaps, wobbles and very wobbly. basically light must go through like a film with no gaps.
RE: life adjust Z - my way
You also have bed level compensation to deal with minor side to side - front to back variation in bed level. I have to add a -50 um to one side to get a truly good layer 1.
RE: life adjust Z - my way
Hi,
I'm also a newbie having trouble with my 1st layer. The first 2 pictures were printed with -800 and -825, I settled for the shiny -800. Yet when I start printing an something else, the 1st layer looks horrible (last picture). What am I doing wrong?

When I adjust the live z for the part Im printing to a nice smooth layer, I end up with a stringy layer when I print the test file from the op.
RE: life adjust Z - my way
The last pic shows likely more than 1 layer thick. Top infill comes into play. Best fix is to use the new "monotonic" top infill pattern available in PrusaSlicer Alpha, and possibly enable ironing as well.
You can fiddle with extrusion widths and calibrating your extrusion multiplier in the meantime, but the "lawnmower" effect is related to the direction adjacent lines are printed and difficult to remove with other top infill patterns.
RE: life adjust Z - my way
The last picture is really just the 1st layer, with 0.2mm layer height specified in Prusaslicer.
I'm using the Prusament PLA, so I kinda hoped not to have to worry with extrusion width and multiplier. Is that assumption wrong?
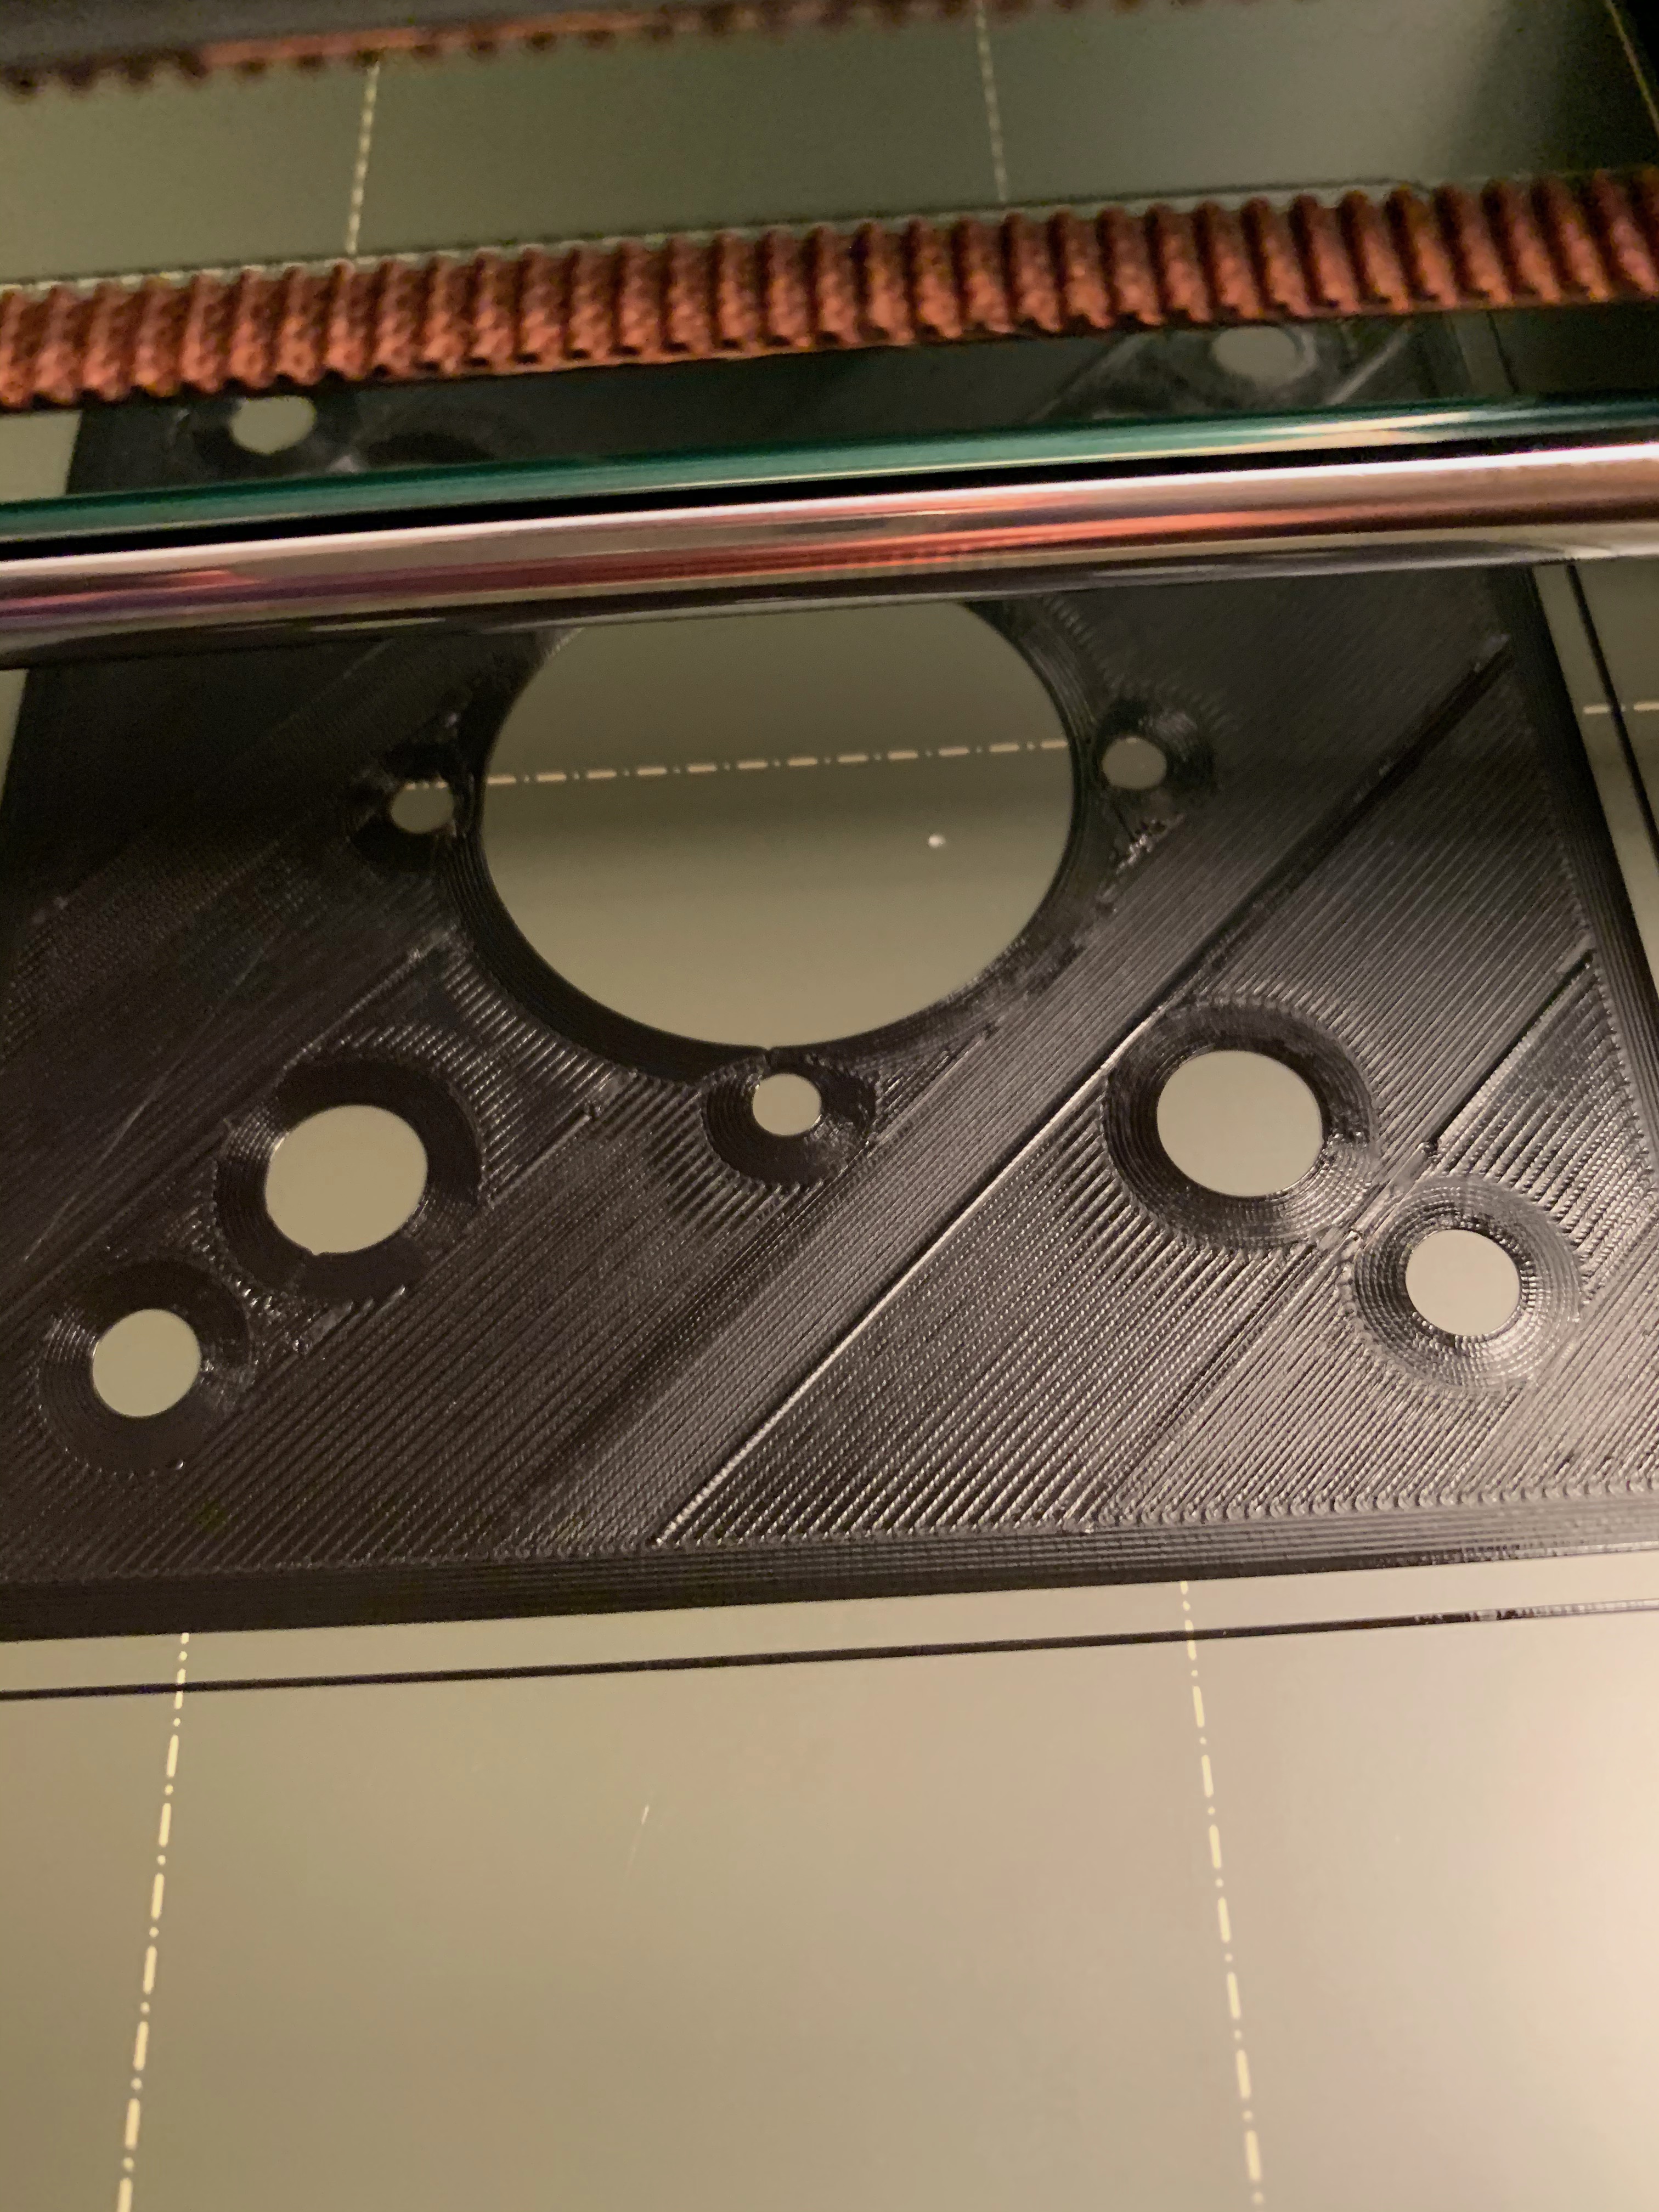
The extra thick lines in the picture appear to happen because they were the last lines to be filled. Unlike with the calibration file the printer doesn't go from one corner to the other, rather it jumps around (due to the holes in the object I guess). Could this somehow be controlled in the slicer?
And thanks for responding 🙂
RE: life adjust Z - my way
Hi Ferly,
Could you try the last print again but as it it printing, try reducing the live Z a little more.
in your case -800 seems to be a little too low. (there's not a lot in it...)
on the image with the holes in the first layer, what is happening is, the Slicing algorythm looks at the surface and picks some start position. (I don't know the decision process) it then prints all of the stripes that it can manage, until there is a major change in geometery, the slicer then picks another start position and prints what it can, eventually there are areas where the new print filament butts up to existing cold filament, and this sometimes leaves an emphasised boundary line, because the new hot filament is forced to pile up, on the existing cold filament.
the cause of this, is excess filament in too little space.
For the first layer the cure is to raise the nozzle a tiny bit and that will hopefully allow just enough space for all of the available filament to lay down without squishing too much and give you a smoother surface...
good luck, Joan
I try to make safe suggestions,You should understand the context and ensure you are happy that they are safe before attempting to apply my suggestions, what you do, is YOUR responsibility. Location Halifax UK
RE: life adjust Z - my way
The last picture is really just the 1st layer, with 0.2mm layer height specified in Prusaslicer.
Ah, OK. Just a 0.2mm thick layer with holes then, correct?
I'm using the Prusament PLA, so I kinda hoped not to have to worry with extrusion width and multiplier. Is that assumption wrong?
The profiles should be good in terms of the extrusion multiplier. Playing with extrusion width lets you try to fit odd numbers of extrusion lines. The exact amount varies depending on the specific shape you're printing and the angles used for infill. Those odd lines happen when two different patches of infill meet up and an odd line disrupts the visual consistency. The resulting extrusion disrupts the neat "lawnmower" pattern.
It's just a work-around that can improve visual appearance. This is a limitation of the infill pattern, and is definitely fixed with the "monotonic" infill pattern.
The extra thick lines in the picture appear to happen because they were the last lines to be filled. Unlike with the calibration file the printer doesn't go from one corner to the other, rather it jumps around (due to the holes in the object I guess). Could this somehow be controlled in the slicer?
The difference is the holes. On a flat, uninterrupted surface, the default rectilinear pattern can consistently use alternating line directions, giving that neat and tidy mower effect. Once you introduce holes or other obstructions, solid infill is printed in sections to work around features like holes and bumps. You can watch this in action as the slicer tries to neatly fill in around the external perimeters printed around the holes. It tries to avoid overlapping extrusions. With monotonic, the infill lines can overlap those perimeter lines to produce a consistent pattern (along with a few other features) to give a more uniform appearance.
With the latest Alpha PrusaSlicer releases, you can try Print Settings->Infill->Top fill pattern and Bottom fill pattern to try monotonic out. Otherwise, playing with extrusion widths (Print Settings->Advanced->Top solid infill) and extrusion multiplier are your best bet.
If you'd care to save your part & settings out as a project 3MF file, zip it and attach it to a reply here, I'd be happy to show the results with monotonic infill.
RE: life adjust Z - my way
Thanks Joan, that's what I ended up doing. I raised the zlive to -750 and it helps to reduce the squishing.
I was just not sure, if this is expected behaviour or if I'm doing something wrong. But the 2 files print quite differently due to the geometry. The calibration file with -750 is just not quite squished enough I would have thought, so that was really confusing seeing such a big difference.
I will print both files again later on with -750 and post a picture.
Edit: Will post the file later also, Bob. Thanks guys!!!!
RE: life adjust Z - my way
So, did a couple more test prints.
Here is the test file and the 1st layer of the part I was printing before. The test file was printed with zlive -800 and -750. For the part I had to use-725 to get rid of all the squished lines.

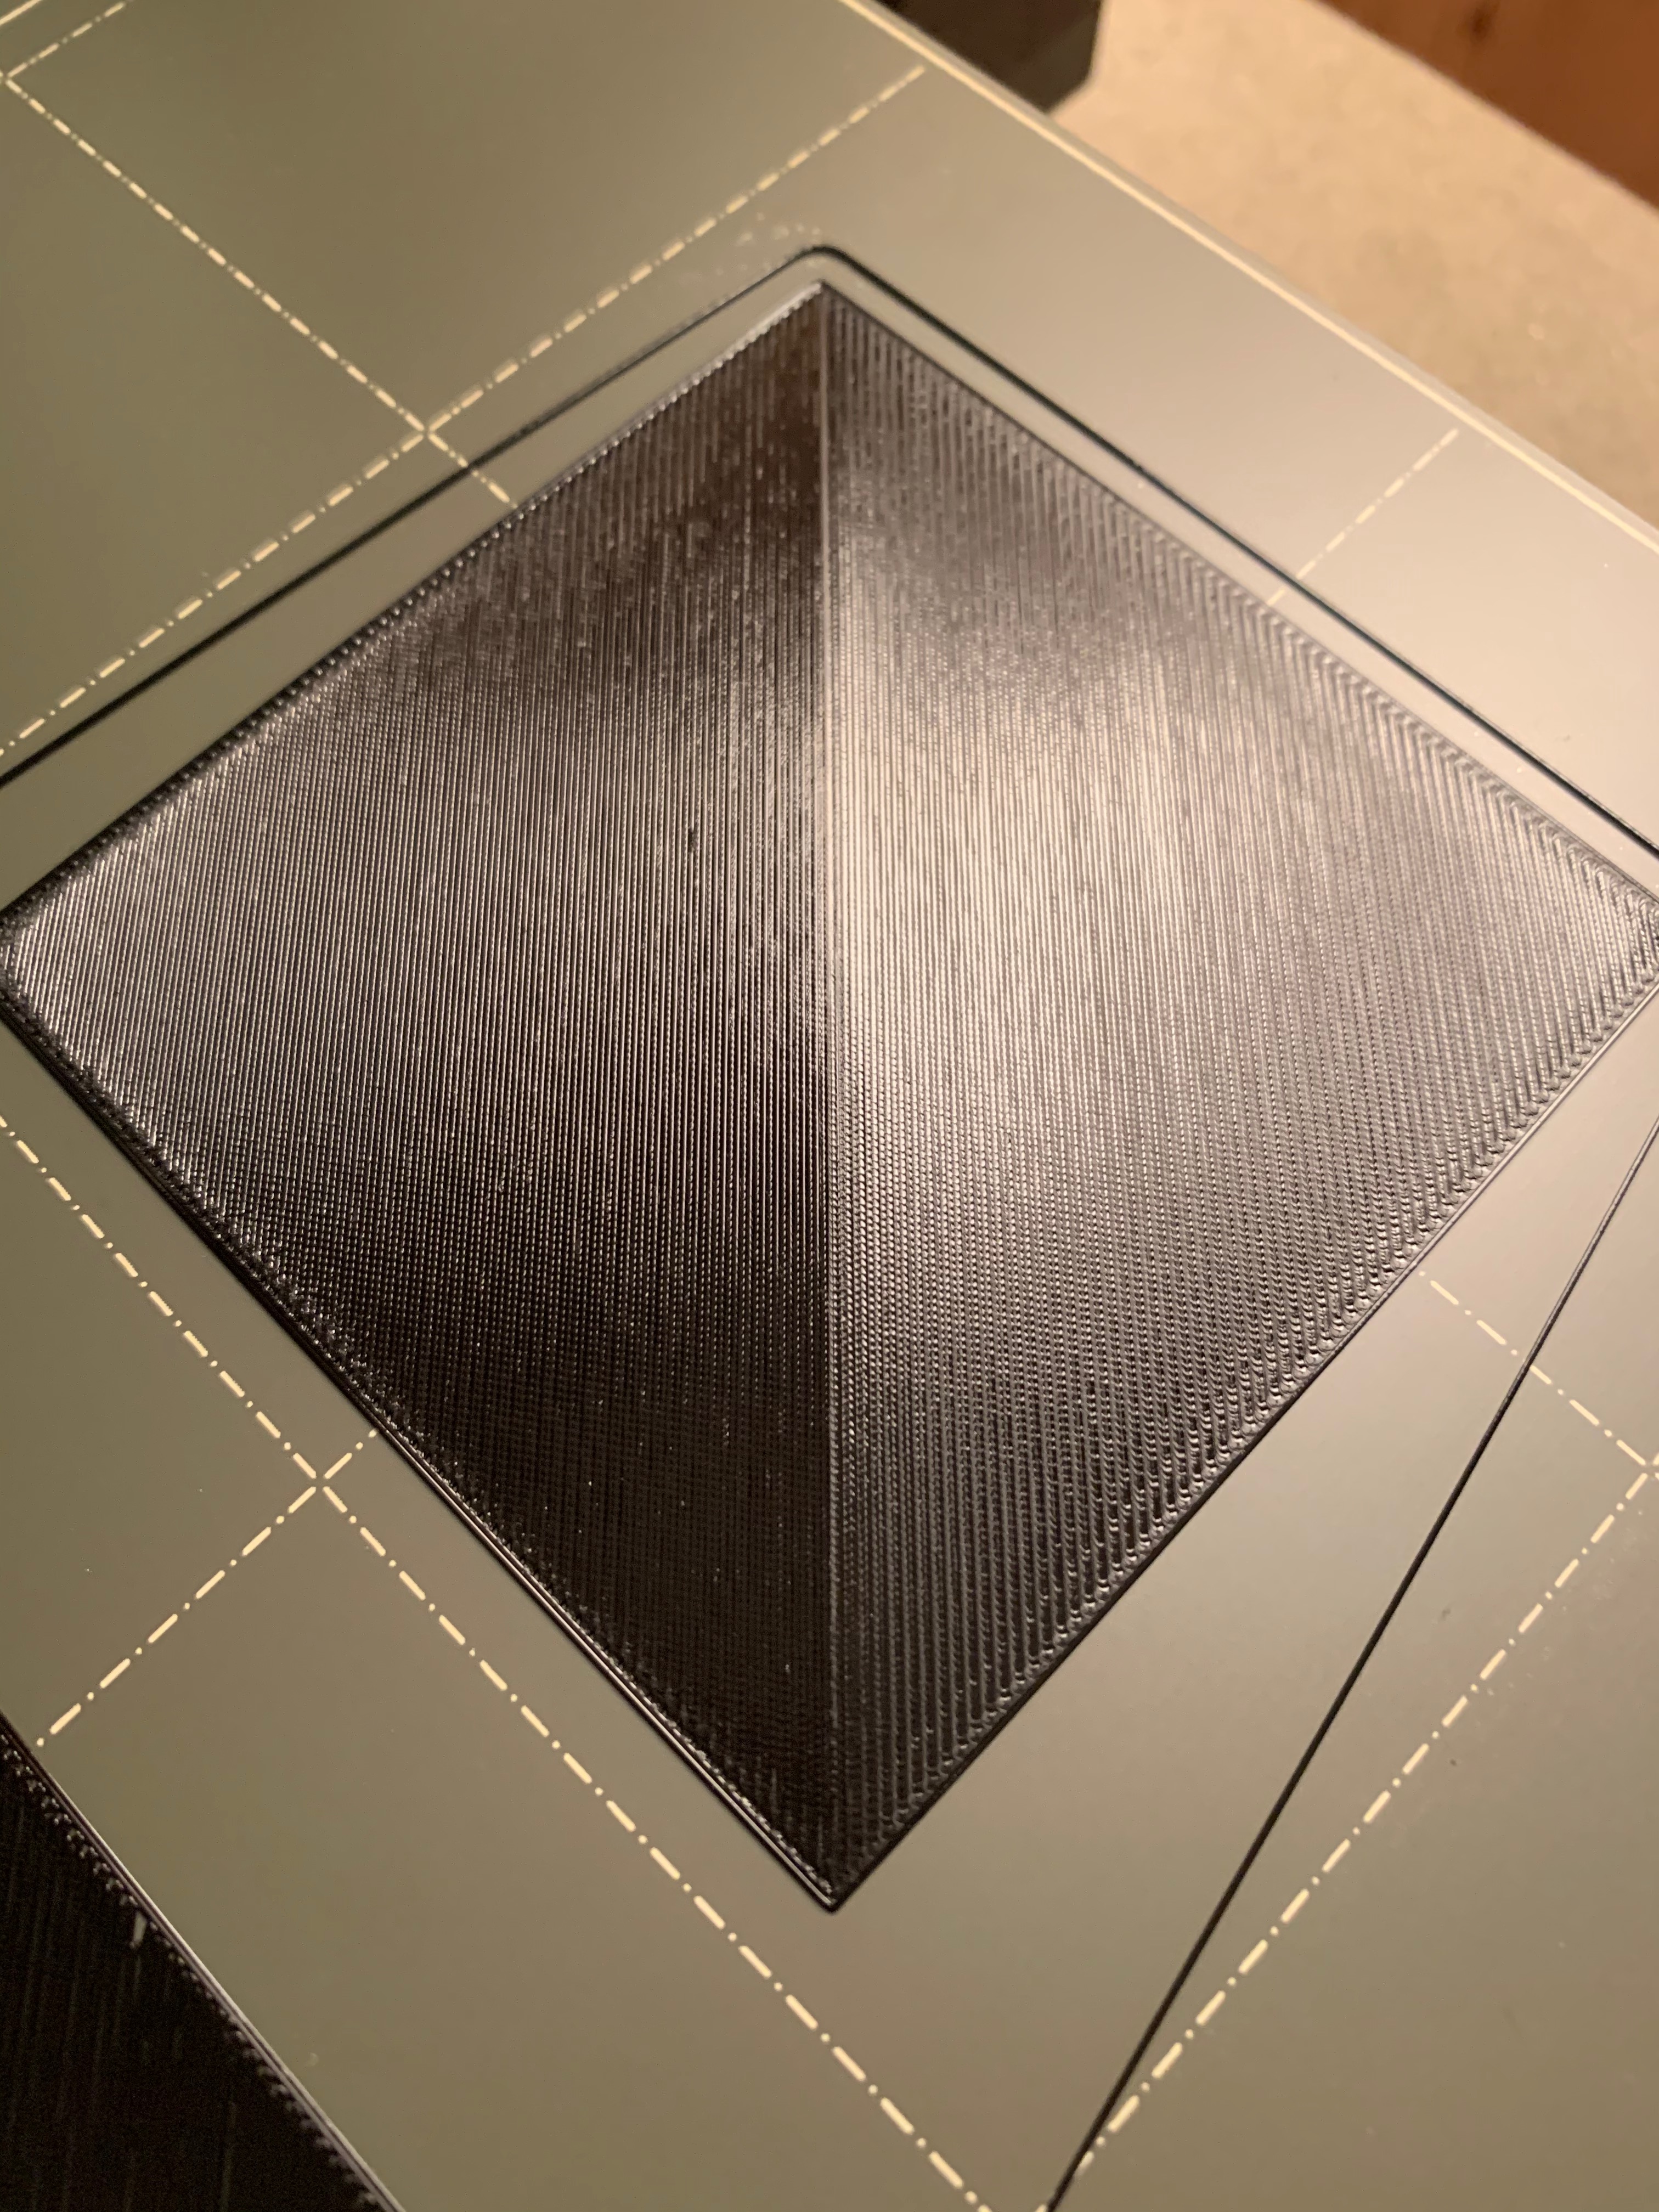
Here is the backside of those prints:


And here is the test file against a light:
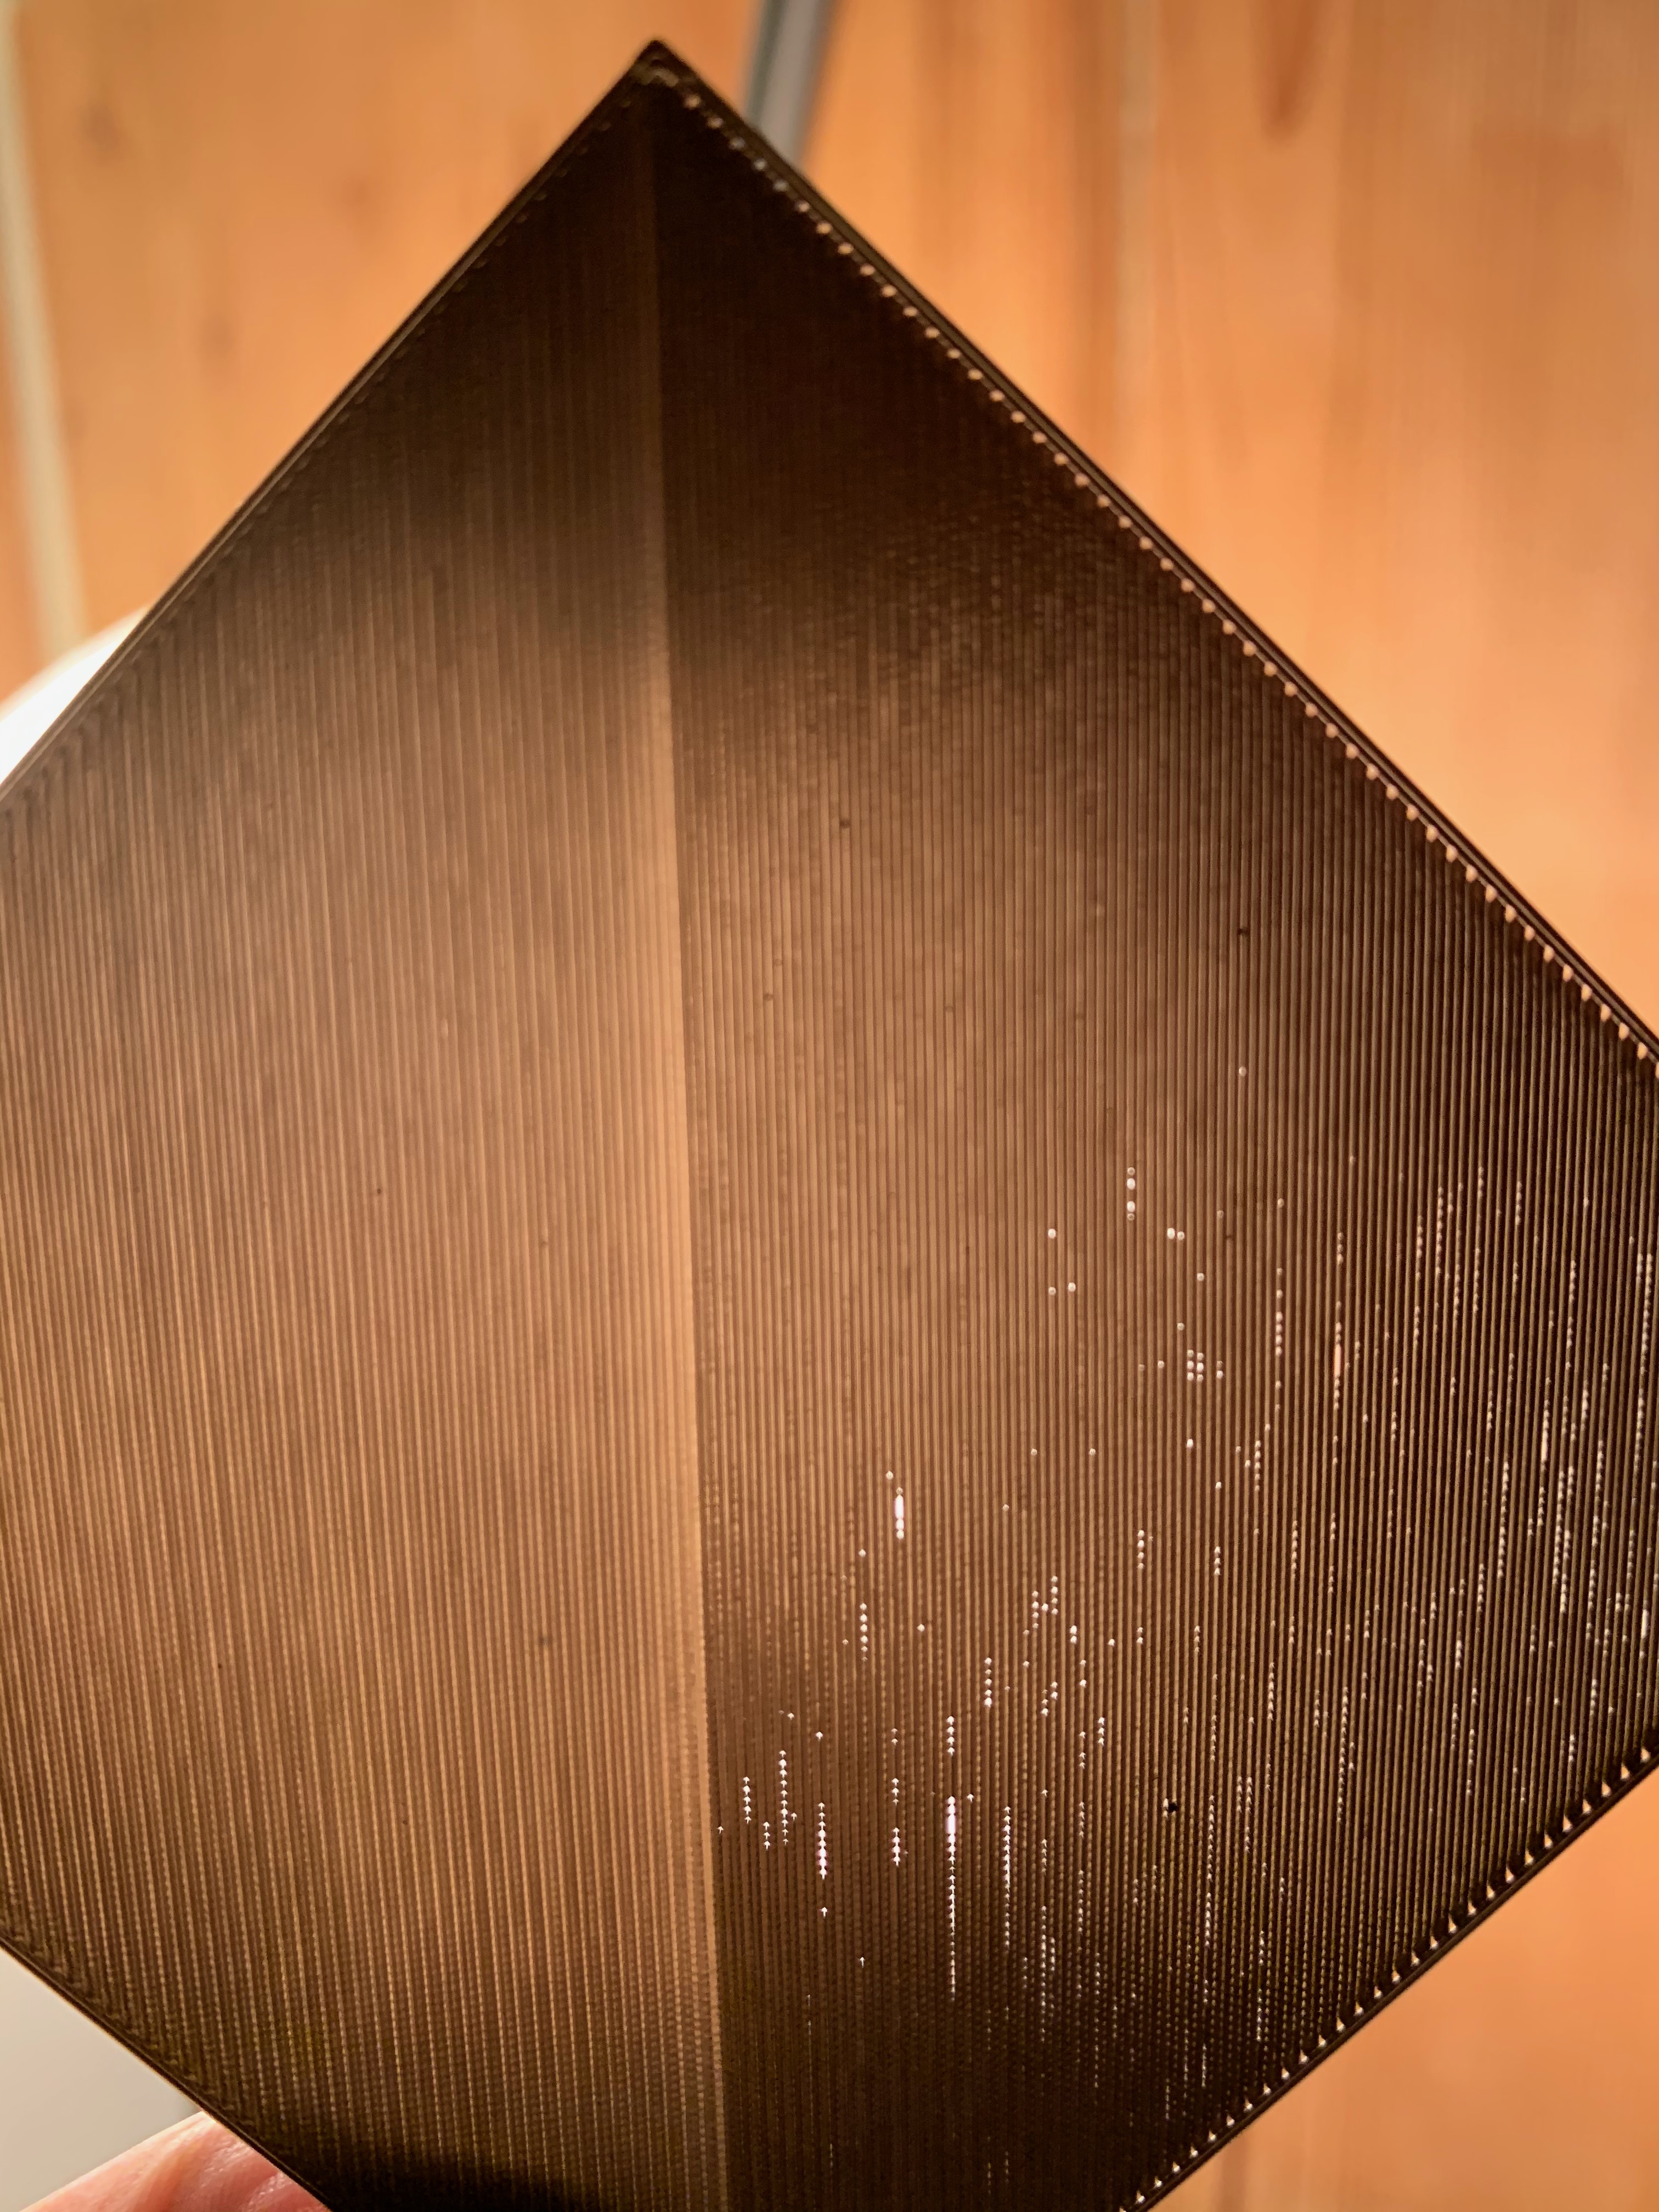
So to me the -800 would be the best first layer of those prints. However due to the geometry and infill pattern I would have to go down to get rid of the squish.
I also had a look at Bob's suggested alpha version of Prusaslicer and there is a lovely picture and explanation of the very same 'problem' I'm having (for reference: https://github.com/prusa3d/PrusaSlicer/releases , you need to scroll down a bit). So the explanation given earlier is spot on.
I have to say, I do not care for the aesthetics of those parts. I'm more worried about the layers that go on top of those squished lines. Do they stick correctly? Does it affect the overall sturdiness of the part? What would the recommendation be, if we follow the tried and trusted 'form follows function' formula?
And as a last question, am I correct with the -800 for the test file or can the pros see something wrong with it?
And thank you so very much for all the help you guys have given!
I tried attaching the 3mf file, but I get an error saying this file type is not allowed. Zipping it doesn't help either.
RE: life adjust Z - my way
Hi Ferly,
there are restrictions on which file types can be attached on the forum... which can be very frustrating... however if you Zip the .3mf file, you can then attach the .zip file.
the situation you are experiencing could be more complicated than you expect....
the Life adjust 'Z' files are getting old now, they were produced in Simplify3d and were appropriate at that time, however Prusa Slicer has been moving on since then, so it is entirely possible that you are getting different results.
Life Adjust Z, has got you into the right ballpark, and now you would be better working with live files from your own slicer setup.
watch the first layer and adjust slightly if required... changes in temperature, changes in filament type(Manufacturer etc), even changes in filament colour can cause small differences in live Z
a small amount of the overlapping that you started off with will resolve itself in successive layers at the bottom of a print, we sometimes worry too much about imperfections...
for your first layer you are looking for a smooth top surface with allstrands of filament squished together. if you turn the test patch over after printing you should see that:-
the strands form a single contiguous surface, (excellent)
if the lines are all straight, but there are hairline crevaces between the strands, your live Z is a touch too high. (Pretty good...)
If the lines are starting to bend a little and crevaces are beginning to form irregularly in the surface, live Z is getting too low (TOO BIG a negative number) (this effect usually accompanies a reduction in quality of the top surface, and if there are changes in geometry of the model, will lead to the overlapping of some sections of the print due to there being insufficient space for the filament to lay down flat... )( poorer results...) (Over squiishing tends to cause reduced adhesion in extreme cases)
this next paragraph is possibly going to age very quickly...
If you get the overlapping lines on your ultimate top layers, this can be caused by slight over extrusion. in which case, reducing the flow rate on the LCD Panel, or reslicing (Checking that the filament diameter measures the same as the diameter shown in slicer) (a slightly over size filament will cause some degree of over extrusion because all of the calculations are based on the smaller size... If the filament size is actually correct, reslicing with a slightly reduced Extrusion multiplier, can improve the top surface
Note Prusa Slicer typically slices prints with layer heights greather than 0.075mm using a reduced flow multiplier of 95%
This line is in the PLA settings in prusa slicer 2.3.0 Alpha3 (Similar lines are in other versions)
M221 S{if layer_height<0.075}100{else}95{endif}
it it easier to get away with slight under extrusion, than slight over extrusion. and remember that this is complex flow dynamics, lots of factors can cause changes.... I have only mentioned a few...
3d printing is still a bit of an art...
I think Prusa Slicer 2.3.0 and later versions, will change the top layer issues, because of Nonotonous infill and ironing, moving forward.
Regards Joan
I try to make safe suggestions,You should understand the context and ensure you are happy that they are safe before attempting to apply my suggestions, what you do, is YOUR responsibility. Location Halifax UK
RE: life adjust Z - my way
That is an excellent tutorial, especially the extra sentence about being too close and the LiveZ setting being too big of a negative number. Thanks for your help on the forum, I read your replies often and learn each time.