RE: life adjust Z - my way
Gonzonia,
That is spectactular! I agree that you must have had several issues but it certainly looks like you've got them all resolved now.
Happy printing!
Steve
RE: life adjust Z - my way
I just got my Mini yesterday and have been printing the PLA_S3D_Calibration..._v6.1. This is my 1st 3d printer so noob alert!
I am finding that when I print a whole square with a constant Live Adj the right side of the print shows as lower than the left. Especially the starting and ending corners. I was looking a bit at the gcode file to see if I could reposition the print to the middle of the bed to see if that showed different results (planning to use G92). As I was looking through I saw the G80, that is a "Meshed based z-probe" according to the knowledge base. This article also says this only applies to MK2.5-3s but doesn't mention Mini. When I run this gcode file I don't see any mesh bed probing happening. Is that normal? It seems to me like I'd want the probing to happen as normal when doing this kind of test to account for any bed variance. Do others with i3s see mesh probing to start? Do others with Mini's see or not see that happening?
Here's some pics with Live Z at -0.250
RE: life adjust Z - my way
Following up to the previous post (which is awaiting moderation) I see that in Pronterface that if I send a G80 it is an unknown command. I presume that is not the case for the i3 series.
>>>G80
SENDING:G80
echo:Unknown command: "G80"
RE: life adjust Z - my way
When I look at the Prusa-Firmware-Buddy/doc/gcode/PLA_V2Calibration_MINI.gcode file in git it uses: G29 ;meshbed leveling.
Maybe I should substitute that for the G80, assuming someone can confirm that G80 does actually do mesh bed leveling and not just set the type of mesh...
RE: life adjust Z - my way
Hi Mog,
I think I am the only Moderator around at the moment, we are all volunteers.
I don't have a mini myself, so I got a USB cable out to try the Commands on my Mk3, and spent ages trying to get it to work.
I am not sure whether it is a faulty cable or faulty printer, whatever the problem is, the USB device is not being recognised
the M80 command appears to be a setup command not an execution command
I am not sure what you are trying to do (Other than get your printer working...)
did you try to use any additional parameters with the G90 command?
Life Adjust Z My Way, is set up for the Mk2 and mk3 printers which have a larger beds than the mini. which is why the print is off centre...
try the attached file, which should give you a PLA Print 75mm square in the middle of the bed,
Here is a list of the Start Gcode, which sets the mini up at the beginning of a print.
G90 ; use absolute coordinates
M83 ; extruder relative mode
M104 S170 ; set extruder temp for bed leveling
M140 S[first_layer_bed_temperature] ; set bed temp
M109 R170 ; wait for bed leveling temp
M190 S[first_layer_bed_temperature] ; wait for bed temp
G28 ; home all without mesh bed level
G29 ; mesh bed leveling
M104 S[first_layer_temperature] ; set extruder temp
G92 E0.0
G1 Y-2.0 X179 F2400
G1 Z3 F720
M109 S[first_layer_temperature] ; wait for extruder temp
; intro line
G1 X170 F1000
G1 Z0.2 F720
G1 X110.0 E8.0 F900
G1 X40.0 E10.0 F700
G92 E0.0
M221 S95 ; set flow
as you can see G29 is the Mesh Bed Leveling command that is use by the Mini...
if you are trying to invoke Bed level correction, the Mk3 has an LCD Menu option to activate this feature.
I suspect you would need to put a positive value in the right hand side of bed level correction
If you can't get a smooth first layer, all of the way across, try setting the patch so that the left side is a little bit high, and the right side is a little bit Low rather than the right hand side being all the way low... as it is at the moment.
I hope this post is of use. regards Joan
I try to make safe suggestions,You should understand the context and ensure you are happy that they are safe before attempting to apply my suggestions, what you do, is YOUR responsibility. Location Halifax UK
RE: life adjust Z - my way
@joantabb
Thanks Joan,
To be clear, I was just trying to get my Live Z calibrated so I could start printing other things. I found that using the original mk2/mk3 gcode on my Mini sort of worked, and I'd seen other posts say it did. However, it was not doing the mesh probing to start the print and I thought this might be incorrect. I still don't know that it probes on the i3, but it certainly seems like it should/would. Now with your gcode file it does "correctly" do the mesh level on my Mini since you used the Mini profile with the G29 in there.
The gcode you created does not have the G87 that was described as "; magic code to tell the printer a calibration has been done", but since I have already calibrated with the Wizard? this still seems to work ok without it.
Now printing CaliCat...
Thanks for your help
RE: life adjust Z - my way
Jumping in on a old thread because this is exactly what I've been needing in order to better calibrate my PET-G prints. When I print the squares, it looks pretty good and is .2mm thick (I need to get a caliper that will show the hundreths, though, to be sure). However, the strands that make up the body of the square do not attach to each other. When I pull the square off the bed, the strands are like really, really close piano wires, each individual. I suspect it is not supposed to be that way when printing correctly; is that accurate?
RE: life adjust Z - my way
Sorry, just saw robert_rm's thread a couple pages back and it answered this question. Should have been more persistent in reading through the thread. Thanks to everyone who has answered questions here - this is super helpful!
RE: life adjust Z - my way
If they arent squished into a solid unbroken sheet then your Z can still go down.
RE: life adjust Z - my way
I had a massive blob a week ago that required a complete rebuild of the extruder assembly. New hot end, x-carriage, extruder body, etc. I ran through the first layer calibration and thought I had done a pretty good job but was still experiencing some 'lackluster sticking' pla. Decided to troubleshoot and ended up printing this 3 times to completely dial in the first layer cal. All I can say is WOW... What a difference this makes, my printer is now super dialed and PLA is sticking like glue to the bed, very please!!
To all those who are having any issues with first layer cal, PLA not sticking well, etc. Follow this thread! Clean the bed with soap and a sponge (scrubber side) and prepare to be amazed!
RE: life adjust Z - my way
That was very useful!
Thank you
RE: life adjust Z - my way
I had the hardest time getting the first layer to stick to the metal plate. I played with tons of different settings. I went back to the xyz calibration. moved the probe up and down. I spent 3 days on this and was ready to throw the printer into the trash.
Then I looked back at the metal plate. I had cleaned it with alcohol and soap and yet it still felt extremely smooth. I flipped it over and the other side was a little more sticky. That solved my problem. The first layer sticks fine to that other side and I'm able to print my face masks for people that need them.
Maybe someone else had the same problem and has some suggestions on cleaning?
Nonsense requires a serious interest in life
RE: life adjust Z - my way
Is there life z file for FLEX ?
RE: life adjust Z - my way
Is there life z file for FLEX ?
No, but you can easily create one. Just open PrusaSlicer, select your desired filament type, a 0.2mm layer height and the printer nozzle you're using. right-click the bed area and select Add shape->Box. Then click the little lock icon next to the size inputs and adjust the size to 75x75x0.2mm.
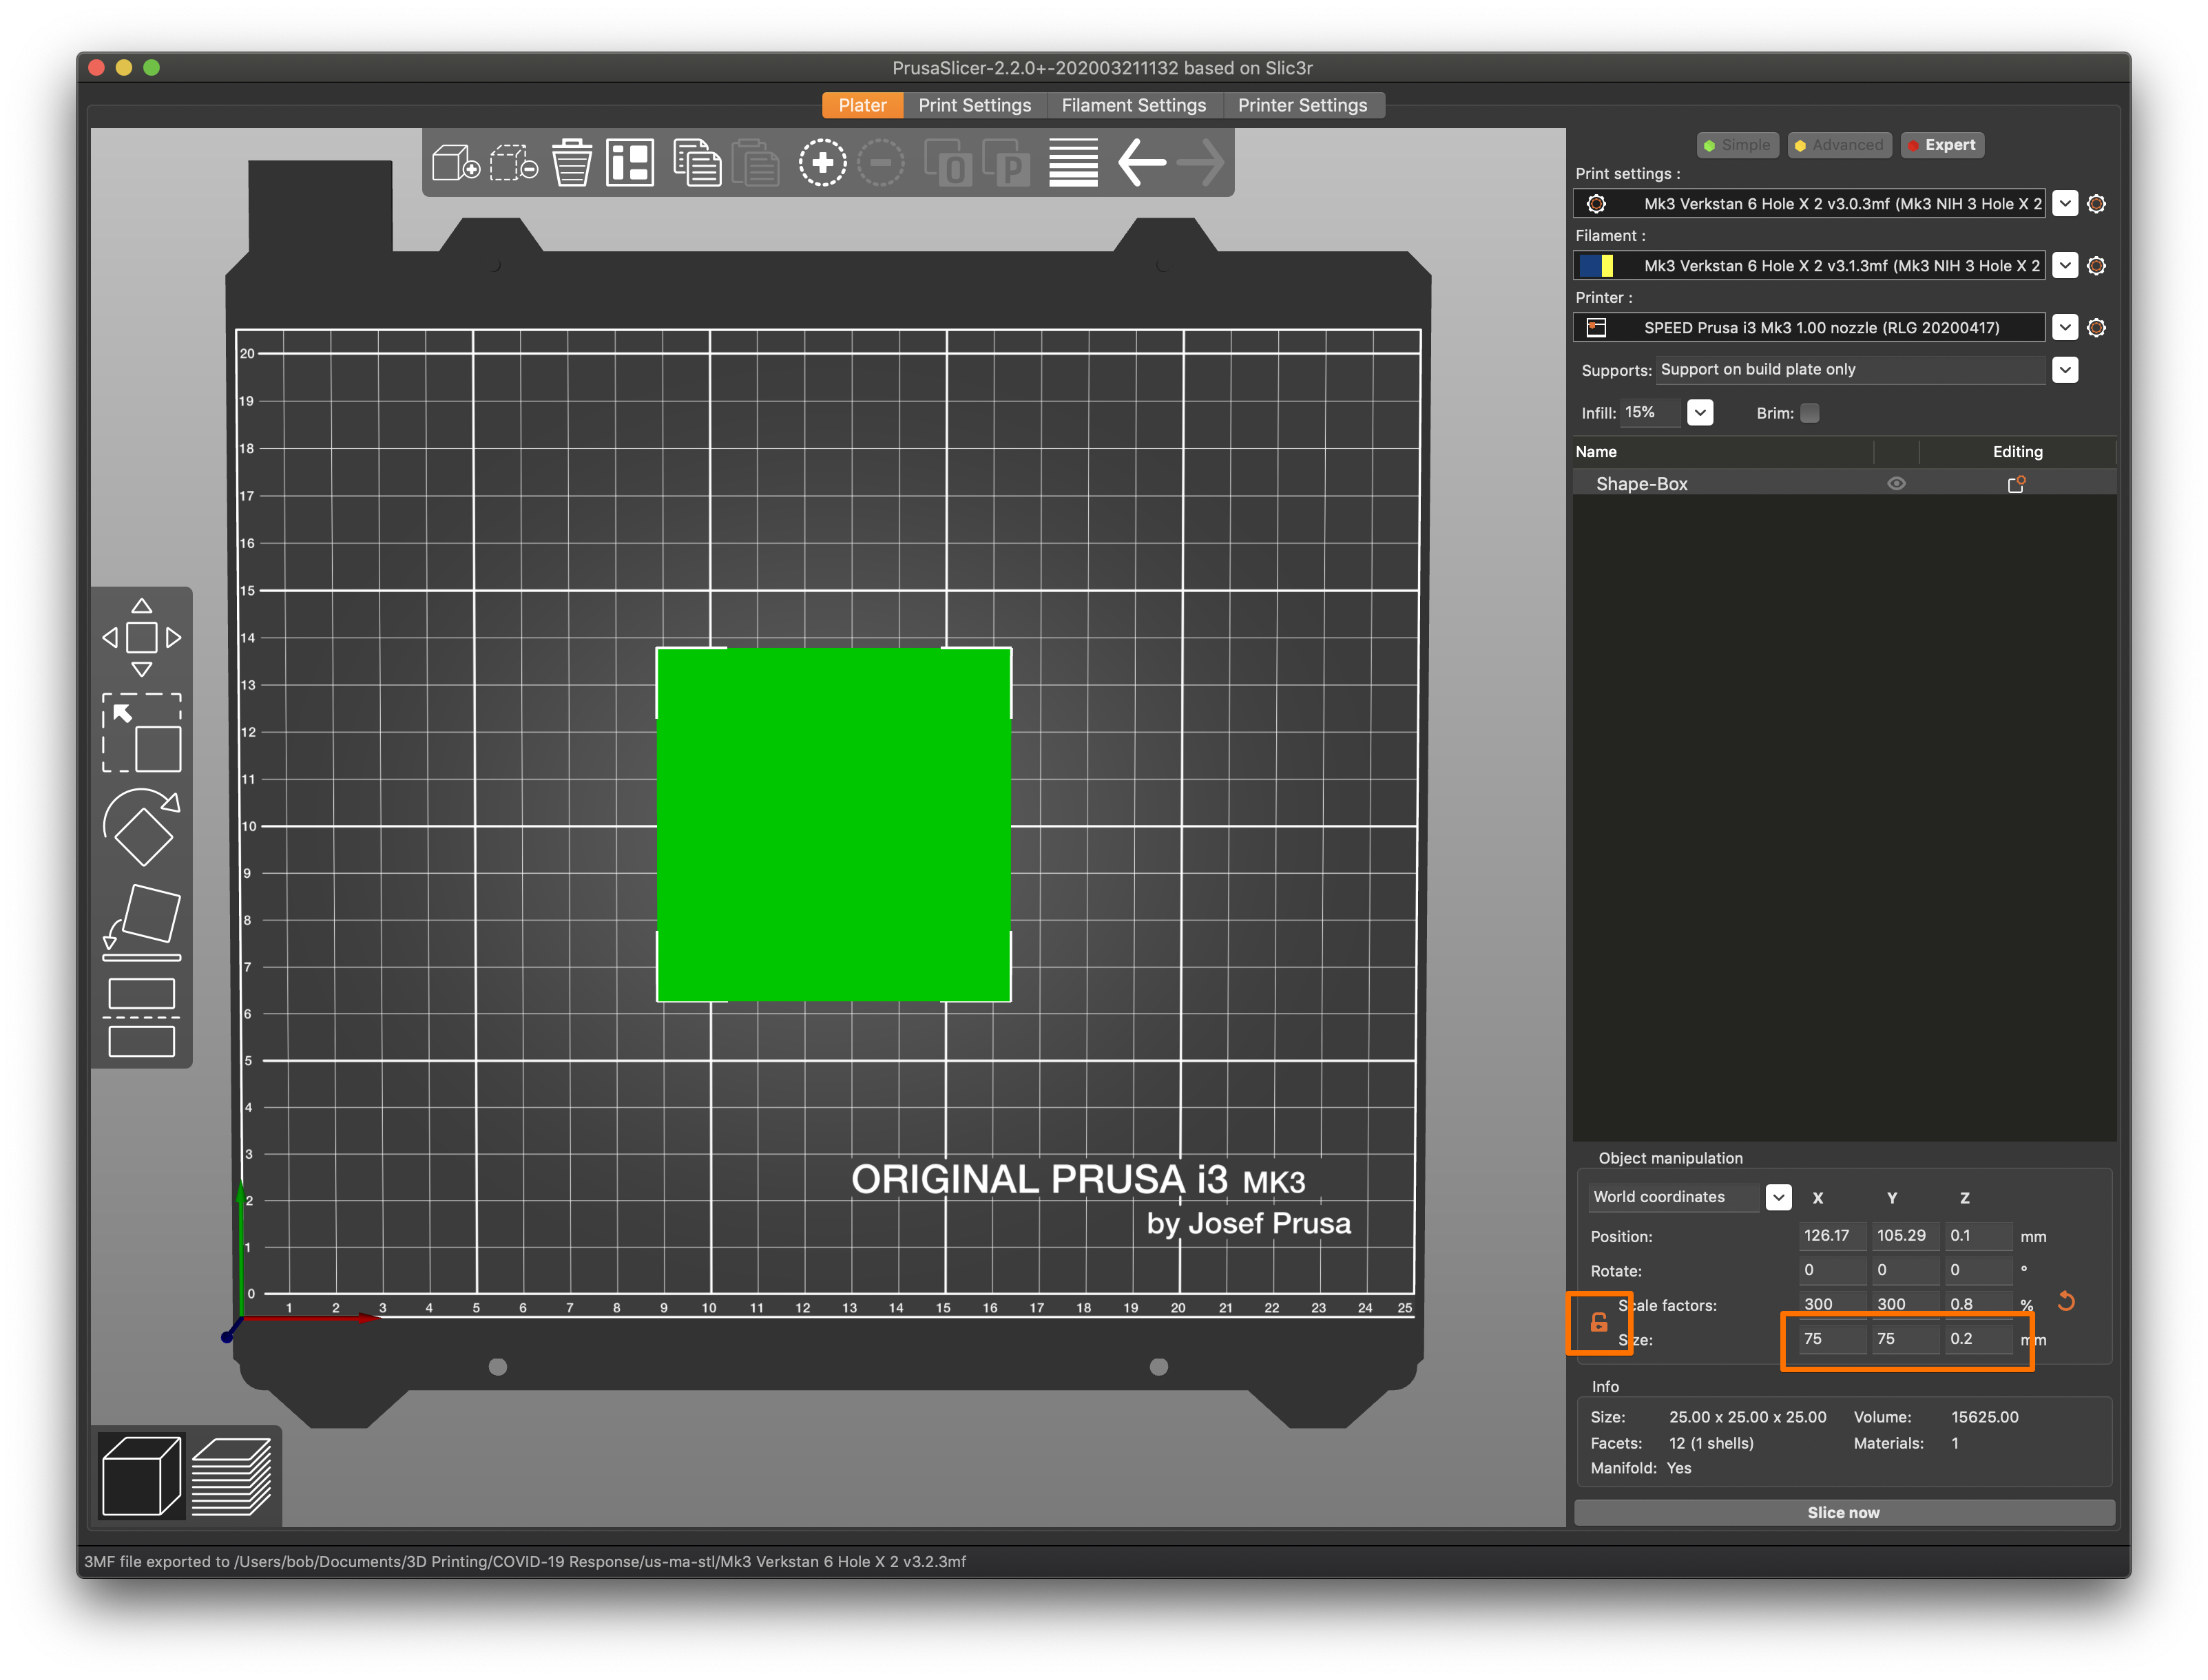
It doesn't offer some of the beeps and pauses of the original Life Adjust prints, but is otherwise the same process. You can also just print the Prusa logo STL, observe the 1st layer and stop the print.
RE: life adjust Z - my way
@m-10
Mir ergeht es ähnlich! Ich bin nicht ganz sicher aber du könntest recht haben. Ich habe auch die Platte gedreht und besseren erfolg. Ich habe jetzt die Temperatur der Platte erhöht auf 95°. Nachdem diese Testdrucke gut halten:
S3D_calibration_surfaces_75x75@200um_v6.1.zip
from
https://forum.prusa3d.com/forum/original-prusa-i3-mk3s-mk3-assembly-and-first-prints-troubleshooting/life-adjust-z-my-way/
Und die letzen Drucke haften sehr gut.
RE: life adjust Z - my way
bernhard-prenner - that's good to hear. I've made two more changes:
1. I'm only touching the coated plate with rubber gloves to keep any oil or grease off it.
2. I used a fabric cloth to give it a real good cleaning with alcohol when the plate is cold. That seems to help as well.
I had some more trouble when my prints wouldn't stick but now I'm printing masks again. I'll keep the higher heat bed temperature in mind if my prints will get messed up again.
Nonsense requires a serious interest in life
RE: life adjust Z - my way
@httpsforum-prusaprinters-orgforumaccountm-10
Clean bed with dish soap, 2 or 3 times , with hot water, after this it should stick, also do this after filament change, and then a few prints you can use alcohol, then again clean with dish soap.
Also important is first layer calibration:
Extra , and if everything is OK, not needed.
First layer slow down to 10 mm,
First layer 5 or 10 C hotter,
Bed 10 C hotter.
RE: life adjust Z - my way
RE: life adjust Z - my way
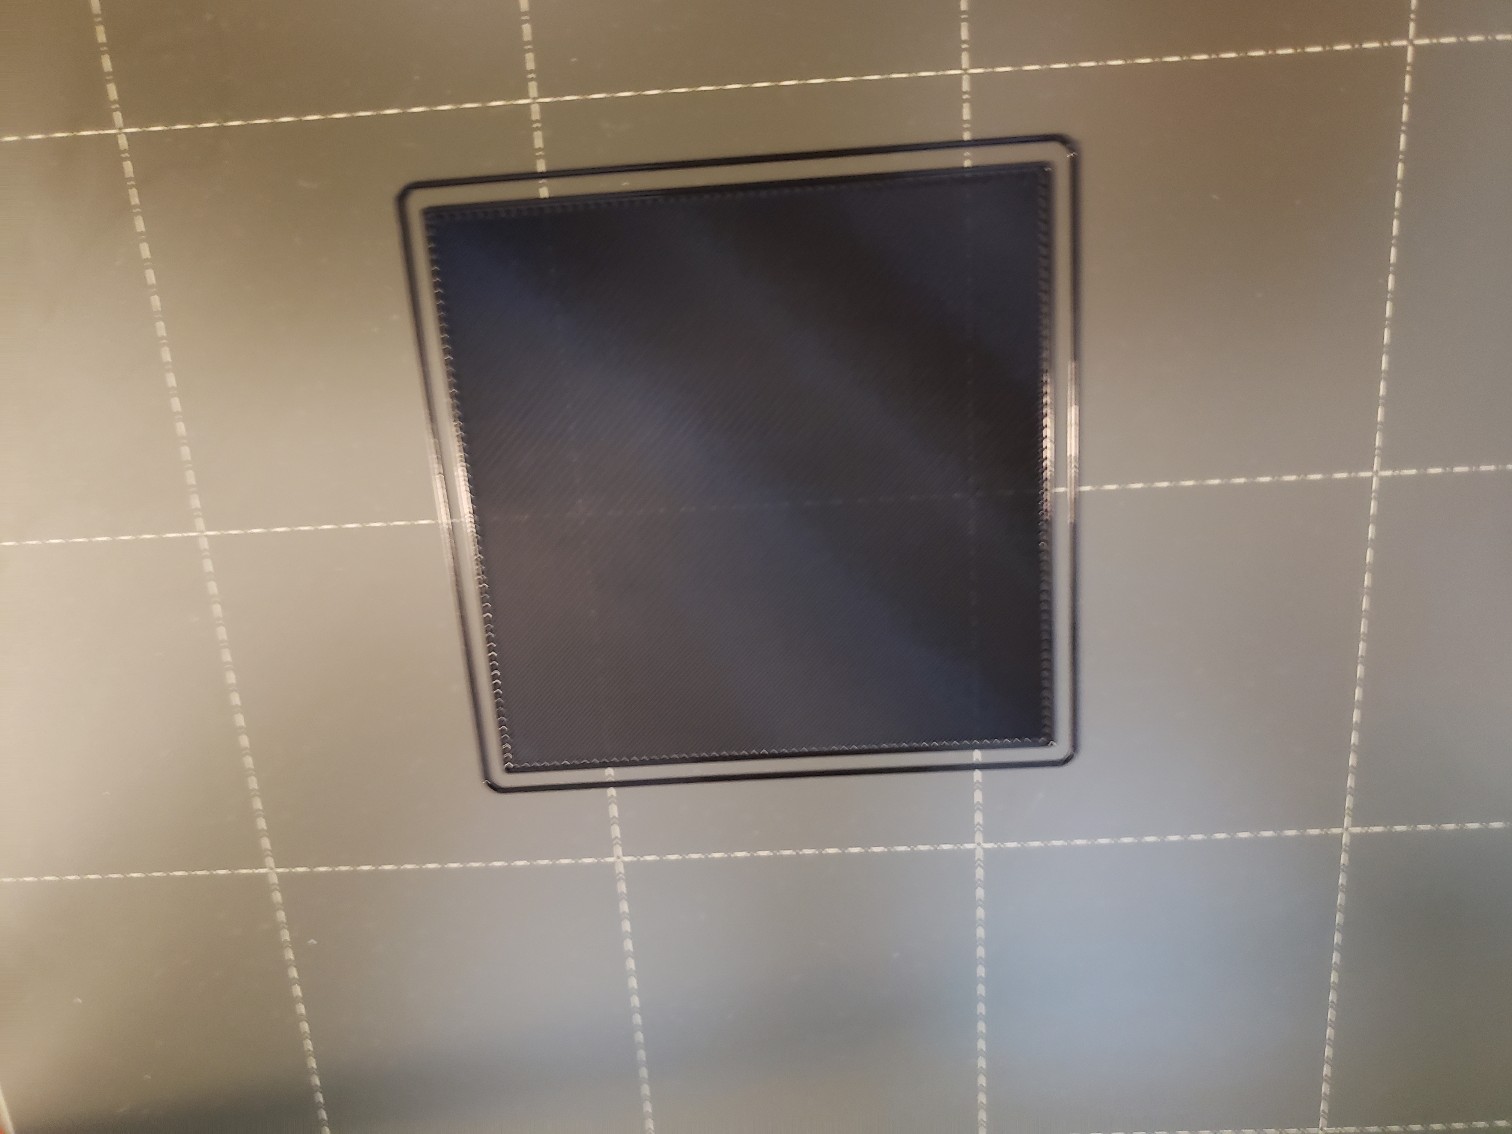
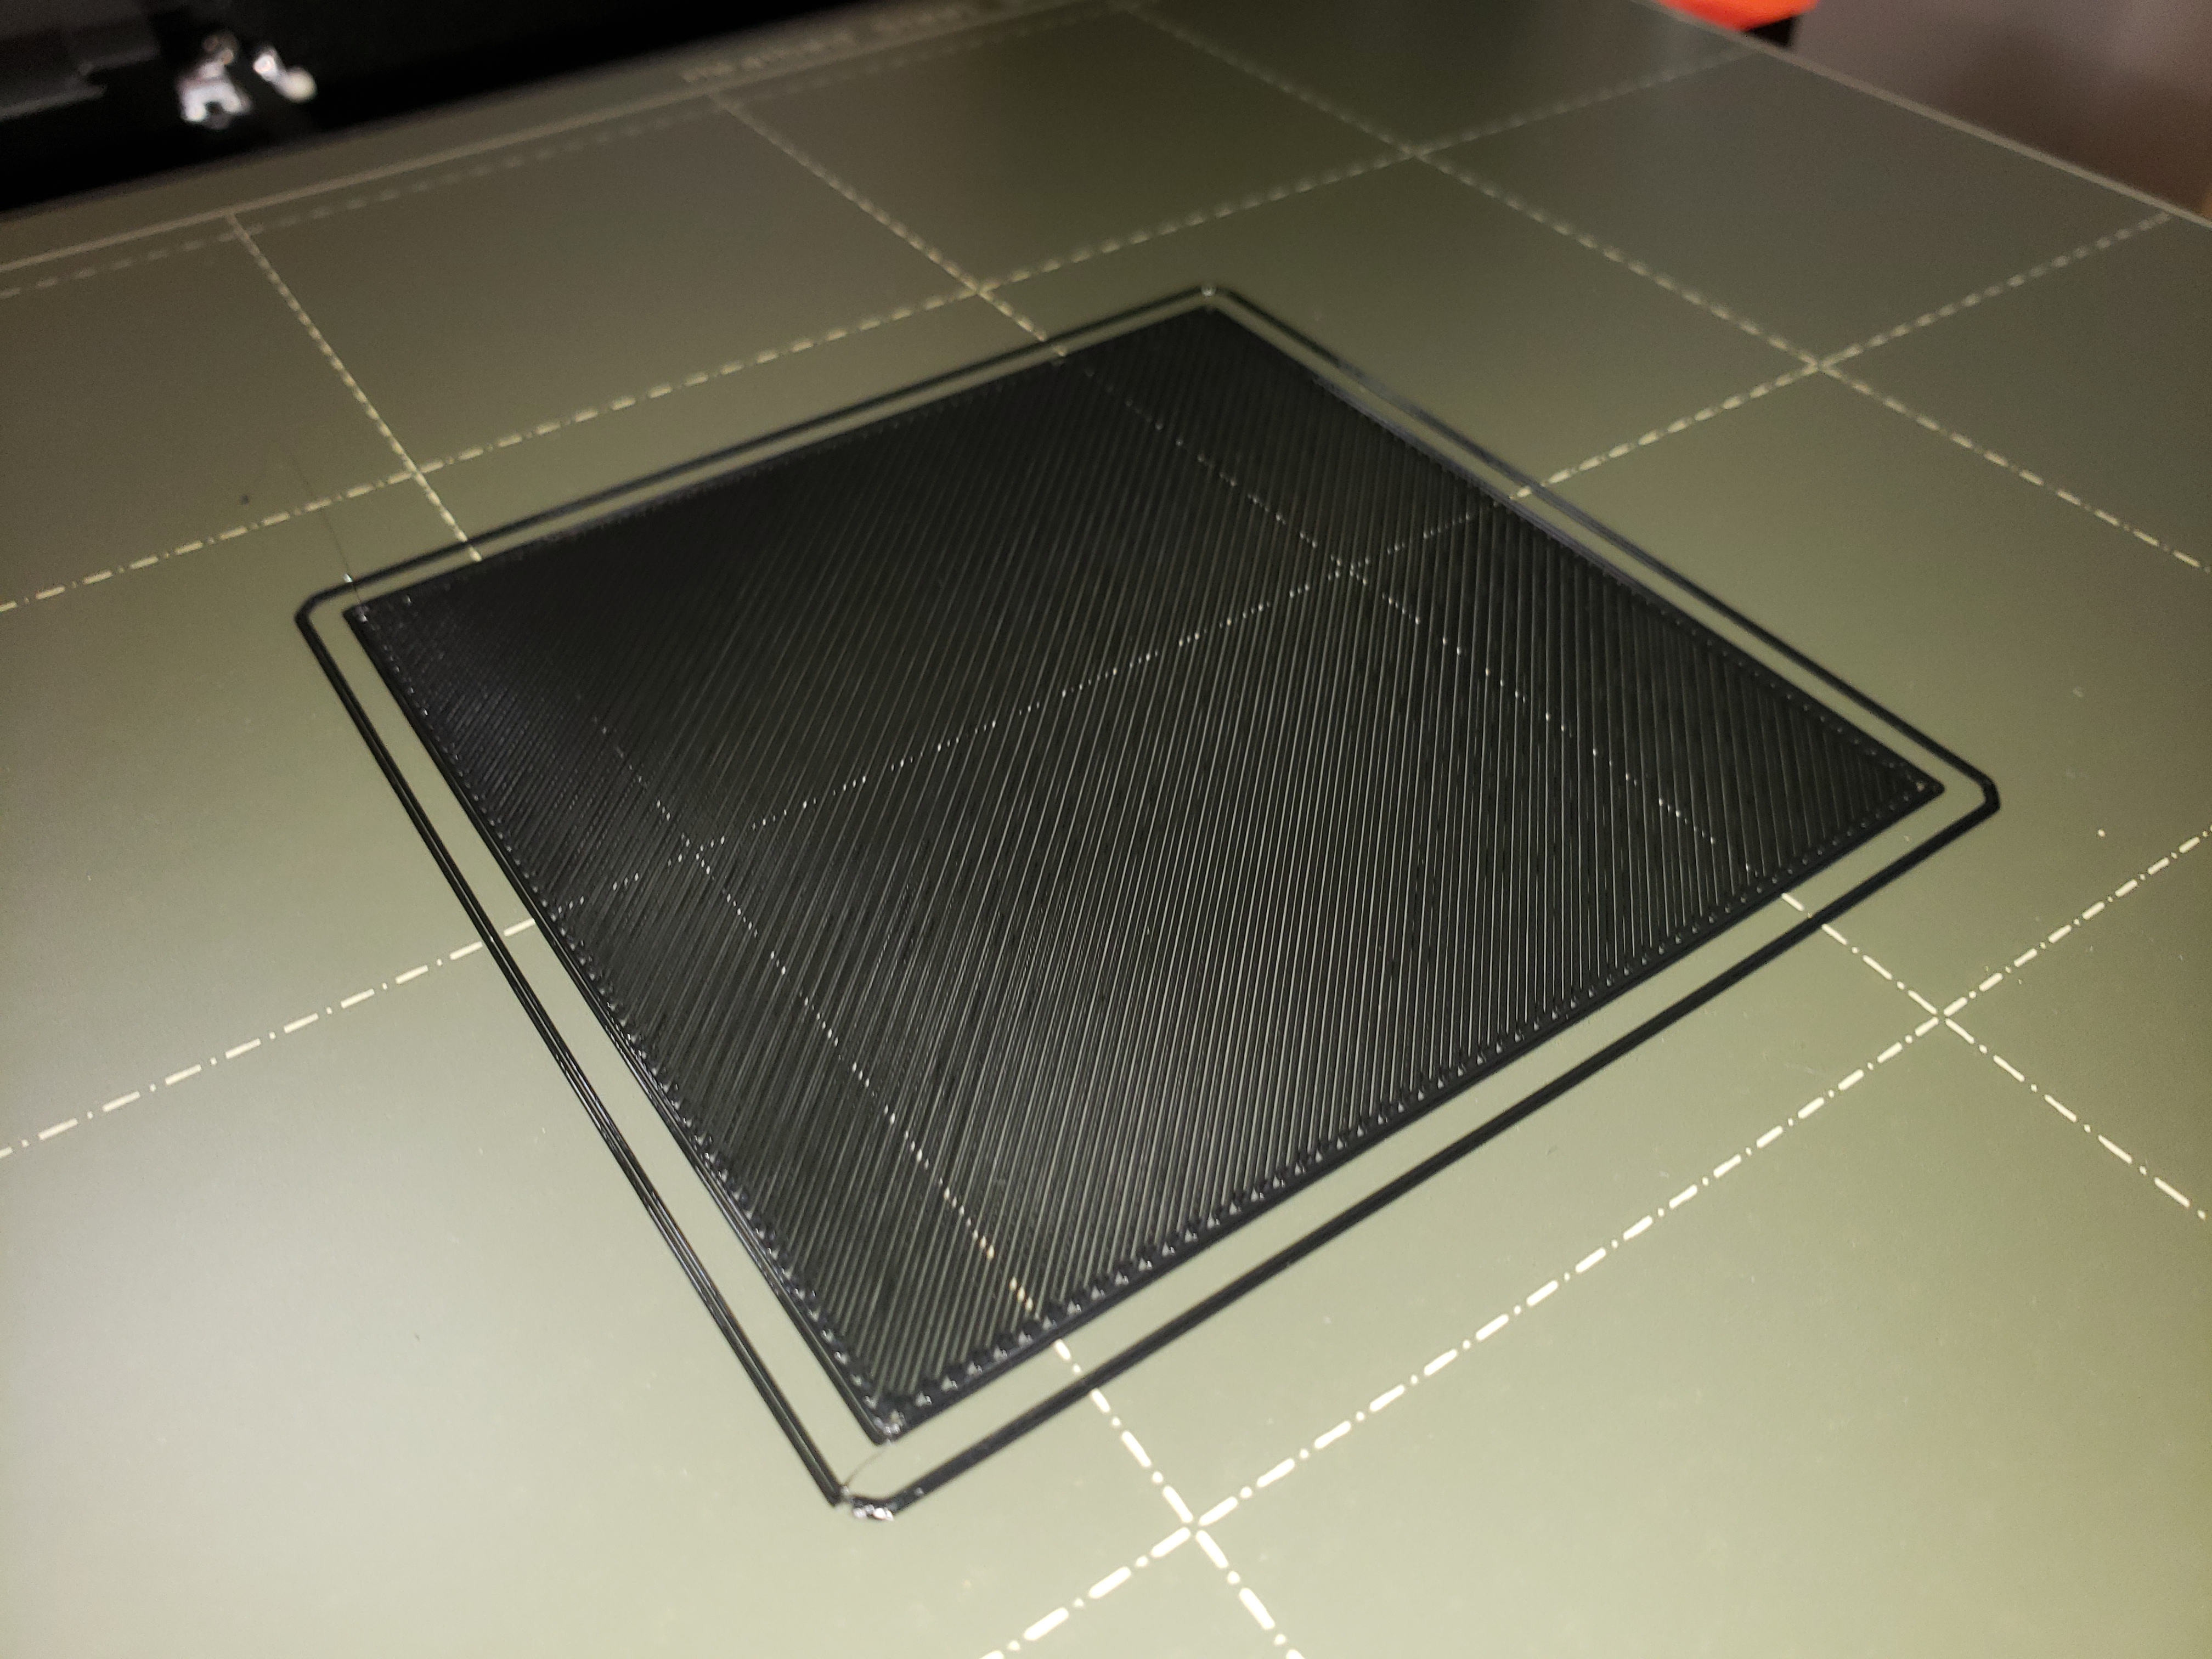
@akerezy
Your live z needs to go lower. I can see gaps between the infill (the 45 degree section). When you peel it off the bed it should be 1 complete sheet of plastic. You shouldn't be able to separate the strands.
btw it should be 1 layer thick, so 75x75 by 0.2 not 2mm. The great thing about Jeff's method is you can adjust the Z while its printing so it makes adjusting it faster.
RE: life adjust Z - my way
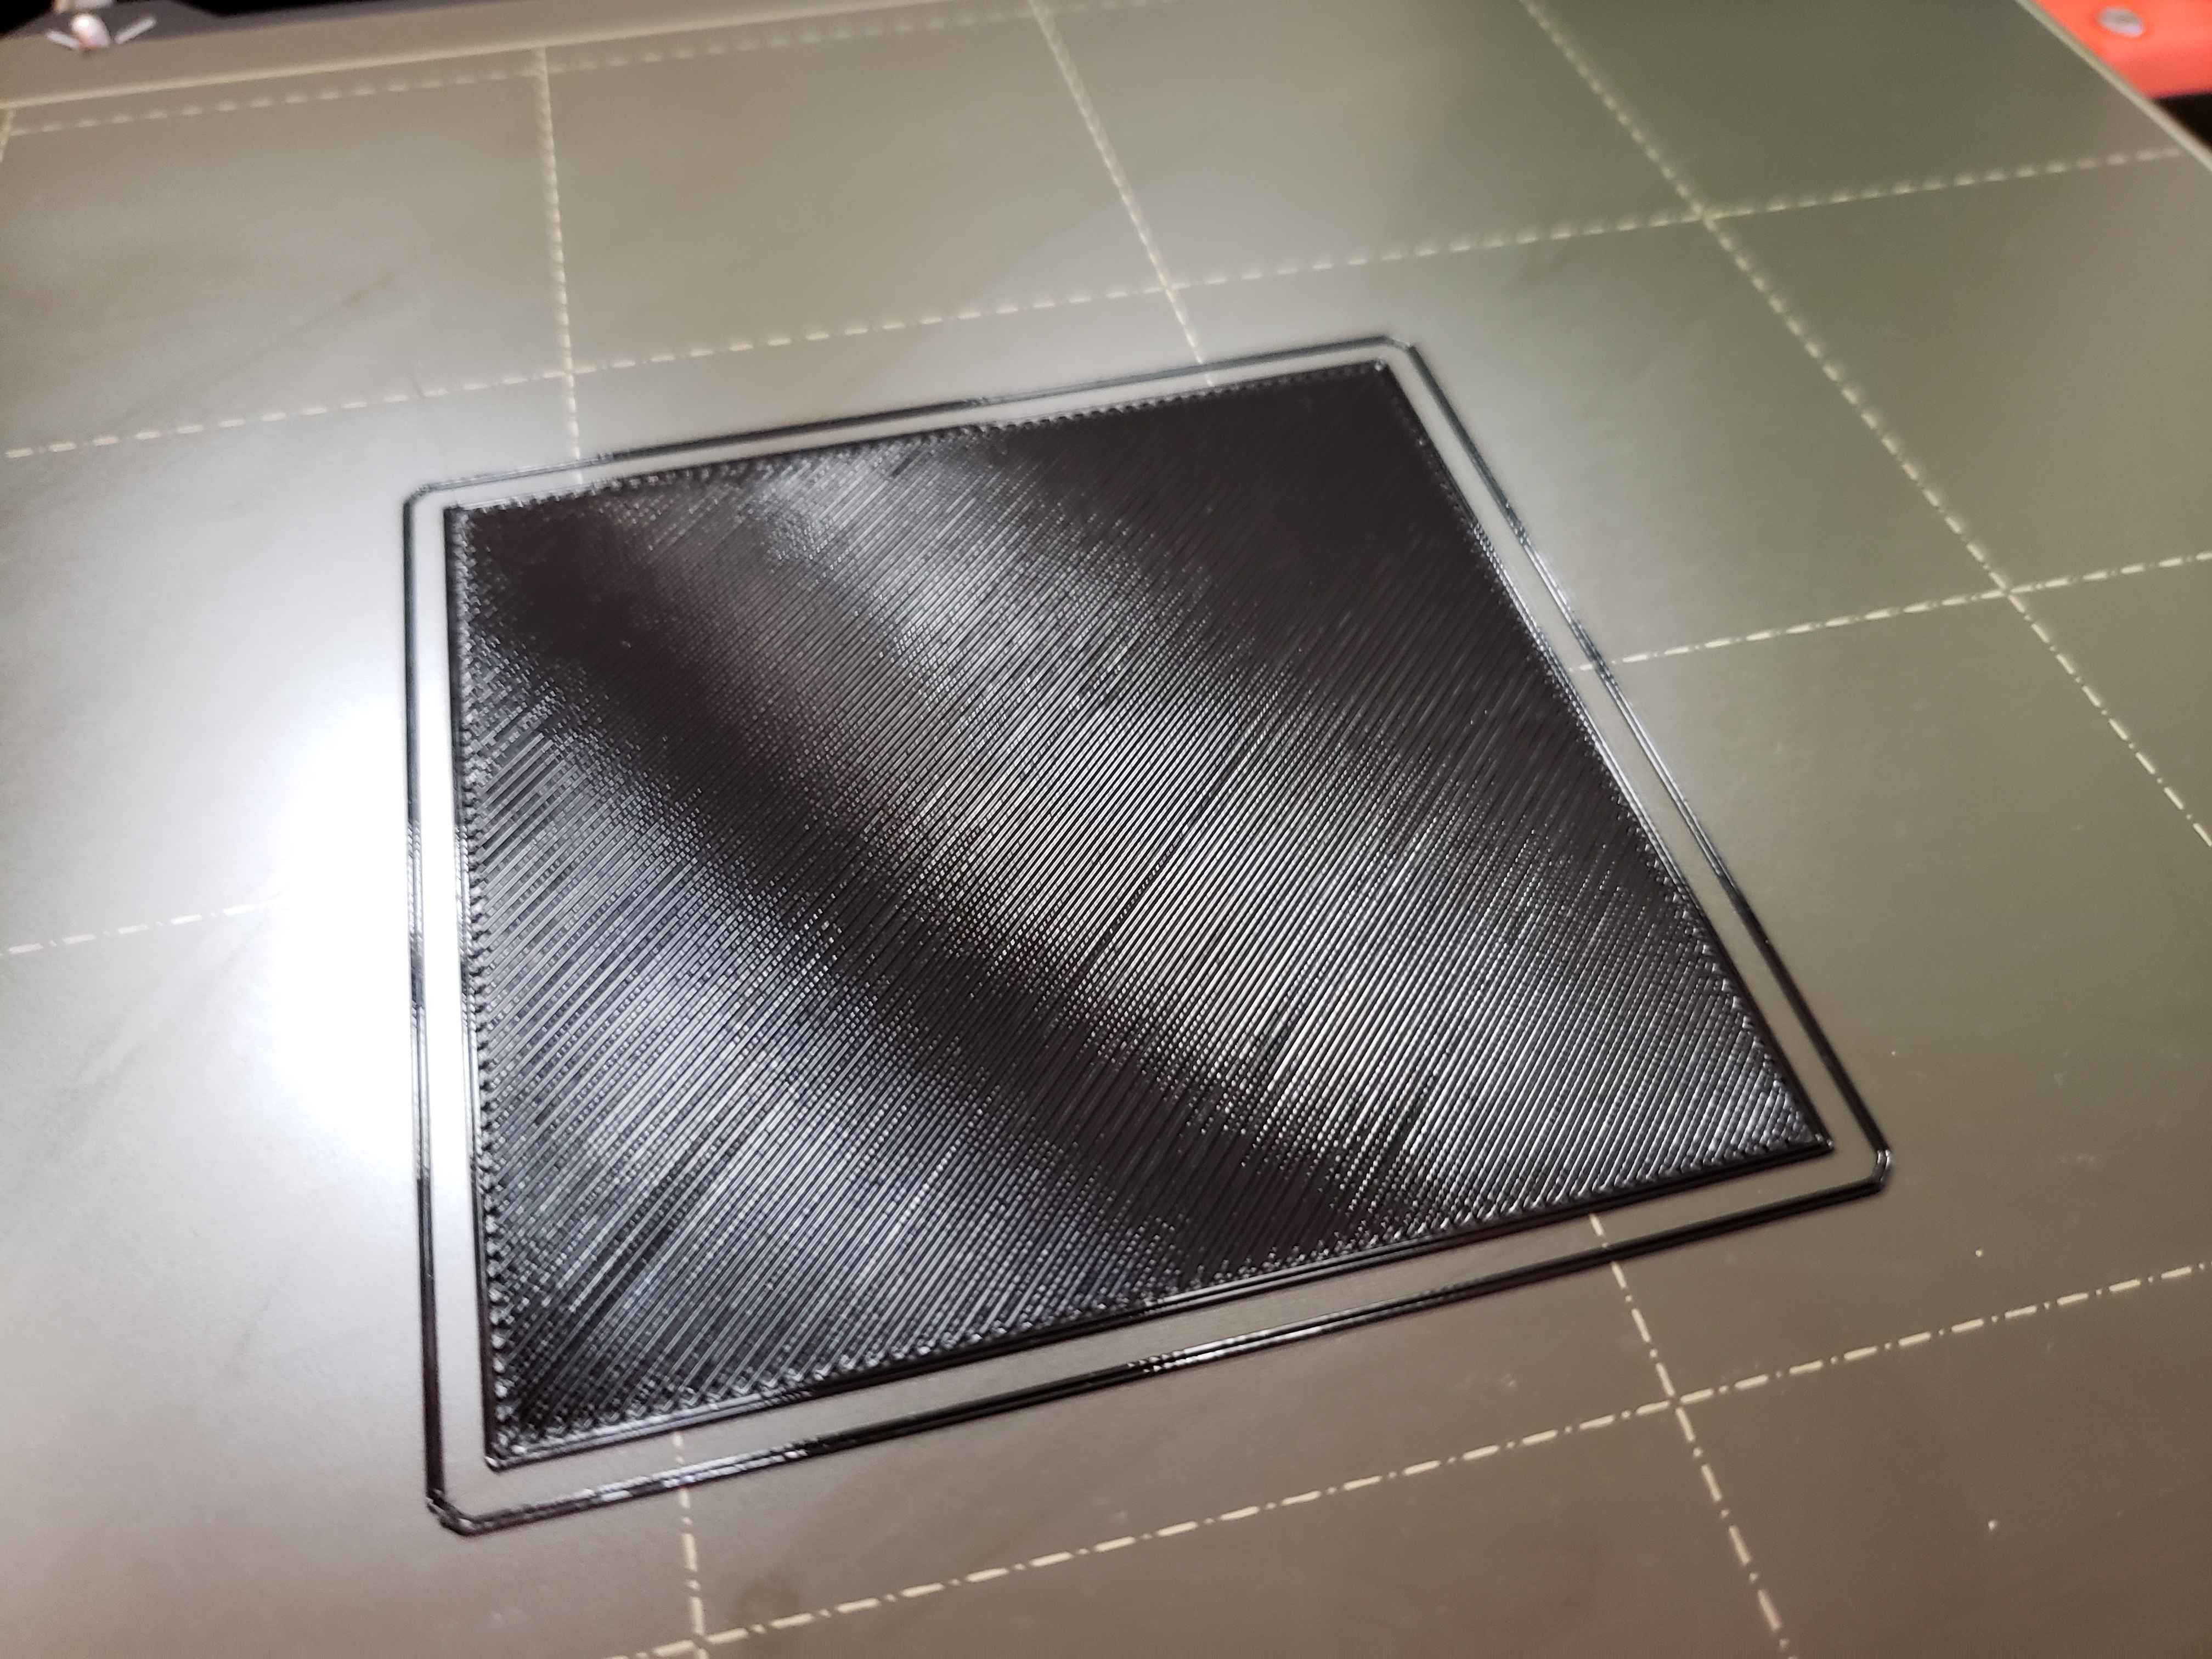
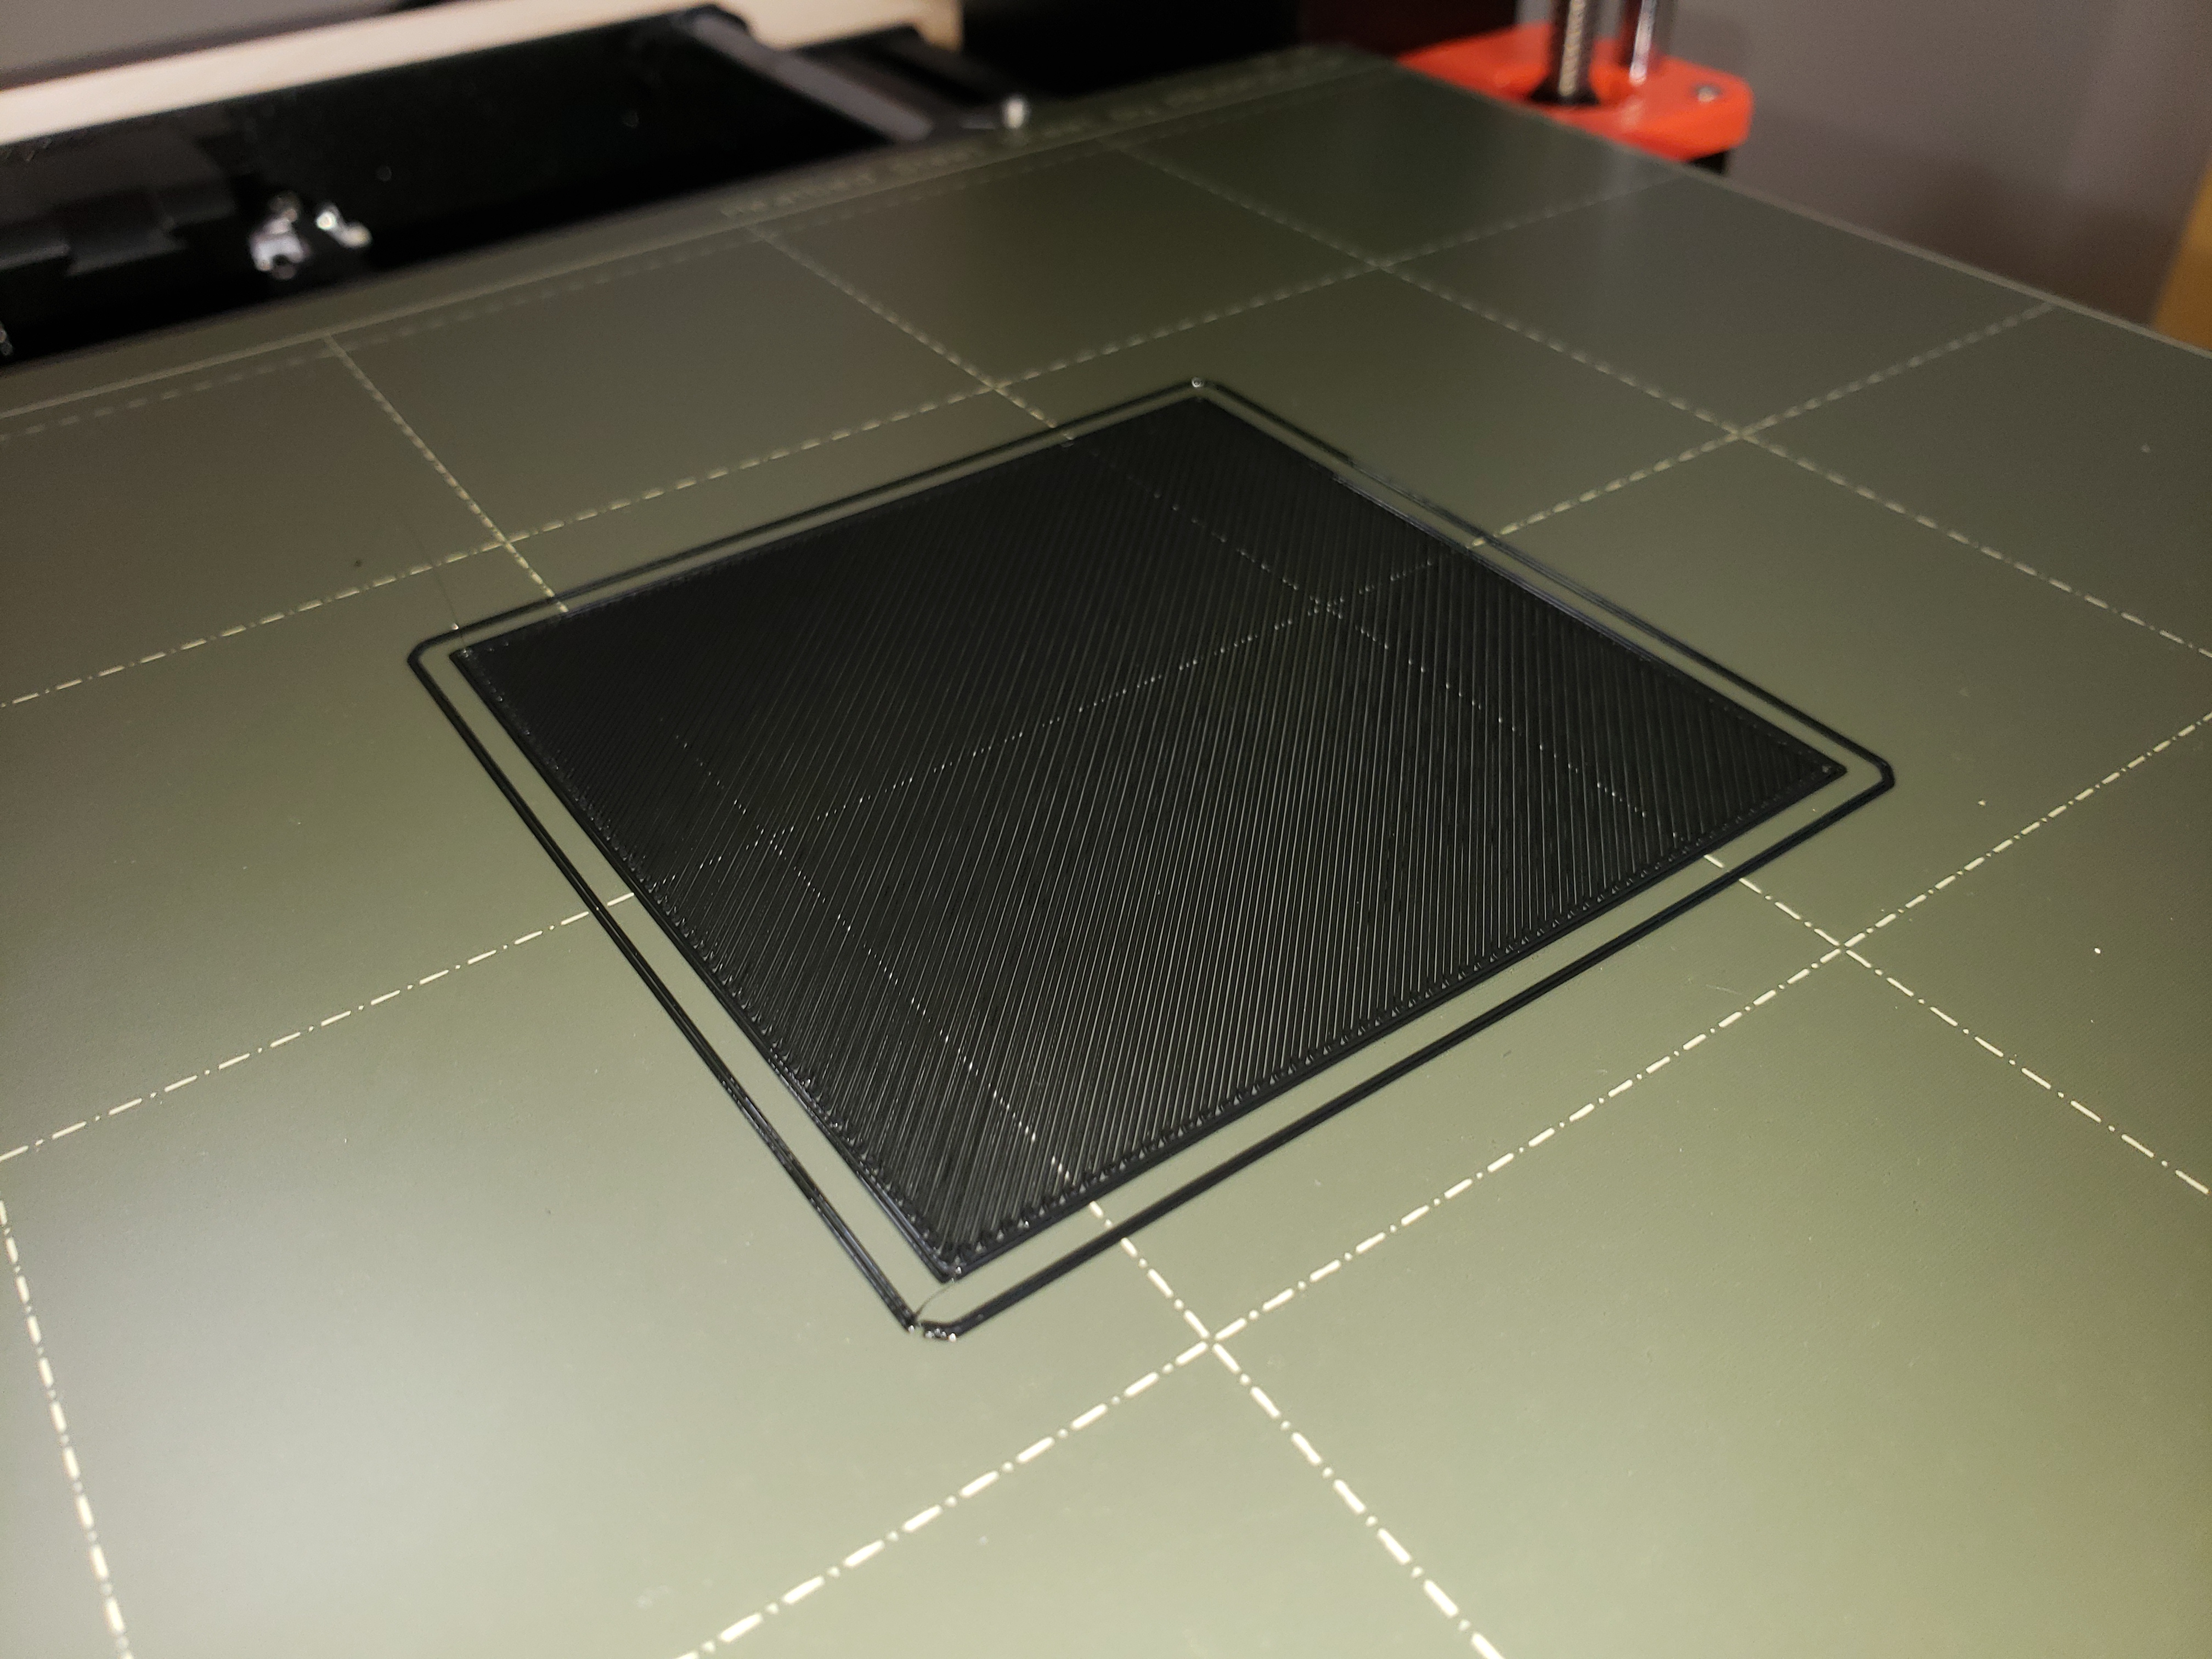
Hello - Thank you so much for your reply. This is so helpful.
I adjusted the z from -20.0 down to -13.0 which to my understanding means that it's moving the nozzle closer to the build plate.
Below are my pictures after this adjustment - again I appreciate your help.
P L E A S E - let me know if this is low enough, or if I need to adjust it lower?