RE: life adjust Z - my way
Don't even look at the numbers. Lower your Z while the calibration square is printing. If you use the one from Live Z you have plenty of time.
Stop when the filaments start to merge and become one surface. Post your result here and let us comment.
This assumes you are using 7x7 point mesh bed leveling and have a clean surface...
RE: life adjust Z - my way
Hoping to get some advice here. I bought the ready made printer, but annoyingly didn't notice the zip ties on the Y carriage and ruined the calibrations. I had to reset the printer and I am trying to dial in my Z values using this method as I was having huge adhesion problems on fine lines using PLA on the smooth sheet.
On values cira -0.5 to -0.8 the print separates into individual strands. They start to merge together at around -0.9 into a full layer that looks combined, but I can still feel the individual lines when I run my finger over it. I have been decreasing in -0.25 intervals and I am now at -0.975 and I can feel the surface being even rougher. Have I gone too negative here and my sweet spot is likely between -0.8 and -0.9 or should I be going even lower and the roughness I am feeling is expected?
RE: life adjust Z - my way
Stephen,
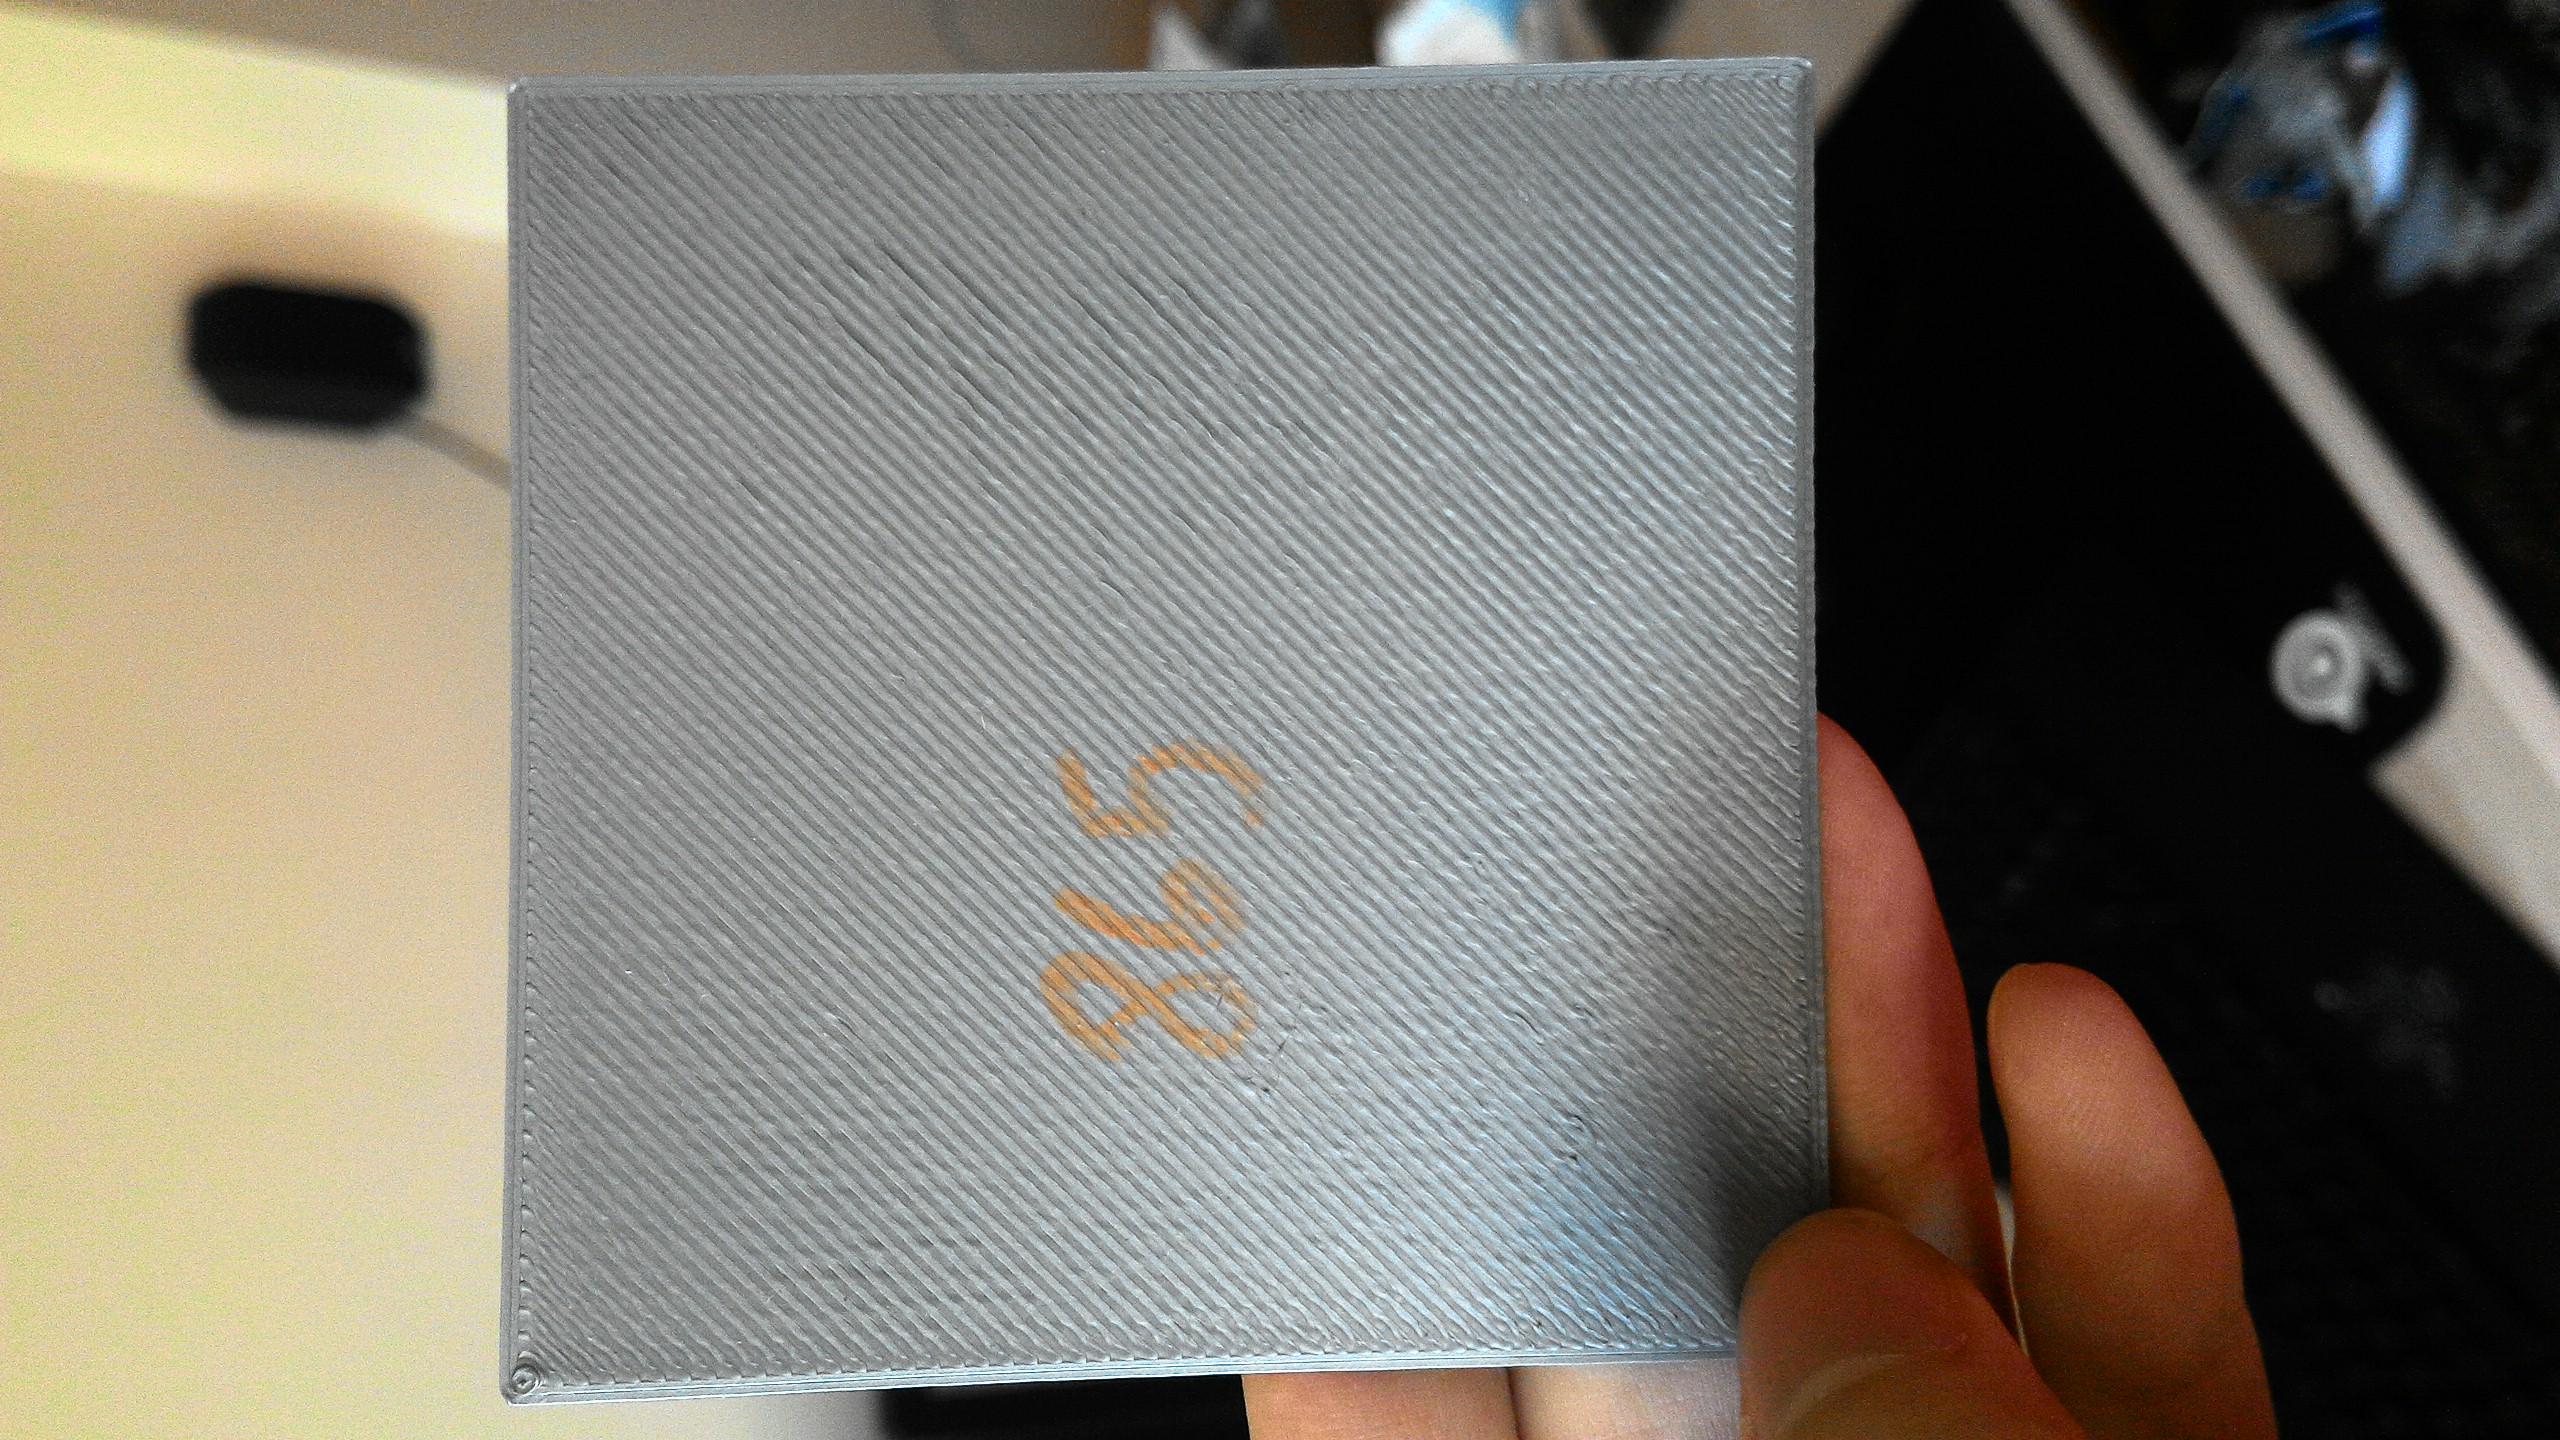
Yes, it does sound like you have gone too low. Unfortunately due to the vagaries of the PINDA probe mounting adjustment there is no correct value or range of values for comparison across printers. The top surface of the live-Z test print will never become completely smooth as there is nothing to "force" the individual strands of filament together at the top, however the surface will feel uniformly smooth when the live-Z is good. The roughness that you feel at -0.975 is due to the nozzle actually "digging" in to the surface of the extruded material. If you have a magnifying glass you can actually see the "trench" pushed into the surface. I would begin by raising your live-Z by about 0.025mm and run another test coupon. If the first part of the coupon still shows evidence of the roughness then raise the adjustment by 0.01 (approximate) steps until the roughness disappears and you will be pretty good. If you then post a picture here of your test coupon (front and back) you may get some additional input.
Regards,
Steve
RE: life adjust Z - my way
@robert-rmm200
I'm using 7x7.
This is my thread that i show my Z test prints: https://forum.prusa3d.com/forum/original-prusa-i3-mk3s-mk3-assembly-and-first-prints-troubleshooting/the-noise-coming-from-x-axis-and-first-layer-problem/#post-195645
RE: life adjust Z - my way
@steve_g
Thanks for this. I will try what you suggested and get some pictures once I have it smoothish.
RE: life adjust Z - my way
@jeffjordan
Thank you, this helped me a lot. It was really anoying to calibrate Z with Prusa calibration. But this is easy now.
RE: life adjust Z - my way


I need help on this first layer inconsistencies. I've literally tried every value but still couldn't find the sweet spot. All the first layers have some inconsistencies. What should i do ?
RE: life adjust Z - my way
Fernwehmind,
This thread has grown so long I don't want to go back to see if you are using 7x7 Mesh bed leveling (49 point) in favor of the default 3x3 (9 point). If you are already using the 49 point leveling then you are getting close, if not, turn that on in the settings and then run again with a value of -0.855 or so and see what result you get. The coupons do show a little bit of variation from the bottom right to the top left even in those that have been run at a constant live-Z so you may have a bit of a bed leveling/warping issue to resolve as well.
If you are already using the 49 point leveling and the new coupon still shows that inconsistency you could try loosening and re-tightening the headbed screws following the pattern in the assembly manual. Note these screws do not need to be very tight, tightened an 1/8 to 1/4 turn past contact is sufficient as there is no mechanical stress on these save the heating/cooling of the bed.
Hope this is of some use. Let us know how you are getting on.
Regards,
Steve
RE: life adjust Z - my way
@steve_g
Hi Steve,
I'm using 7x7. Thank you very much for your suggestion! I'll definitely try that and will let you know if it will fix this or not.
RE: life adjust Z - my way
@steve_g
Hi, i tried loosening and re-tightening the headbed screws as you said but still get inconsistencies unfortunately :/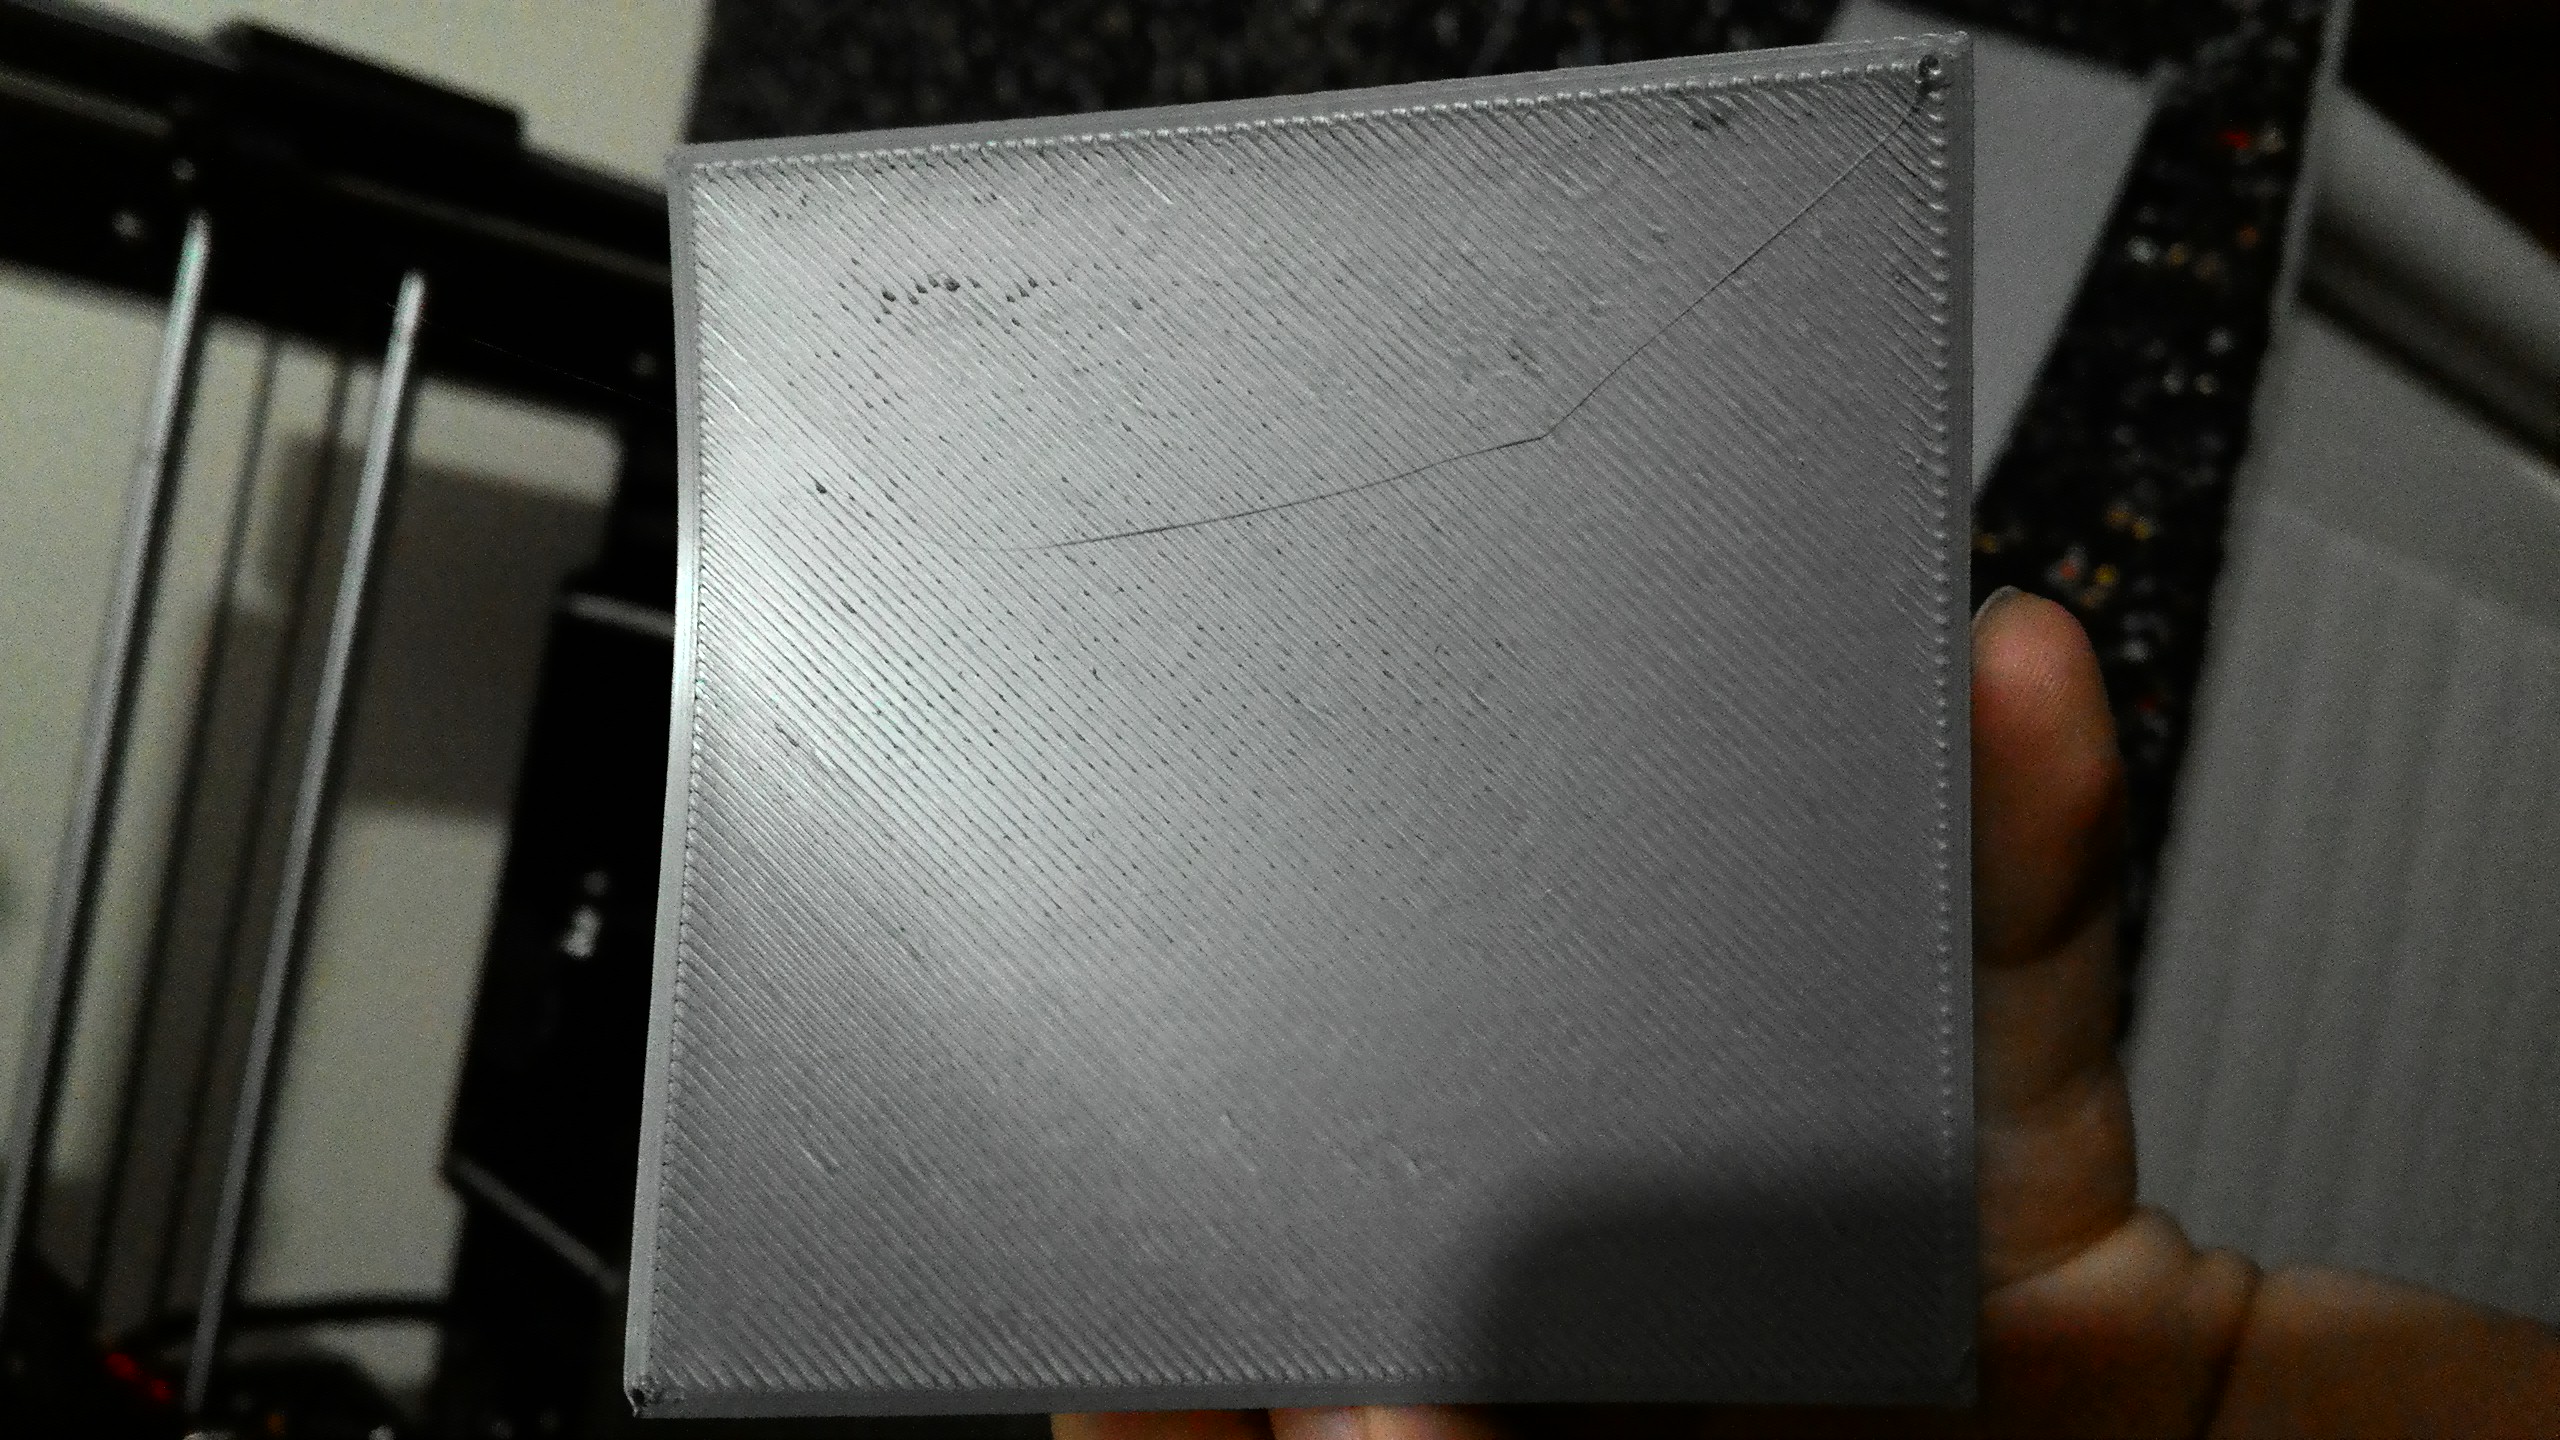
RE: life adjust Z - my way
Ok, I think I am not getting this.
Edit: This is using 7x7 bed levelling
With -0.925 I can feel a few ridges, but all the strands are meshed. I can see some roughness in the top right.
With -0.93 the rough area seems less rough, but it is starting to separate in the top left corner.

-0.928 has the rough area on the top right and the top left feels a little thin.

Any advice appreciated!
RE: life adjust Z - my way
Further to this, I did a 9 squares test and essentially got absolutely no adhesion on the left hand side, so I am going to try and bump the level up there slightly and see if it helps.
RE: life adjust Z - my way
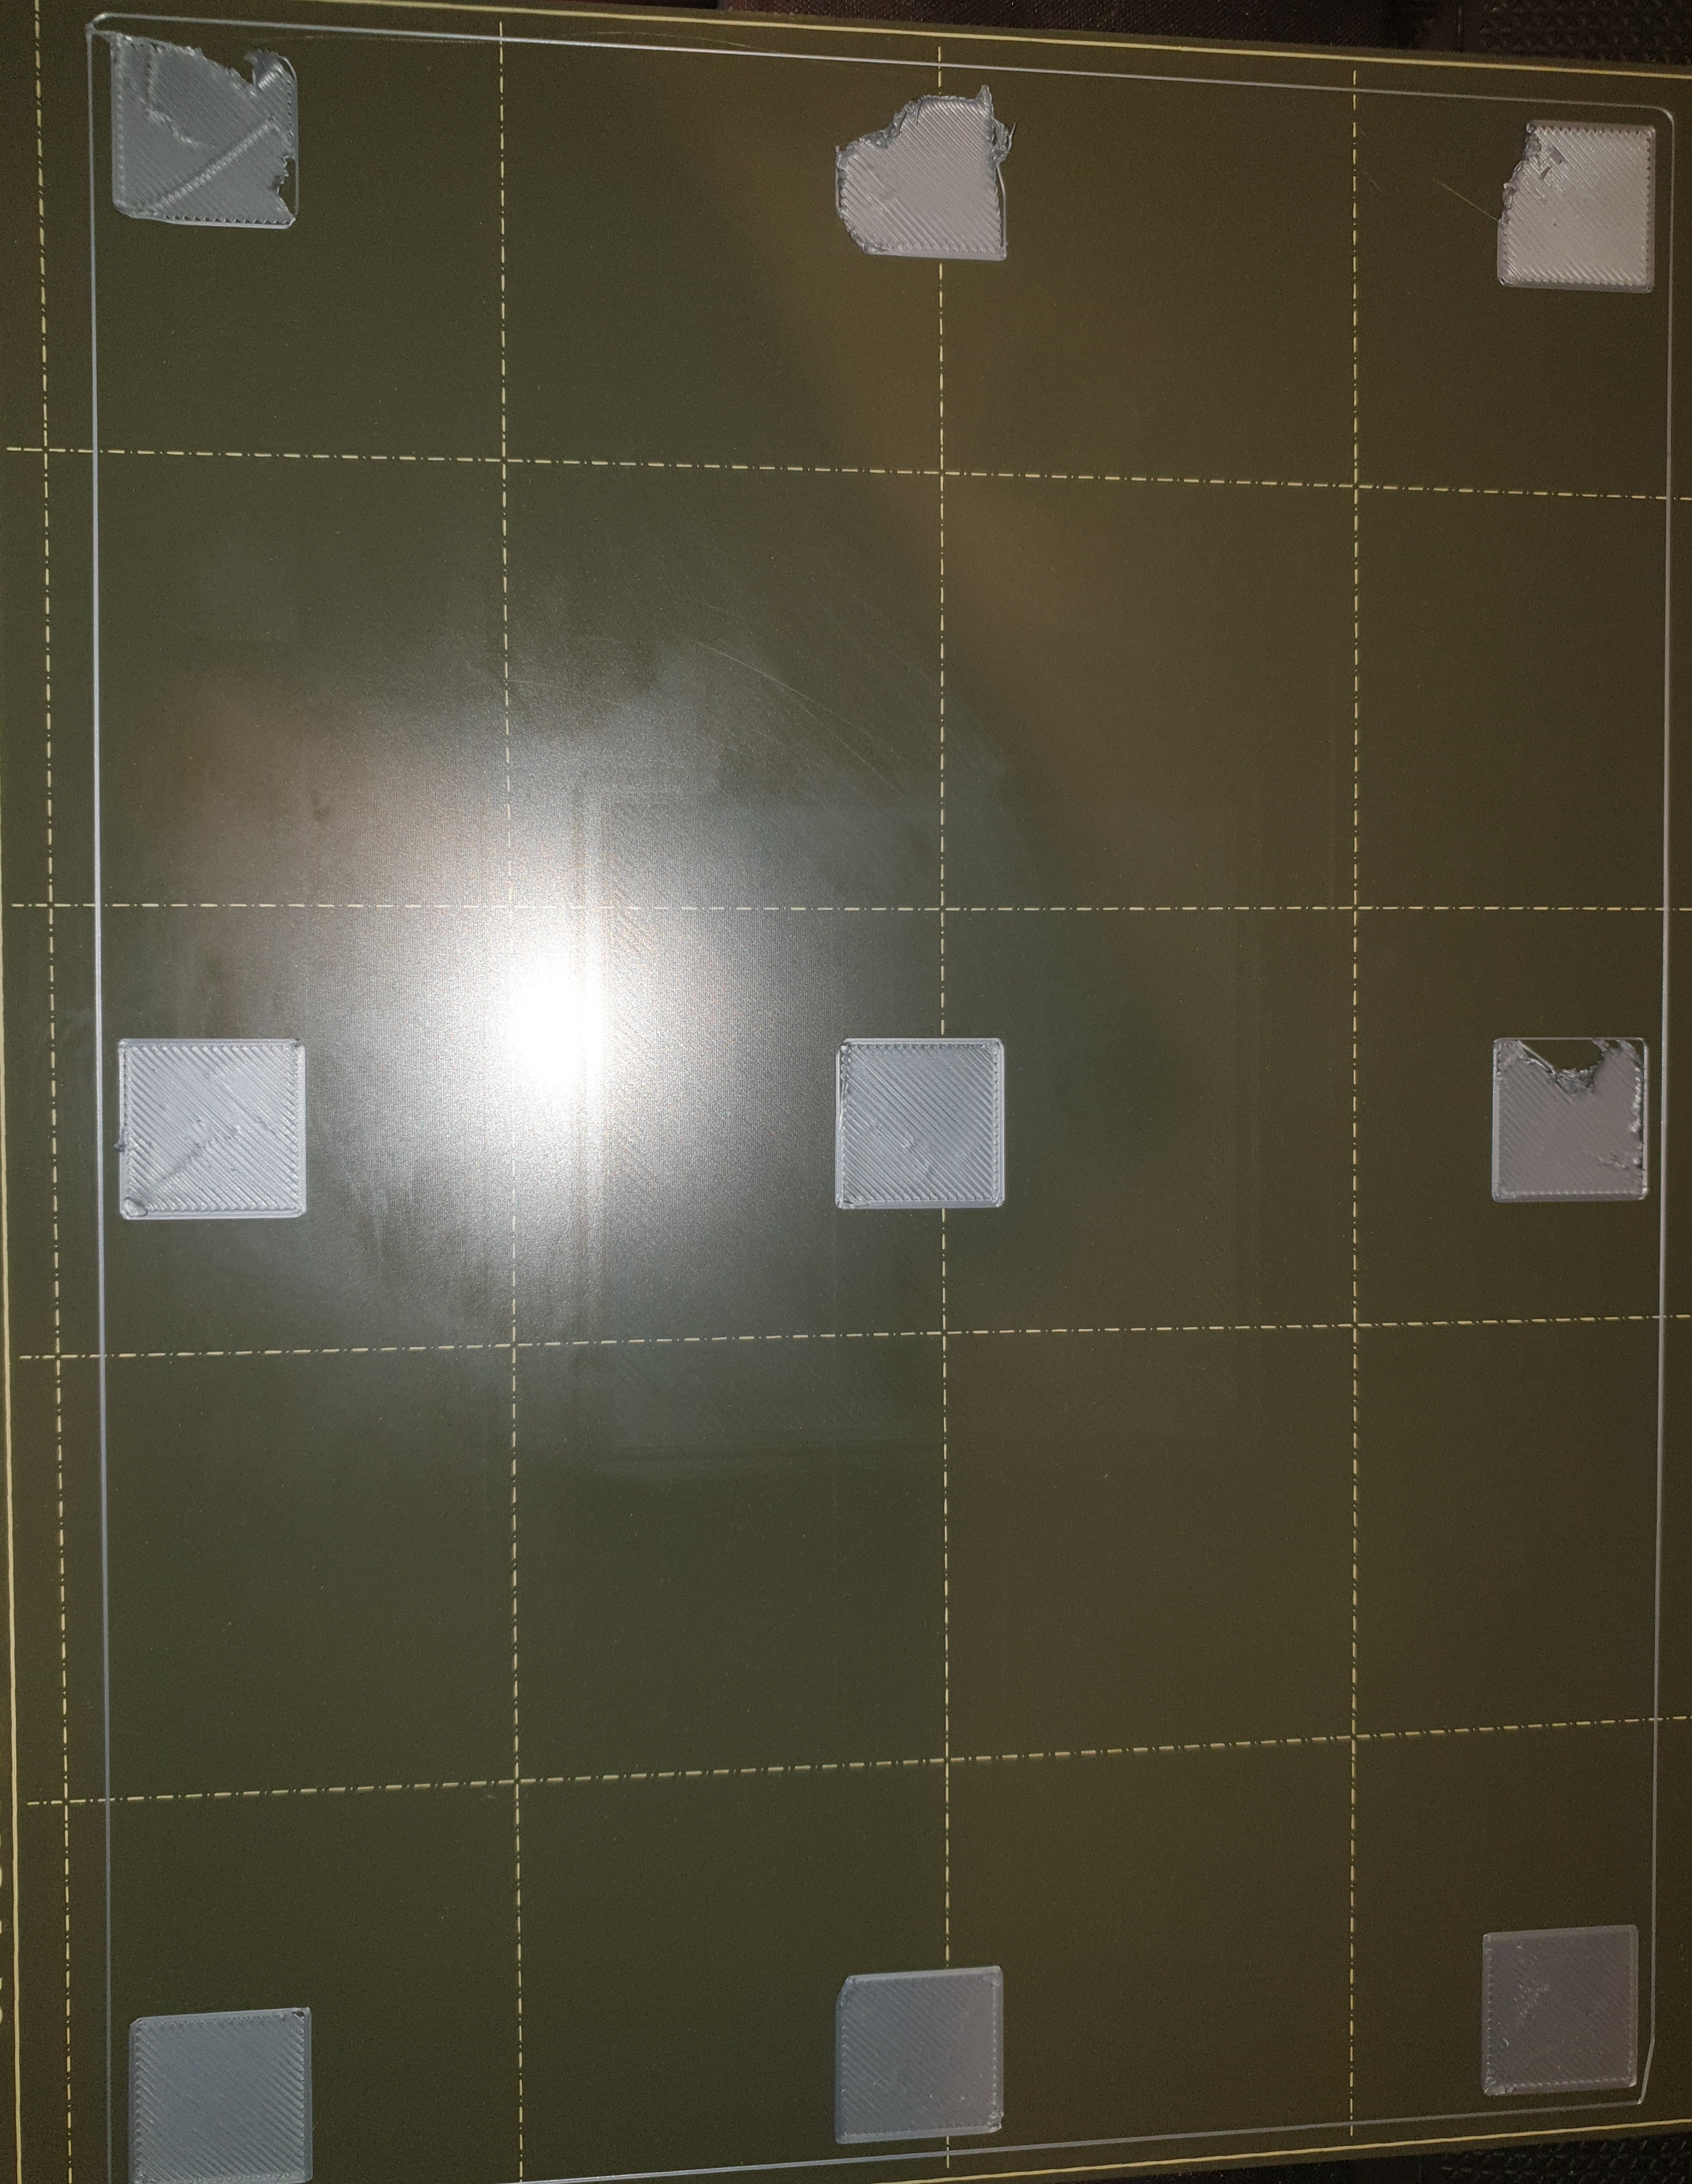
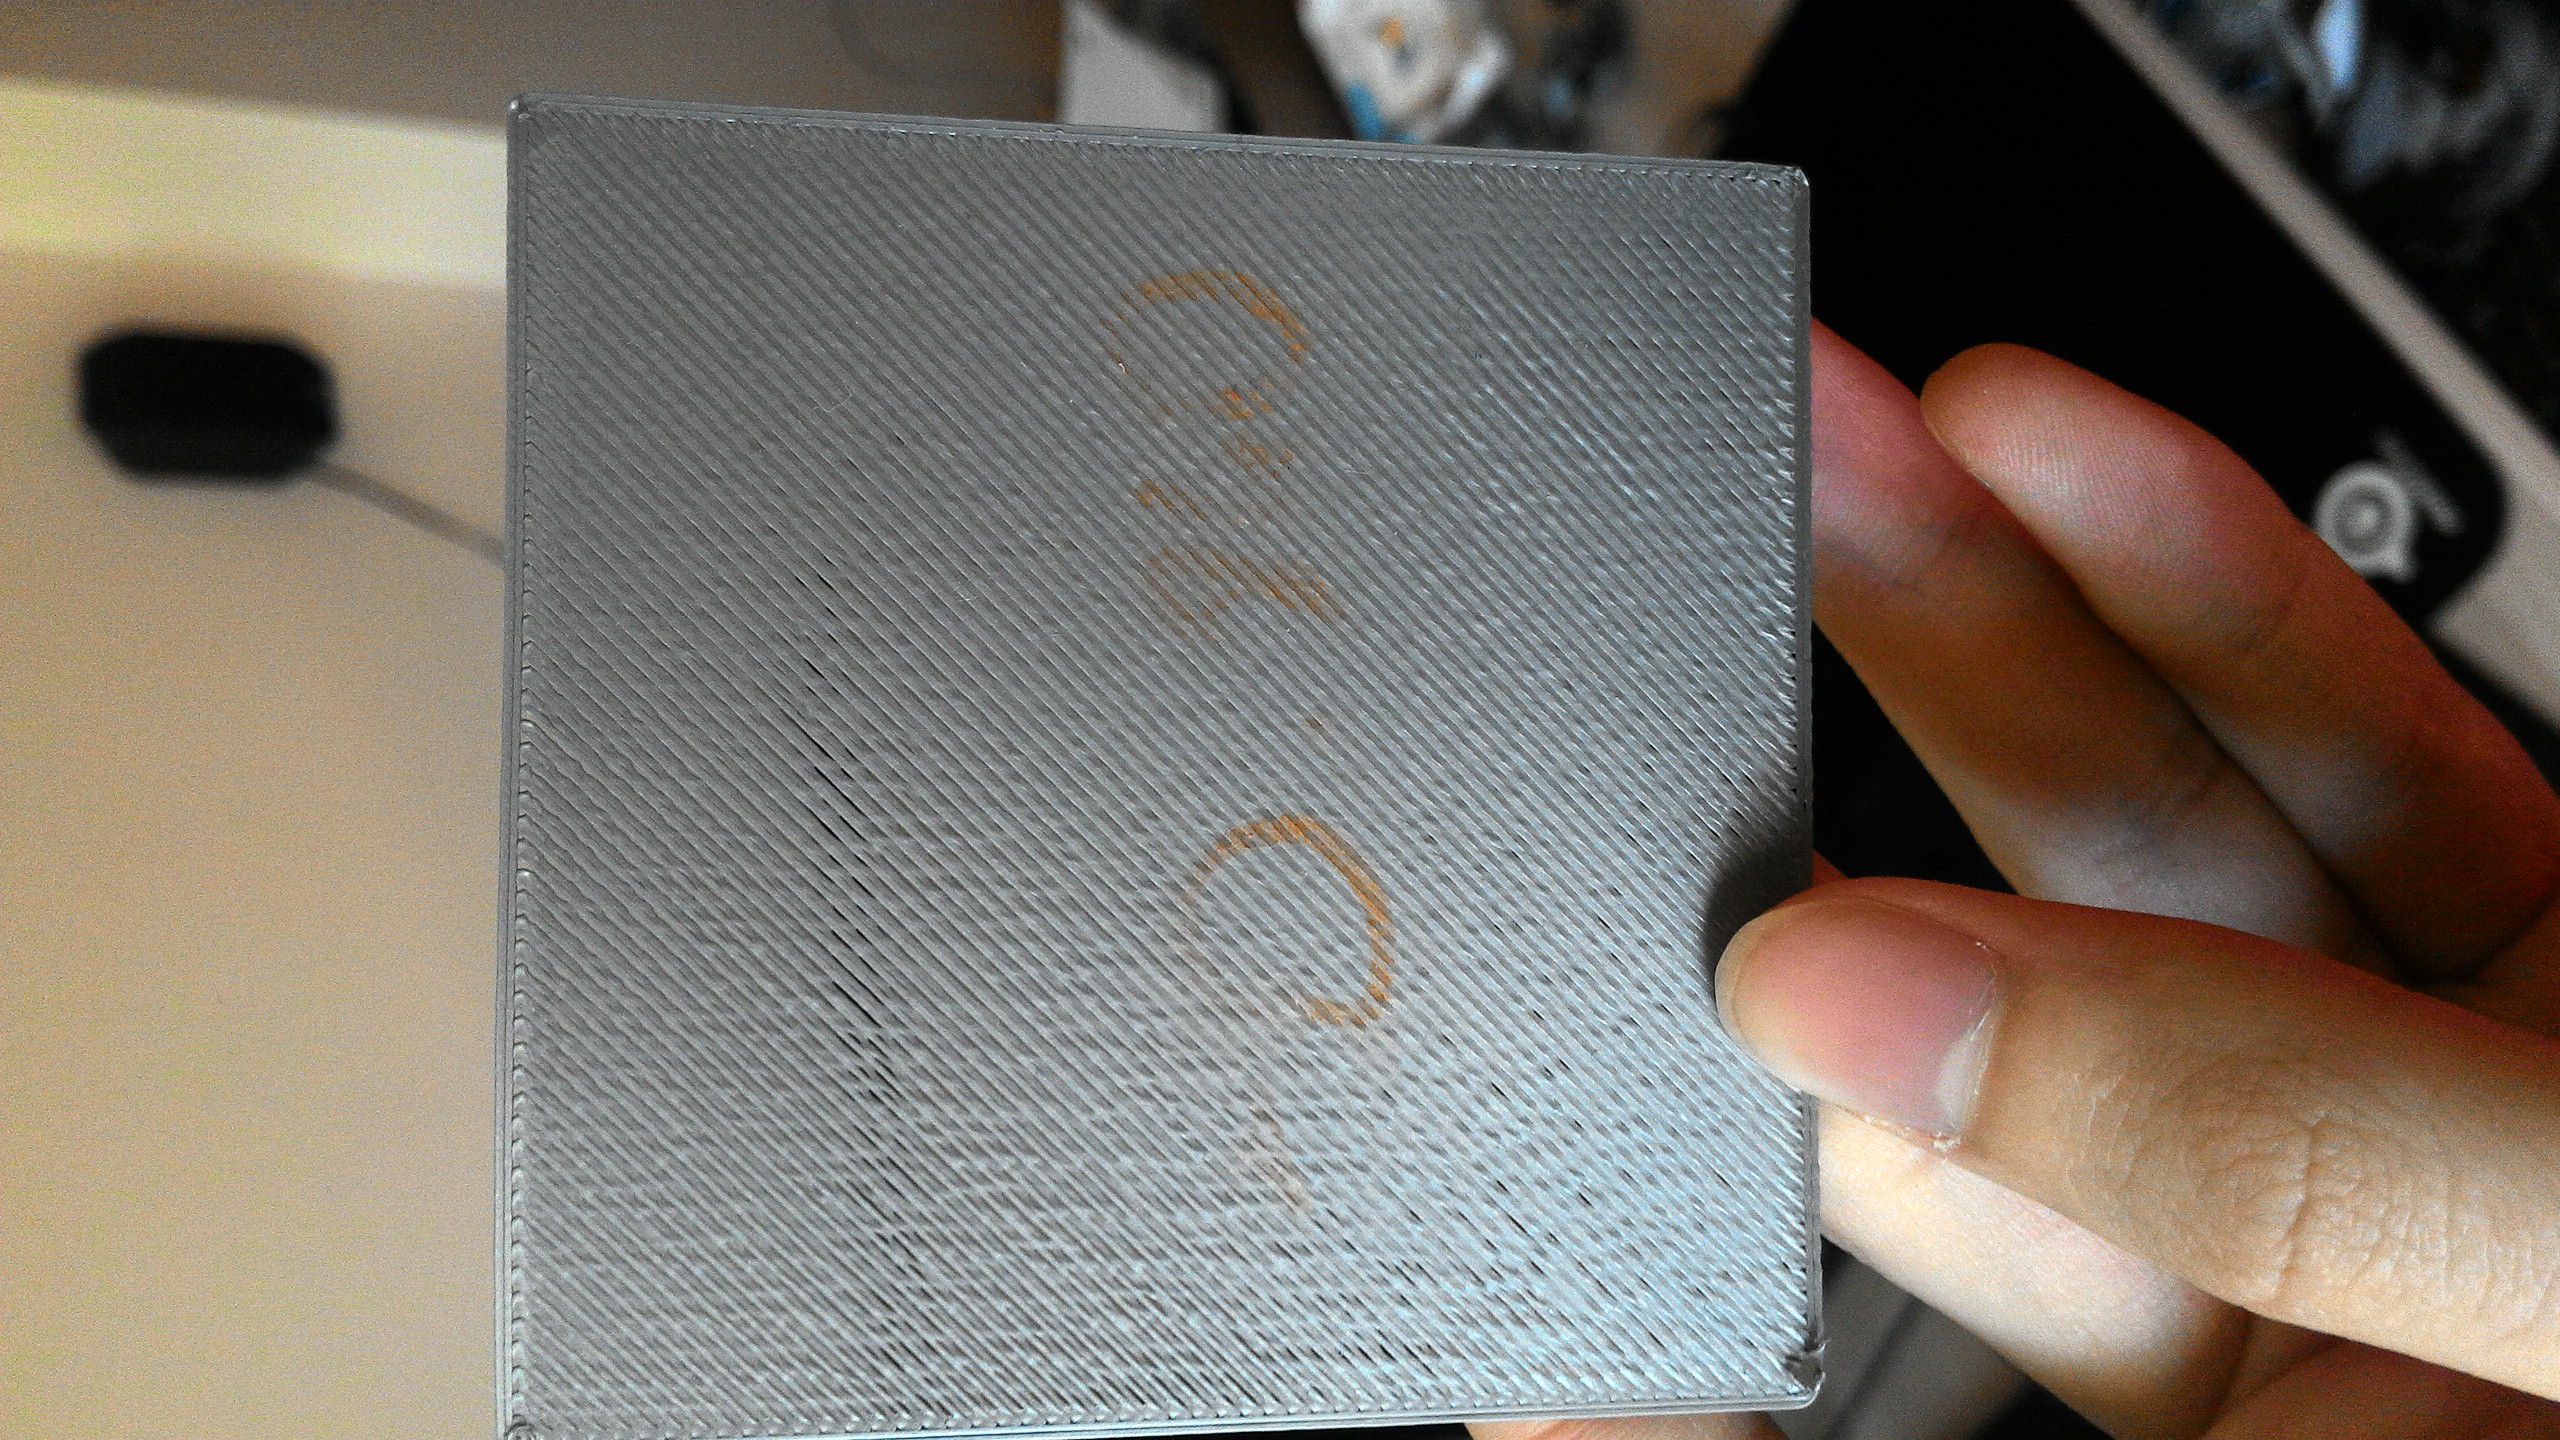
Ok, I think I have a problem here. Do I adjust the bed value up or down?
RE: life adjust Z - my way
Tell us how you cleaned your bed first. Your pictures point more to loss of adhesion than Z problems.
RE: life adjust Z - my way
@robert-rmm200
Iso alcohol wipe 99% then a splash of 99.9% iso rubbed over it.
RE: life adjust Z - my way
Humor me.
Take your plate to the sink and scrub it with lots of hot water and unscented detergent like Dawn.
Dry with a clean paper towel and never touch the print area.
Now try your print again. No IPA this time.
RE: life adjust Z - my way
@robert-rmm200
Scrub with a brush\pad\similar or with a cloth?
RE: life adjust Z - my way
@robert-rmm200
Scrub with a brush\pad\similar or with a cloth?
Bare hand is fine. Not trying to abrade the surface.
RE: life adjust Z - my way
@robert-rmm200
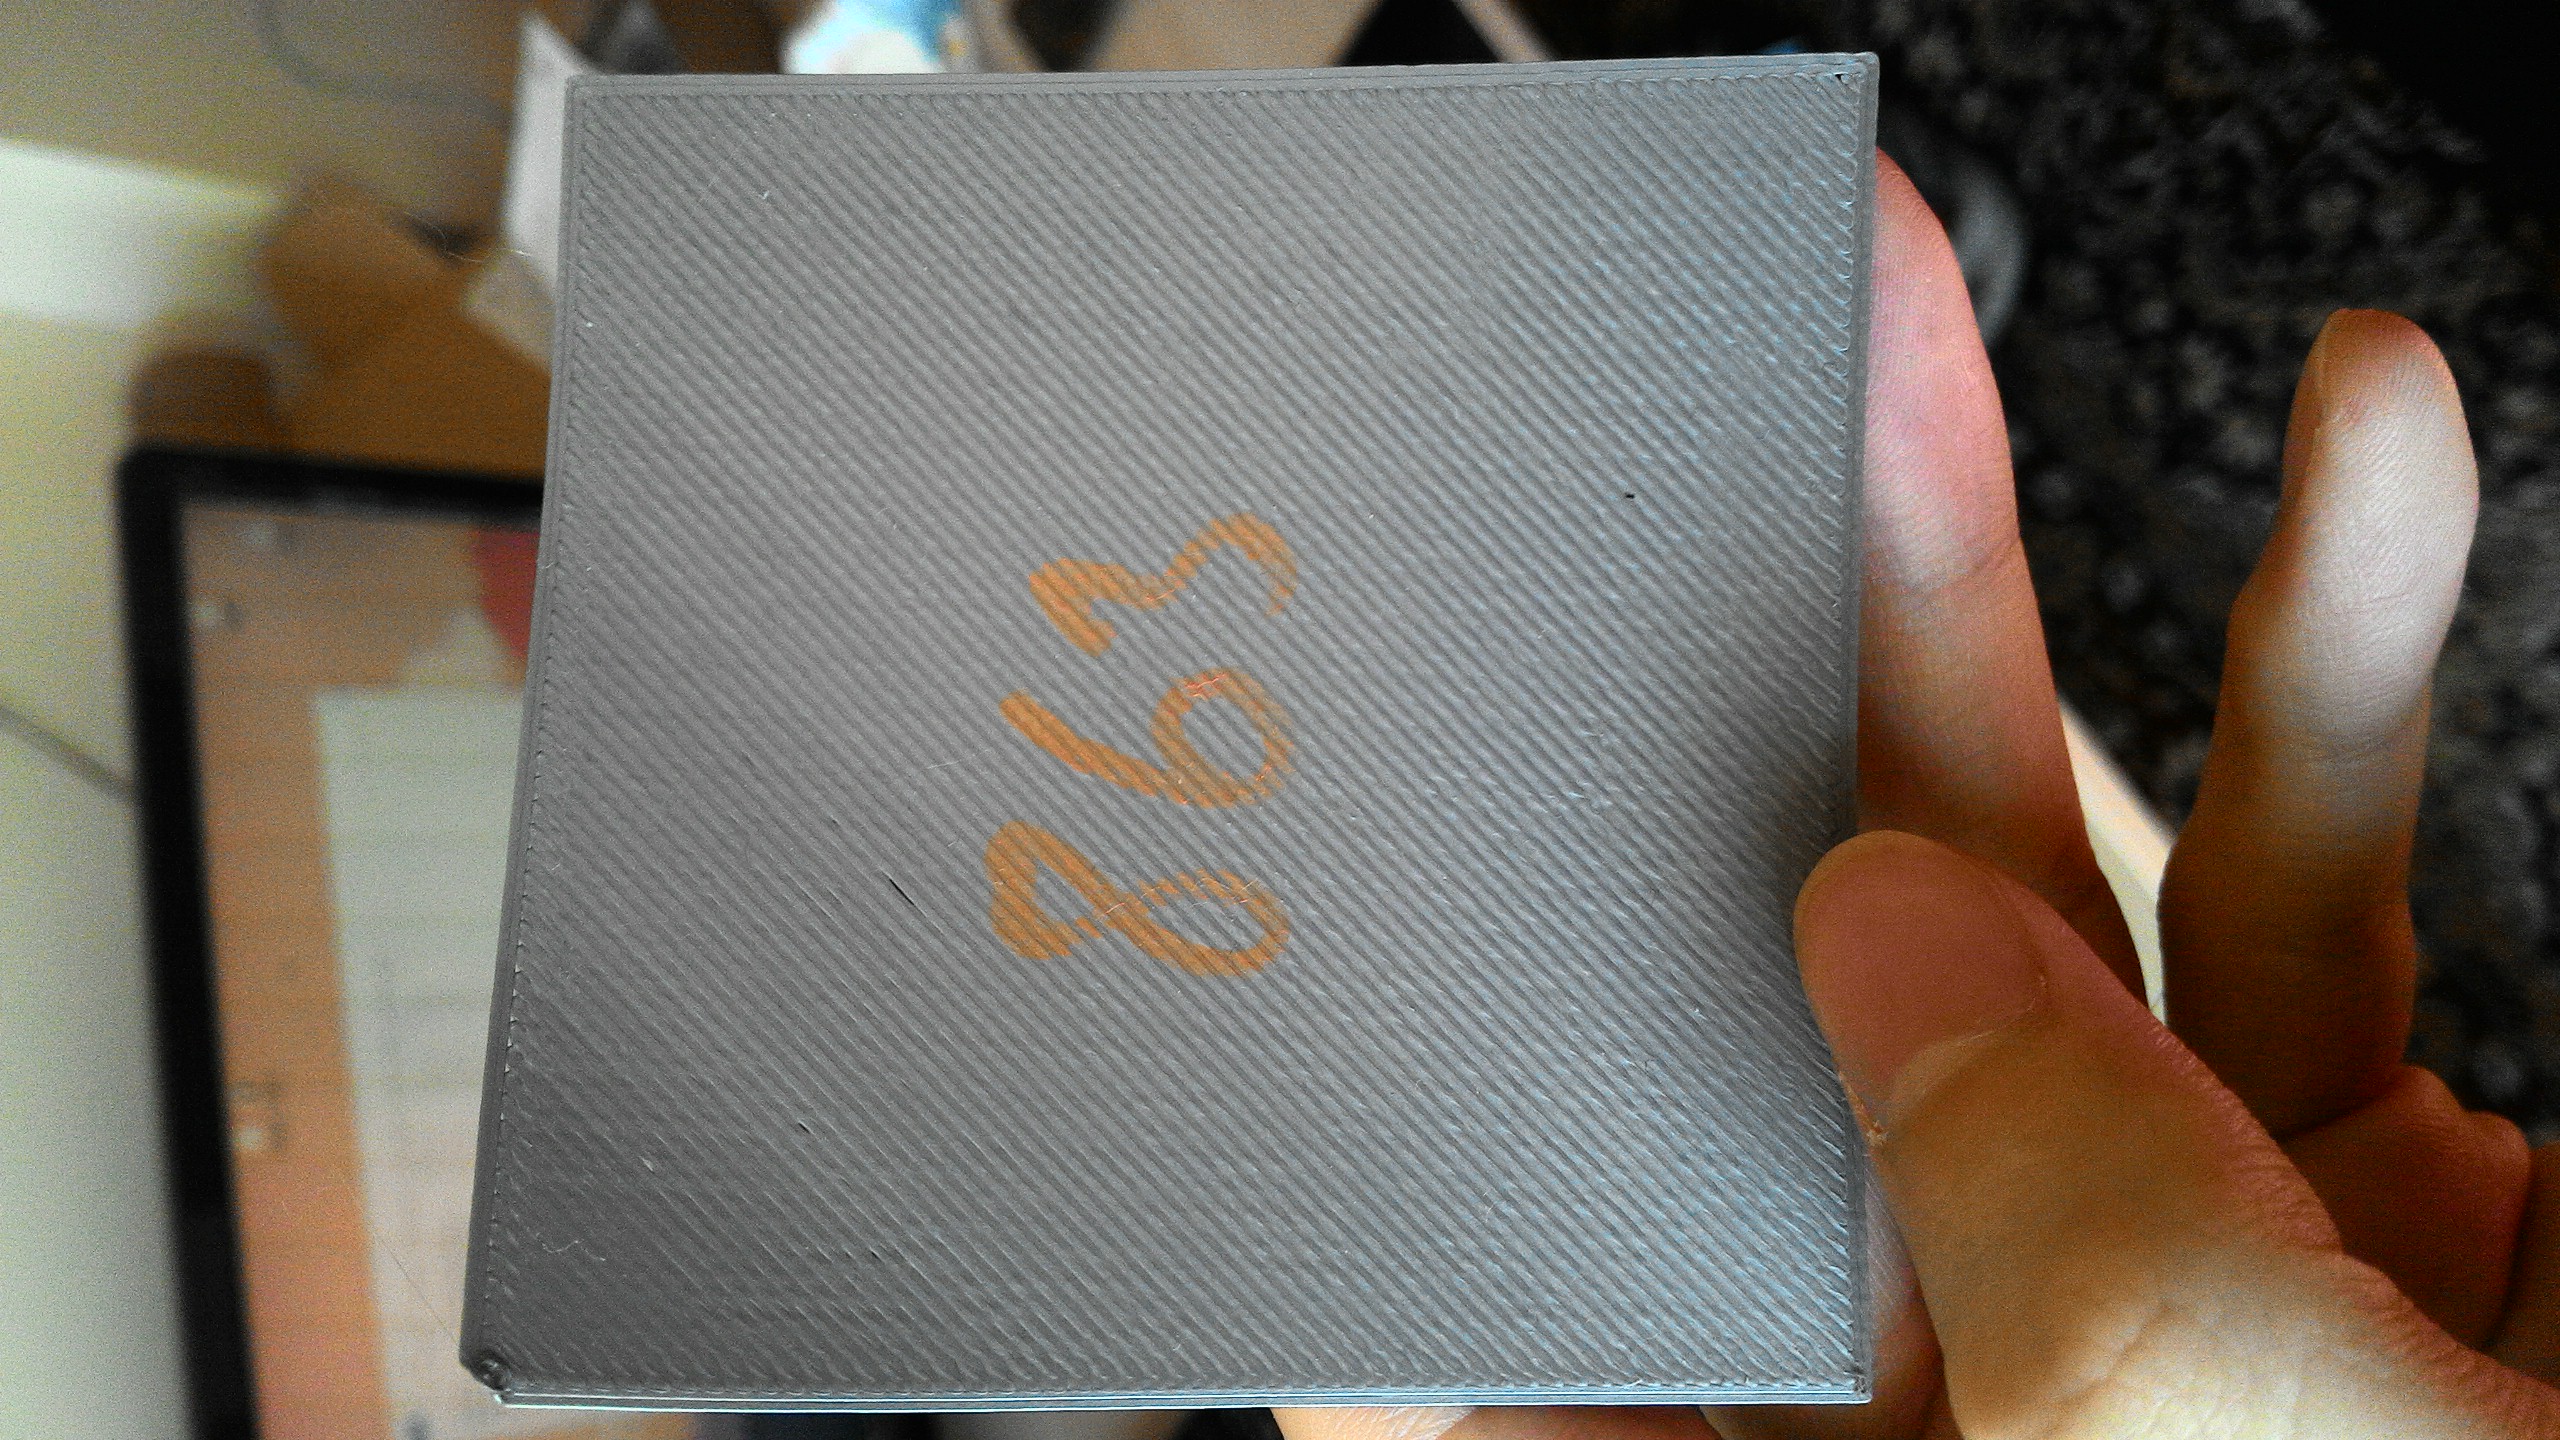
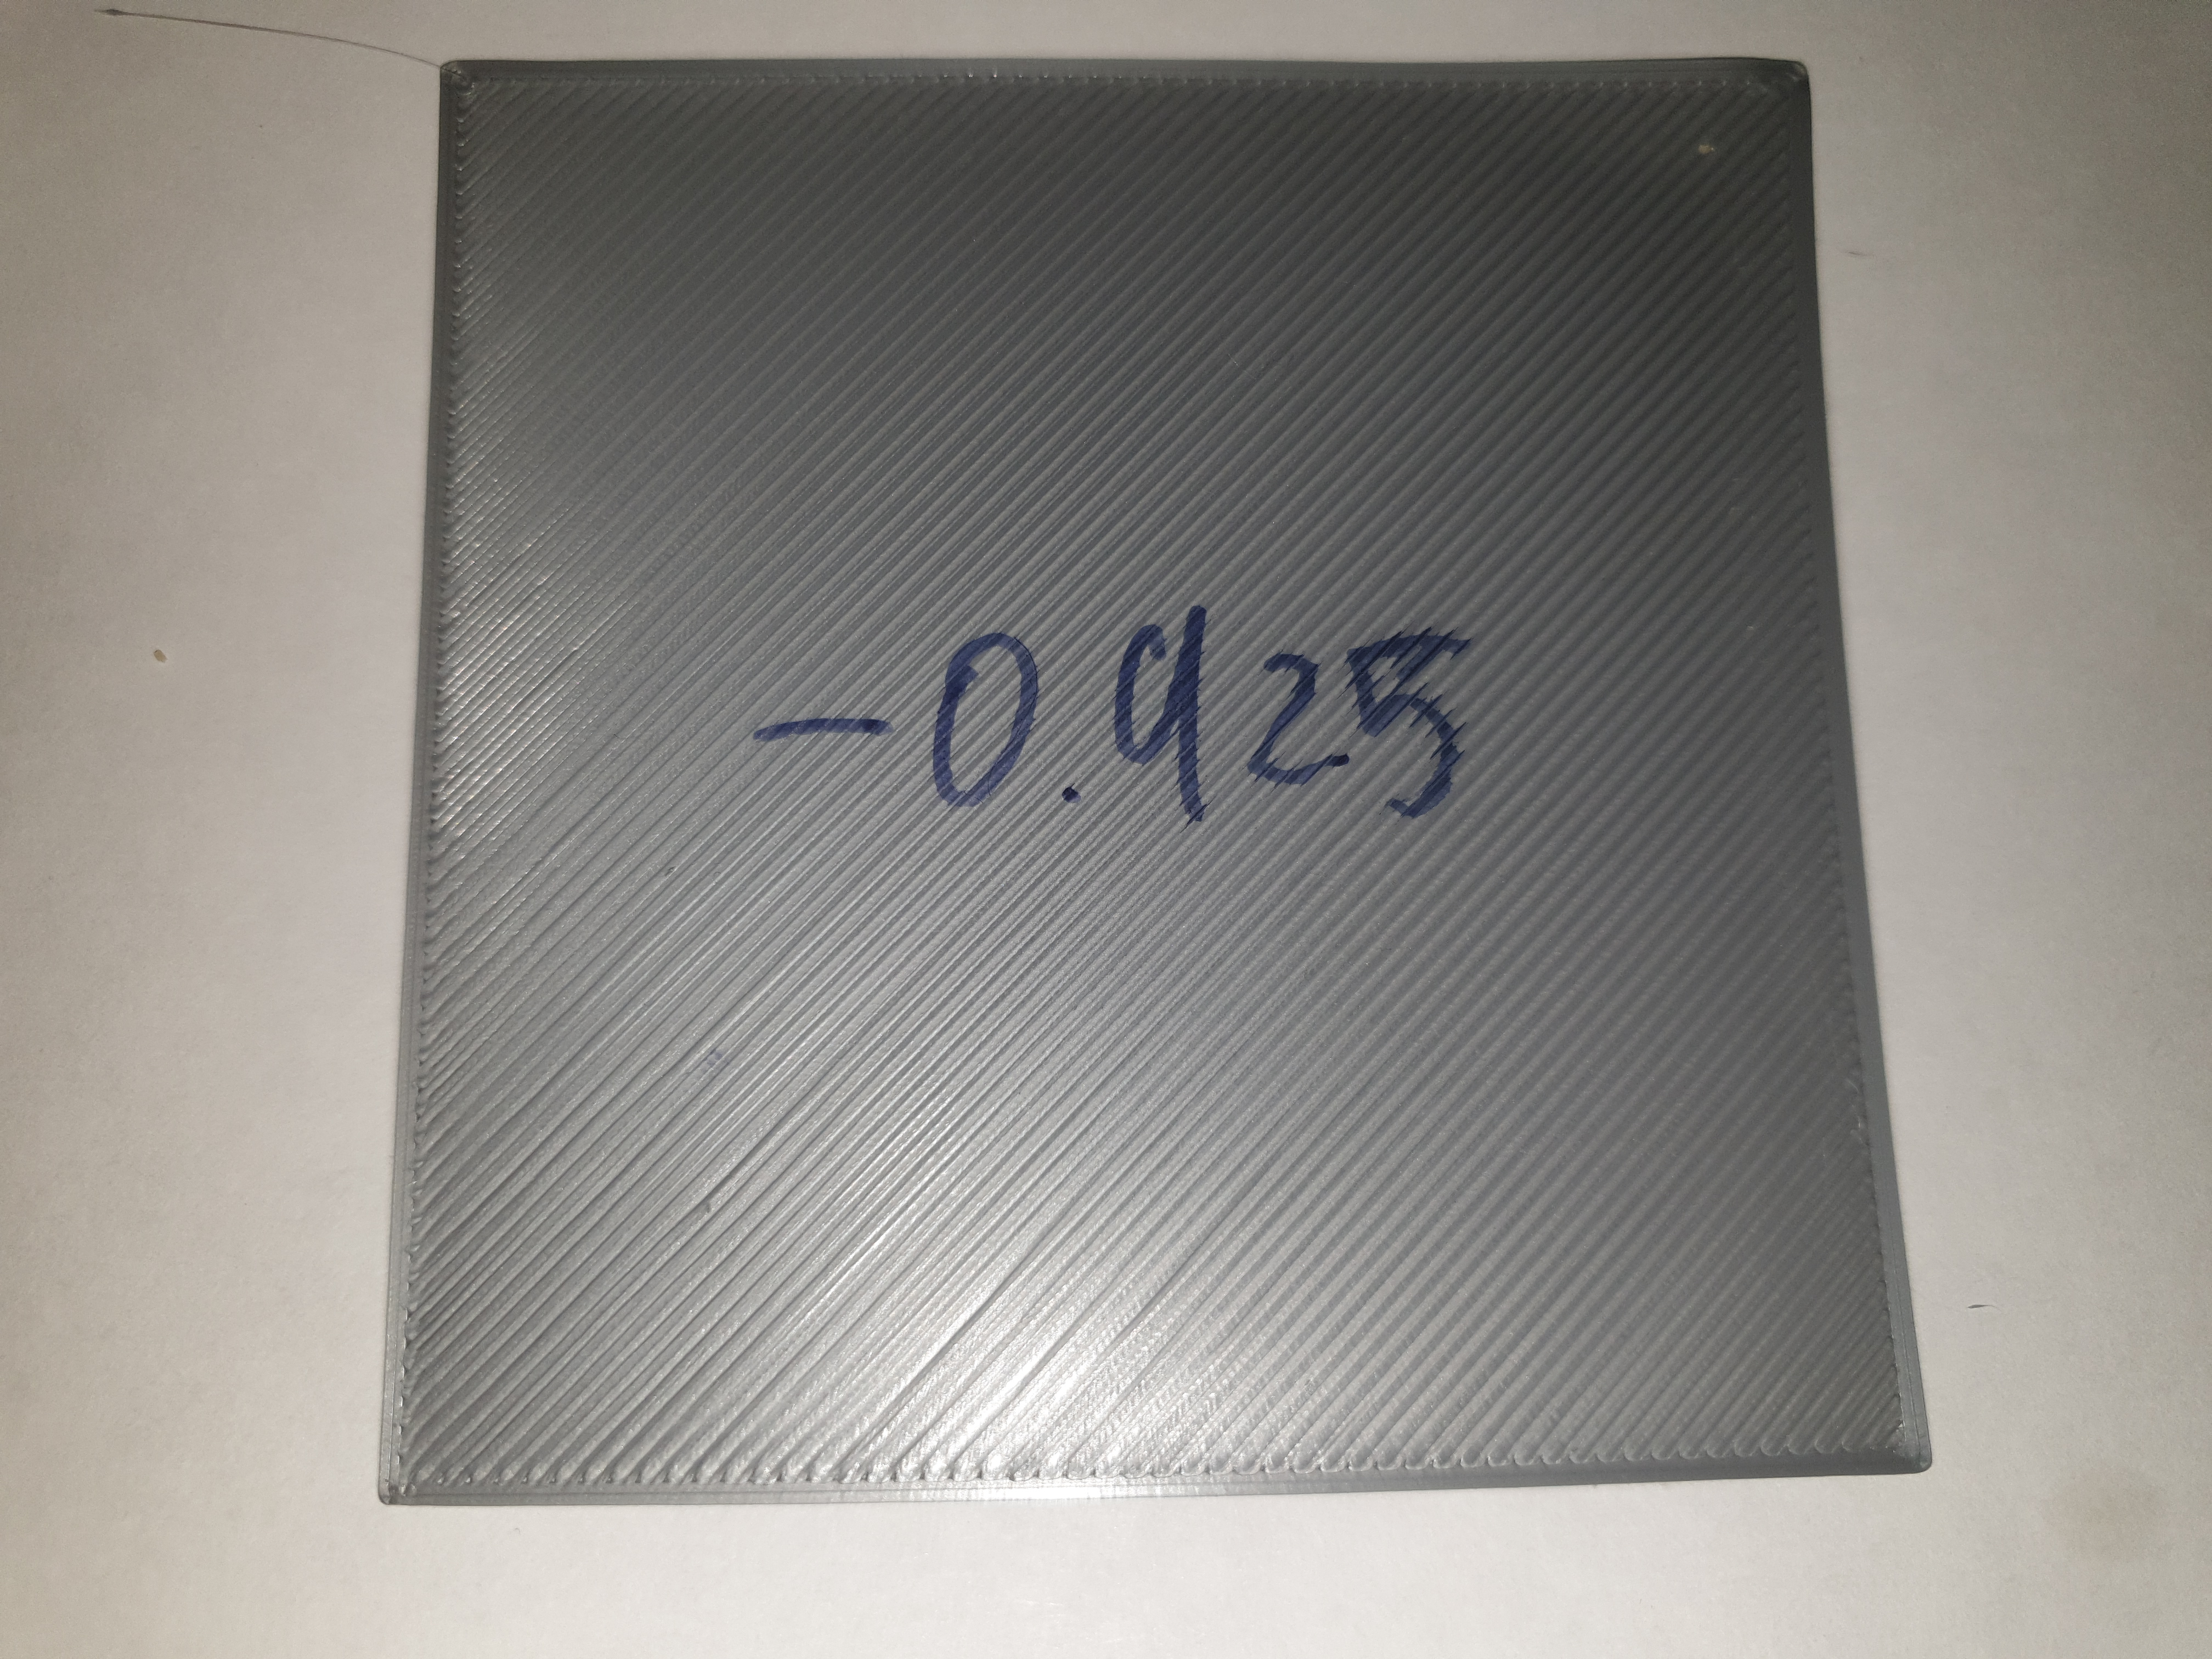
That made a large difference, but I am still seeing surface abrasions at the edges. Live Z is currently at -0.928


RE: life adjust Z - my way
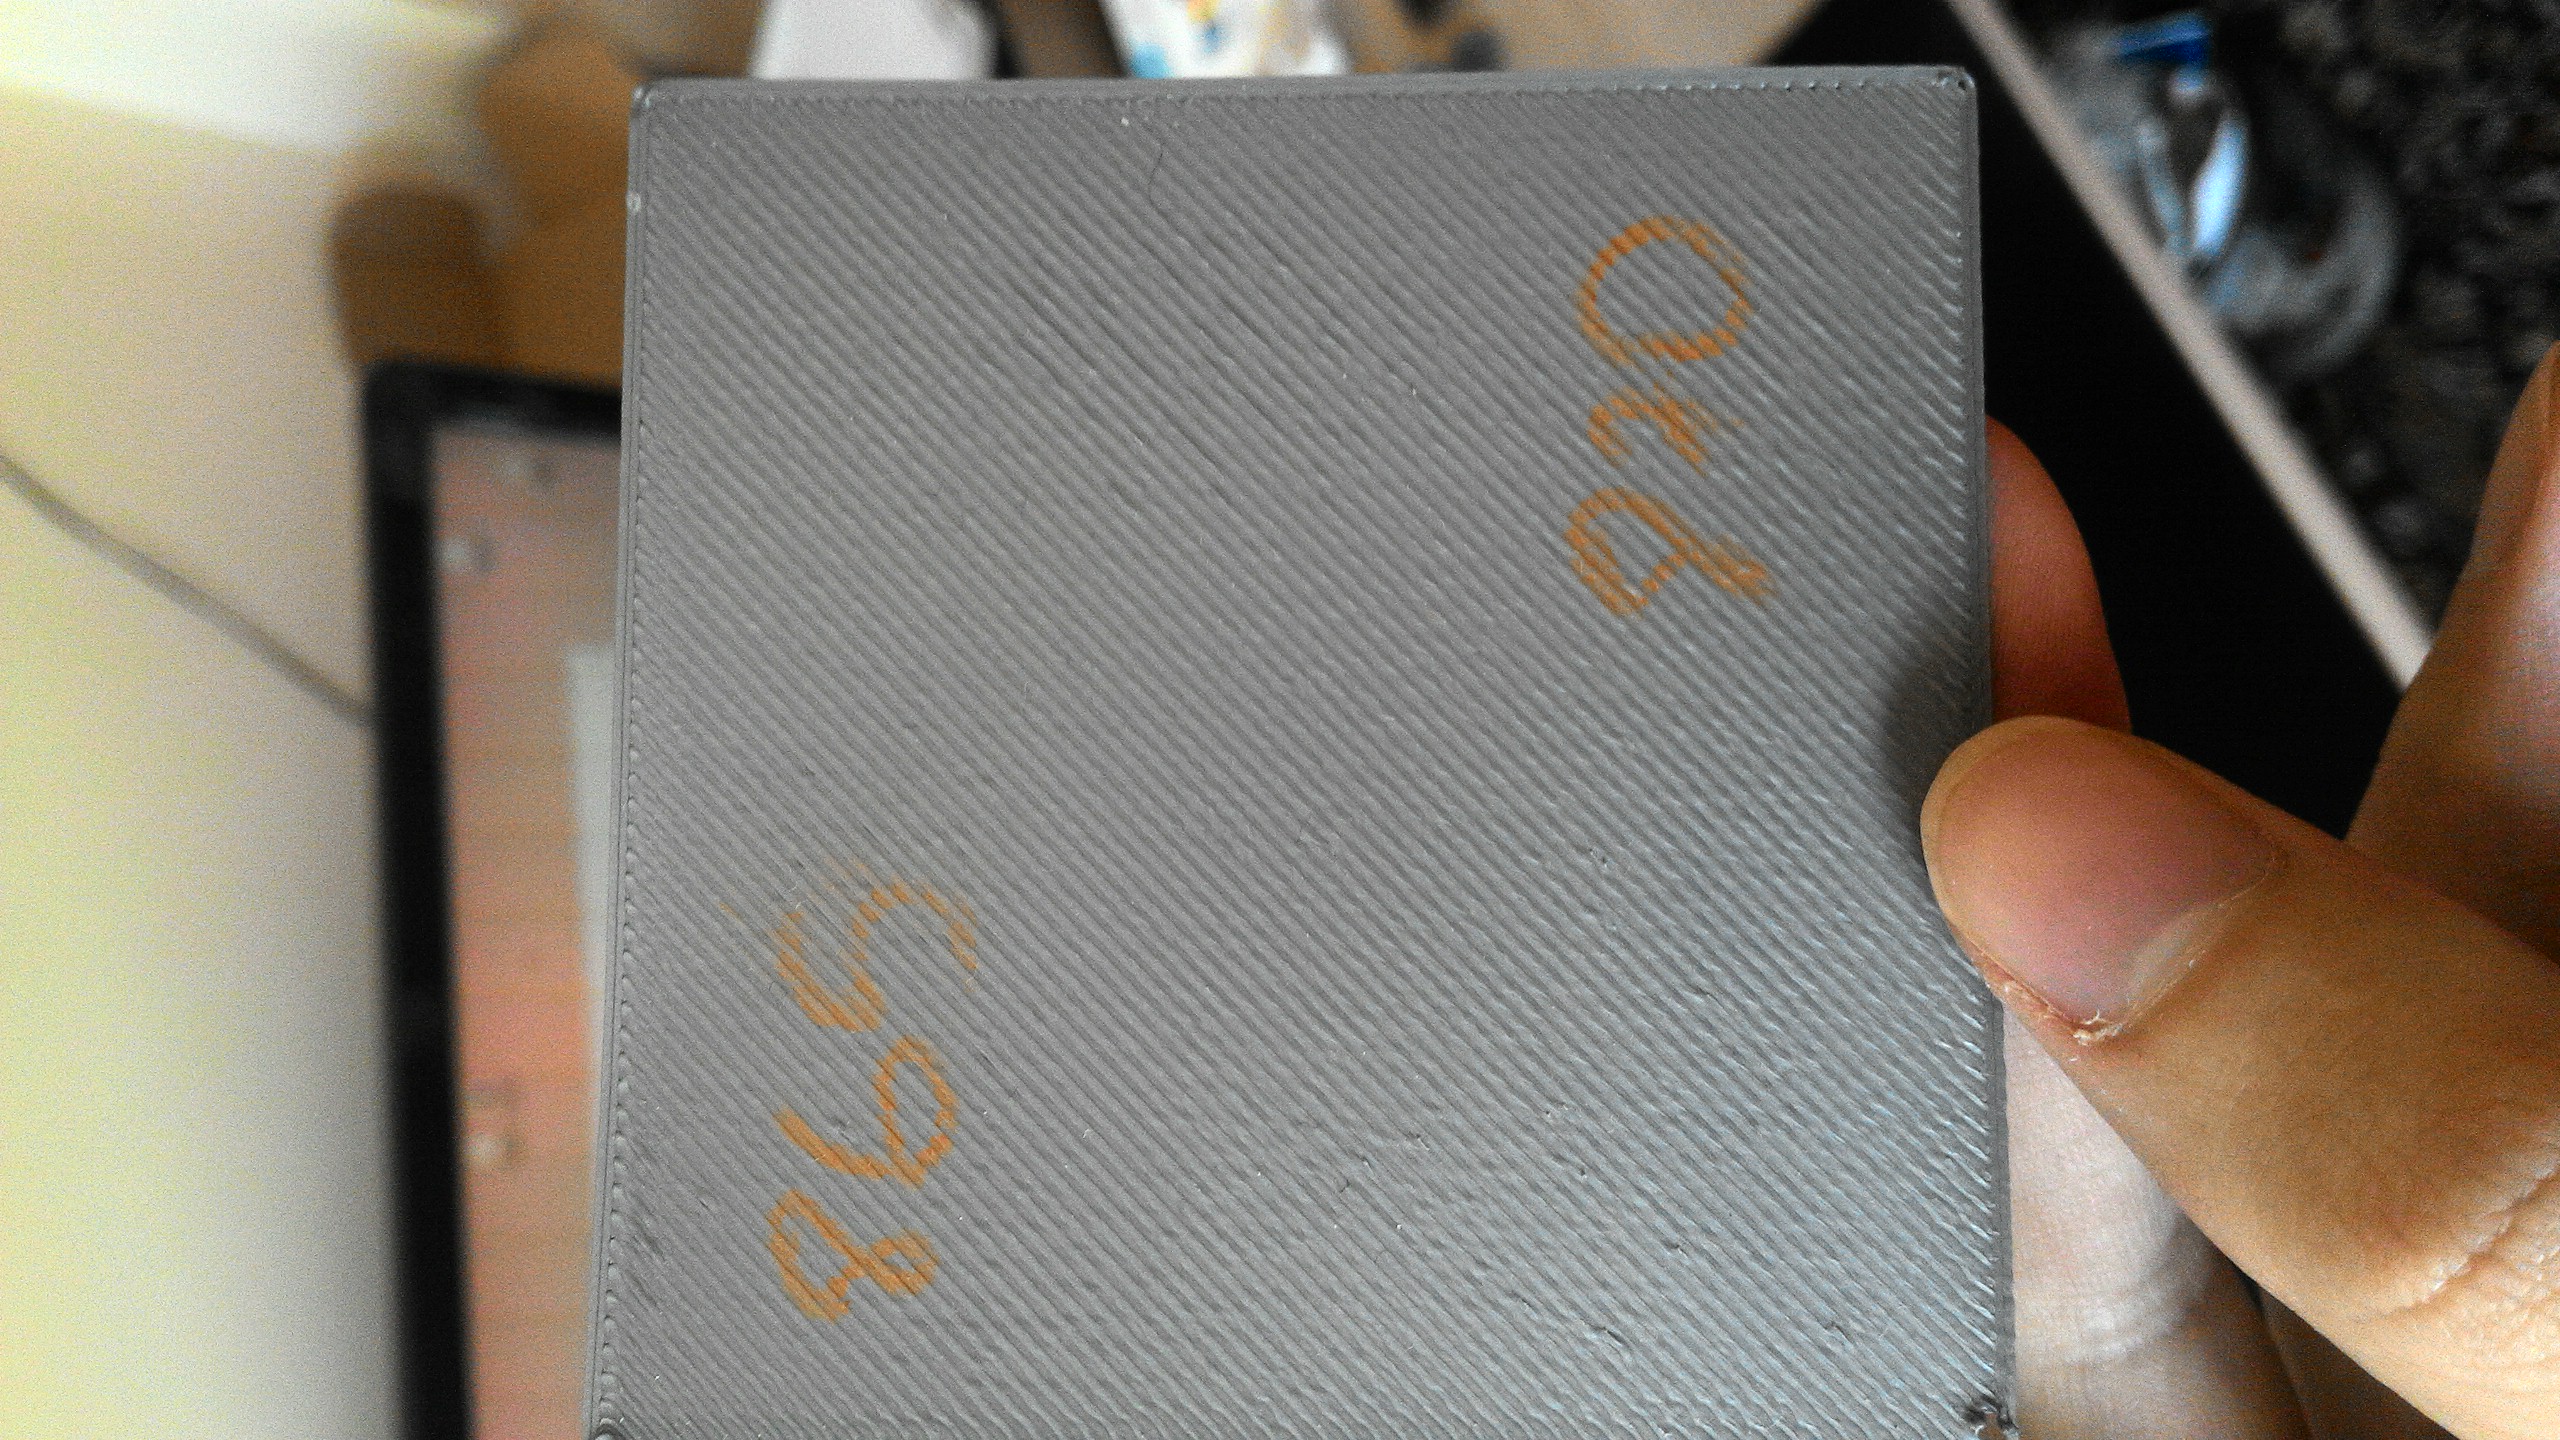
Adhesion certainly looks better. I think your nozzle may be dragging now from too negative a Z.
Could you do a single larger calibration square - like from this topic? We can tell a lot from looking at that.