Re: life adjust Z - my way
The 170C temperature is an ooze reduction measure. At that nozzle temperature filament is less likely to leek out of the nozzle during calibration. So calibration is run at that temperature and then the nozzle is raised to full print temperature before commencing the print.
Regards,
Martin
Martin Wolfe
Re: life adjust Z - my way
I wonder if you might consider a small change at the end of the print you command the Z up near its max height and if you use this with a filament near the end of the spool the tight wind sometimes snaps the thing off near or flush with the top of the extruder I have just had this happen with quite new Prusament Galaxy Black... I know I can dig into the raw gcode and modify it but give that it took my fumble fingers to add the G80 N7 ; mesh bed leveling 7x7
3 tries due to inadvertent typos I would rathe not make this change for each version.
one other request do you have a version for Ninja flex? as flex filament remains the one type of plastic that I have yet to get a successful print from.
Thanks again are due you; as the provider of the best utility gcode I have yet to use.
hi community
just want to share with you my way of finding the right correction value for the life Z adjustment.
just in case that somebody still tries to get it right with the v2 calibration gcode that came with the kit, which i think is only of limited usability.
💡
find attached a little gcode that should print a 75x75mm surface with 0.2mm height (PLA settings).
i simply print this file in a bright color (takes about 12 minutes) and change the life Z adjustment level in the middle of the print, when the diagonal of the square is reached.
so a little film is printed. a good idea is to write the settings with an edding at the sheet 😉 .
i repeat the procedure until i get a completely smooth and homogenous surface.
in addition it's a good idea to measure the thickness of the film with a micrometer gauge or a digital vernier calliper ❗
➡ when you look at the attached picture, you can see at first sight, that the right foil (with the -365um and -400um) shows some small gaps, which indicates that you need to squish down the nozzle a little bit more.
furthermore you can see that the -500um setting delivered the best result, and as you can guess: it's thickness was exactly 0.20mm.
anything more to explain ?
update:
just forget to tell you how you can get the film off from the heatbed without damaging it:
just use coolant spray at one edge. the sheet will immediately curl up and you can get it off easy as pie from the printing surface with your spatula.
edit 17th january: just replaced the attached gcode file with one where i added a "G1 Z=10.000 F1800" at the end, just to make sure that the nozzle moves up a little bit more (would remain at 0.2mm after the print).
edit 29th of august: removed the first test sheet (which has been downloaded more than 1000 times) and replaced it by the most recent one (v4).
calibration_surface_PLA_75x75@200um_v4.zip
20170116_223130.jpg.
➡ update (14.01.2018): calibration surfaces for PLA, ABS & PETG (generated with the latest S3D version, lin-advance, G87 and preheat procedure to avoid nozzle dripping (tnx 2 PJR)):S3D_calibration_surfaces_75x75@200um_v6.1.zip
Re: life adjust Z - my way
Does this code take into account Bed Level Correction settings?
I print off the test square with more gaps toward top left. I add a negative modifier to the back and left side Bed Level Correction (-10 first, then tried -20) and the square appears to look pretty much the same using your Gcode.
Re: life adjust Z - my way
How do I find the most current gcode file, without having to hunt for it in ~500 comments please? My apologies, new to this forum, and thanks
Re: life adjust Z - my way
Hello everyone,
Recently, I embarked on the world of 3D printing but I encounter problems of calibration with the MK3. I feel that my bed is not at all flat ...
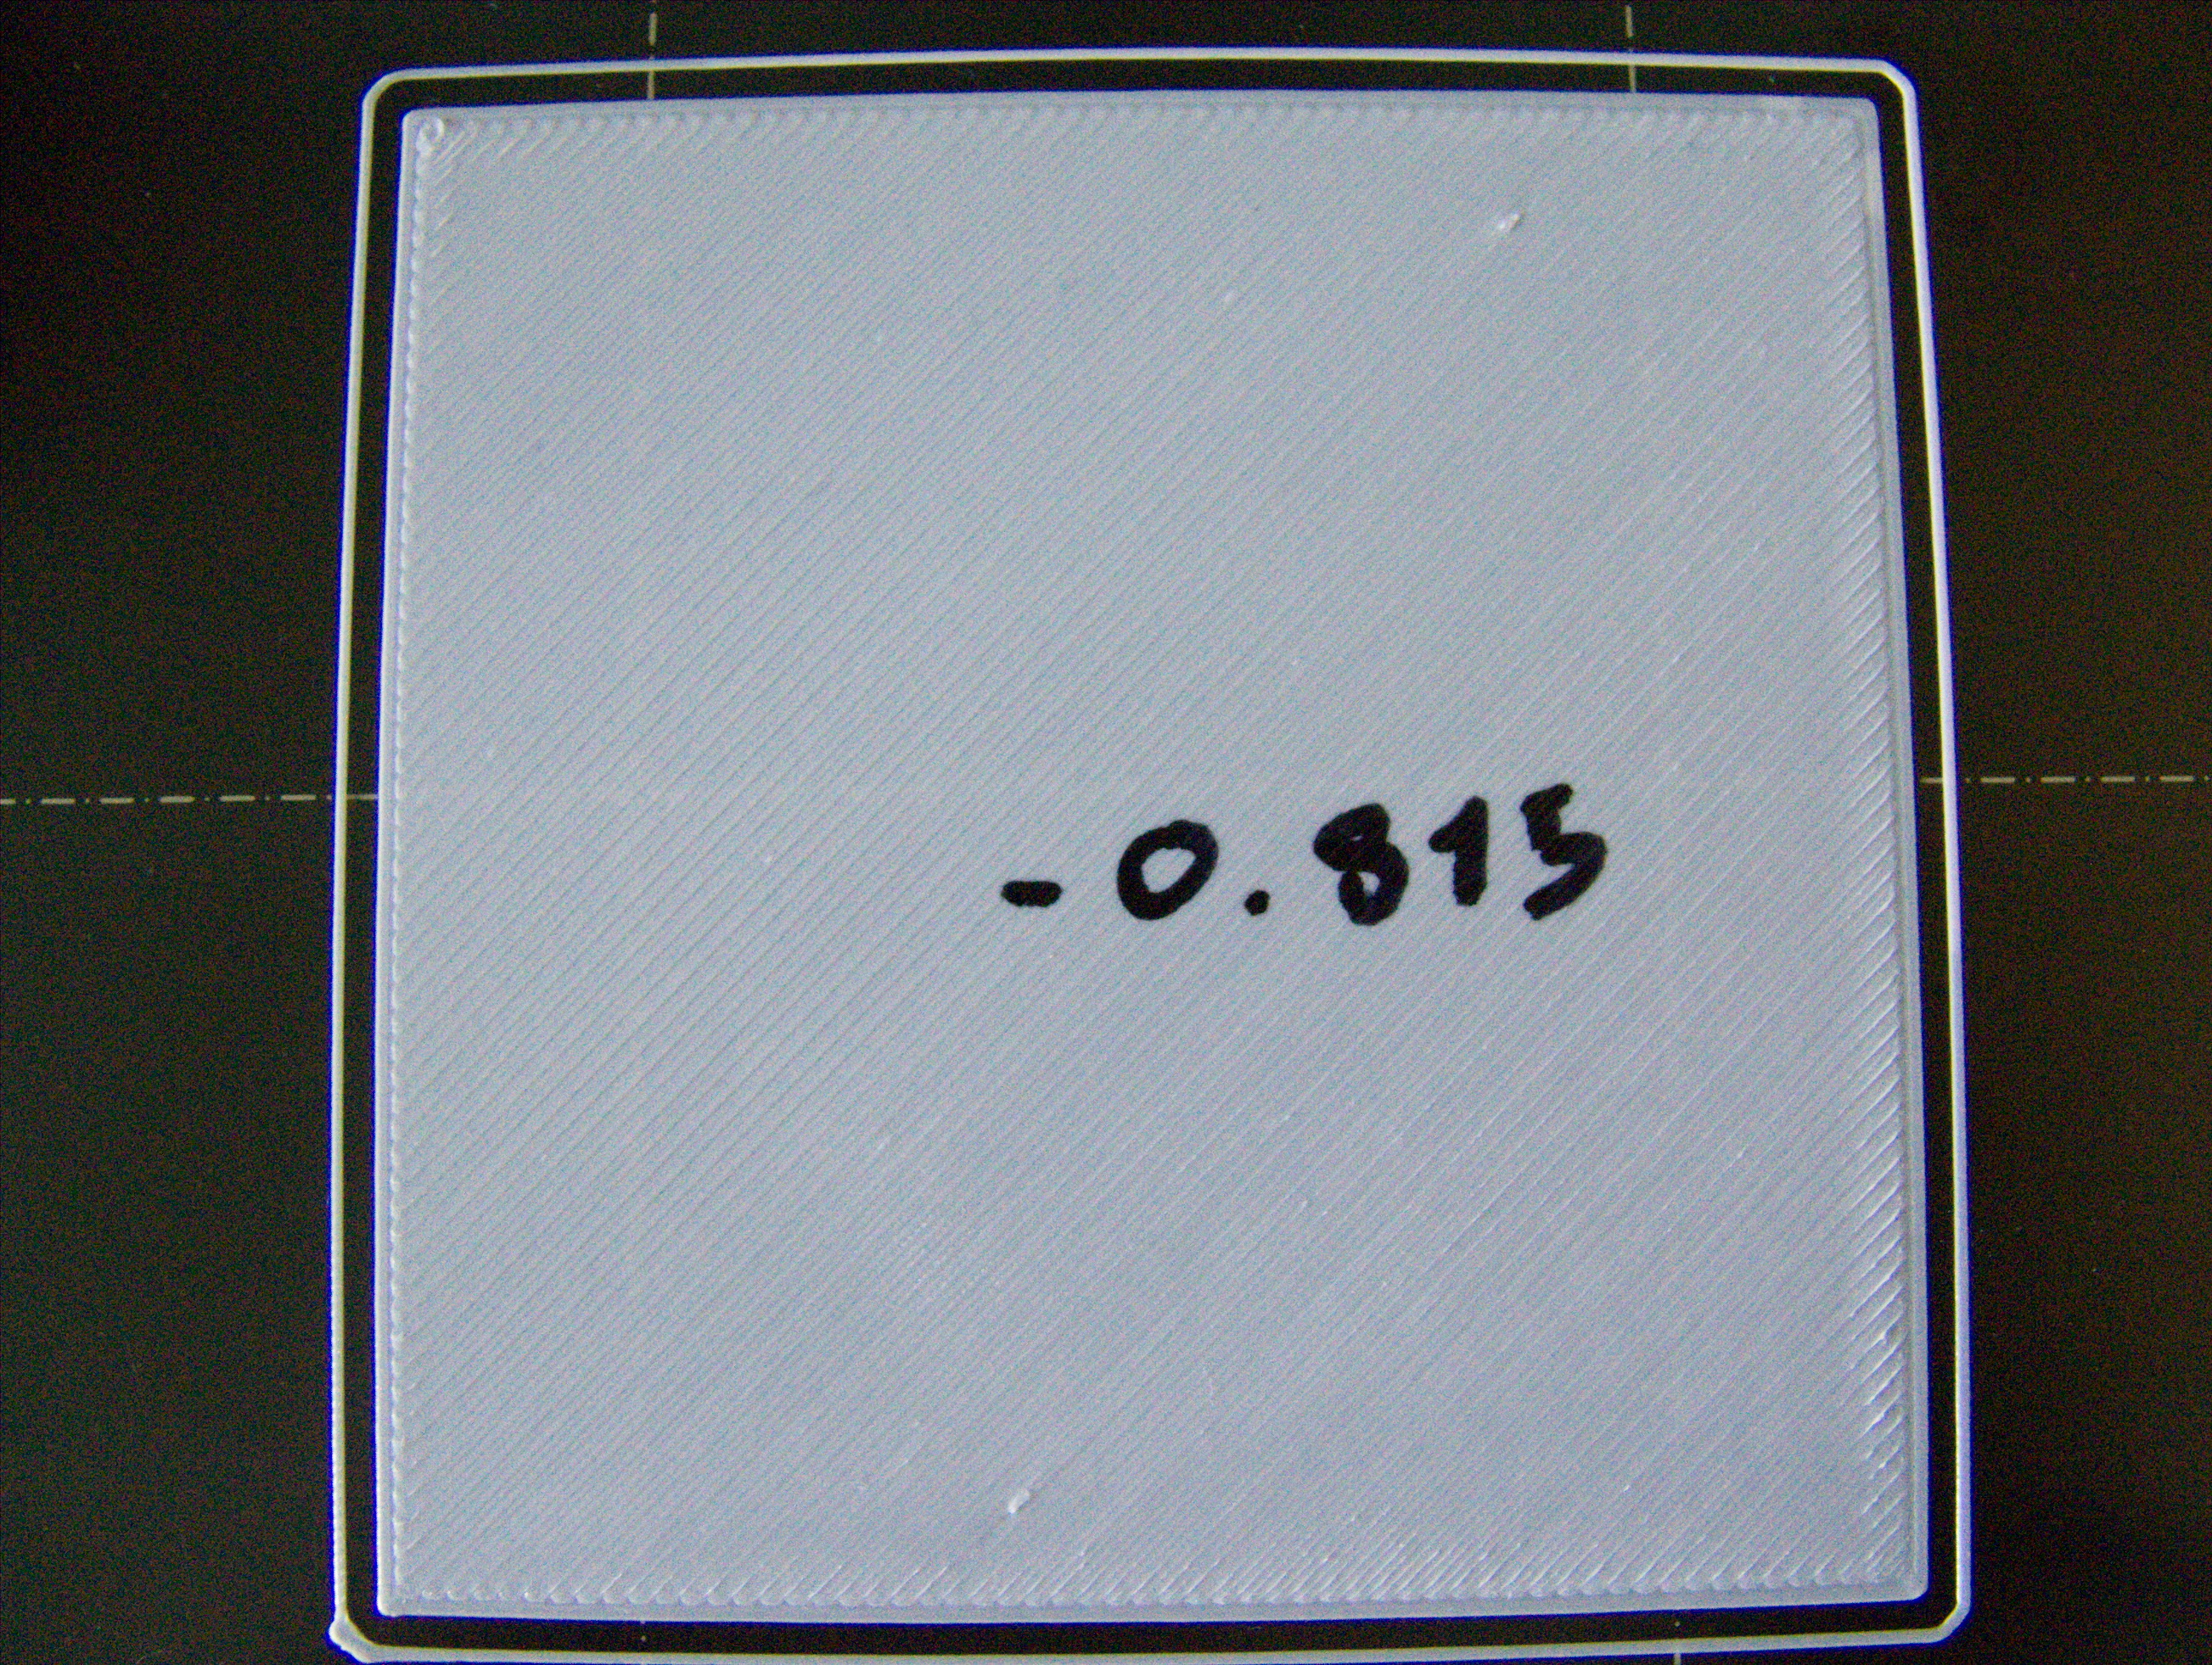
I used the file "calibration_surface_PLA_75x75@200um_v4.zip" to set my "Live Adjust Z". View the photo.
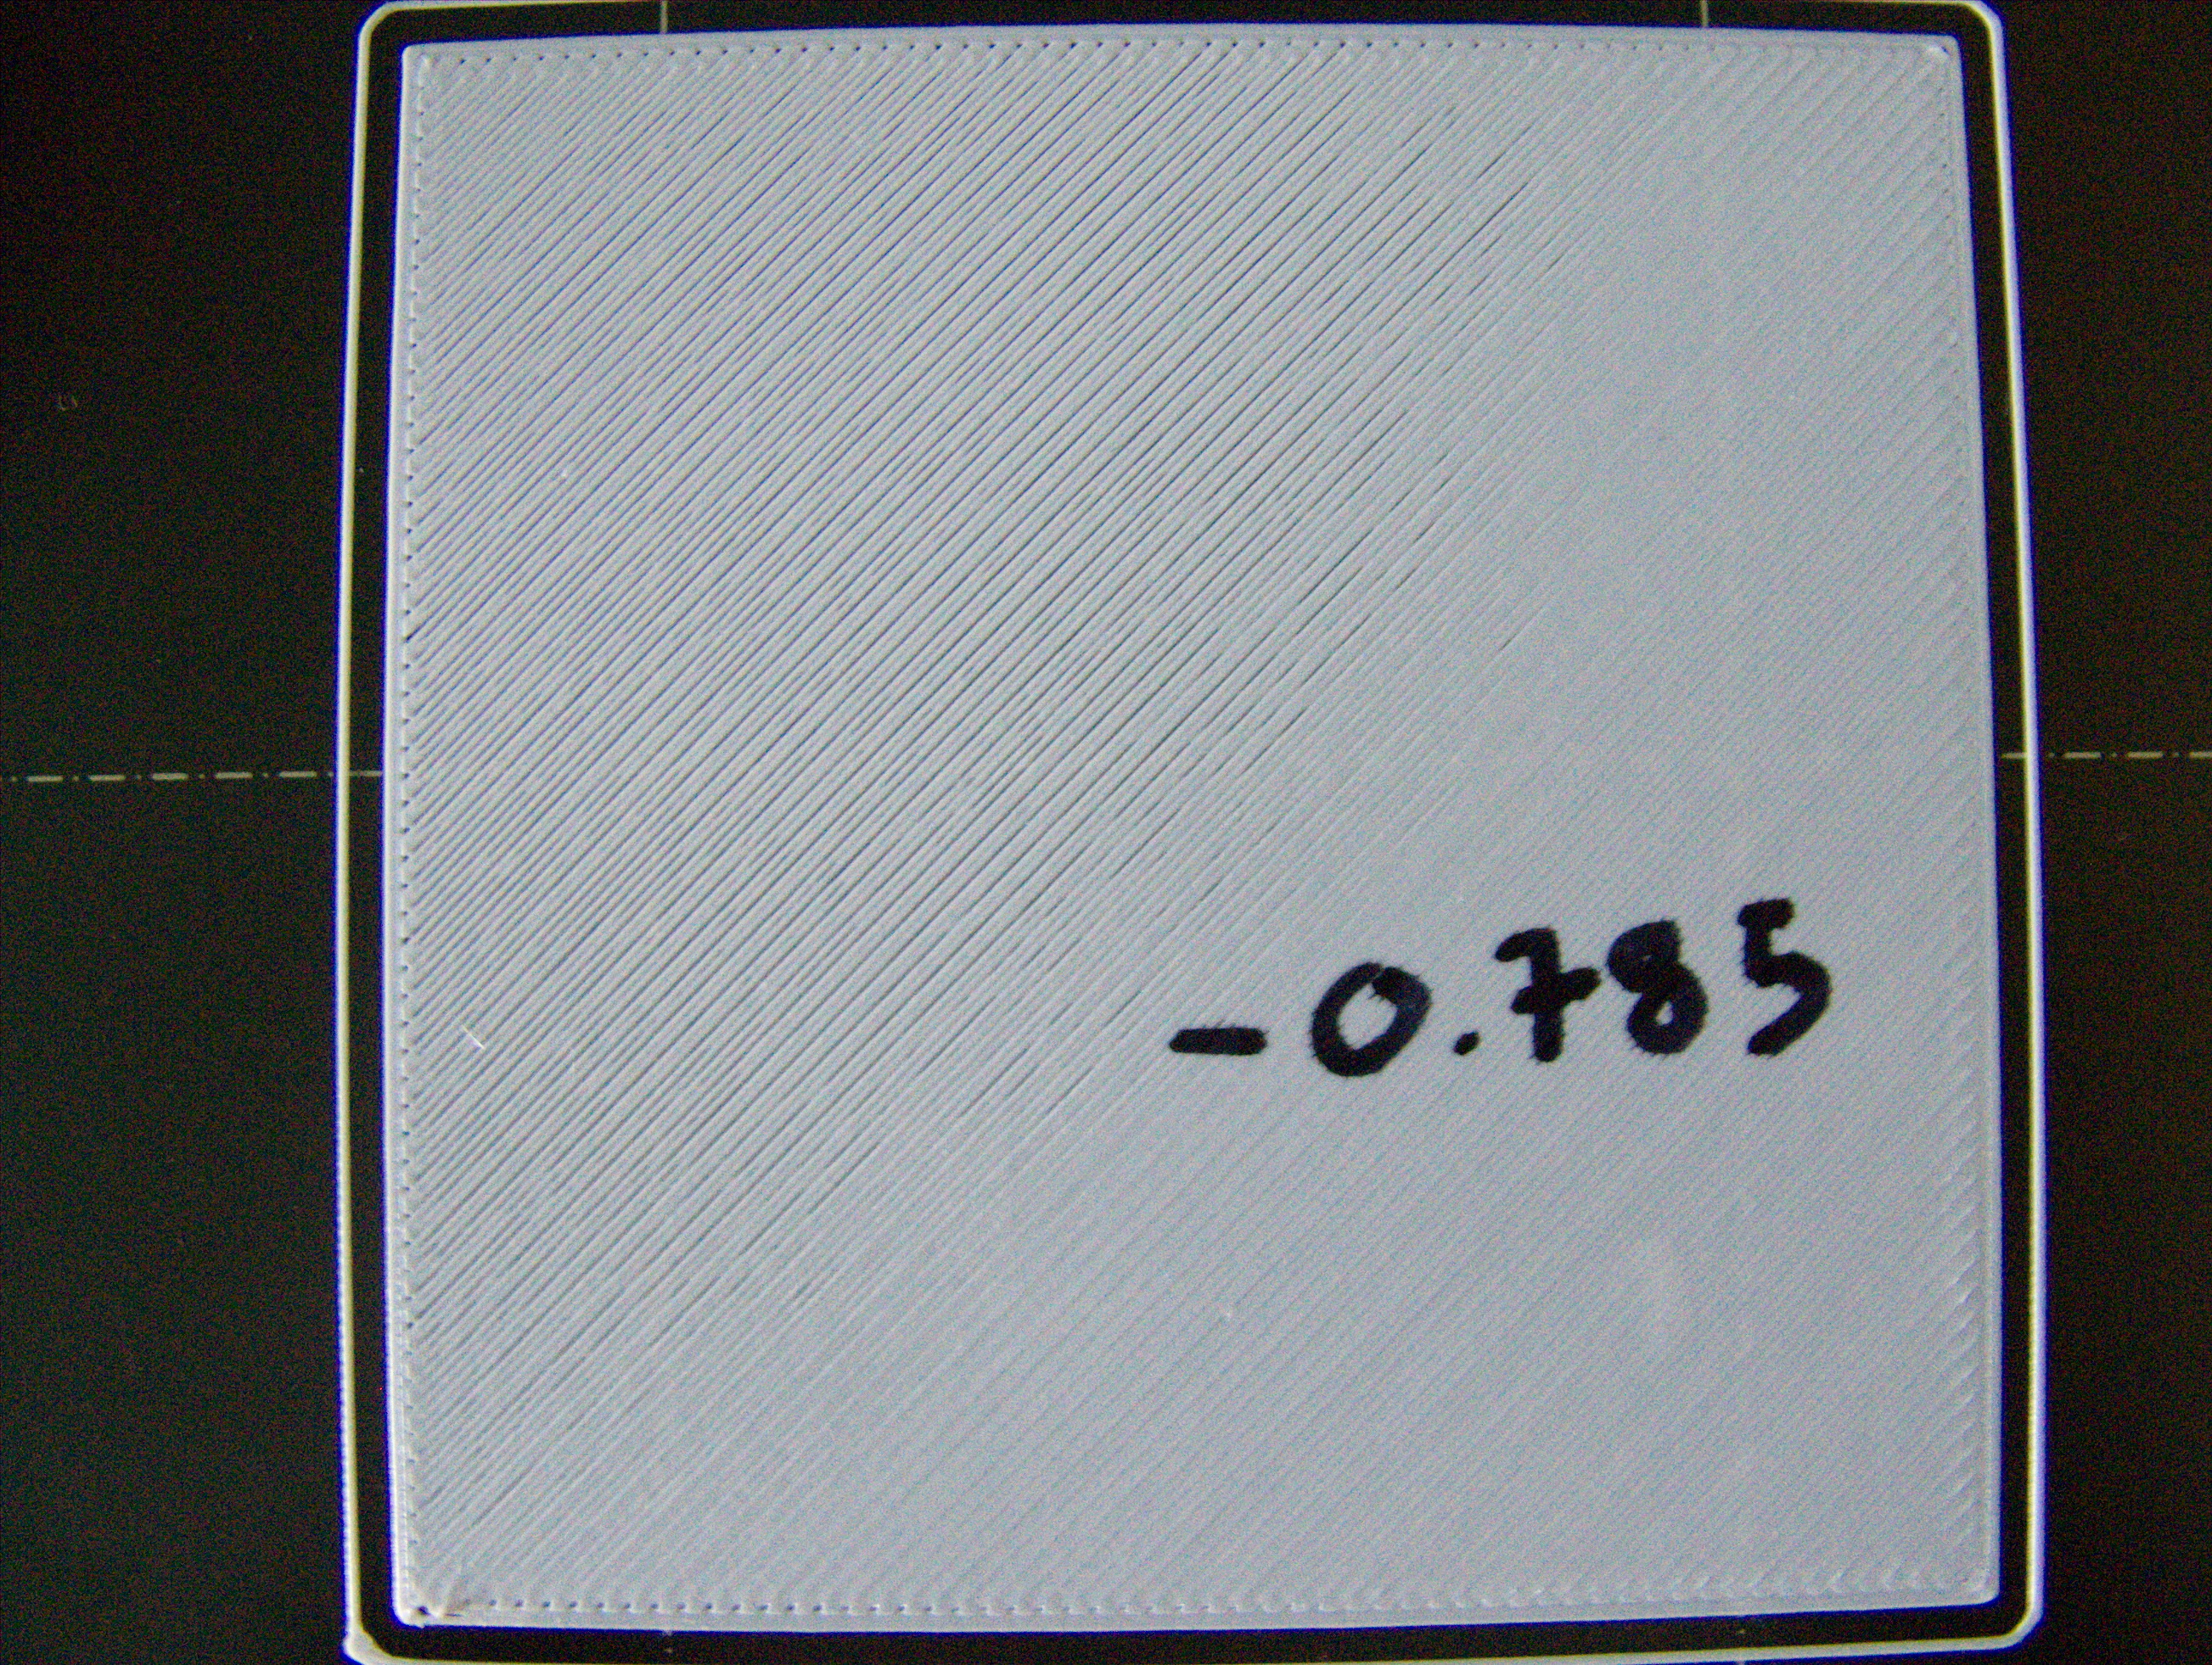
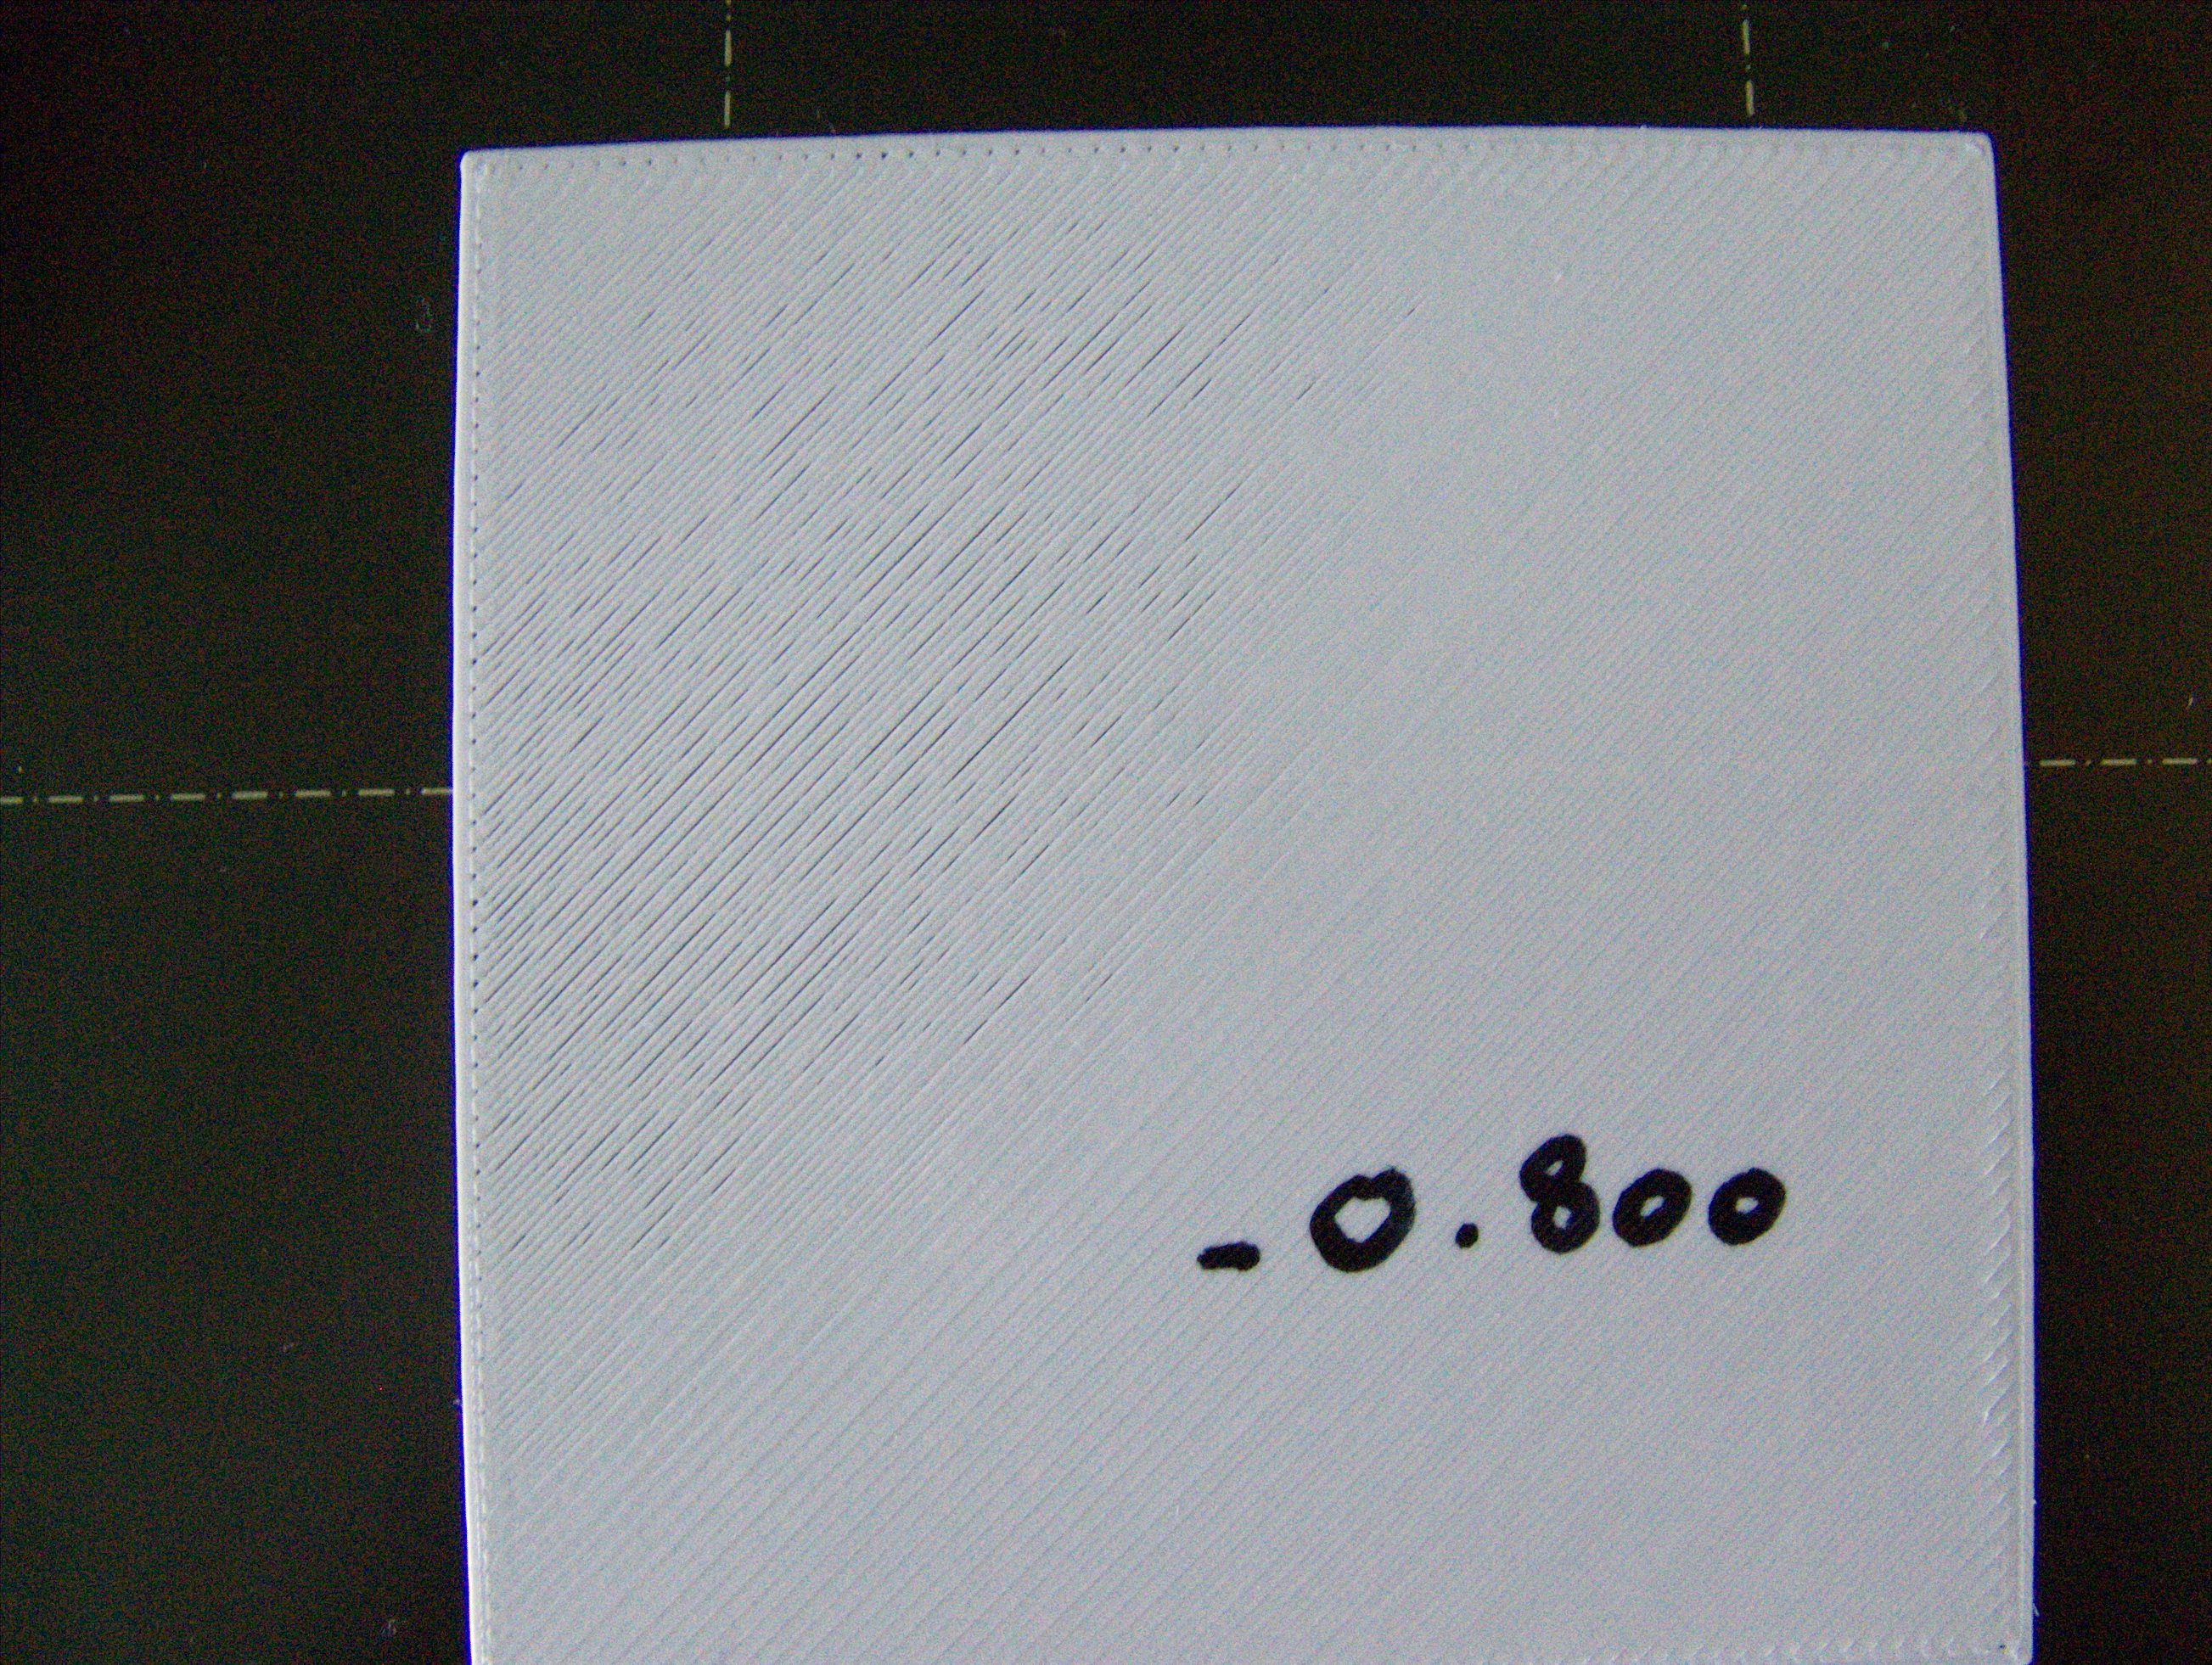
Then at -0.815, to the right of the square more and more rough and the left side is better. It's bad on a small impression, it's going to be disaster on a big impression.
I feel that the "Mesh Bed Levelling" setting does not help much in my case. I also test the option "Calibration - Bed level correction", it regulates one side and it offsets the other.
Do you have any advice for me please?
Do I have to check my assembly of my bed with its support ...?
Cordially.
(Translate by GoogleTranslation).
Re: life adjust Z - my way
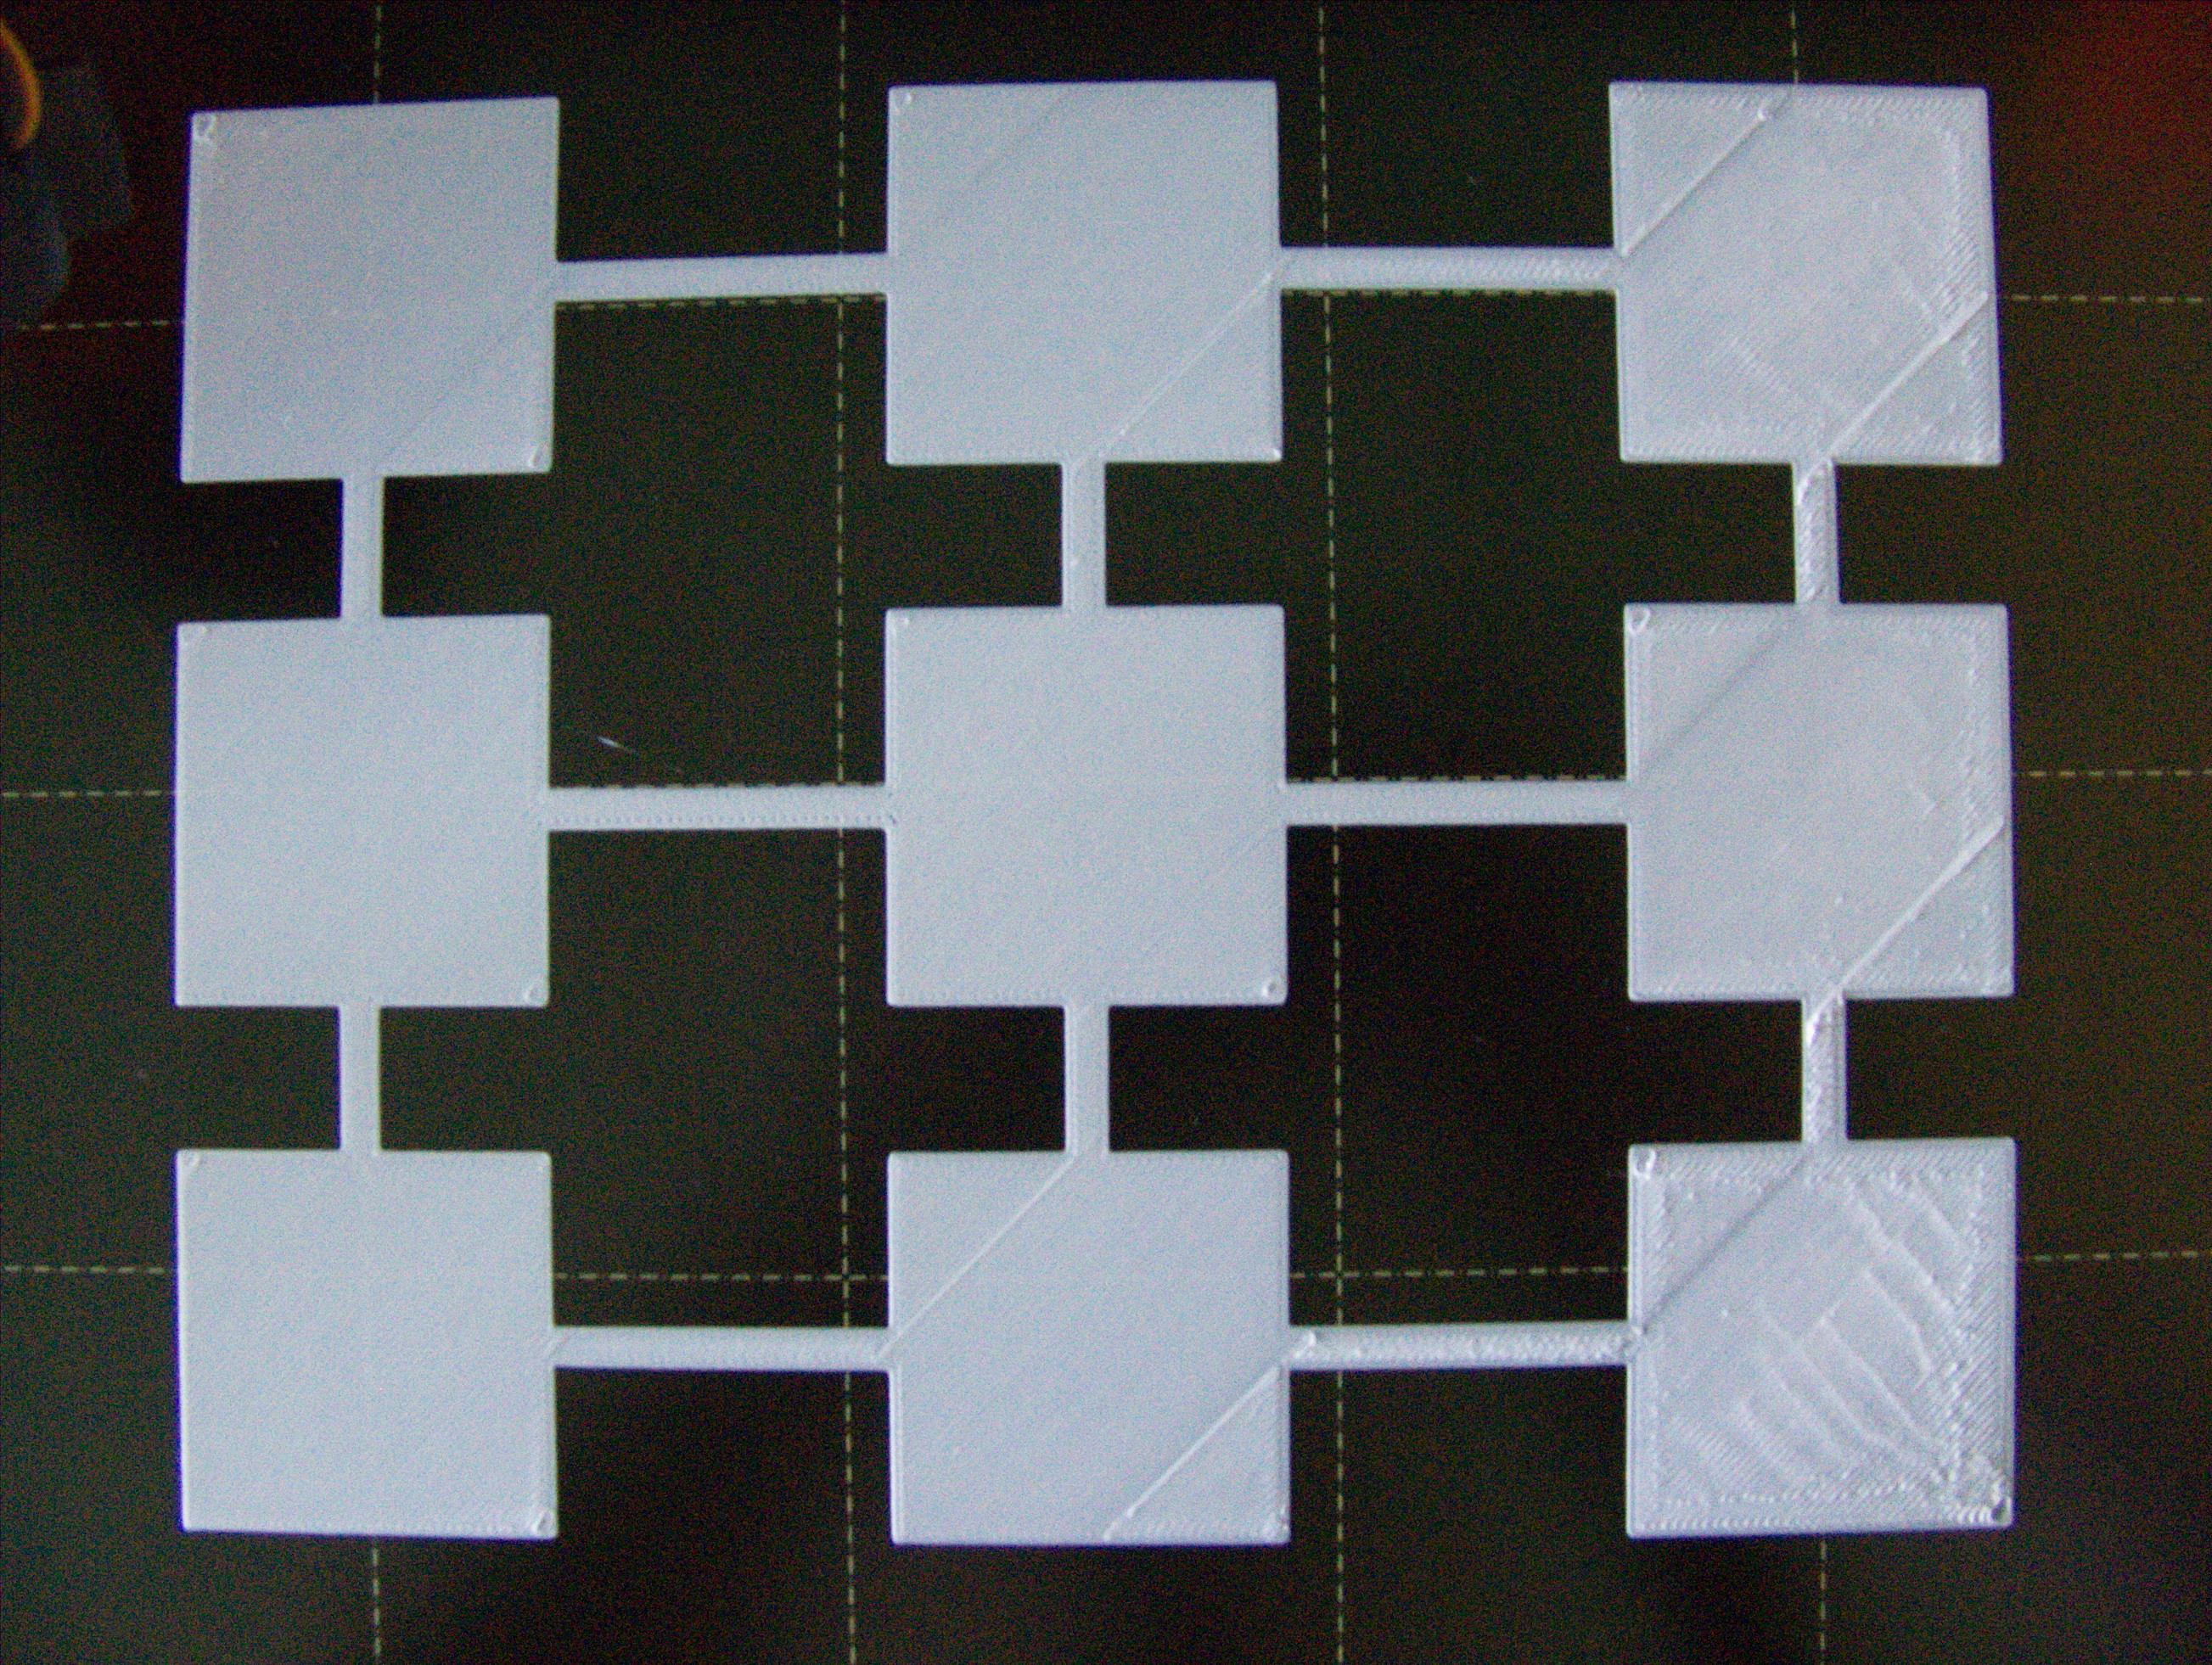
9 square print.
Re: life adjust Z - my way
Mickael:
your square at -0.815 does not look too bad, but the 9 square test does show the right side of the bed is higher than the left.
Before making changes, did you try -0.810 or -0.812 or -0.807?
The change between -0.800 and -0.815 shows the gaps were getting smaller and maybe an in between adjustment will fix it without you having to do the bed level correction. I would try -0.810 on the 9 square test and see what that looks like and possibly -0.807 or -0.812 after and see if it reduces the ridges on the right side first, it may solve the problem.
Then, after you get it bracketed better, try the bed level correction, you could try +5 on the right and 0 on the left and see what that does. Make changes of +/- 0.005 on the sides and front and back to zero in on the perfect level. Make sure to write down your changes so you do not get confused.... 😀
9 square print.
Strange women, laying in ponds, distributing swords, is hardly a basis for a system of governance!
Re: life adjust Z - my way
Thank you for your advice, I'll look into it tomorrow, I'll let you know.
Re: life adjust Z - my way
No problem.
One thing to keep in mind, your test piece there has thick connecting lines between the 9 squares, so you need to disregard the diagonal lines in the middle of the squares - that is from how the extruder moves from square to square, for example the center bottom row square illustrates this, the middle section of the square filled in first, then the bottom, then the top.
This is why I used unconnected squares for the tests, but as long as you are aware that is what it is and ignore it you will be fine.
Strange women, laying in ponds, distributing swords, is hardly a basis for a system of governance!
Re: life adjust Z - my way
Thank you for these instructions! I would like to say that they helped me, but unfortunately no.
Today, within two hours, I made several live adjustments to the Z axis. Again and again I thought, now I have it. But with the next expression the result looked different again. Without making any adjustments... I don't get consistent results since upgrading from MK3 to MK3s.

Does anyone have a hint for me? Before I convert the MK3s back to an MK3 (if that's possible at all)...
Re: life adjust Z - my way
Pictures can be deceiving, but to me, every one of your samples looks way too low (too negative). I'd back it up to something like -500 and work down. Adhesion may be weak if too high but will gradually improve. When it's right, a gentle nudge should not dislodge a line. If you have gaps, come down slowly.
Also, be sure you have a clean PEI surface. Dunk it under the kitchen sink with original formula Dawn dish soap. Wash and dry with plain paper towels. Do not touch the PEI surface.
Re: life adjust Z - my way
Today I have been running this test for a while, and I encounter results similar to the ones mickael.b2 posted earlier, where it seems like the top left of the bed is lower than the bottom right.
This is a print where I started at -830, went to -800 and got major gaps. When I went down to -850 I noticed I was still getting gaps, which was strange, as the beginning at -830 looked good. Even going down to -900 at the end (upper left corner) did not do away with all the gaps:

I'll spare you a bunch of intermediate prints, but a full print at -908 looks like this; still some gaps at the top left, but the lower right starts getting rough:

-910 nearly gets rid of all the gaps, but things keep getting rougher in the lower right:

I'm new, so I might be missing something, but this is weird to me. I can see how there would be a difference horizontally and/or vertically, but how could there be a clearly diagonal difference?
I'm reluctant to go even lower (but maybe I should?), and I don't know how I would correct for this diagonal issue, so any advice would be very welcome.
Cheers
Re: life adjust Z - my way
After reading up on the entire thread, I notice that several people have encountered this "diagonal difference".
It strikes me that the effect is the same in all these cases, where the nozzle seems to get further from the bed while the print advances from bottom right to top left. It never seems to be the other way around.
I also learned there's still some other things I could check and try, so I'll get on with that. I'll post any interesting finds.
Re: life adjust Z - my way
Just to followup, I managed to rectify the situation by (very) patiently doing bed corrections. Positive numbers for right and front, negative ones for left and back.
Slightly sleep deprived, but a happy camper.
Re: life adjust Z - my way
Is there any way to get a copy of the current files without going back page by page to find the current set?
Re: life adjust Z - my way
Is a Z value greater than -1100 ok? The best rectangle I get is with a Z value of -1200, and -1300 I think is too much. But compared to all the smaller numbers everyone has here (like -400 to -500) I am not sure if I am doing something wrong in my assembly.
Re: life adjust Z - my way
Is a Z value greater than -1100 ok? The best rectangle I get is with a Z value of -1200, and -1300 I think is too much. But compared to all the smaller numbers everyone has here (like -400 to -500) I am not sure if I am doing something wrong in my assembly.
Recent info from Prusa says -1.999 is ok I run -1.555 zone without problems... i think individual Pinda sensitivity as well as its height is a factor in what your good numbers will be
Re: life adjust Z - my way
Is there any way to get a copy of the current files without going back page by page to find the current set?
Mark, to the best of my knowledge, the latest files are edited into the first post on the first page of this epistle1...
Regards Joan
I try to make safe suggestions,You should understand the context and ensure you are happy that they are safe before attempting to apply my suggestions, what you do, is YOUR responsibility. Location Halifax UK
Re: life adjust Z - my way
Is a Z value greater than -1100 ok? The best rectangle I get is with a Z value of -1200, and -1300 I think is too much. But compared to all the smaller numbers everyone has here (like -400 to -500) I am not sure if I am doing something wrong in my assembly.
Adjust the height of the PINDA. When the z-axis gets too large, the sensitivity of the PINDA decreases and there is more noise. I recall Prusa recommends the z-axis value should be less than 1000.
Re: life adjust Z - my way
Mark, to the best of my knowledge, the latest files are edited into the first post on the first page of this epistle1...
Regards Joan
Hi Joan,
I stumbled across this today. In my view, this is probably one of the most important threads on this forum. I recommend you make this sticky so others can find it easily.