Re: life adjust Z - my way
This thread has been infinitely helpful. Spent a whole weekend trying to sort out levelling issues to no avail.
Re: !!! Before you ask ... Troubleshooting VIDEO! (UPDATED)
Here is my starter advice for getting your printer going well, and avoiding some of the common frustration inducing issues.
0) Make sure the belts are tight, and all of the axises are free to move smoothly. Make sure the wire bundle coming out the back of the extruder is held high and does not droop down where it will hit the print when the extruder is at any height. Make sure the X and Y axis are as perpendicular as you can judge by eye.
1) Run the Self Test from the menu. Make sure everything is connected correctly.
2) Make sure PINDA is above nozzle tip by <1mm but above the nozzle. About 0.6mm is a good starting point (but anything between 0.5mm and 1.0mm is fine), which is about the thickness of a credit card. Place a sheet of paper on the bed, and run the XYZ Calibration from the menu. Stay with the machine, and watch it. As it hunts for the calibration points, watch if the paper moves. If it does, STOP THE PRINTER. That means the nozzle is dragging and the PINDA sensor is a bit too high, lower it and try again, but make sure it is still higher than the nozzle tip. Repeat until you have a good XYZ Calibration. (Note the instructions on the XYZ calibration, and make sure the nozzle tip is clean.)
3) Set your Live Adjust Z roughly correct. This lets the printer know the distance between your PINDA sensor and the nozzle tip. The printer can measure the distance from the PINDA to the bed so this lets the printer know where the nozzle is relative to the bed.
a) Set Live adjust Z = 0.00. (XYZ Cal does this).
b) Do a Calibrate Z. (Head must be clean of drips and lumps).
c) Do a Home. This leaves the head at Z=0.15mm. DON’T SKIP THIS STEP.
d) Use Setting -> Move Axis X and Y to get in the approx center of the print space. DON’T TOUCH Z.
e) Put a piece of printer paper under the head. Printer paper is approx 0.1mm
f) Wiggle the paper while adjusting "Live Adjust Z" (in settings) until the paper just starts to drag on the paper.
g) Back off a bit (50) on the “Live Adjust Z”. Backoff: If you started seeing the paper drag at -0.675mm, change it to -0.625mm.
NOTE: If your Live Adjust Z value is >1mm something is wrong. It should be approx the distance from the PINDA probe to the nozzle. Anything between 0.4mm and 1.0 should be fine. (Less than 0.4 means the PINDA probe might catch on some print that curles up a bit, greater than 1.0 means either you did something wrong, or are just barely in the PINDA’s detection range.)
NOTE: The above may not be correct. The Live-Z value might be different from the PINDA to nozzle spacing if the PINDA is particularly sensitive or particularly insensitive. If the value is out of bound, proceed, but with caution. Most users on the forum report numbers “near” the distance from PINDA to Nozzle, but some seem to have more sensitive PINDA sensors which can me moved significantly higher than 1mm, and the Live-Z value is drastically different.
Note: Now you have set the nozzle approximately 0.15mm (paper +0.05mm) above the bed while the printer’s electronics think the Z is at 0.15mm.
I've done all this to here to the letter. Perfect XYZ calibration, PINDA properly located about a credit card thickness above the nozzle. Here's where it gets weird. The Live-Z value for step (f) is -1.280 at the point where the paper starts to catch, and backed off to -1.230 later in step (g). I thought I might have received one of those sensitive PINDA units so I carried on anyways.
4) Load some filament.
a) Make sure the tension screws are about 14mm from the body with no filament in the extruder. (This is looser than is intuitive for most people. Too tight or too loose will cause issues.)
b) Heat the extruder. You can do this with pre-heat or settings->temperature.
c) Use Load Filament from the menu. Continue until you have a nice thin strand coming from the extruder.
d) Cool it back down.
5) Make sure the bed is very clean.
a) Wipe with as pure an isopropyl alcohol (IPA) as you can find. The little toweletts are not enough in my opinion. Use (and re-use) a paper towel and a good squirt of IPA.
b) (If really dirty, you can use Windex followed by Acetone followed by IPA, but that should only happen if you had used glue stick or other things on the bed and want to really clean it off). I do this if I am changing materials.
6) Get your Live Adjust Z dialed in real well. This ensures the first layer is properly squished down to the bed for good adherence and print quality.
a) Print using "Calibration_surface_PLA_75x75@200um_v4.gcode" found in Jeff's "Life Adjust My Way" Thread (Read through page 7 or so till you see the .v4 code. Look at the pictures.)
http://shop.prusa3d.com/forum/prusa-i3-kit-building-calibrating-first-print-main-f6/life-adjust-z-my-way-t2981-s150.html
b) Repeat until you have a nice test print - all stuck together and one nice clean sheet.
So the first time I printed this (with Live-Z set at -1.230), I experienced pretty bad extruder skipping right away so I quickly backed the Live-Z value off to the region of -0.700 and -0.600 on the 2 halves of the square in order to print at all, but they turned out pretty bad.

I did another print at -0.550 and -0.500 (pictured) and they look like I need to dial it down a lot more still but I'm not sure if I should, because the outer perimeter of the square lifted off at -0.550 and I was lucky that the second pass stuck it back down somewhat. It seems to be a common problem for me where if I set the Live-Z to a high enough value where the middle of the square prints in neat, non-wavy or torn up layers, then the skirt and the perimeter of the square either won't print or won't adhere to the heat bed.
I know from troubleshooting this printer for countless hours over the weekend that the bed levelling is pretty out of whack - it feels like the left side of the bed sits lower, and the front as well (but to a lower extent). But I have had no luck with the default bed level control settings, not even at 100 microns. The next step might be to try custom firmware that allows for 8 points of adjustment.
All in all, I don't know if what I'm experiencing is symptomatic of a larger issue that I don't quite see. I've printed 2 Benchys, a Prusa logo and a whistle to completion, and all the bottom layers were quite mangled but I pushed through it without knowing any better at the time. They turned out acceptable, but I don't want to print any more until I solve my first layer issues.
7) Do the PID calibrations for the bed and the extruder from the calibration menu. Note: Some users don’t like the PID calibration and feel it has caused problems. Others have had great luck with it.
Later on I did the PID calculations in the printer itself - didn't seem to do anything. I did the temperature calibration as well, and set "Temp Cal" to on for a test print, but even after waiting about 90s before the print started, it still failed on the first layer.
I've also tried changing my extruder multiplier to 1.11 based on my test extrusion - didn't seem to help either.
I feel like I'm going in circles here. Before I try to flash new firmware, is there something I'm missing? I'm pretty bummed at the moment.
<edit note>
post has been moved from the sticky trouble shooting thread, to this one... where it mostly belongs to.
JeffJordan
</edit note>
Re: !!! Before you ask ... Troubleshooting VIDEO! (UPDATED)
I am hoping someone can move this discussion over to it's own thread, instead of in the sticky "before you ask" thread.
It does look like your Live Z is still too low (too large a negative number) and the nozzle is dragging though the filament. I would keep going. Try -450 -400 and see how those look.
I can't explain why you didn't drag the paper, UNLESS YOU DID NOT DO A HOME FIRST. If the nozzle was up a bit (not at the 0.15mm left by the HOME command), and you tried to drag, it would register a much larger number. You may want to verify that again.
<edit note>
post has been moved from the sticky trouble shooting thread, to this one... where it mostly belongs to.
JeffJordan
</edit note>
Any advices given are offered in good faith. It is your responsibility to ensure that by following my advice you do not suffer or cause injury, damage or loss. If you solve your problem, please post the solution…
Re: life adjust Z - my way
This has been a big help, thanks so much for putting this together! I have what I believe to be a mostly successful test print (though it does appear to angle up to the top left corner).
After reading many of the posts I noticed several people mention that once the single layer test print is completed it can be very hard to remove from the bed. In my case, I lay a razor blade flat on the bed and then angle it up just enough to get under a corner. With one corner loose it pulls off really easy. Should it not be that easy? If so, would that suggest there is a cleanliness issue with my bed?
I would kill to get something like this out of my mk2s. Sadly I haven't had any luck. I've done everything stated on this thread. So frustrating.
Re: life adjust Z - my way
....
I would kill to get something like this out of my mk2s. Sadly I haven't had any luck. I've done everything stated on this thread. So frustrating.
really everything (even calibrating the extruder as mentioned/explained at site#17) ?
so, what's your specific problem ?
post some pictures on how the calibration sheet looks at your side, how your pinda is set up (height difference between tip of the nozzle and tip of the probe), how your pei sheet looks like (clean and tidy ?). tell us what tools you use to clean the sheet. tell us about the filament you use. etc.
did you read aaron.s5's good post at the sticky troubleshooting thread ?
and most important: don't give up !
dem inscheniör is' nix zu schwör...
Re: life adjust Z - my way
....
I would kill to get something like this out of my mk2s. Sadly I haven't had any luck. I've done everything stated on this thread. So frustrating.
really everything (even calibrating the extruder as mentioned/explained at site#17) ?
so, what's your specific problem ?
post some pictures on how the calibration sheet looks at your side, how your pinda is set up (height difference between tip of the nozzle and tip of the probe), how your pei sheet looks like (clean and tidy ?). tell us what tools you use to clean the sheet. tell us about the filament you use. etc.
did you read aaron.s5's good post at the sticky troubleshooting thread ?
and most important: don't give up !
My specific problem is that 7 out of 10 times my first layer will not stick even if I use glue. When it does stick I get a square that you can see and feel individual strings of plastic and it breaks up (like an accordion). I've done everything that aaron wrote about with no luck. Bed is cleaned with Medical Grade alcohol (99% purity) and fresh microfiber towels. I do know that 3d printing is not as easy as regular printing, but having built this machine in May and still having issues with it with only 2 succesful prints (batarang and marvin from the SD) is heart breaking.
Re: life adjust Z - my way
I can see that you are frustrated, but that didn't really answer the important questions.
which type of filament do you use ?
what's the exact height difference between the tip of the nozzle and the pinda probe ?
how much did you lower the nozzle with your live z adjustment ? at which level did you reach the point where the flow of filament begins to stall ?
did you do the extruder calibration ? if so, what's your e-step value, and does it really remain stored in the eeprom (3.0.12 has an issue with this) ?
and by the way (it's mentioned here inside the thread somewhere) if you use pla, there is no need to use any glue. I made the experience that if you use a glue stick, it's more difficult to dial in the first layer height.
dem inscheniör is' nix zu schwör...
Re: life adjust Z - my way
LOL Yeah I freaked out and thought the printer had some error ! But now that I know the tones are very helpful 😉
Thanks again for such a great tool.
Best,
Alex
Re: life adjust Z - my way
I used your g-code and way as well and the outcome is very good. numbers and pictures you provided help a lot to understand. Thanks!
Re: life adjust Z - my way
Jeff,
I am suffering from the MK2S auto Z adjust messing up my bed level. I feel that your Z method will be my golden ticket. I am new to the forums so I cannot request the firmware with a PM..
Any help would be appreciated.
Thanks,
Mike Rimes
Re: life adjust Z - my way
@jeff.
Sir I have been fiddling around with the live adjustments since I bought the kit . Your Gcode has actually made my day. Thanks for such a detail process of getting the live z height to the right spot. Now I am tempted to hyperfining the bed levelling. Hope you will not mind helping me in that too.
Re: life adjust Z - my way
This post is awesome, got me back on track after having a major 'disaster' with my pre-build printer.
Having no knowledge, had to pull a misprint that fused to my nozzle and ended up having to do a full factory reset.. after which I calibrated and every print failed; figured out it had to do with the live-Z distance; that was all I could figure out from the manual...
Running this print with live z from -250 to now -520 made it behave again.
Prusa should consider putting the file and info from this thread into the manual! or at least link to it!!
thanks Jeff for sharing and caring!
Re: life adjust Z - my way
This thread really helped me out.
Not sure I could have adjusted Z without it.
Thanks alot!
Re: life adjust Z - my way
This is such a good method, I'd like to add a page to the MERG Forum summarising your method. Is that OK?
Re: life adjust Z - my way
This is such a good method, I'd like to add a page to the MERG Forum summarising your method. Is that OK?
yeah, no problem with that.
dem inscheniör is' nix zu schwör...
Re: life adjust Z - my way
I just wanted to add my kudos for this method. My calibration is now darn near perfect. (It would be perfect if I could find my micrometer.) That together with fixing the leak in my hotend has my printer finally working as it should.
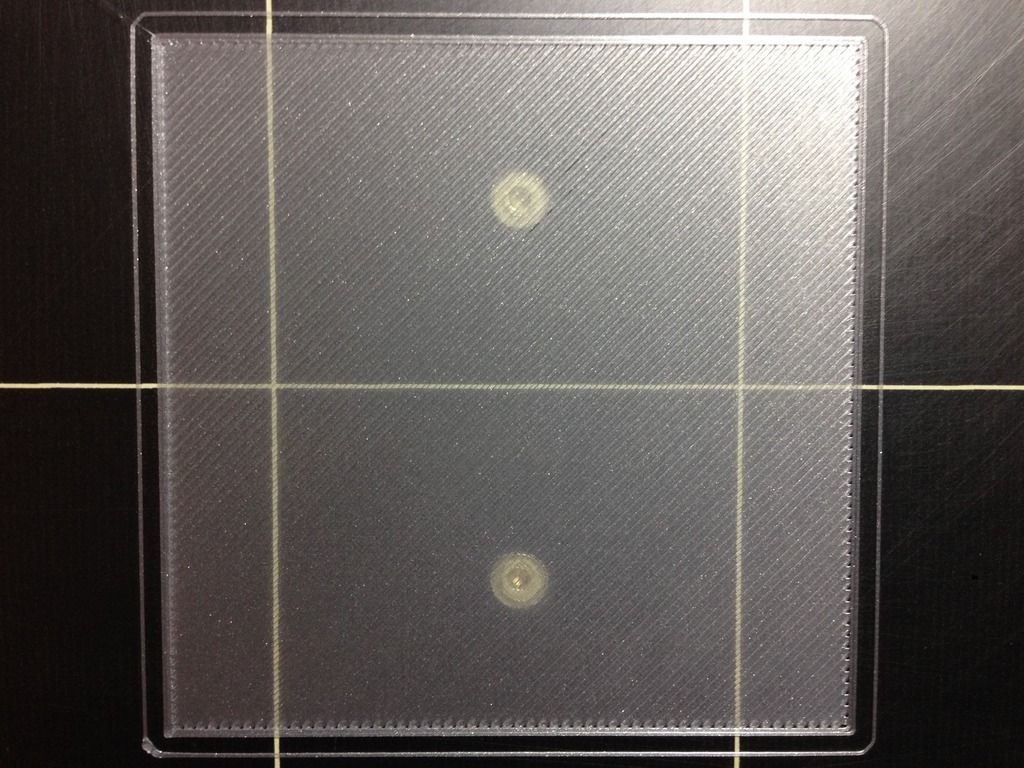
My two cents worth: I print this test patch with translucent ink. That way, filament traces that are firmly attached to the bed look dark, while traces that have not stuck are much brighter and shinier. That even allowed me to see any tiny slope in the calibration and eliminate it with the Bed Level Correction.
[No one wants to know this, but the reason for the brightness difference is that when incident light leaves the bottom of a trace which is stuck down, it hits the PIE sheet, which has an index of refraction similar to the filament. That means nearly all of the light enters the PIE and is then absorbed by the bed. Very little is reflected and the trace looks dark. For an unstuck trace, light out the bottom first hits air, which has an index of refraction significantly different than the plastics. This makes a lot of the light bounce off the bottom surface of the trace and head back out through the top. This extra reflected light is what makes the trace look much brighter.]
Re: life adjust Z - my way
This is EXACTLY what I needed, and honestly should be the default print test. I spent 3 or 4 days adjusting microns and test printing different things. Following this did the trick quickly.
Re: life adjust Z - my way
Stumbled upon this great post.
This should be included with the printer on the SD card and in the manual tbh. Just looking at a strand on your printer and deciding if it is "squished down" enough if you never had a 3d printer in your life (live?) is :geek:
Question, how do you measure the thickness with a digital caliper? I have one but when measuring it just gives me 0.0mm 😐
Re: life adjust Z - my way
My life Z has been adjusted 😯
Thanks for the thread! Very helpful. And, I didn't know my printer could sing to me!
Re: life adjust Z - my way
If you are measuring the thickness of the film using a micrometer is easier, if you have access to one?
A vernier caliper has a 'sharp' tip which might bite into the plastic and not give an accurate reading? Try using
the flat area half way down the jaws, across a corner of the printed film?
A micrometer has a flat surface on the jaws
Regards
Chris