Re: life adjust Z - my way
Are these live-z adjust deviations normal:
PLA -0.430
ABS 0.000?
I have it the other way around, I have a value of -457 for PLA and with ABS the nozzle was way to high, so the Z value is -1350. It could be that the bed is now 100 deg instead of 55, which influences the pinda probe.
Btw, thanks Jeff for all your affords and helping me, I have the perfect Z value now for PLA, didnt even need to mess with bed level finetuning.
oh btw, is my assumption correct if I say,
first layer height is Z=life adjust Z value
layer 2 has an offset 0.2 (when sliced with 0.2) from first layer height? So 0.2 + life adjust Z value
Re: life adjust Z - my way
Hey
How can I adjust the "multiple extrusion factor"
Do I just have to multiply the E-number with extrusion factor.
Example
With out multiplayer:
E 2.00
With 1.10 multiplayer:
E 2.20
Cheers pau
Re: life adjust Z - my way
Hi Jeff,
Just want to say thanks you for your work on this, I've had problems getting a couple of prints to stick and this has helped me set up the live Z to get the first layer properly and is much better the V2Calibration code. It is now printing perfectly.
Thanks again,
Graeme
Re: life adjust Z - my way
Hey Jeff
Hey
How can I adjust the "multiple extrusion factor"
Do I just have to multiply the E-number with extrusion factor.
Example
With out multiplayer:
E 2.00
With 1.10 multiplayer:
E 2.20
Cheers pau
are you using a extrusionMultiplier with 1.075?
so the the extrution value is already multiplied by 1.075?
Re: life adjust Z - my way
Awesome gcode, finally I feel sure about the Z.
Now I just need to be able to slice my own code, everything I download as gcode prints great, everything Slic3r spits out is a complete mess.
This print failed 10 times, hen I downloaded a random gcode from the web and it was a success. How do you guys slice, and if you use Slic3r by Prusa, with what settings?


Re: life adjust Z - my way
To Jeff - THANK YOU!! This thread was a life saver (ok, just my sanity)!! I went from things not sticking to the print bed at all to a perfect first layer - all thanks to your efforts. Well done! 😀
To any other MK2S kit builders that are having problems with bed adhesion or getting a good first layer. READ THIS THREAD! It will change the way you feel about your printer.You will go from 👿 to 😎 in no time.
Thanks again for doing a great service to the community!
Hyrum
Happy MK2S kit builder :ugeek:
Re: life adjust Z - my way
Thank you for your way of life adjust Z. It really helped me.
I think It will be good to have such gcodes for PETG and ABS too.
Re: life adjust Z - my way
Thank you for your way of life adjust Z. It really helped me.
I think It will be good to have such gcodes for PETG and ABS too.
simply alter the temperature settings inside the gcode to the settings required for your abs and/or petg filament.
you'll find them between line 188 and line 191 of the gcode (remember, a gcode file is an ordinary text file and could be edited with nearly every common editor):M104 S215 T0
M140 S55
M190 S55
M109 S215 T0
so if your petg is fine @ 240°C hotend and 75°C bed temperature, simply replace S215 by S240 and S55 by S75.
ps. don't blame me by the order of the M104/140/190/109 commands... it's the way simplify3d did this with my prusa default profile.
dem inscheniör is' nix zu schwör...
Re: life adjust Z - my way
Thank you jeffjordan...... Truly a lifesaver....
Just built my mk2, and had a LOT off issues.
After reading this thred (and some of the other you linked to), i now have none 😀
THANK YOU ...
Re: life adjust Z - my way
Thank you jeffjordan...... Truly a lifesaver....
Just built my mk2, and had a LOT off issues.
After reading this thred (and some of the other you linked to), i now have none 😀
THANK YOU ...
😀
this proves how important a proper first layer is. ... and that a good knowledge of all the related topics (pei sheet, extrusion, calibration etc.) might help to avoid failures and frustration.

dem inscheniör is' nix zu schwör...
Re: life adjust Z - my way
Hi,
first of all I'd like to thank you all for your time and effort in helping new users. I got my PRUSA i3 MK2S last Friday (a few days ago). When printing the first parts I was somewhat unhappy with the results, especially cubic parts.
I then stumbled over this excellent thread. May I ask a question?
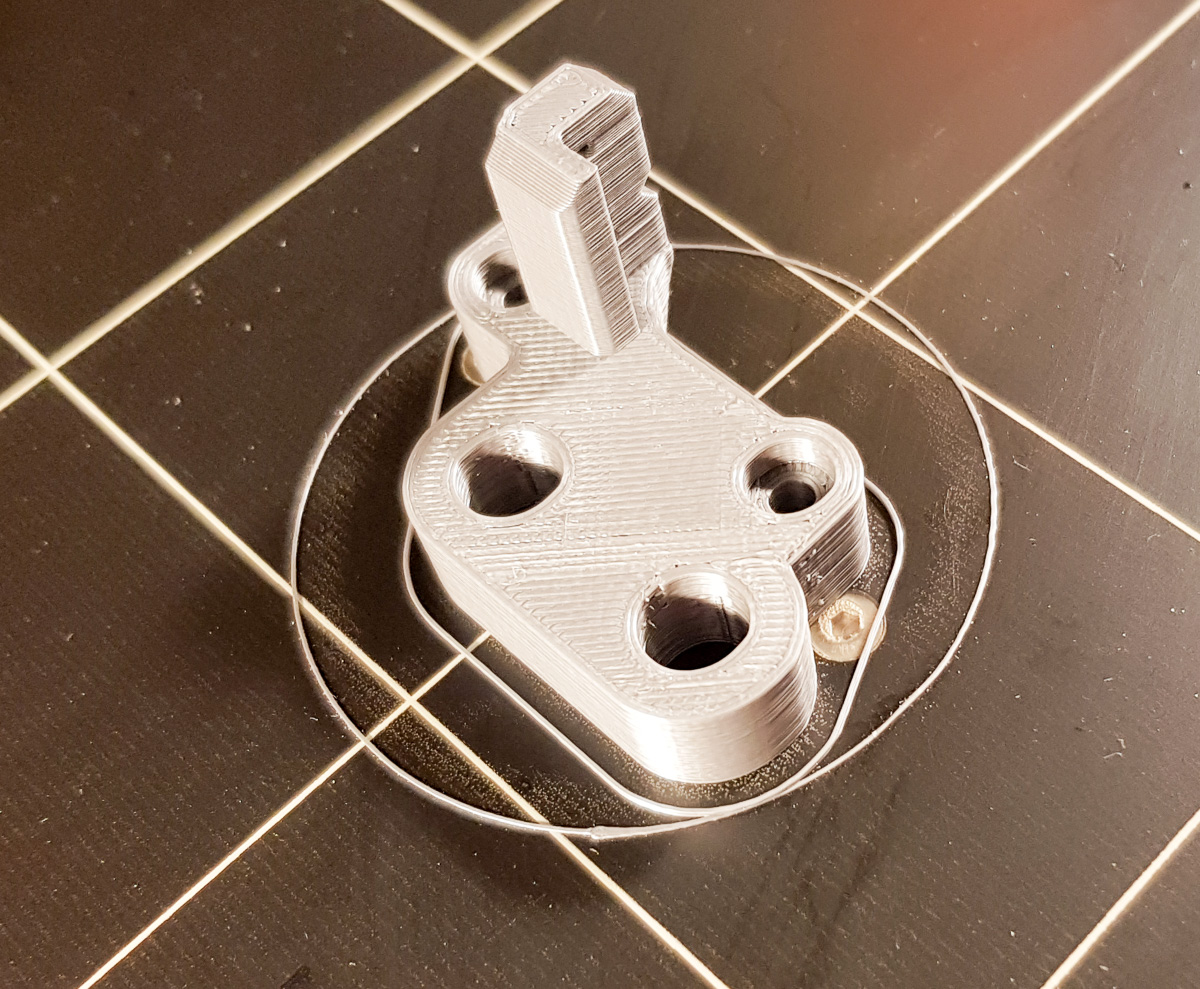
I figured out that my nozzle was still too high up.
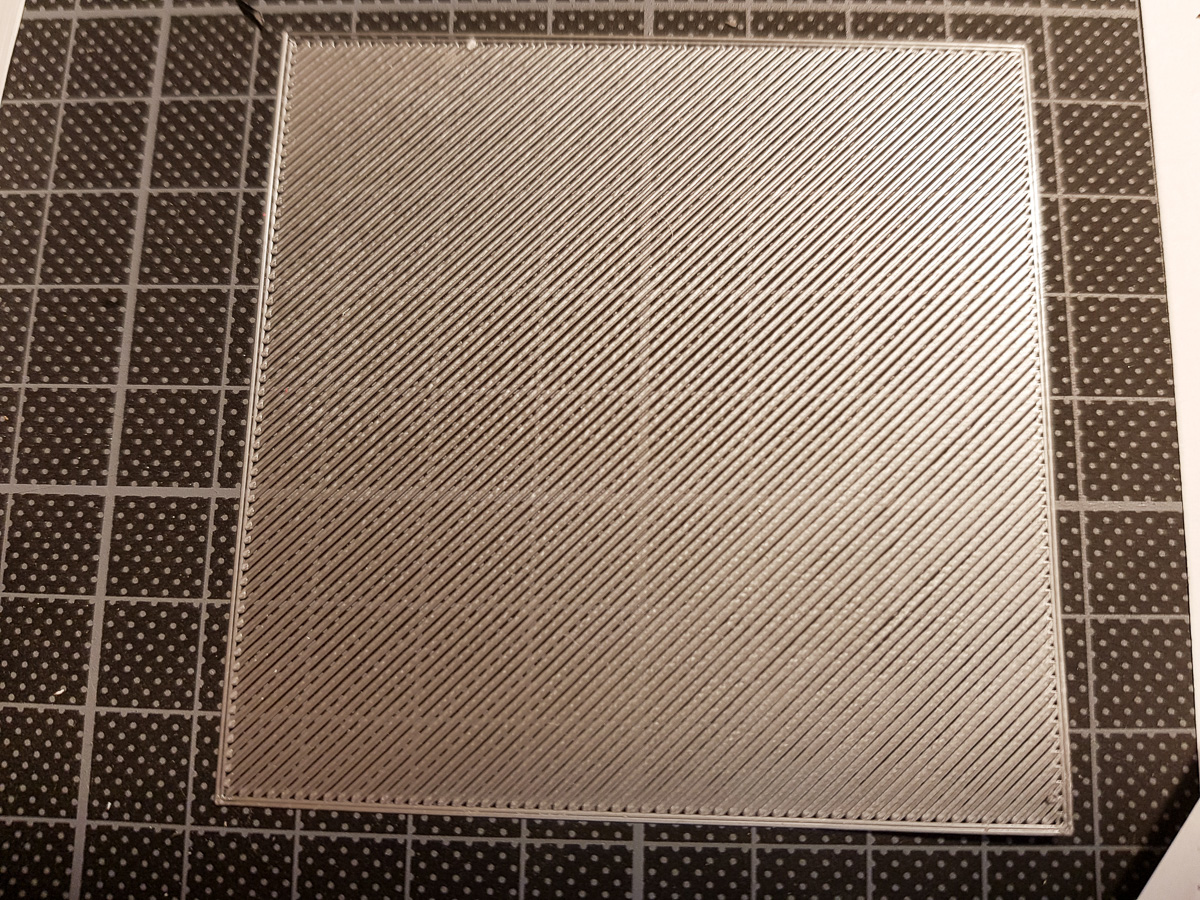
The 1-layer-square showed separate lines. I re-calibrated the entire printer from the list I found on this forum. Did all the steps. However the best I can get the layer is with the pattern you see. It seems that the bed is seriously out of shape. I don't really know how to fix it. Or is my guess wrong?
Next thing I noticed is that the extruder feeds 95mm when I move it 100mm. Are these 5% something I should take care of or is it withing normal tolerance?
Your help is highly appreciated.
Thanks
Cheers
Alexander
Re: life adjust Z - my way
BTW here are a few pictures of the Benchy from the SD. I thinks it's quite OK. Or should I expect better results?
Re: life adjust Z - my way
More pics of the Benchy
Cheers Alexander
Re: life adjust Z - my way
...
Next thing I noticed is that the extruder feeds 95mm when I move it 100mm. Are these 5% something I should take care of or is it withing normal tolerance?
...
would be a good idea to do an extruder calibration (as described @ page#17 (ff) of this thread.
furthermore I think you can improve your benchy increasing the hotend temperature a little bit.
but at all, it's a very reasonable first print with the benchy :P.
dem inscheniör is' nix zu schwör...
Re: life adjust Z - my way
Dankeschön Jeff,
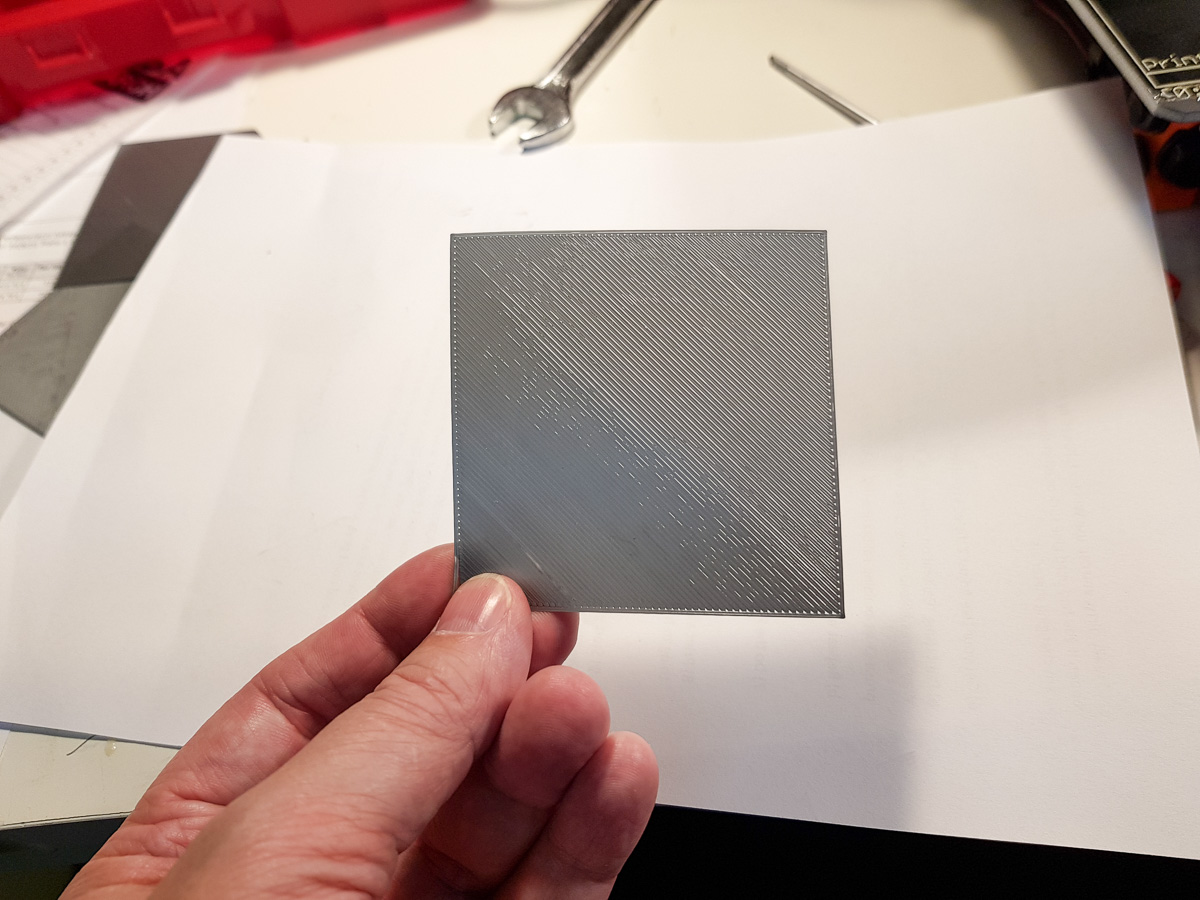
may I ask you also to look at my 1-layer calibration V4 printout on p.21?
After looking at the result, I had a closer look at the machine and noticed that there is an angle between the main frame (where X and Z are mounted) and the bed of 0.5° to 1°. I assumed that bed-leveling and calibration would iron that out. When you look at the printout: the first triangular area looks as if the nozzle is too far down (it actually is) and from the second half on the nozzle is too far up.
What would be your recommendation?
Best regards and your help is highly appreciated.
Alexander
P.S. your way of calibrating Z is just perfect. I wish it would find it's way into the manual. Would have been great to have it from the very beginning.
Re: life adjust Z - my way
Dankeschön Jeff,
may I ask you also to look at my 1-layer calibration V4 printout on p.21?
...
1. Gern geschehen :mrgreen:.
2. can't see any picture from you at p.21 of this thread. so I guess you mean the last picture you've posted just before your benchies (here @ p.22) :
🙄 the problem is, that your bed isn't mirror-flat, or if it is, it isn't recognized by the printer as perfectly flat. have a look at the thread about the hyperfine bed levelling.
the problem of the meshbed levelling is that the firmware assumes that each of the 9 calibration points at the heatbed is detected in exactly the same way (same sensitivity, same layer depth of the etched copper circle, same layer thickness etc.). but that's a theoretical assumption.
in the real world there are tiny deviations in detecting the round copper layers inside the heatbed, which is simply a five-layer pcb (printed circuit board) with a big, meandered shortcut.
➡ inside the genuine prusa firmware, you can try to compensate the imperfections with 4 bed level correction values for front, right, left and rear.
but this method has major disadvantages, because each value influences the live z adjustment of the middle as well and furthermore it's a little bit clumsy.
💡 so Peter (PJR) came up with the idea of using 8 additional correction values (instead of the four) and made an amendment to the firmware, that he posted inside the mentioned thread, which allows you to modify each of the 8 points surrounding the center point through the G92 command.
I took his amendment and his idea and implemented it into my experimental firmware, where I replaced the 4 correction values by eight and even made it permanently remembered by storing the values inside the eeprom (at new locations, so that there will be no interference with existing values).
dem inscheniör is' nix zu schwör...
Re: life adjust Z - my way
💡 so Peter (PJR) came up with the idea of using 8 additional correction values (instead of the four) and made an amendment to the firmware, that he posted inside the mentioned thread, which allows you to modify each of the 8 points surrounding the center point through the G92 command.
I took his amendment and his idea and implemented it into my experimental firmware, where I replaced the 4 correction values by eight and even made it permanently remembered by storing the values inside the eeprom (at new locations, so that there will be no interference with existing values).
Yeah, I think that Jeff and I make a pretty good team 😉
Peter
Please note: I do not have any affiliation with Prusa Research. Any advices given are offered in good faith. It is your responsibility to ensure that by following my advice you do not suffer or cause injury, damage…
Re: life adjust Z - my way
Hello!
Here's my third attempt at the square. As you can see, it seems ok at the bottom right corner, but starts to get bad. My live Z axis is at .250, and i'm nervous to overcorrect since a portion of it is fine. I've tried multiple bed levels, and calibrations. The .250 was set by bringing nozzle to center of bed and leveling with a sheet of paper after an automatic home.
Ignore the parallel lines in the print. They're from my first purse sd card calibration print gouging into the pei. I'll replace once my new stuff arrives.
Any tips? Thanks so much for help. I'm new at this, ha.
Re: life adjust Z - my way
...
Any tips? Thanks so much for help. I'm new at this, ha.
same problem as alexander.b12 above, same answer (two posts above yours) !
dem inscheniör is' nix zu schwör...
Re: life adjust Z - my way
Ok, seems super complicated, but thanks so much! Can you PM me the firmware with solution? And mind terribly walking me through the steps like i'm 5?
Really, really appreciate it.