Just got my built PRUSA i3 MK3.. complete from the box.
It took a bit, but I did get it connected and printed the batman logo provided the card. The bottom half was a mess but it seem to catch up and build the top very well. I tried printing something from Thingiverse.. and immediately the fail began. It seem to start.. I walk away, came back to a small rats nest underneath. I tried several times, after cleaning up.. I tried wiping the bed a couple times, flip the bed.. tried going back to the batman logo that printed-ish the first time.. and the fail continued and worse. I can get about 5-20 seconds of adhesion then it will pop off the bed and start the rats nest. I AM A TOTAL NEWBIE... sorry, I am smart but this isnt solved without help. 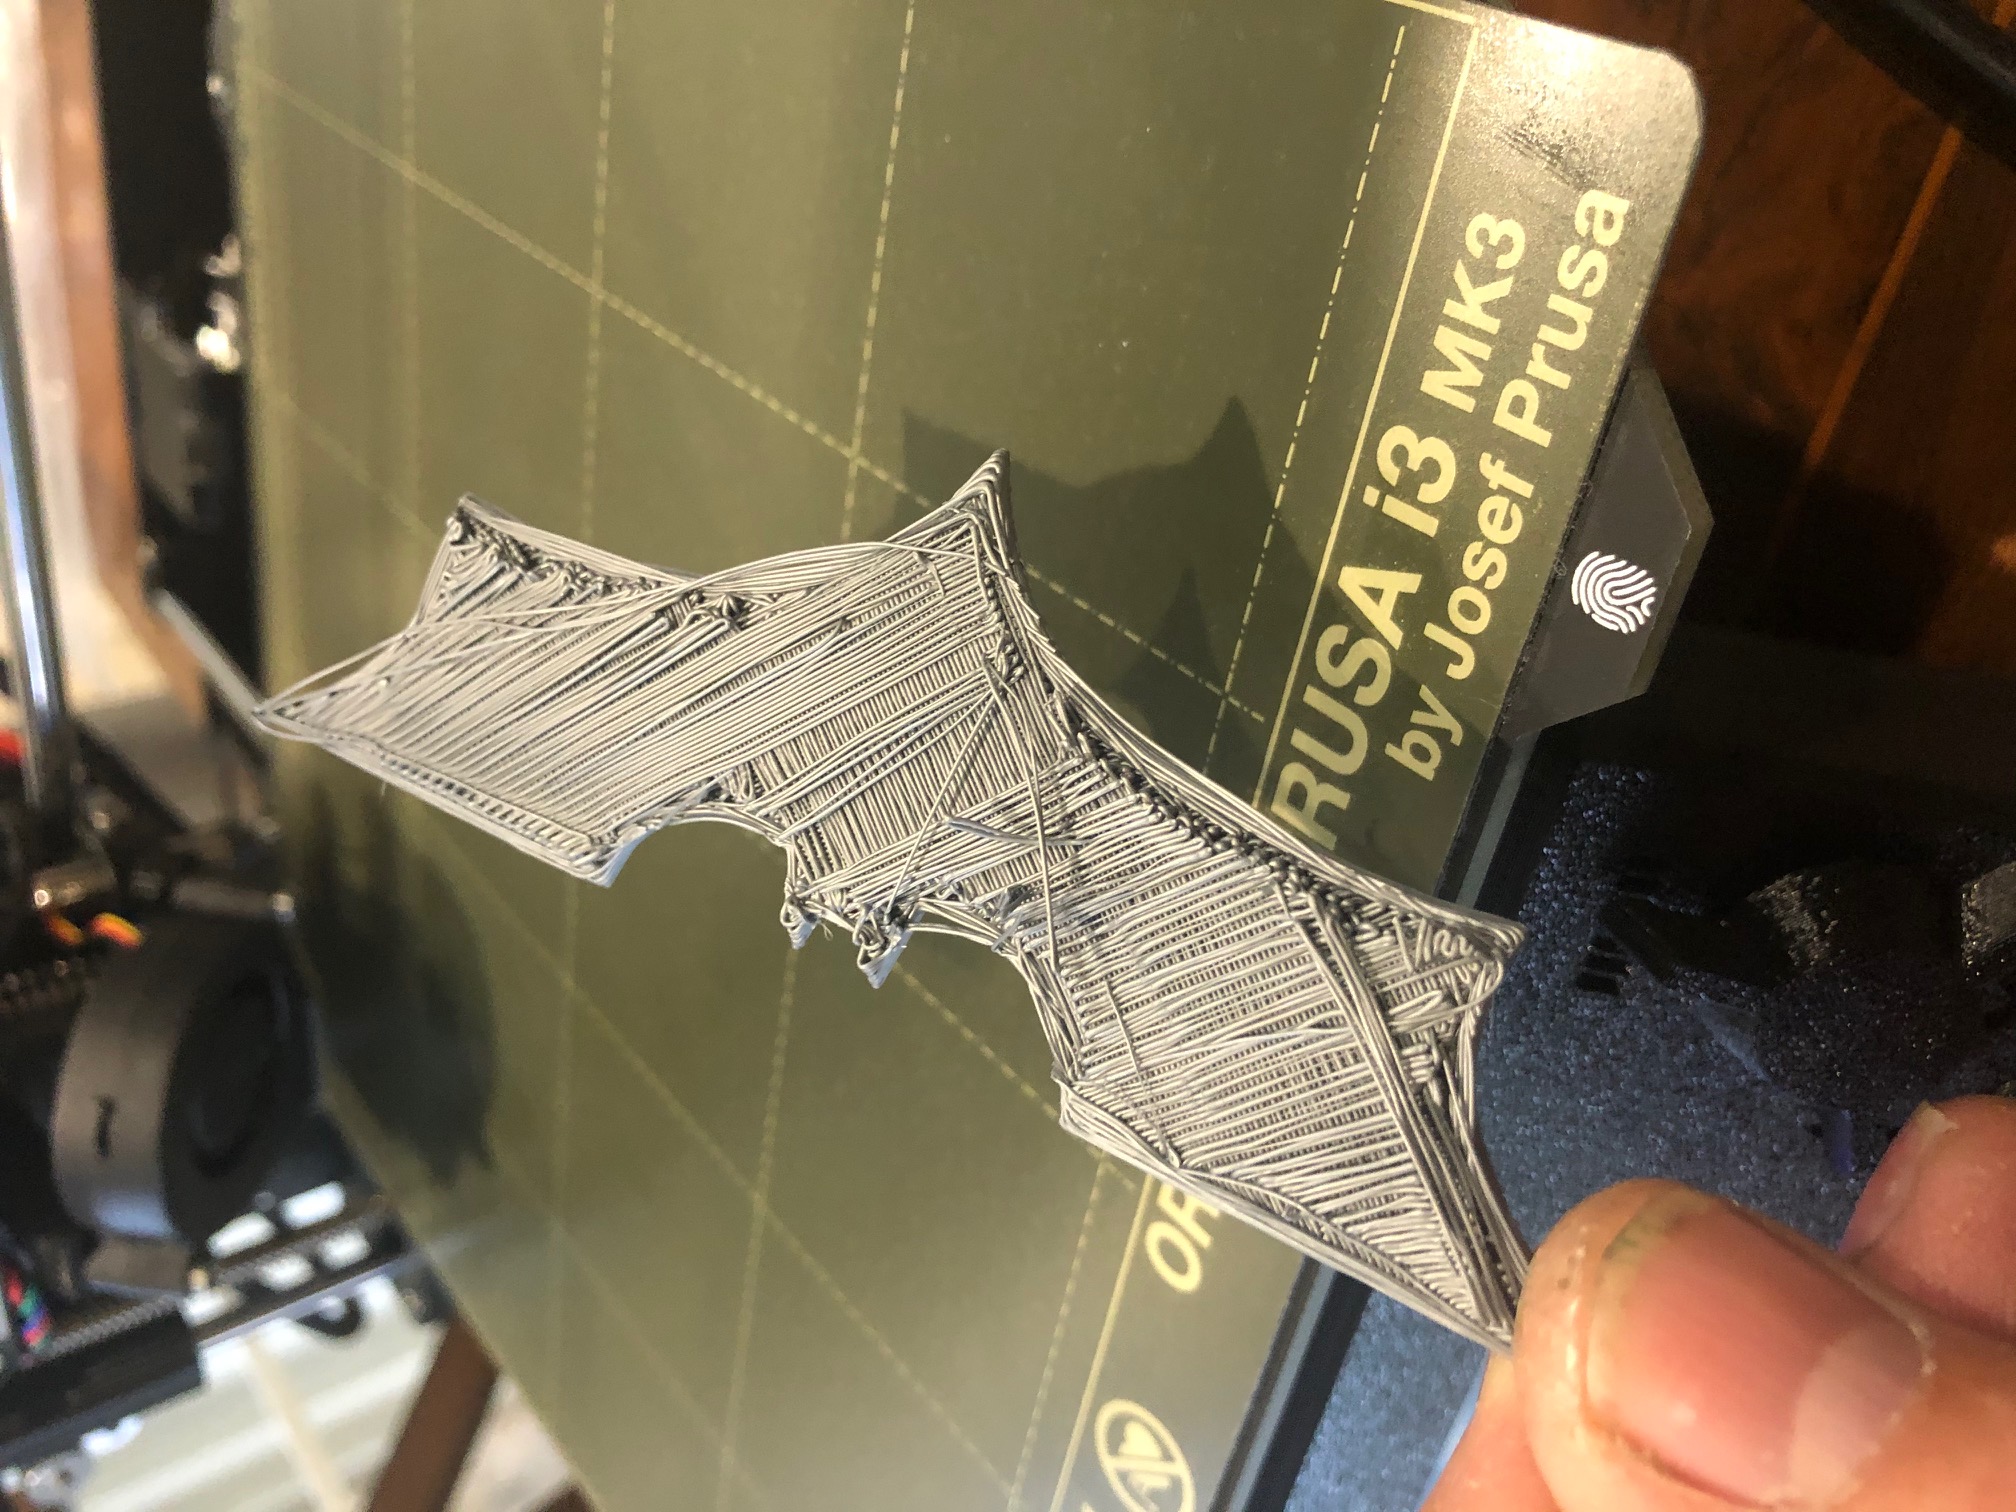
RE: Just got my built PRUSA i3 MK3.. complete from the box.
Looks like you might have skipped a few first-steps 😉
Do a first layer calibration. Your goal is to get a perfect square. During calibration you will have to learn how to set Live-z. It will take a few repeat tries before you have the height dialed in. Lots of how to here on live-z adjustment - it is your path out of the spaghetti bowl.
RE: Just got my built PRUSA i3 MK3.. complete from the box.
I built mine from the kit (amazing instruction book BTW) and did the full calibration and... got adhesion and issues similar to you on the initial trials.
The solution was to wash the plate with dishwasher soap and dry it. Looked at the PINDA height. Redid the first layer calibration until I was happy with the pattern and it was all OK from then on. I suspect the base plate was not that clean initially.
REPAIR, RENEW, REUSE, RECYCLE, REBUILD, REDUCE, RECOVER, REPURPOSE, RESTORE
RE: Just got my built PRUSA i3 MK3.. complete from the box.
@dan-rogers
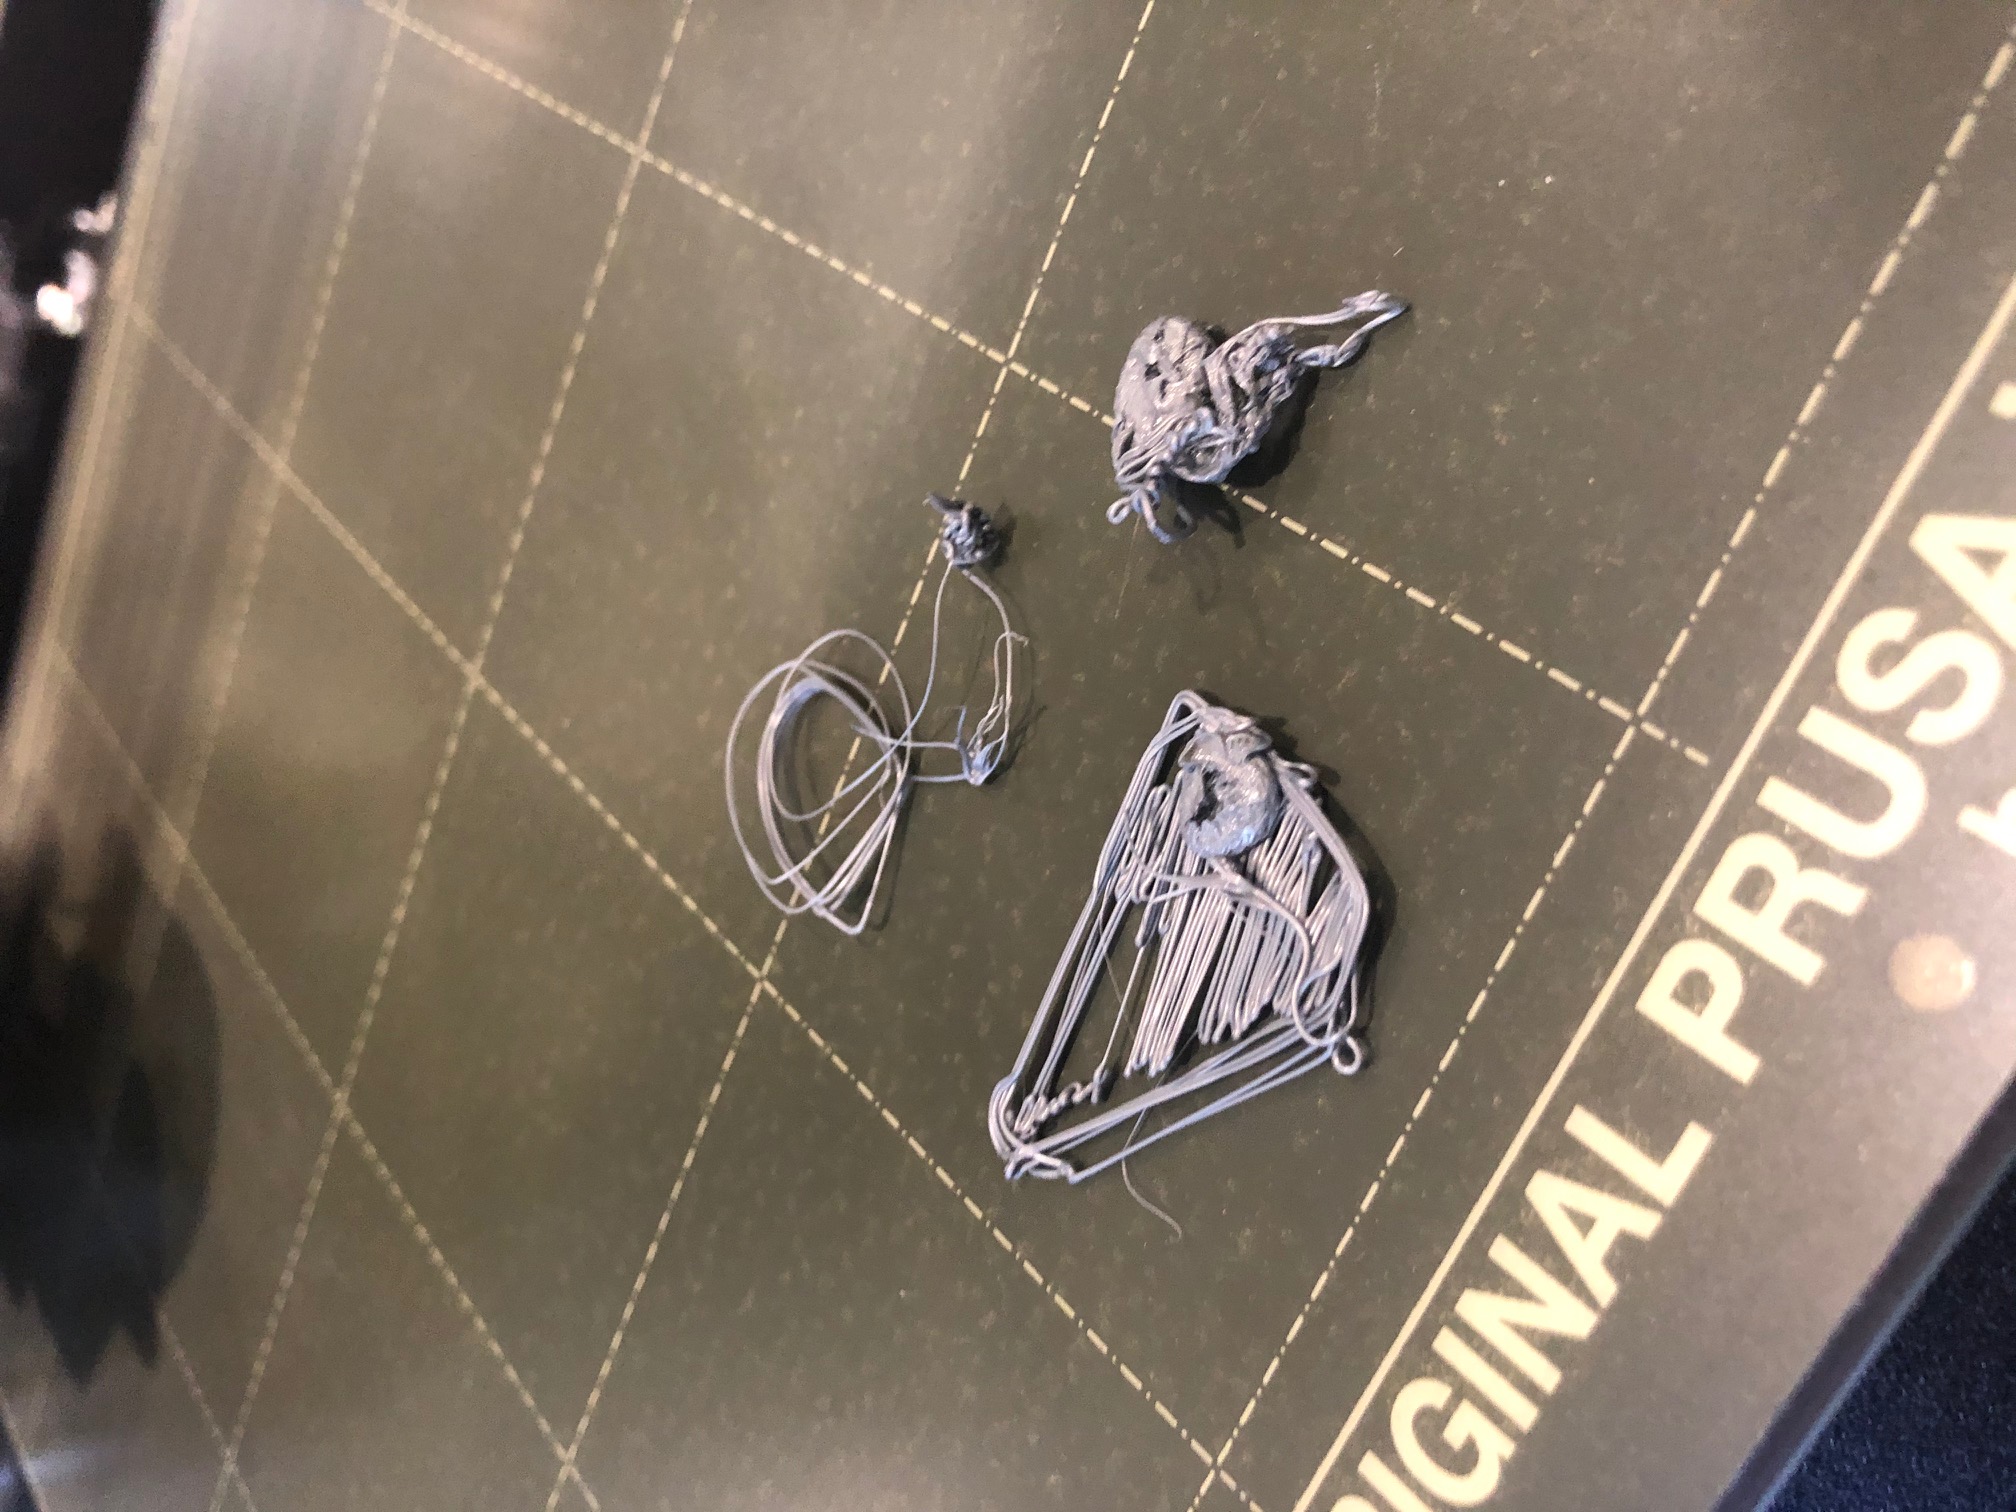
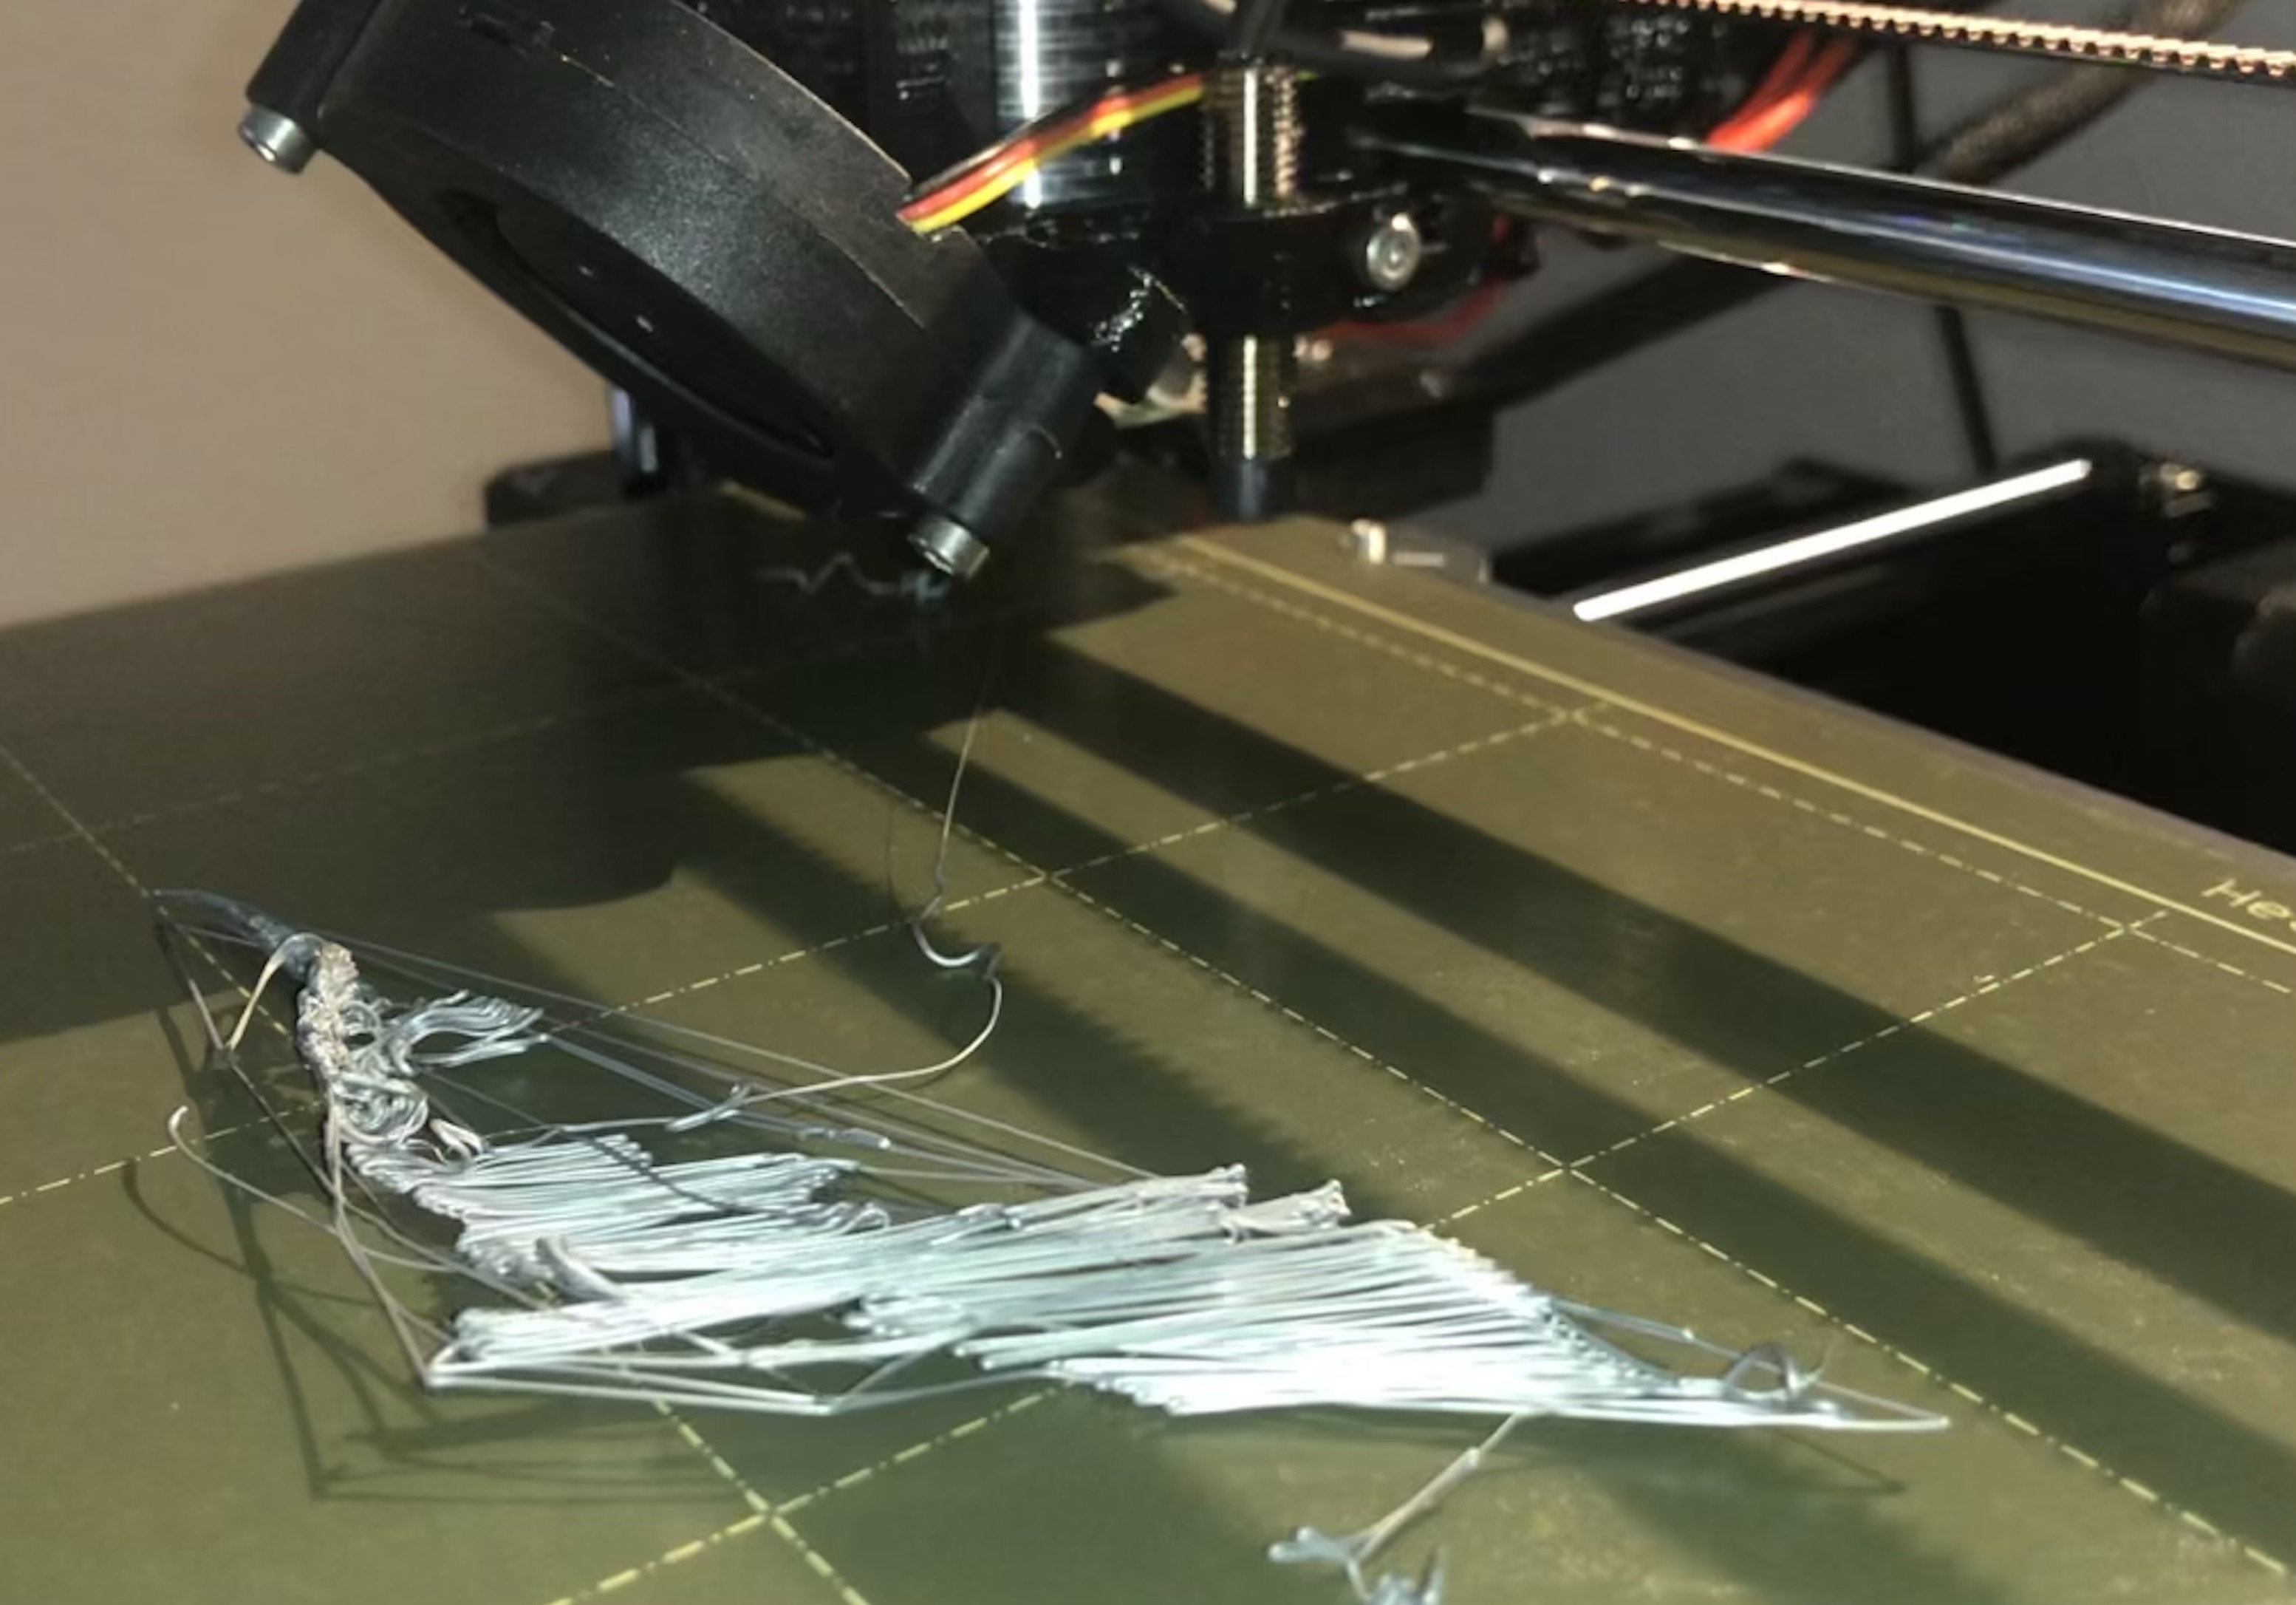
Hey Dan I appreciate you taking the time to respond.. You mentioned for me to do a first layer calibration... Huh? Totally new, just pulled it out of the box.. I have done the "Wizard" calibration which I understand does all the calibrations.. is that correction or are you talking about something else? If you are... how do I do a first layer calibration? From what I am seeing.. it seems to stick to the bed initially.. well most of the time.. and btw it did work the very first time.. but I dont know if the result was actually correct.. I did get the batman logo but it didnt look correct underneath. Ever since then when I have tried to print... either very early it pulls the piece off the bed and drags it around or after a short while. After reading this post I went back to the wizard and ran the calibrations again. I then tried to print and it started well but then disconnected ... meaning it knocks the piece off the print bed and drags it around. It would appear it is not getting a strong enough adhesion to begin with. Can causing the bed to be hotter or colder help with adhesion. Again this is new from the box, but I have cleaned it.. with kitchen soap, with alcohol, etc. I have since also applied the glue stick glue they provide... nothing has solved the problem. at the very beginning of every print.. it will print at the top of the bed.. which always looks good.. not too hard to take off in fact. Right now I am trying again after applying the glue stick.. and so far.. so good.. well it clicked on for awhile.. maybe 4 minutes.. I noticed it was not very level printing.. it seems to leave high spots quite a lot... which I believe it eventually bumps into and loosens the piece from the bed. Anyway.. four minutes in.. and fail. Anything else I can try? Like I said.. 1. it does not seem to be strongly secured to the bed 2. it seems to leave a bit of a mess or high spots... where it would appear the hot filament isnt maybe hot enough to fully melt into the spot it is intended so when the head moves it will lift it up and leave a high spot... which it will hit at some point. BTW.. I am sure I am not the only one, but I keep my house cold.. it is usually 69 or 70 degrees. I have made sure not to put my printer near a vent.. but thats all I can tell you at this point. I have included a photo of the last FAIL.
Again, thanks for your time and attention.
RE: Just got my built PRUSA i3 MK3.. complete from the box.
Hi Nic
Here is my take on things for you right now. That first layer is a mess - and until you master the live Z, you'll be a frustrated printer. The very first automated calibration - the one with the sheet of paper - assuming you did that - is not the end of getting the new printer ready - it is the beginning.
What type of material are you trying to print - assuming PLA, and what sheet are you trying to lay a print down on. The best combo for a newbie is PLA (not PLA+) and the smooth PEI sheet. I'll assume you have that. If you have the textured or powder sheet and no smooth PEI sheet, take a breather and order a smooth PEI print plate. You can get them from Prusa for about $35 and $14 shipping (Special sheet pricing) or you can get them from Amazon from a number of vendors.
There is a choice on your calibration menu called "first layer calibration" - which is different from initial calibration. You need to think of your printer as a highly specialized robot that needs two or three adjustments from the out of box state. Initial calibration gets the head to be able to stay within a piece of paper from the bed. First layer calibration lets you dial in a specific filament/sheet material type combination. And that gets you ready to start trying to print a thing. Live Z is your friend - for example, suppose you have a buddy that sent you a pattern that they print all of the time. They may send you a .GCODE file (throw that away if you have a different printer, or are using a different brand of filament). GCODE is printer/filament specific.
So what you want is either an STL, or a .3mf file. Load that into prusa slicer. Let's start with a 20x20mm 6 sided cube. That kind of design helps you dial in a number of settings. Keep at that one design (cube) until you get it perfect. Dial in first layer calibration first. You are going for a solid one layer sheet and good stick. There is a knob on your printer that allows you dial the head up or down 1/100 mm at at time - it is called live Z. You cannot do a effective first layer calibration without using it. You could watch it print the calibration pattern and never know about live Z, and then wonder why your prints crater consistently.
To use Live Z, the printer has to be past the wipe and past the bed mesh leveling seq. At that point, while the calibration print is starting, click the knob on your control panel. Then scroll down to the "Live Z adjustment" setting, and push on the knob to select (it will click). Now you are able to adjust Z
Counter clockwise will take the head closer .01 mm at a time. So be super-aggressive It isn't unusual to change the Z value by 30, 50 or even 100 little moves. You'll probably have to do the first layer calibration sequence over a few times before you even get close to the best live Z for your situation (combination of printer, material type, color, brand) - but at some point the lines start to not fall off the bed if you push on them. And the final square starts to actually print.
I assure you, looking at your pictures, that you are in the ball park. You just haven't succeeded in getting your first layer down to having the head close enough to the bed to successfully print. That first layer determines how much "stick" the print has to the bed - so if you don't get it stuck enough, at higher heights your prints will always fail in a variety of colorful failure modes.
For now, focus on getting a first layer far better. That bat-man symbol with the icky down side. Concentrate on that until the bottom layer (through live Z) is better than the top layer. You can even use the batman pattern to try to calibrate - live z is available to adjust any time after a print is past the mesh calibration and the initial wipe. Push the rotary knob to get that click - and you'll see you can adjust live-z on any print.
Dial it in until it sticks. Then after the print, see if it is smooth on the bottom layer. If not, dial it closer. Until that first layer starts to have waves in it and filament globs up on the nozzle (you'll need a good nozzle cleaner - good patterns on the prints site for ultimate nozzle cleaner, etc). If you see waves in the fist layer, clockwise live Z by .10's. If it's not sticking, counter clockwise .10's at at time.
What you need to do is become proficient at calibrating your fist layer. We're looking for no stringiness (too high). Forget about any pattern any buddies send you until you can do this. your printer is unique. Your filament brand effects the outcome. The color effects the outcome even within the same brand. This is not easy = but it becomes second nature once you master knowing the importance of a good first layer.
If you can print a calibration cube and it has a nice bottom layer, and a nice top layer (at 20mm) - get there. It may take 1 print. It may take 100 - depends on how bold you are with adjusting your Z. Aggressive moves in Z pay off quickly. Sometimes I need to change my Z by .50 mm (which is extremely aggressive - lots of turning of the knob in live z node. Remember counterclockwise is closer to the bed. Clockwise is further away. If you are seeing your bottom layer in separate strands, rotate that knob counter clockwise three of four full turns at a time - that is what I mean by being aggressive. It is too easy early on in your learning curve to be too mamby-pamby with the live z.
RE: Just got my built PRUSA i3 MK3.. complete from the box.
I have two prusa MK3s+'s built from prusa as well. you still need to do a first layer calibration. As dan said above, It is essential to dial in your zOffset for each filament type you plan to use. If you can't get a good layer, nothing else well work.
RE: Just got my built PRUSA i3 MK3.. complete from the box.
this is what you want.
keep printing these squares and moving your zoffset closer(more negative) until you can't see between the individual extrusions and the whole thing peels off as one square when done. Then you'll have the right zOffset. it's important to note that the correct zOffset value could differ between PLA, PETG, TPU etc. The printer allows you to define steel sheet profiles to account for this and if you switch between the smooth and textured plate.
Here's how you define the profiles. once you've defined one or more profiles you your first layer calibration will update the value for the currently selected sheet profile
https://help.prusa3d.com/en/article/steel-sheet-profiles_1955/
Hope this helps
RE: Just got my built PRUSA i3 MK3.. complete from the box.
I also just got a prusa mk3s, but I put it together myself.
I was in fear of harming the bed, so I didn't do my first layer calibration right. And I was able to print a few things at -0.985, but upon printing a more detailed model and it failed 3 times, I redid it and found I actually need -1.175 as my z offset.
https://www.printables.com/model/13885-prusa-mk3-bed-level-first-layer-test-file/files was really helpful, while using live z. Showed me through repetition what it is actually supposed to look like.