Issue with first layer gaps and bumpy / rough sides
Greetings!
After 11h I have finally assembled my first 3D Printer - a MK3S+ - and did a couple of attempts to get a good first layer and also printed 2 parts to see how it goes. I'm using Prusament PETG for that on a 0.4 Nozzle and usually 0.2 layer height, printing on the textured sheet.
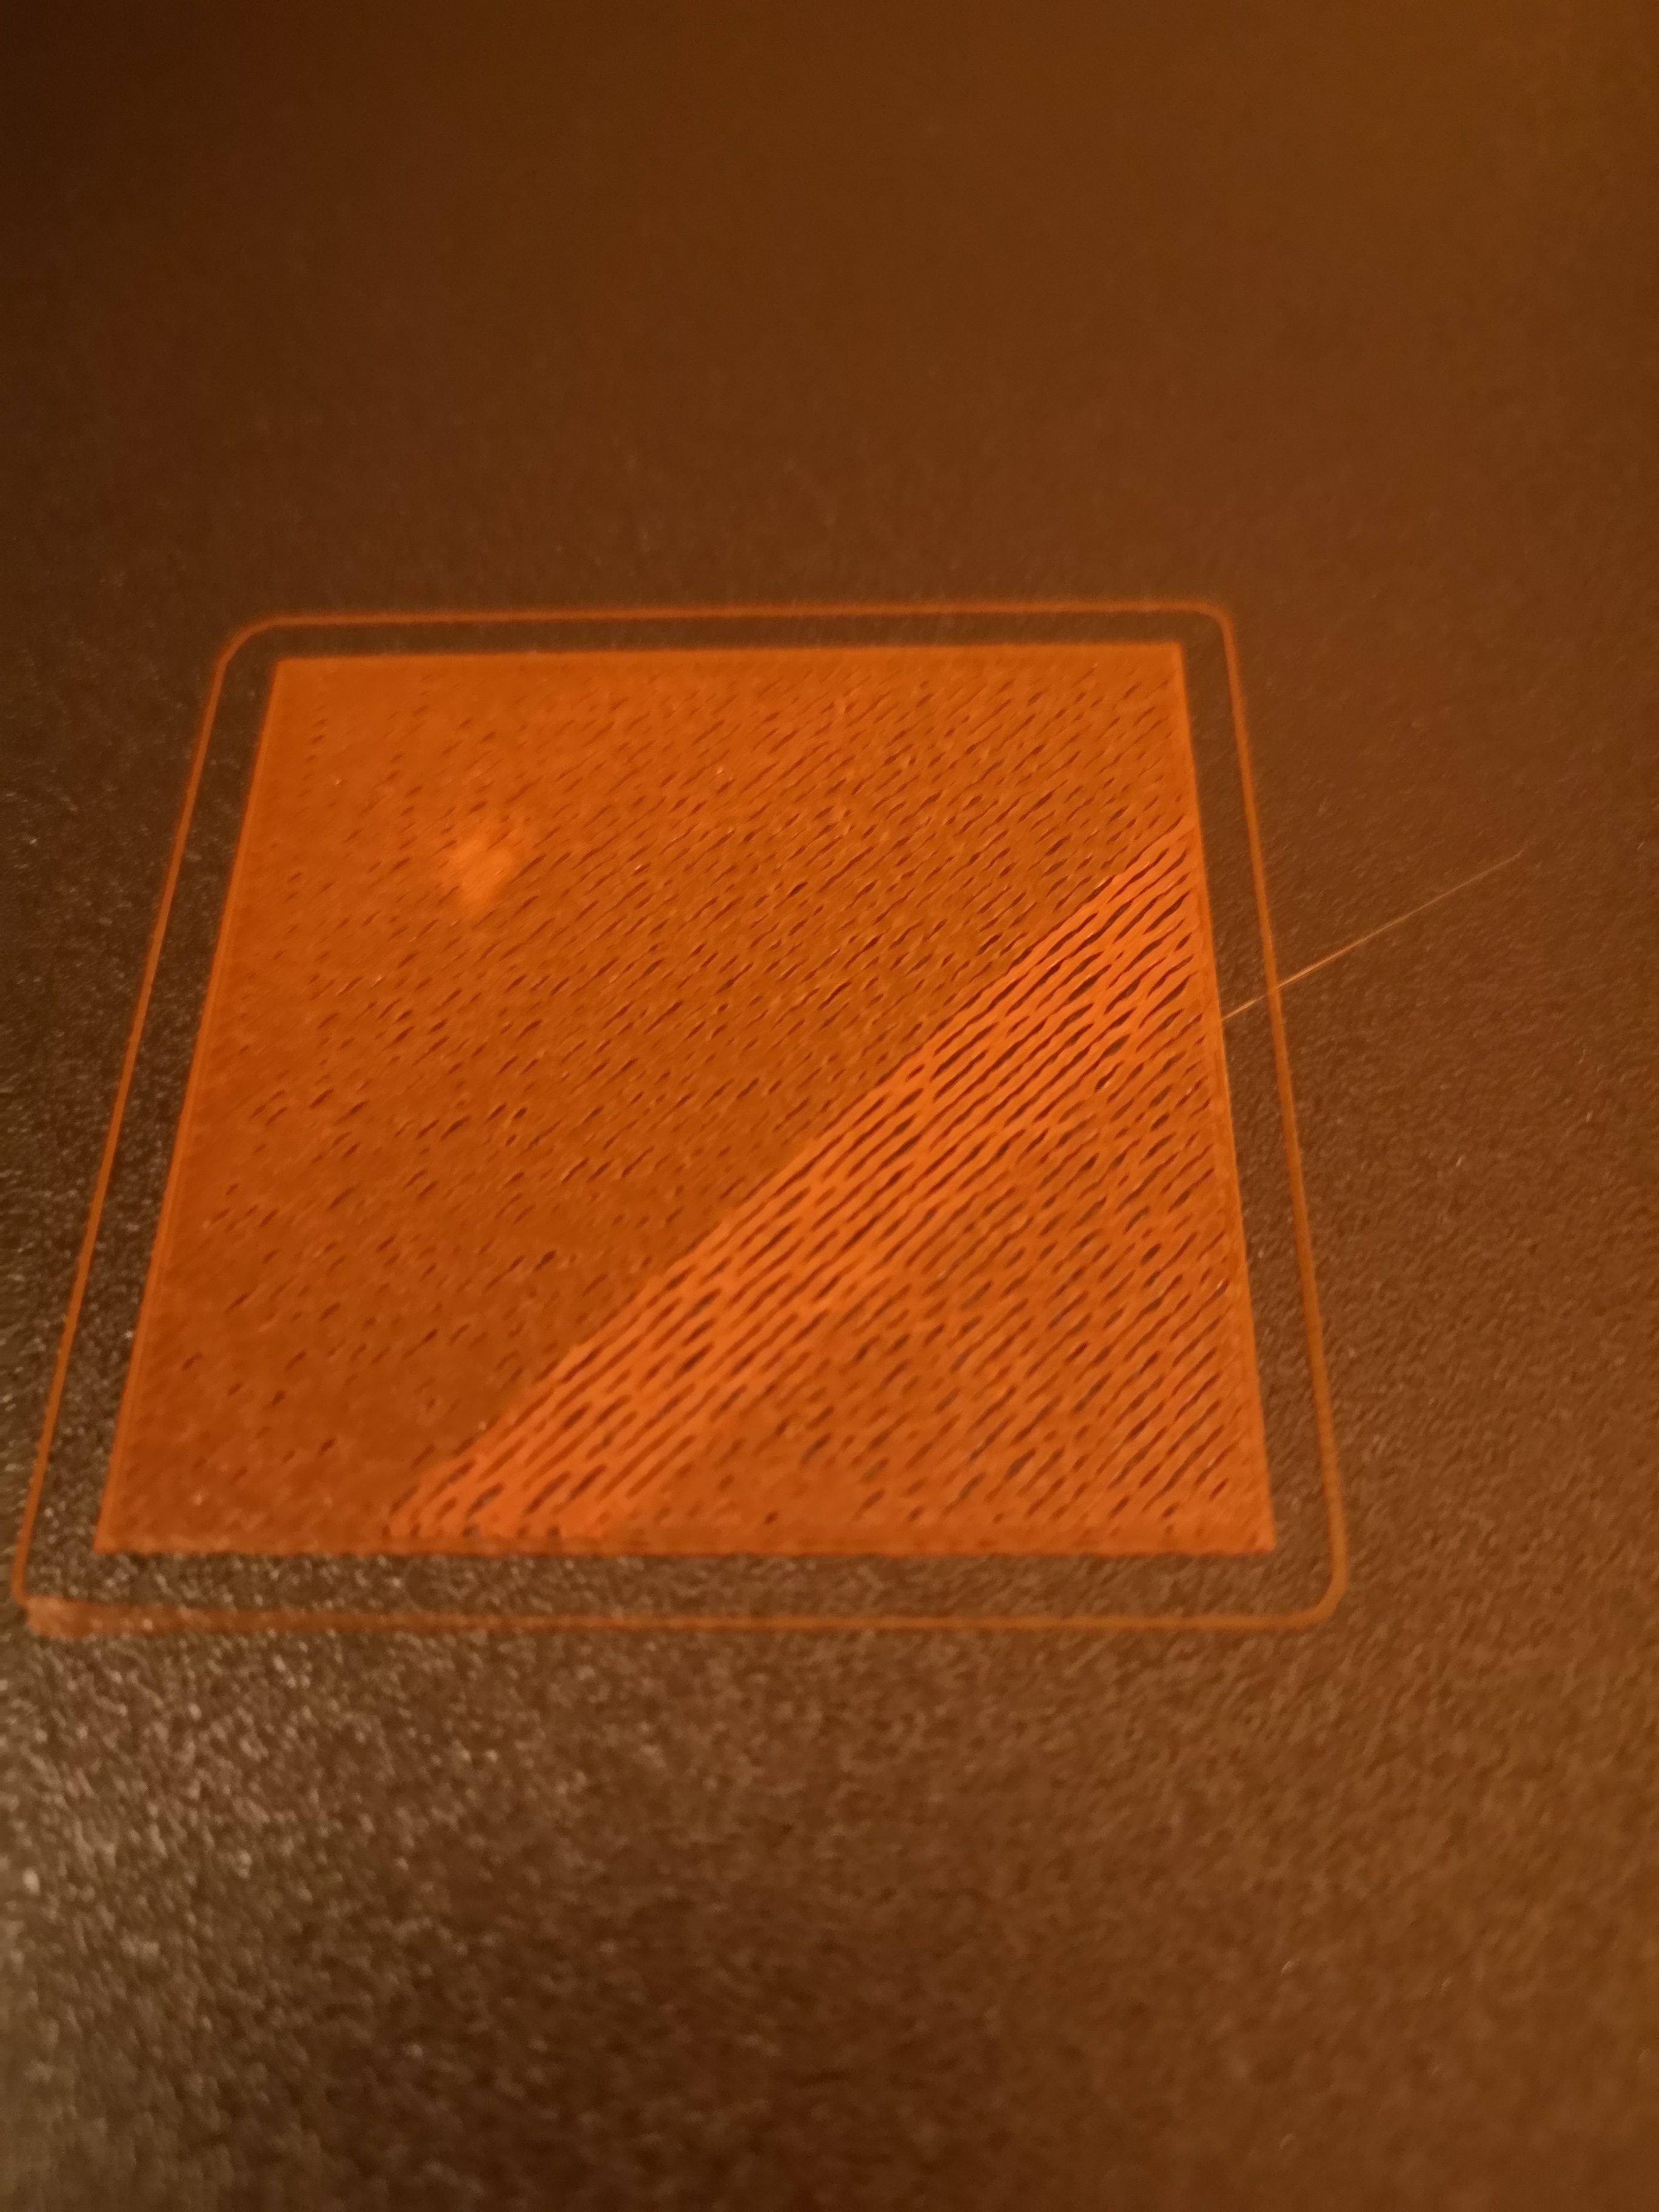
As for the first layer, I have a hard time to get a solid surface. When I look at it against a light source, I can see a lot of small holes between the rows and I cannot get rid of them for some reason.
I've already decreased the Z value by a pretty large amount (-1.8) which is still safe on my setup but does not give me the results I would like. I think the nozzle is too low already, but when I look at the printed test piece, I can see that the rows don't connect consistently. I'd expect them to "melt" together and make a even solid surface, but they don't.
I've attached a photo where I've played with the Z value between -1.7 and -1.85 and also increased flow rate from 95 to 100 (you can see a "blob" in the upper left corner) while printing close to the end (and back to 95 at the very end).
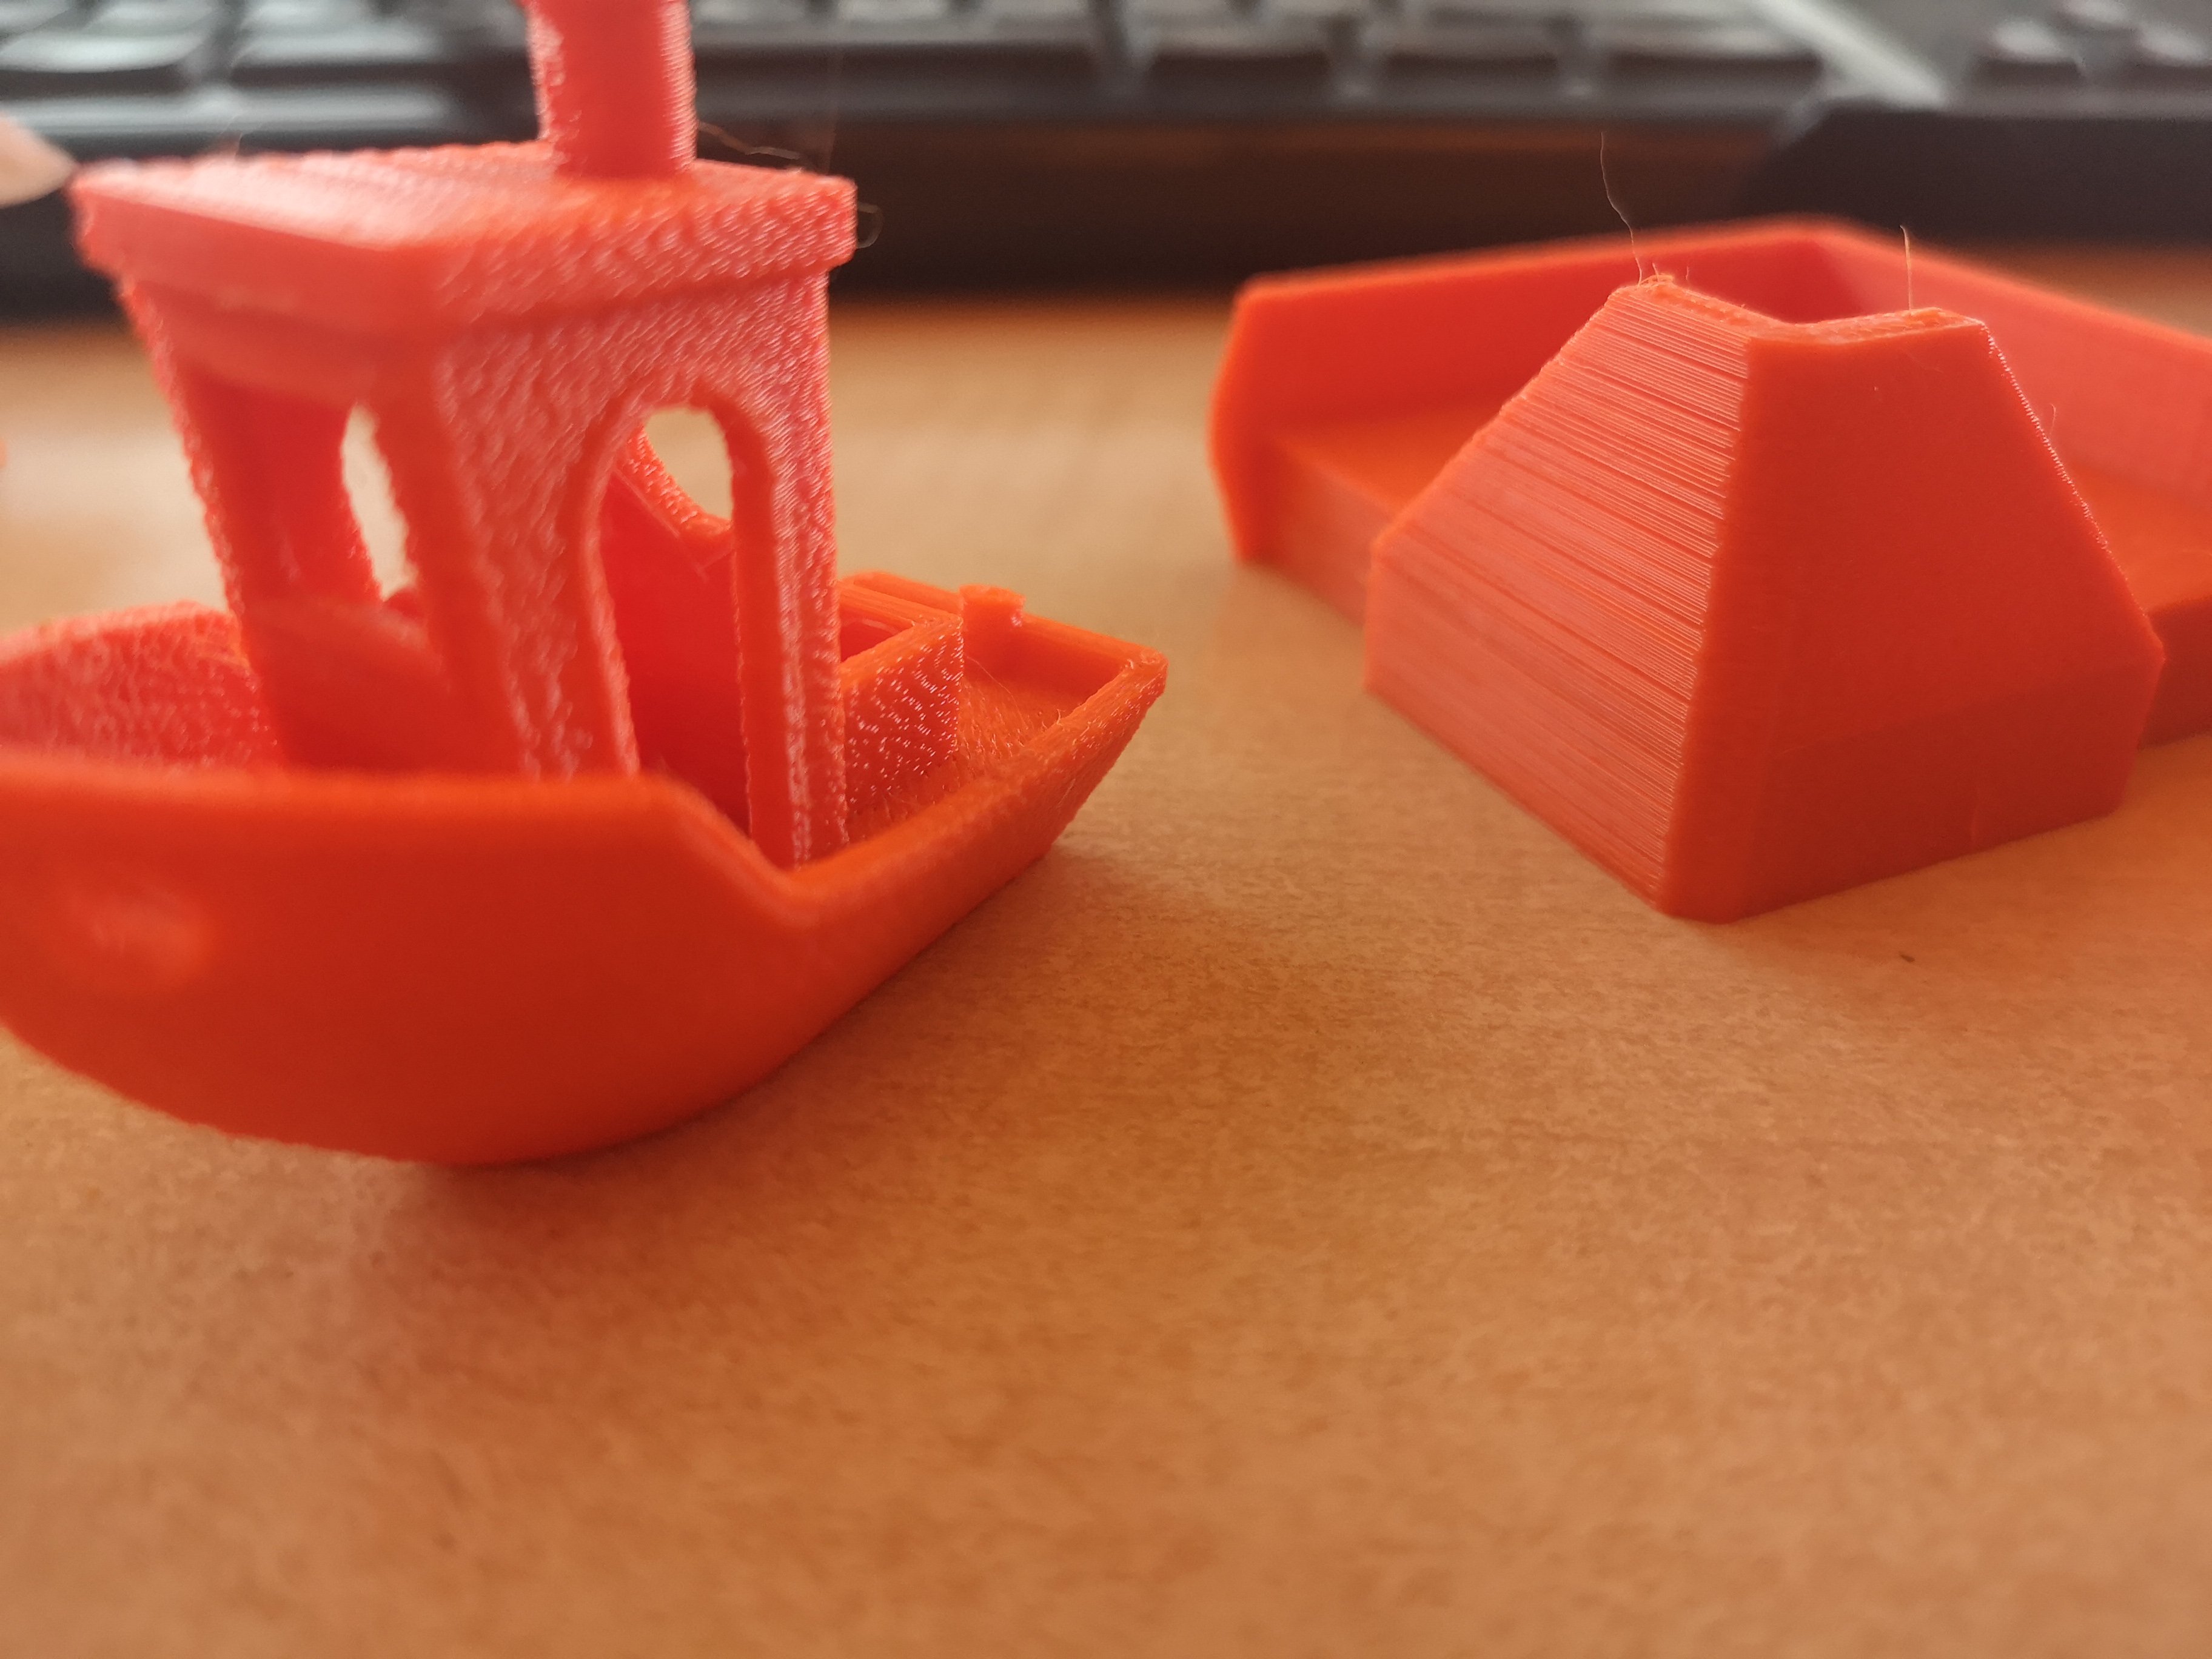
Then, my next problem which I think is somewhat related is, that the objects I've printed either have very rough and bumpy sides (see Benchy left on photo) or "shifted" rows like it does not make a relatively smooth surface but some layers stand out, some do not.
Any idea how to solve any of these problems? 😐
Thank you very much!
RE: Issue with first layer gaps and bumpy / rough sides
Well, I think I finally solved it.
The main issue was with the tension of the X belt. It was at around 225, which I understood would be a value for a tight belt - although the belt wasn't that tight at all. But since the value indicated it was, I refrained from tighten it even more. The Y belt is at around 270.
I disassembled the stepper for the X belt and drilled the holes - as almost every part on my printer, these were too small, which is a problem if the screws should be able to move around in order to adjust the stepper. Then I put the screws back in, tightened the screw on the right side of the stepper, the one that is between the X axis and the frame and tightened the screws on the stepper. The belt tension now is at 259.
I also increased the Z offset a little bit more to -1.860. That it's that high for me probably is because I didn't use the front of the zipper when aligning the PINDA probe.
With these two adjustments I get a perfect first layer and the prints are very good. Not perfect, but the difference compared to before is like night and day. Now I only need some minor tweaks here and there, I'm very happy now.