First layer help
So i am using a Prusa i3 mk3s (build from kit). I am trying to get my first layer perfect enough. I am confused whta to do when i print first layer test prints (squares). First i used the pruso built in automatic calibrations. Small prins (in the middle of the bed, went good. Larger prints are messy at the edges. So i played around with bed level correction and live Z-axis tuning whilst looking at results in Octoprint prusa bedmesh.
I did the last print without changing z level during print. I ended up with these (in my opinion extreme) level corrections
Left: 0
Right: 100
Front:-80
Rear: -40
The results:
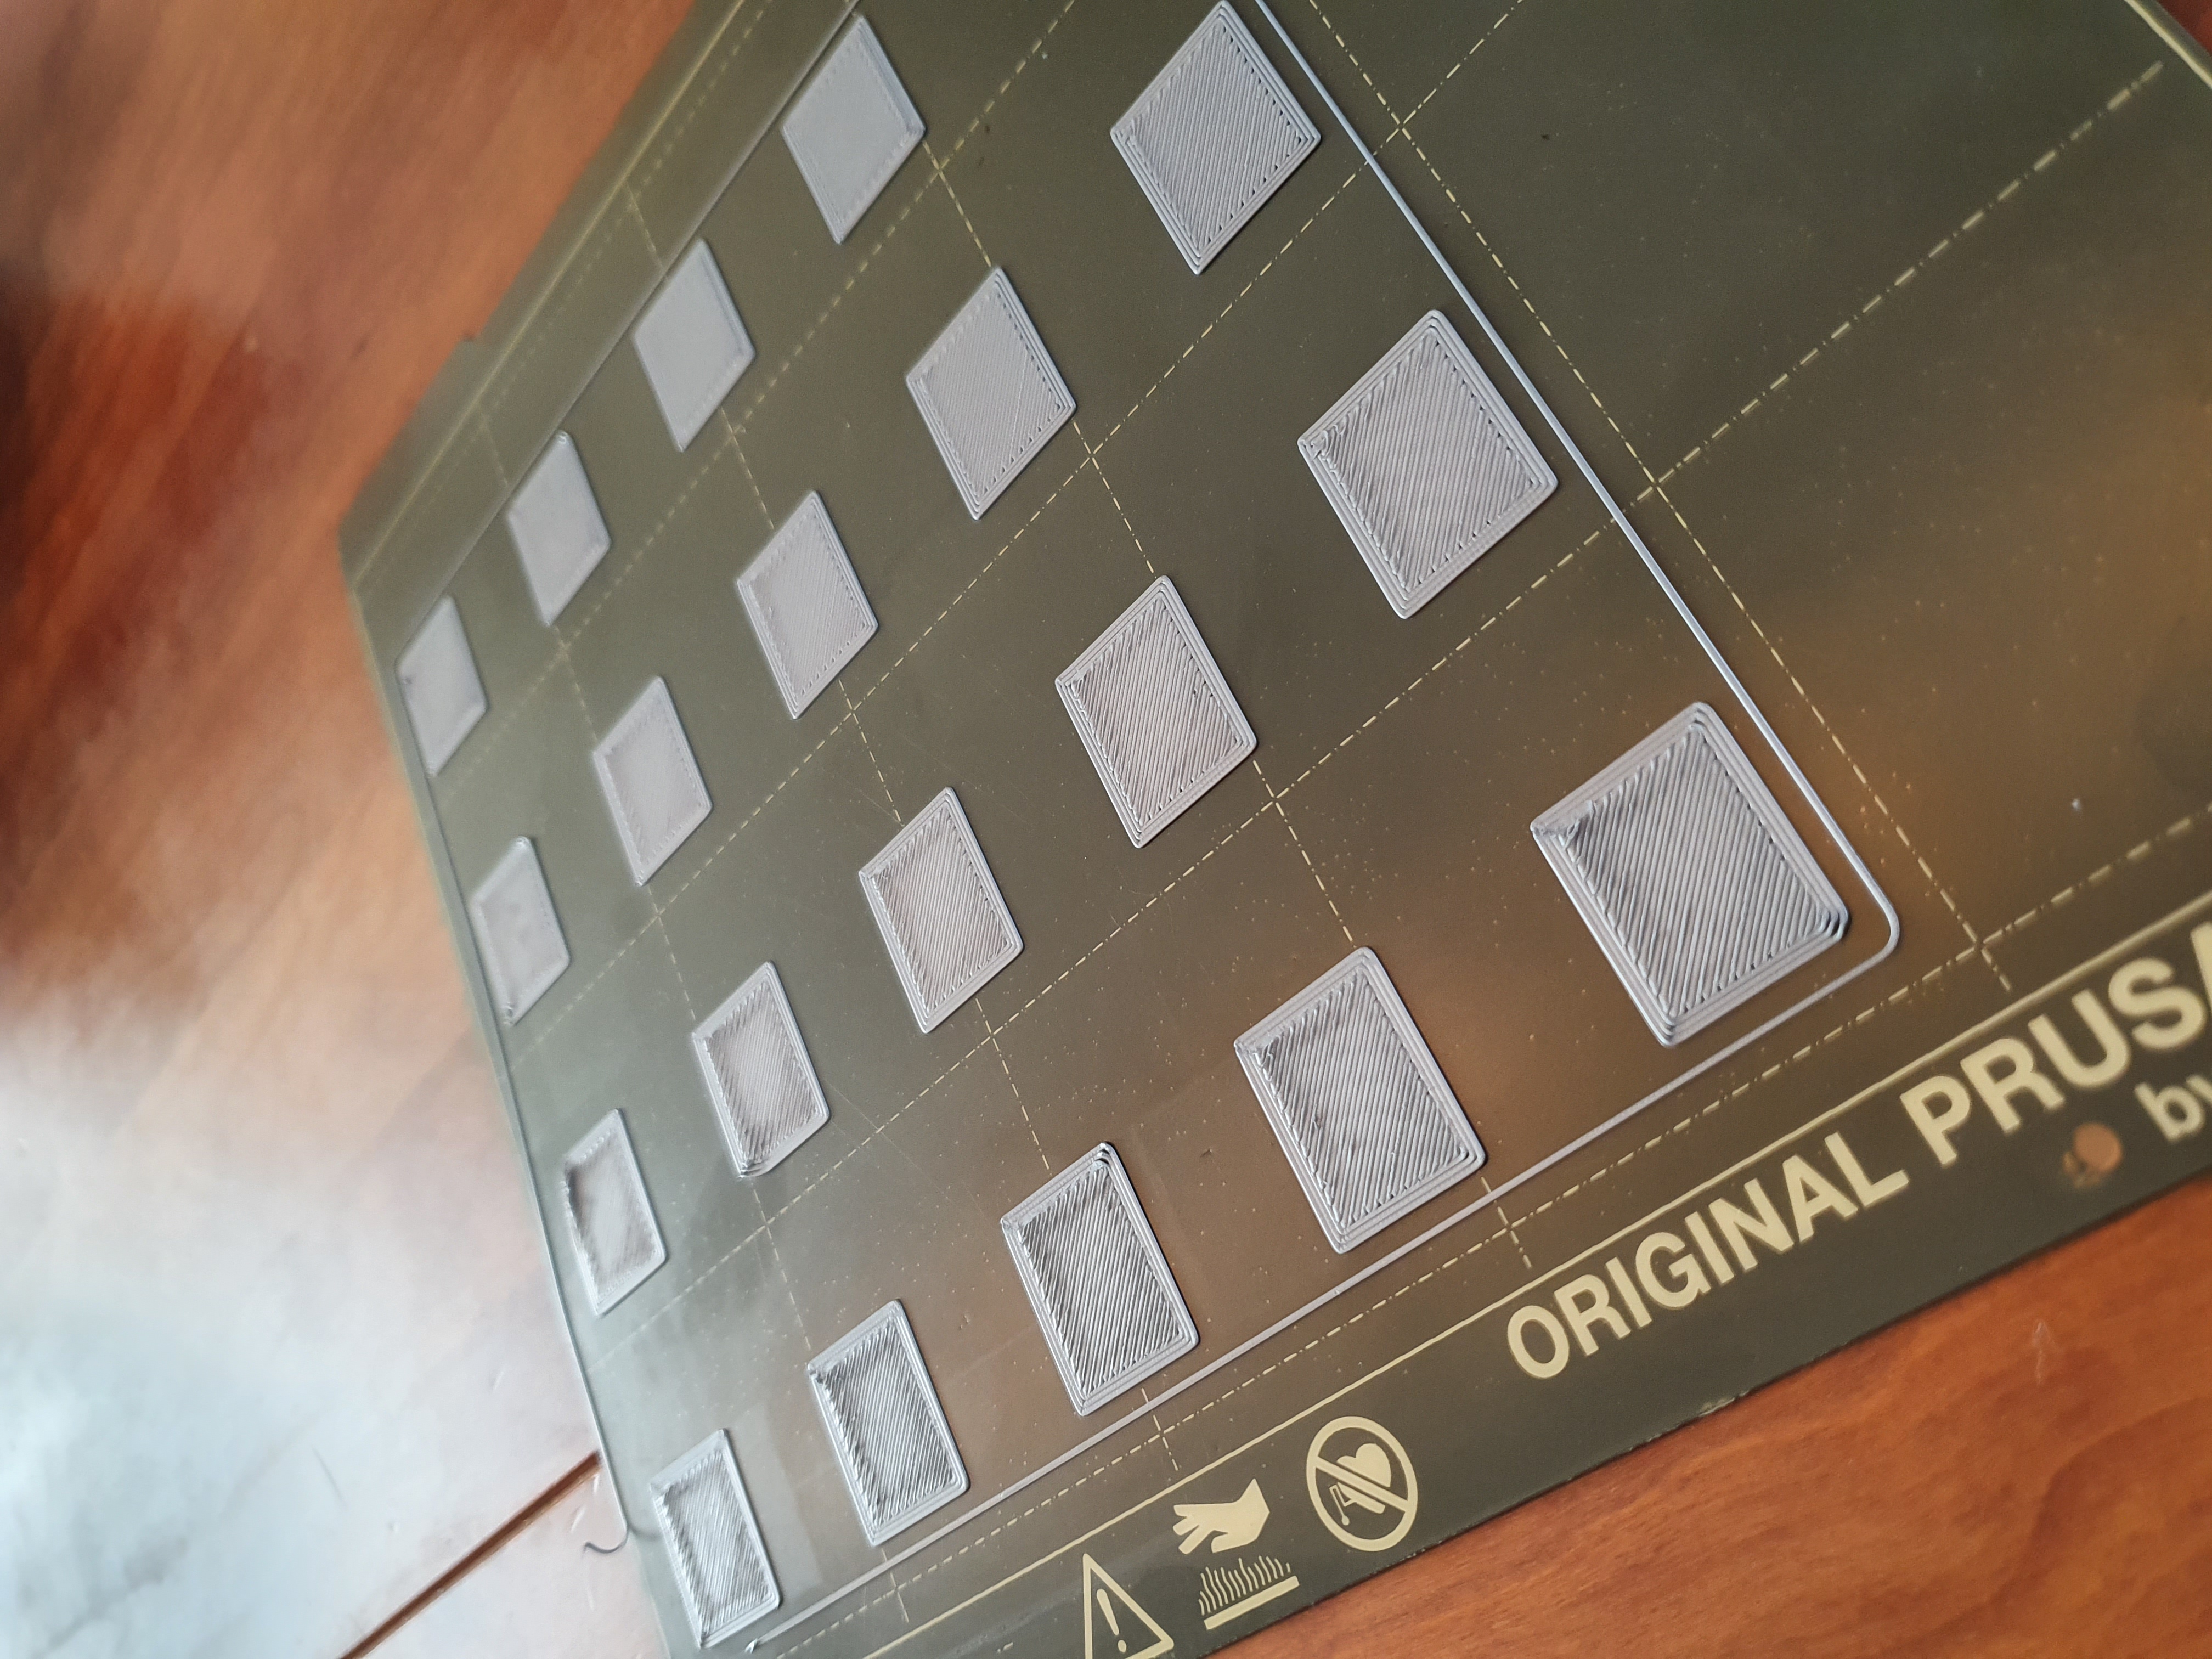
I really don't know what to do next? This can't be it?
I have read posts where the exchanged the spacers under the heatingbed by nylock nuts. Is that really necessary or is there a better way to go about this problem?
Can anyone help out?
Many thanks!
Bart
RE: First layer help
Hi Bart, are you using the default 3x3 mesh bed levelling? it tests 9 points on the bed at the beginning of a print?
or the 7x7 Mesh bed levelling (Available via the LCD Menu) which tests 49 points on the bed?
If you are not using 7x7, I suggest that you try changing to 7x7, and then check your Live Z
the Prusa first layer calibration tool is difficult to manage, I prefer the 'Life Adjust Z, My Way' process
there is a zip file at the bottom of the first post which gives three test patches, one each for PLA, PETG and ABS
Good luck, and happy printing
regards Joan
I try to make safe suggestions,You should understand the context and ensure you are happy that they are safe before attempting to apply my suggestions, what you do, is YOUR responsibility. Location Halifax UK
RE: First layer help
Thank you Joantabb!
I was using the 3x3mesh bed leveling. I will change tot 7x7 and try the automatic process from scratch. I will report back here with the results!
Kindest regards,
Bart
RE: First layer help
So i reset all settings to zero, set the callibration from 3x3 to 7x7 and started the first layer calibration. I corrected with live z tuning. Repeated the first layer calibration again and fine tuned the z. Then i printed the squares. The result in the first try is better than any of my earlier attempts (thank you joantabb!). This is where i am at now:
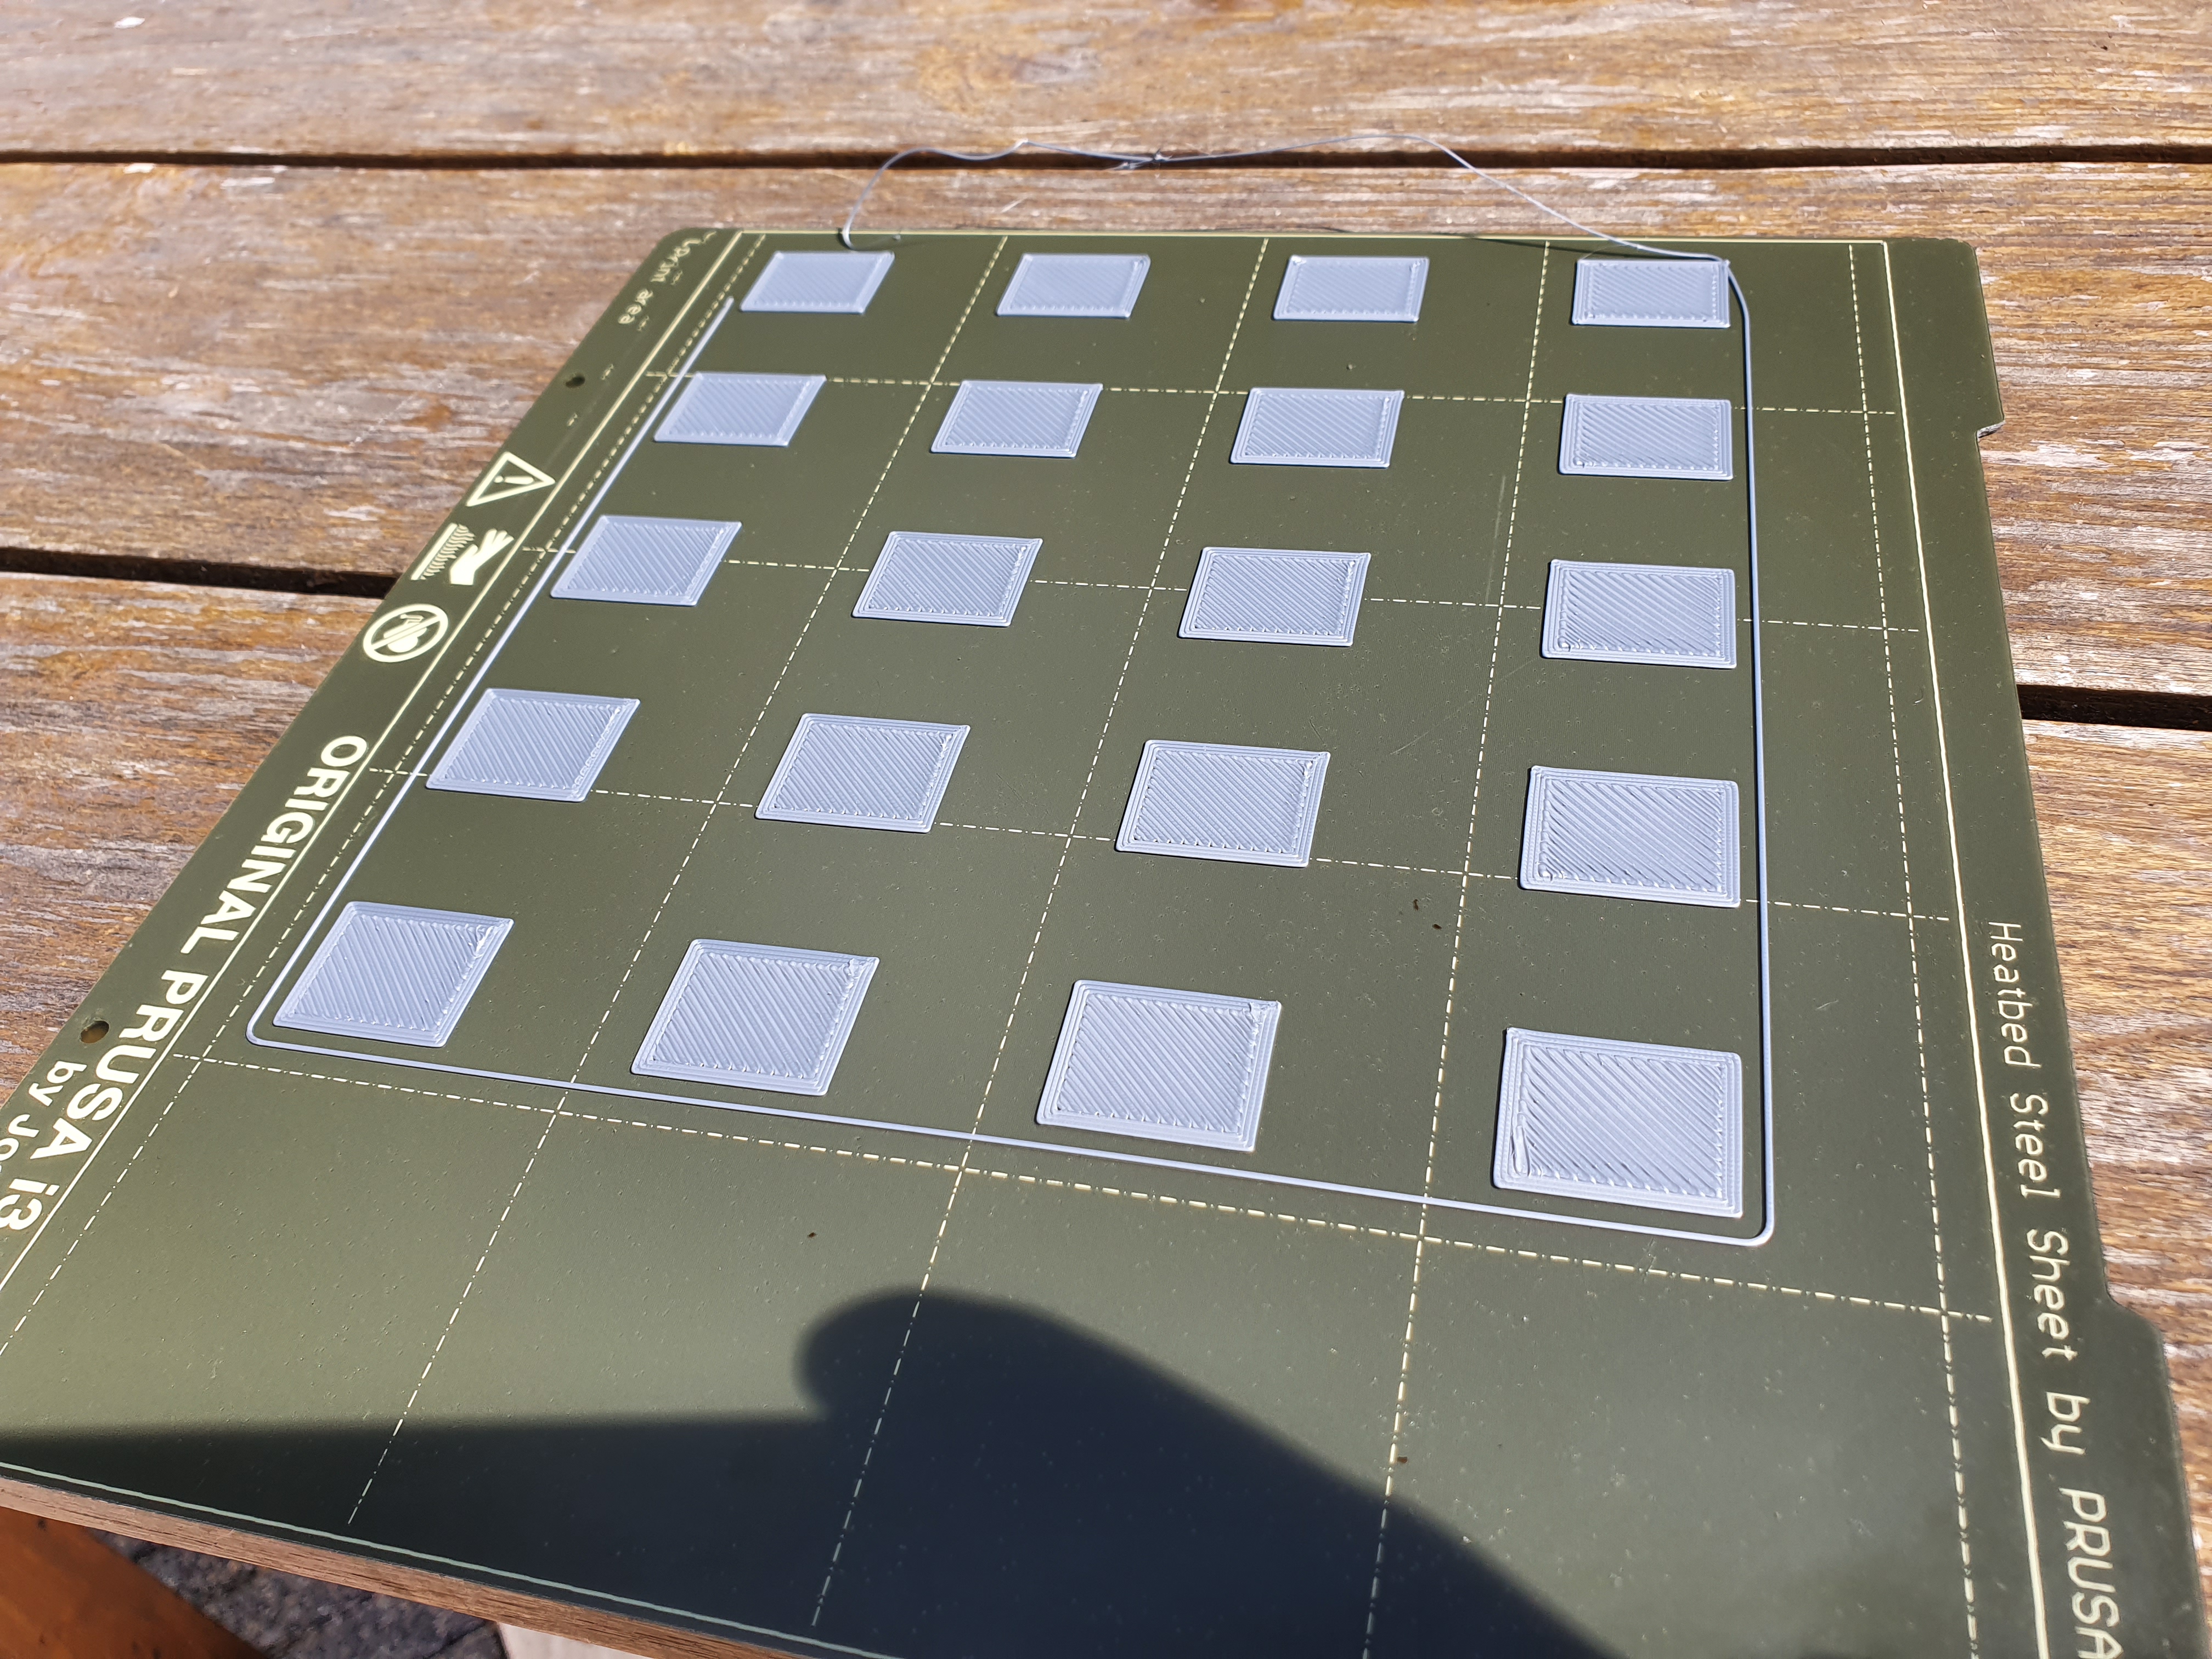
I have two questions though:
1. in my earlier attempts, the last side of the skirt (left) always seems to get loose and gets dragged away with the extruder. What could be the cause? The squares on that side do stick to the pei sheet.
2. are the squares like they are suppost to be? Is this flat enough or should they be flatter?
Thank you so much!!
Kindest regards,
Bart
RE: First layer help
@scoobie2002
Hi Bart,
when you lift the tiles, they should come off as a complete square not lots of spaghetti strands, (Live Z too High)
the square should be smooth to the touch on top, not rough (Live Z correct)
the top of the tiles looks slightly rough to me, if this is the situation, you may have gone slightly too far with Live Z, the nozzle may be ploughing through the filament on the heatbed, (Live Z a tiny bit low) try reducing your live Z negative number size a little so that the nozzle isn't quite so low.
if the surface of the tiles starts to cause waves and wiggles in the lines of filament then your liveZ is way too low
I note your tiles are set over to the left of your buildplate and you say the last tide of the skirt kept pulling off.
this could be because you have handled the build plate and got finger grease on there. any sort of grease or debris can reduce your print bed adhesion.
I always say that I wash my build plate, in the sink, with a new kitchen sponge and dish wash liquid, then rinse with hot water and dry immediately with a clean plain paper towel. the suffactants in the dish wash soap, carry the grease away and leave the surface clean
Wiping with IPA, can spread the grease out more evenly across the build plate surface! there should not be any smear marks on the build plate,
Handle the plate by the edges after washing. 
A higher temperature often helps with adhesion when using PLA...
For other filaments, have a look at the recommendations in the 3d printing manual or knowledge base
here is a link to the Prusa Knowledge Base maintenance article.
Please consider doing maintenance if you didn't lubricate the linear rods and bearings during assembly, note the last paragraph where they discuss washing the build plate
Regards Joan
I try to make safe suggestions,You should understand the context and ensure you are happy that they are safe before attempting to apply my suggestions, what you do, is YOUR responsibility. Location Halifax UK