After messy print failure, printing is skewed and sloppy
I had a printing failure yesterday that made a huge mess and I'm worried something is damaged now.
Yesterday, after a successful first 2 layers had lulled me into a false sense of security, I left the printer alone for a couple hours. When I came back, the print had popped loose and stuck to the bottom of the extruder, and a huge wad of sticky, soft plastic had collected all over the bottom of the hotend and nozzle. Needless to say, I panicked and turned it off. Then I pulled off the plastic as carefully as I could while it was still warm. It was stuck under the wires and around the entire bottom of the assembly and it was really hard to do it without pulling too hard and possibly skewing or doing harm to the wires.
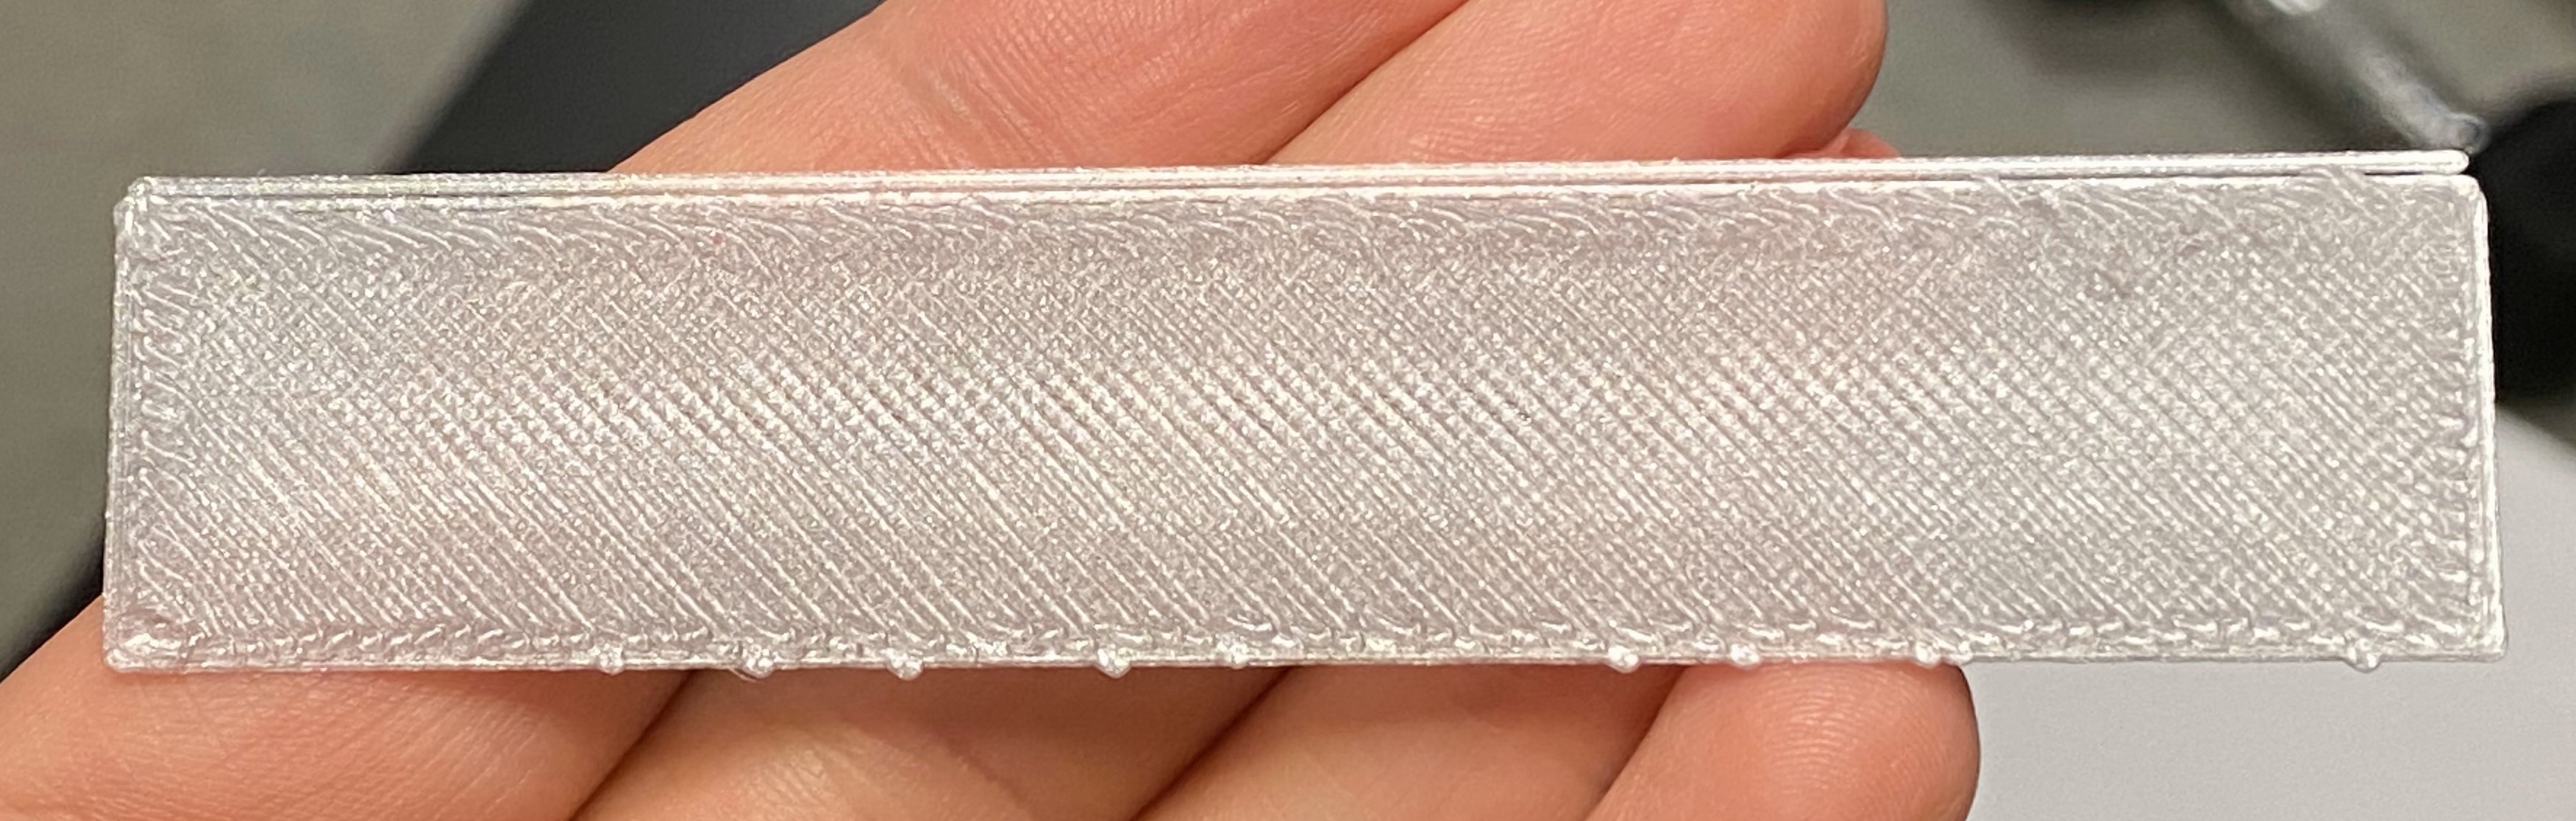
I THINK the wires are all okay. I don't see any visible damage. But clearly SOMETHING is messed up now, because when I try to print a test, it comes out all sloppy and misaligned. See this test, which is from the first 2 layers of the built in Prusa test pattern:

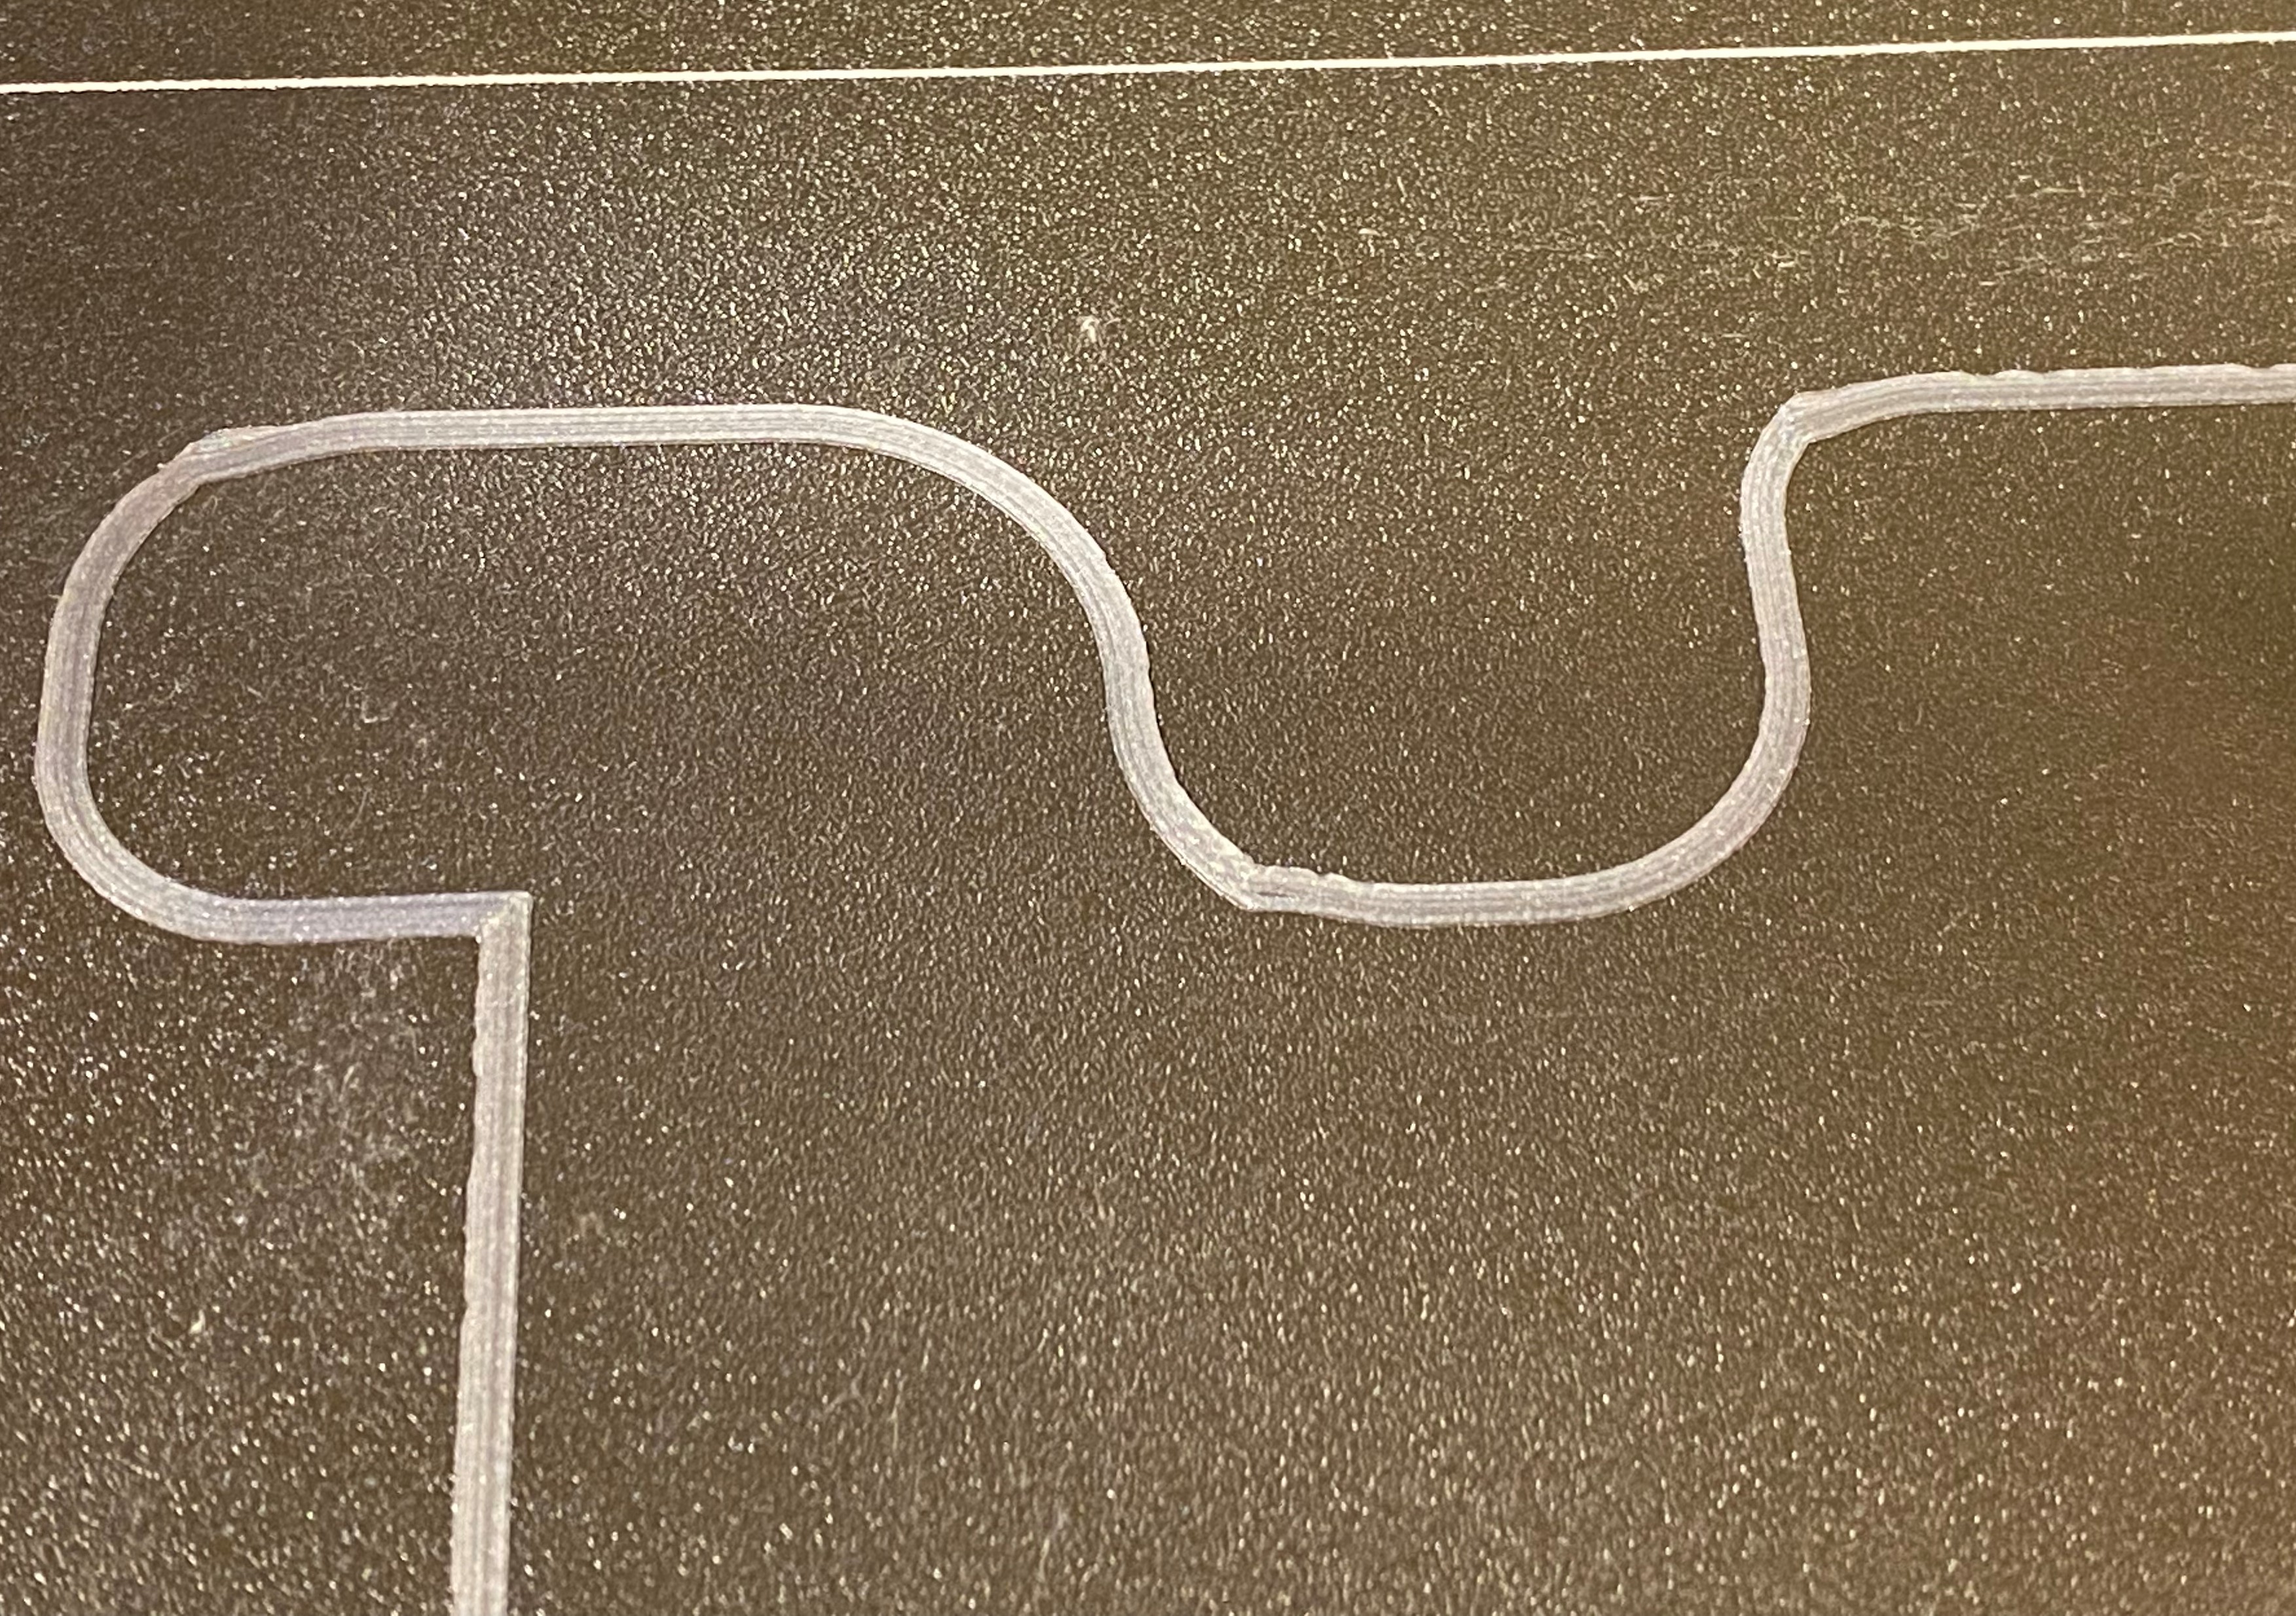
Also, the curves on the test pattern have some odd hiccups to them (and in another print test, I noticed several circles that were askew such that the circle was slightly ovoid and didn't close):
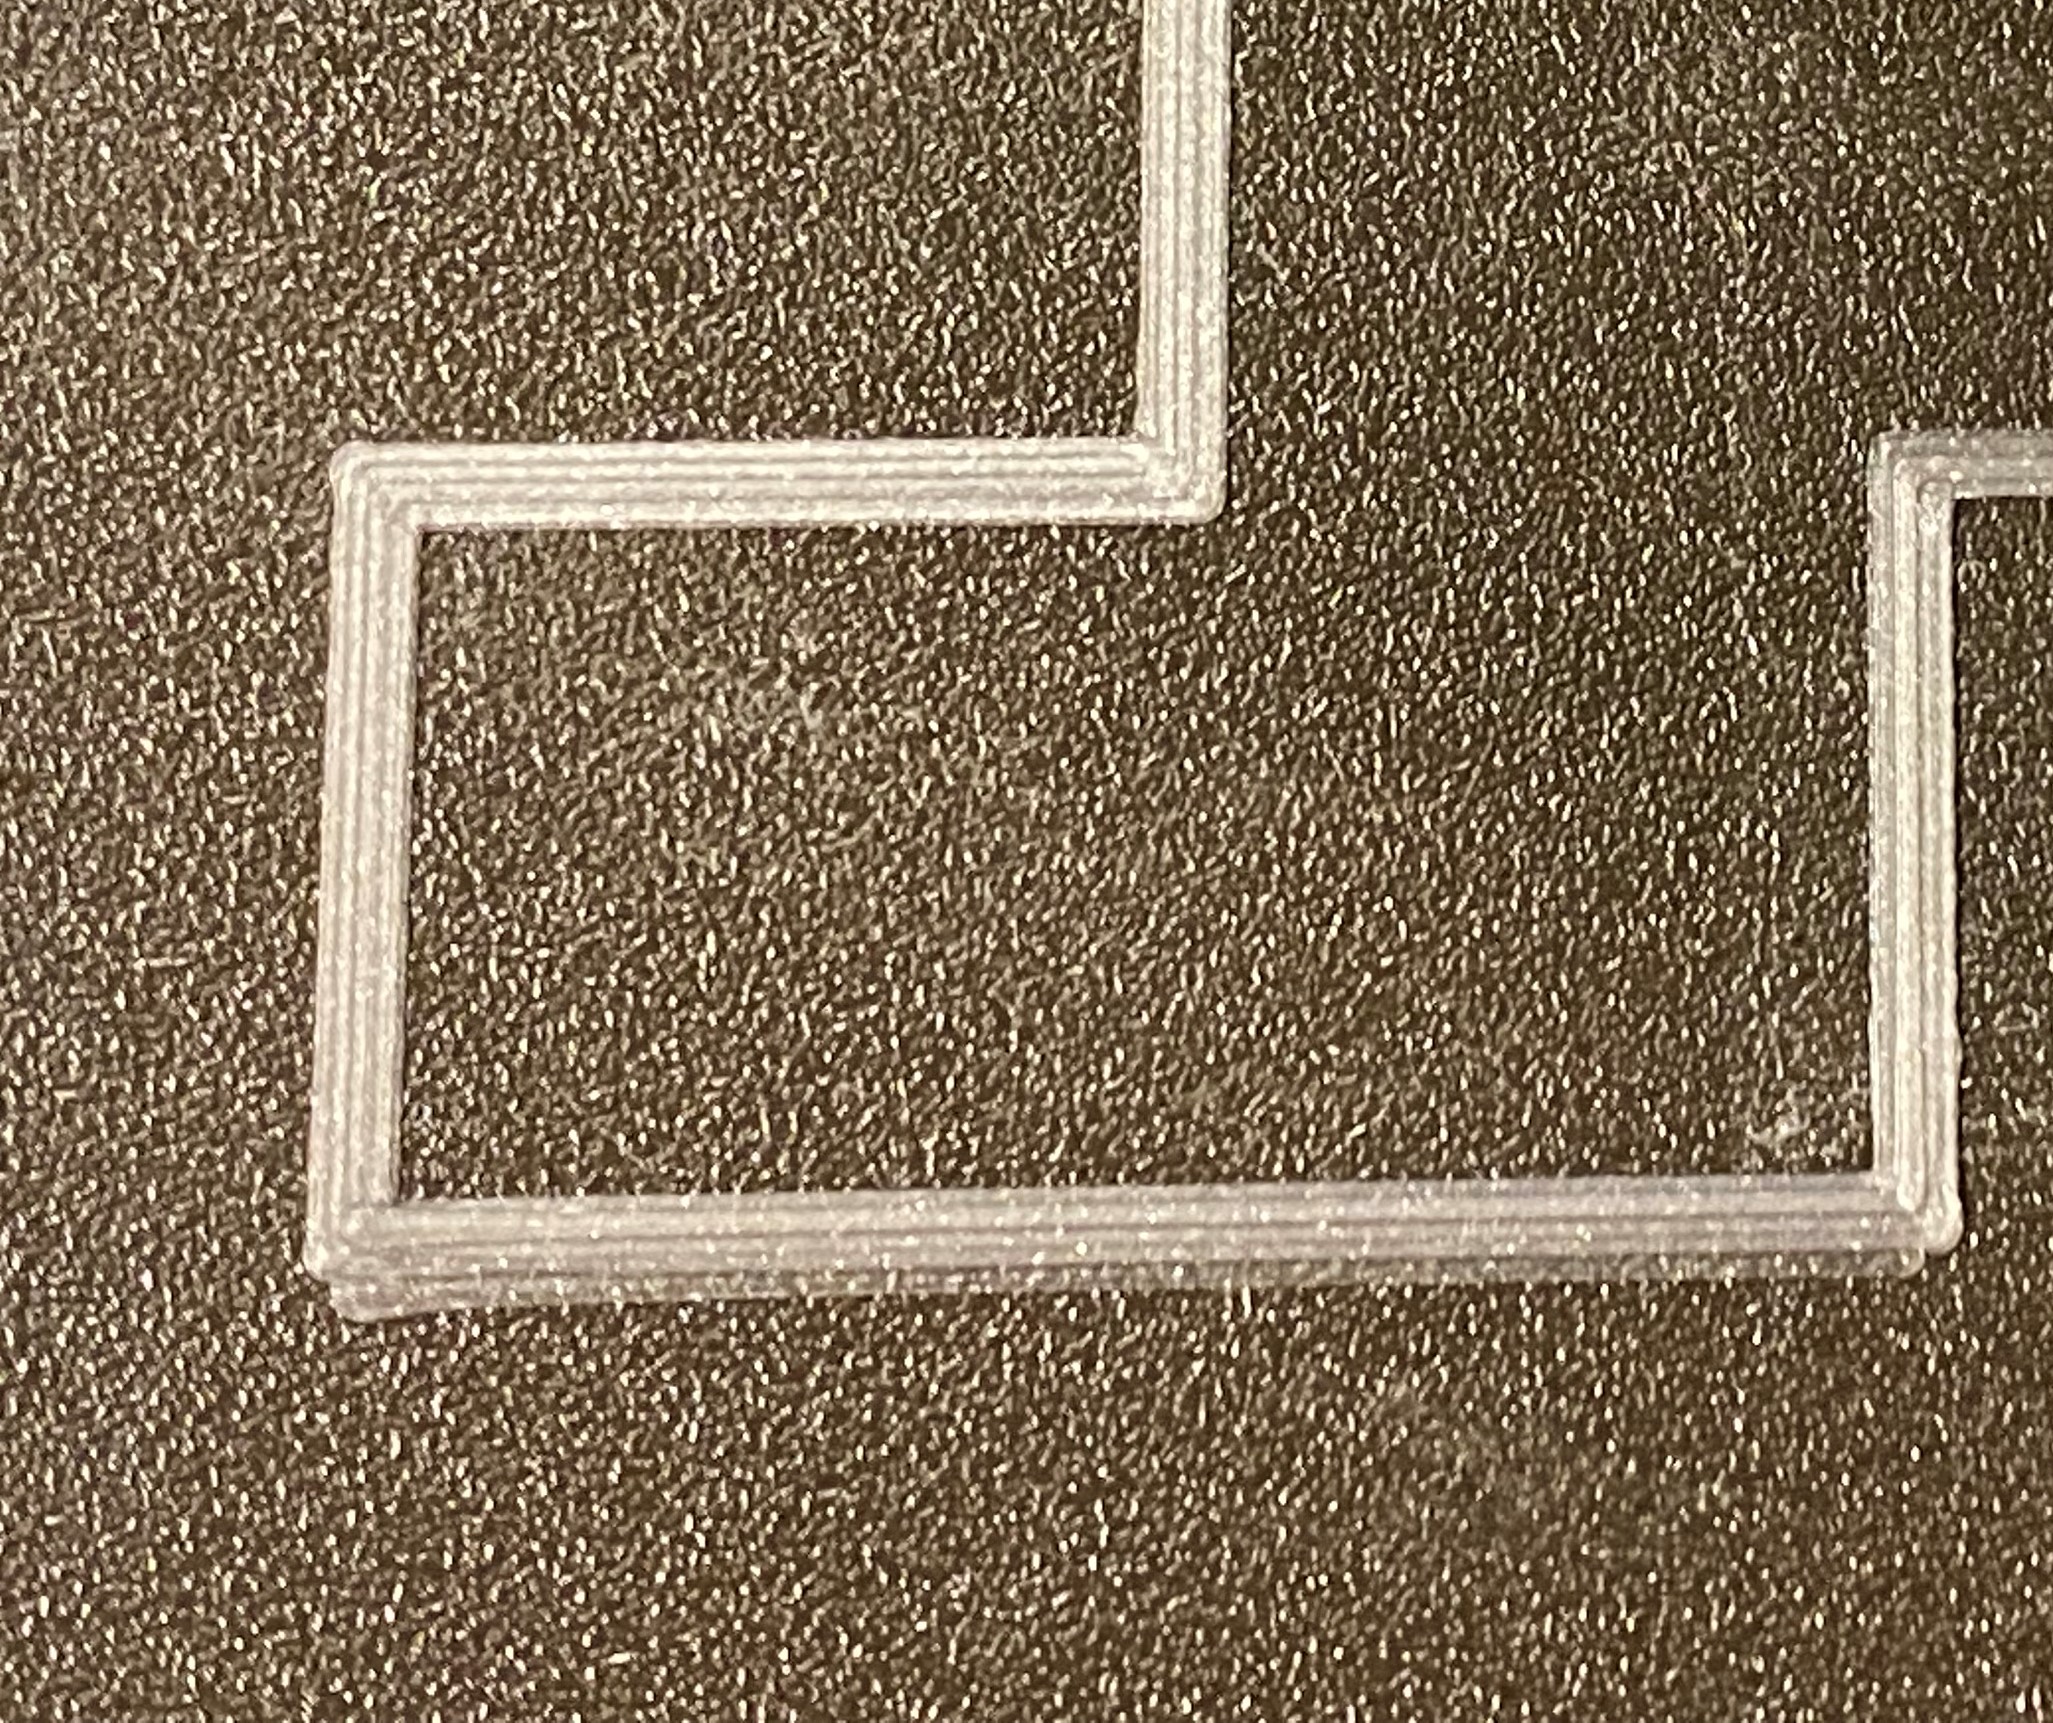
Misalignment in the bottom left of the test pattern:
I tried running the calibration wizard from scratch, and it didn't help. I did notice that I needed to adjust the Z calibration slightly lower than it was previously. This worried me since it seemed like evidence that SOMETHING had changed, but I don't know what.
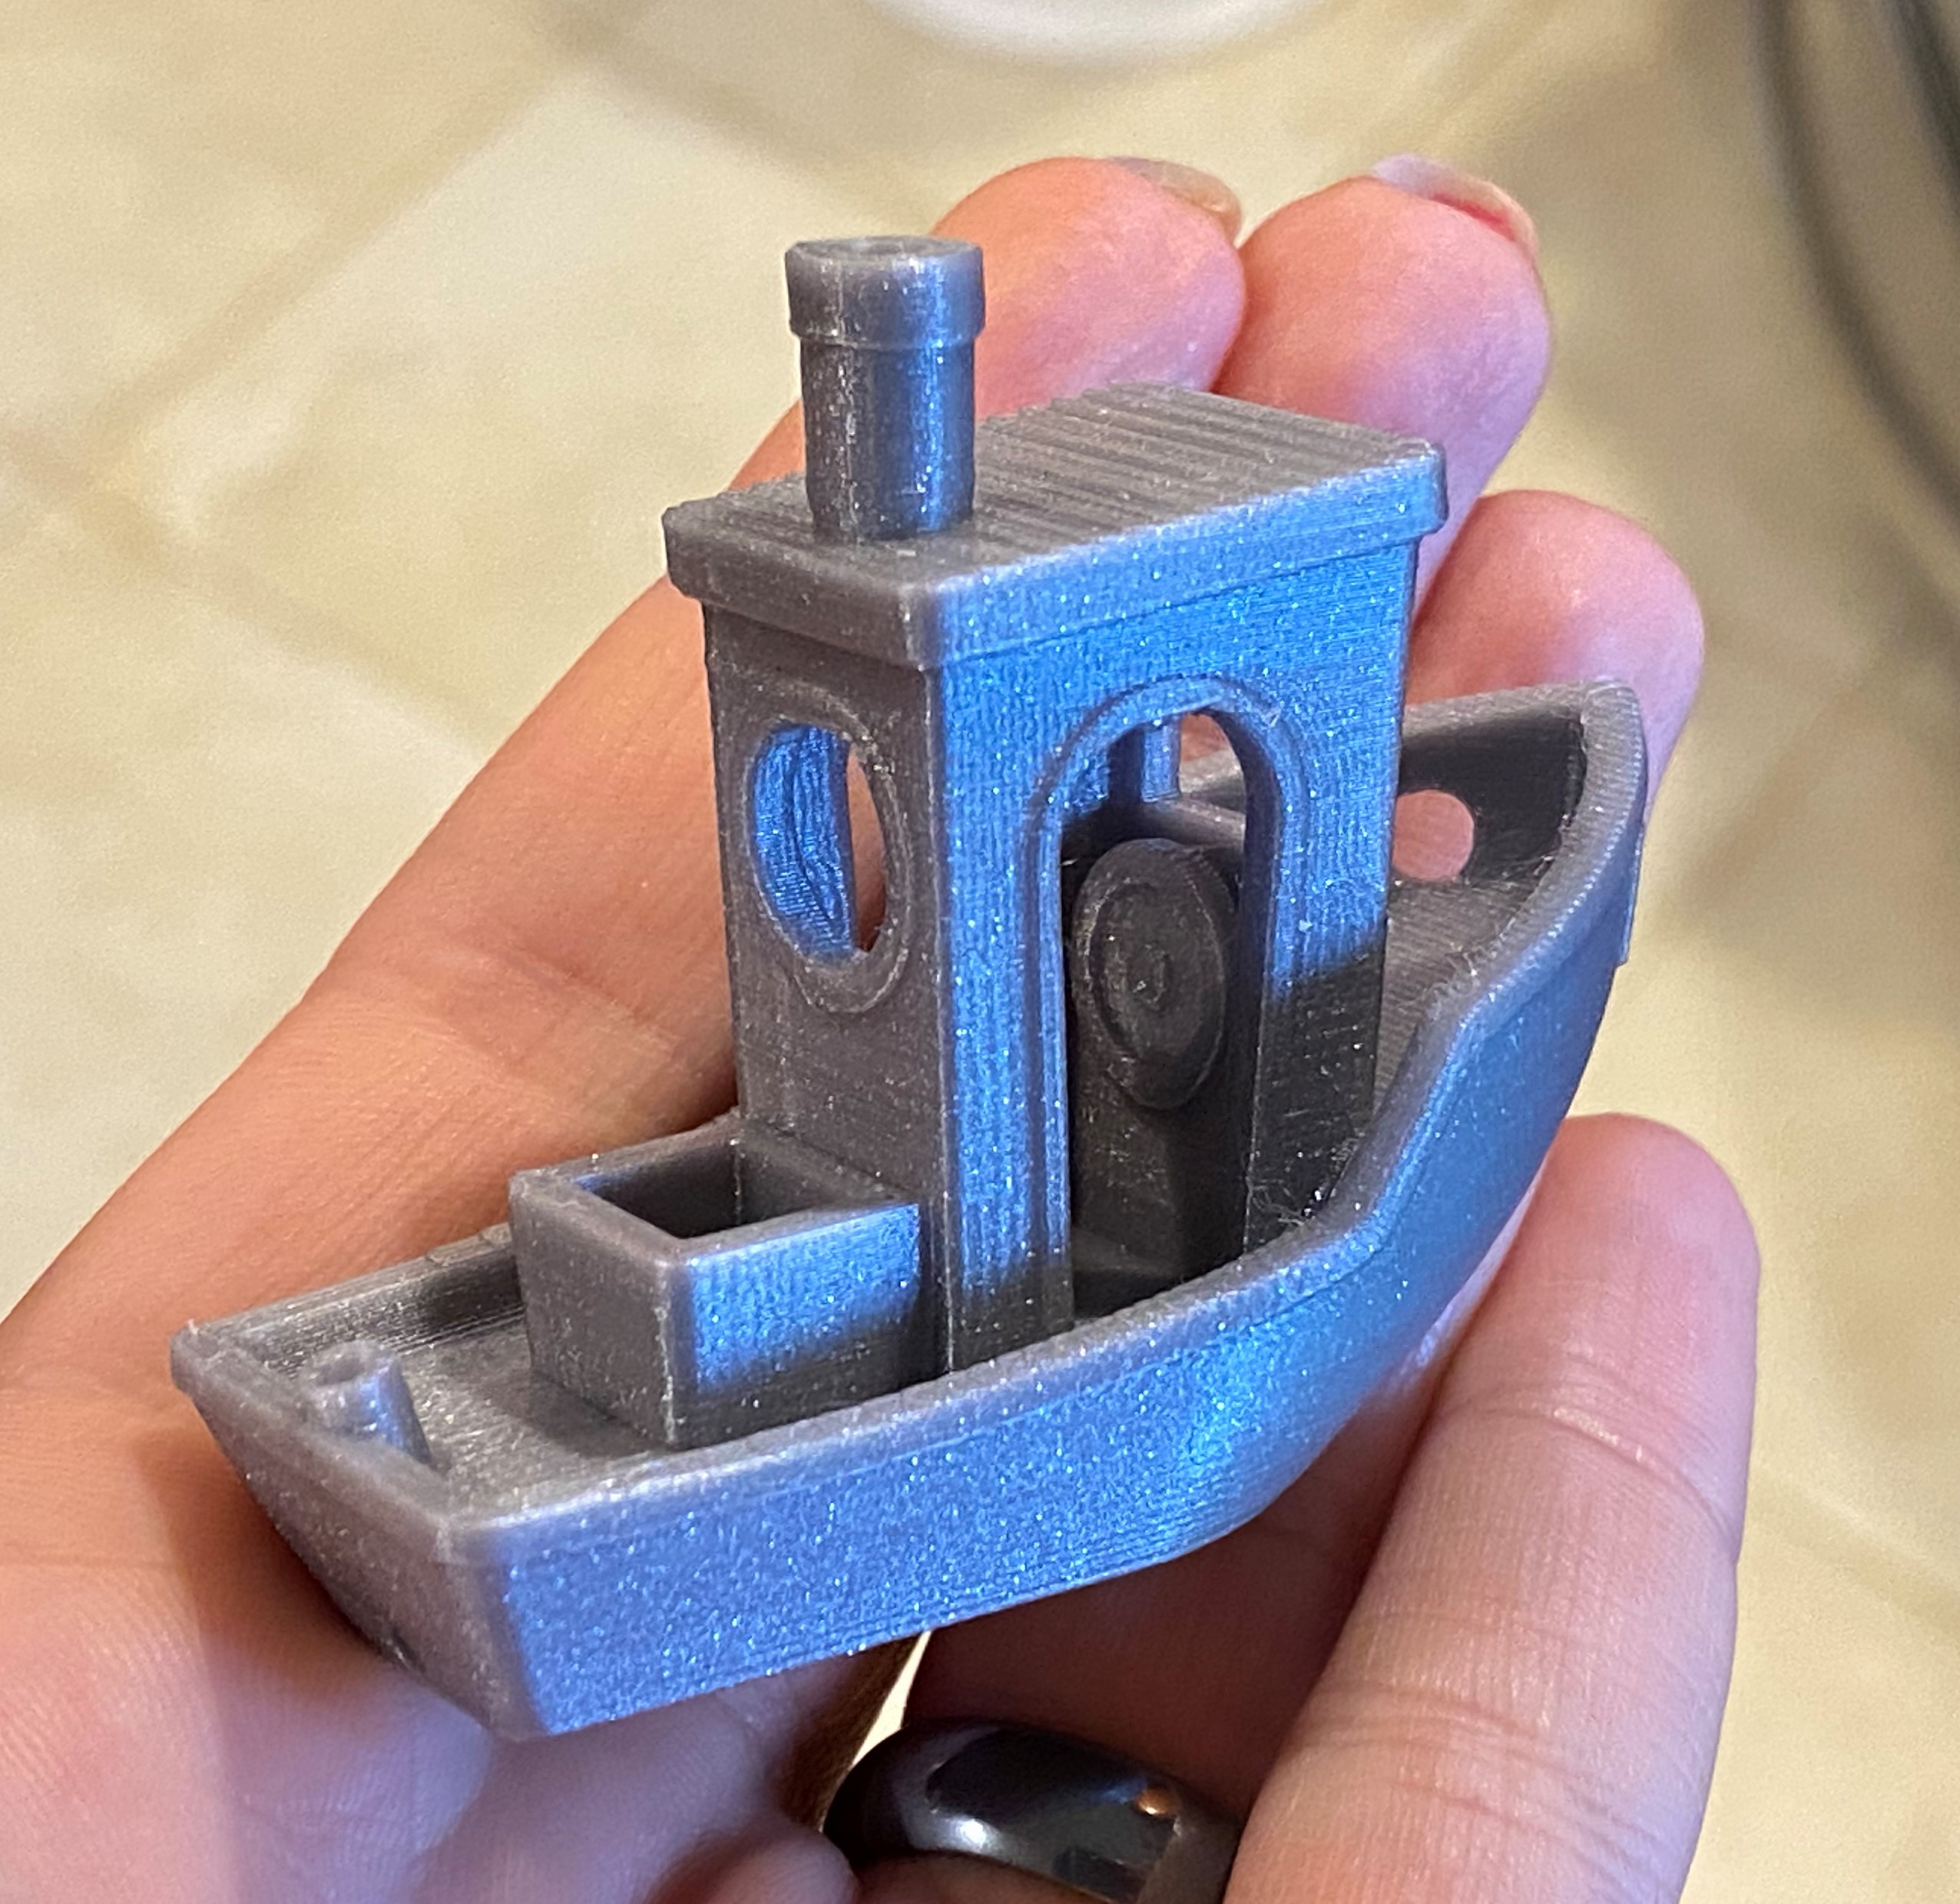
For reference, here is a Benchy that I printed before the accident, so you can see how well it worked before (not perfect, I know, but pretty good)... maybe there are some clues to be found, for anyone who knows more about this than me:
Thank you in advance!!
Best Answer by Rattify:
FIXED: The y-axis belt was loose!
So after I tried cleaning up (the nozzle did indeed need a little more cleaning) and checking the shroud (they were fine), and raised the z-axis a bit, it looked a bit less messy. The wiggly edges and ragged bits were better.
However, it still had the issues with alignment and the curves having a consistent "hiccup" in them. There was also a horizontal ripple in the test rectangle's fill.
After watching closely during the test print, I noticed the problems only occurred during y-axis movement. I could even see a tiny hesitation in the movement that coincided with the ripple. So I checked the belt tension and found the y belt was at 295... still below the 300 limit, but just barely.
I tightened it down to 275 and tried the test again, and now it works perfectly!
I theorize there was just enough slack in the belt to introduce some slop at certain points... maybe a seam in the belt? This may have been causing the consistent hiccups, which didn't seem (to my newbie eyes, anyway) large enough to represent a totally loose belt that was skipping teeth. I will keep an eye on the tension to make sure it doesn't slacken again just in case there is something wrong with the belt or its tensioner or something.
Anyway, it is back to working like new again and I am extremely relieved. Thanks for your help, Dan!
RE: After messy print failure, printing is skewed and sloppy
Check your fan shroud to make sure it is not broken, cracked or blocked with plastic. Cleaning a blob - I am thinking you still have a lot to clean up. What I do when that happens is heat the nozzle up past the temp you were printing - for example, for petg, heat the nozzle to 260 (via the control panel). Then raise the Z to around 175 or so and start picking with needle nose pliers, tweezers, and picks. Most of the plastic will drip off or start dripping on its own. You want it to come out without any residual plastic on the heater block and you want the fan shroud path for the nozzle cooling fan to be unblocked completely. Also make sure the hot end "vanes" are not clogged with plastic (use a pick to get any remaining blob clean).
Your live-Z was suspect in the first place, since your print that turned into a blob lost adhesion (strong possibility). If you were printing PLA, it is unlikely you experienced warping.
In your pictures, I would submit the opinion that you may be too close to the bed - or there is residual filament dragging in the extruded path.
RE: After messy print failure, printing is skewed and sloppy
FIXED: The y-axis belt was loose!
So after I tried cleaning up (the nozzle did indeed need a little more cleaning) and checking the shroud (they were fine), and raised the z-axis a bit, it looked a bit less messy. The wiggly edges and ragged bits were better.
However, it still had the issues with alignment and the curves having a consistent "hiccup" in them. There was also a horizontal ripple in the test rectangle's fill.
After watching closely during the test print, I noticed the problems only occurred during y-axis movement. I could even see a tiny hesitation in the movement that coincided with the ripple. So I checked the belt tension and found the y belt was at 295... still below the 300 limit, but just barely.
I tightened it down to 275 and tried the test again, and now it works perfectly!
I theorize there was just enough slack in the belt to introduce some slop at certain points... maybe a seam in the belt? This may have been causing the consistent hiccups, which didn't seem (to my newbie eyes, anyway) large enough to represent a totally loose belt that was skipping teeth. I will keep an eye on the tension to make sure it doesn't slacken again just in case there is something wrong with the belt or its tensioner or something.
Anyway, it is back to working like new again and I am extremely relieved. Thanks for your help, Dan!
Belt Tension Advise
On belt tension - the #'s in the control panel do not measure belt tension - they measure drag. To measure and set belt tension strongly recommend you get some Prusament PETG, download the GCODE for the Belt Tension Gauge (the one for your printer) from the print library, and use that to determine where you are in the belt tension department.
Glad you got it working again!
PETG
Ah okay, thanks for catching me on that! I will do that test, but do I need the Prusament PETG specifically? I have Prusament PLA (the one that came with the kit) and Matterhacker build PETG, but not Prusament PETG. The international shipping is pricy so I am reluctant to order a single spool for a test unless it’s really necessary.
RE: See if you can borrow some
The GCODE is tuned for the stiffness of Prusament PETG. It won't read right in other PETG (I ran a test and compared three of them)
There's probably some prusites living near you (I didn't check the map) you could borrow some from or have them print you one and ship it to you