Upgrade your Mk2.5/Mk2.5S to use the new Mk3S+ extruder
I recently had to rebuild one of my Mk2.5S printers (blob of death) so I decided to print all the Prusa Mk3S+ extruder parts and see if I could get them to work on the Mk2.5
All I needed to do was design one bolt-on part to actuate the X-axis end-stop. Everything else is plug-and-play.
https://www.thingiverse.com/thing:4804436
If your extruder is working, I do not recommend this upgrade - its too much work. But if you need to replace extruder parts anyway, I highly recommend this approach: maintenance on the new extruder is simpler, the filament path is better, and the filament sensor lever thingy seems to be more reliable.
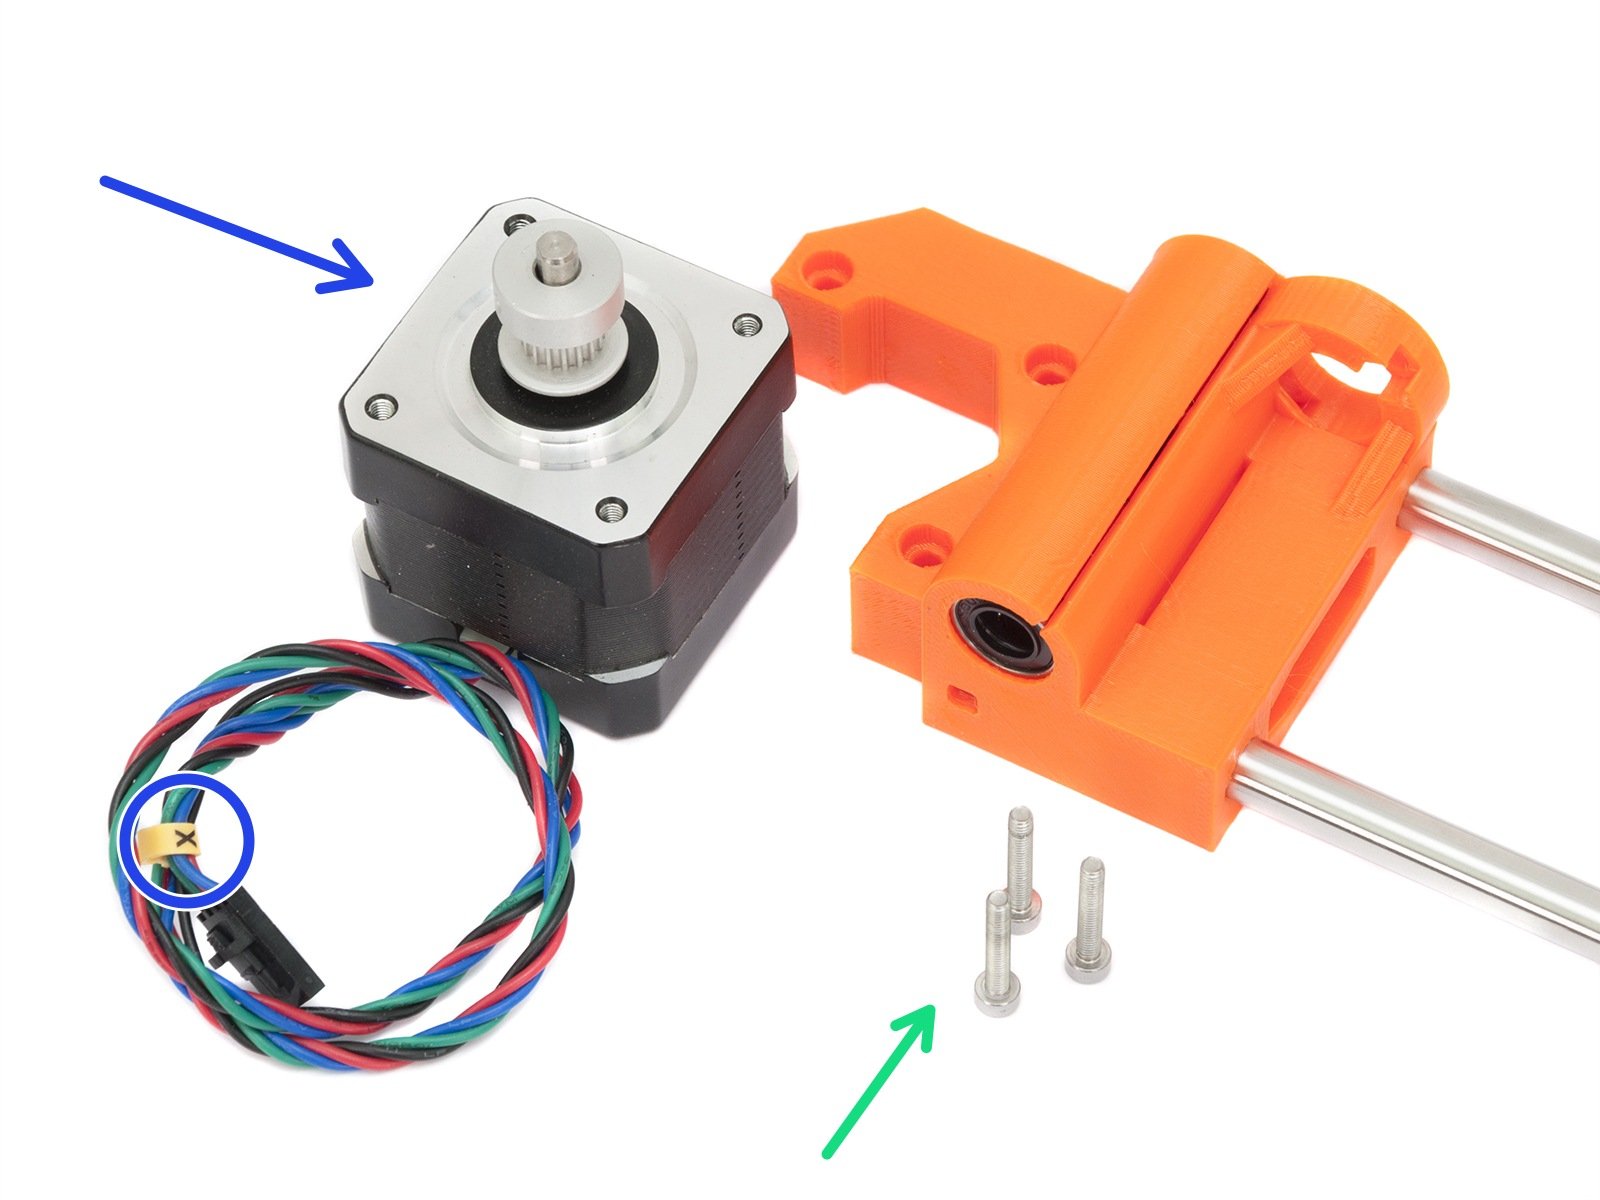
This part adds an actuator for the X-axis end-stop which is missing from the Mk3-style extruders. The actuator also includes a fan cover similar to this one.
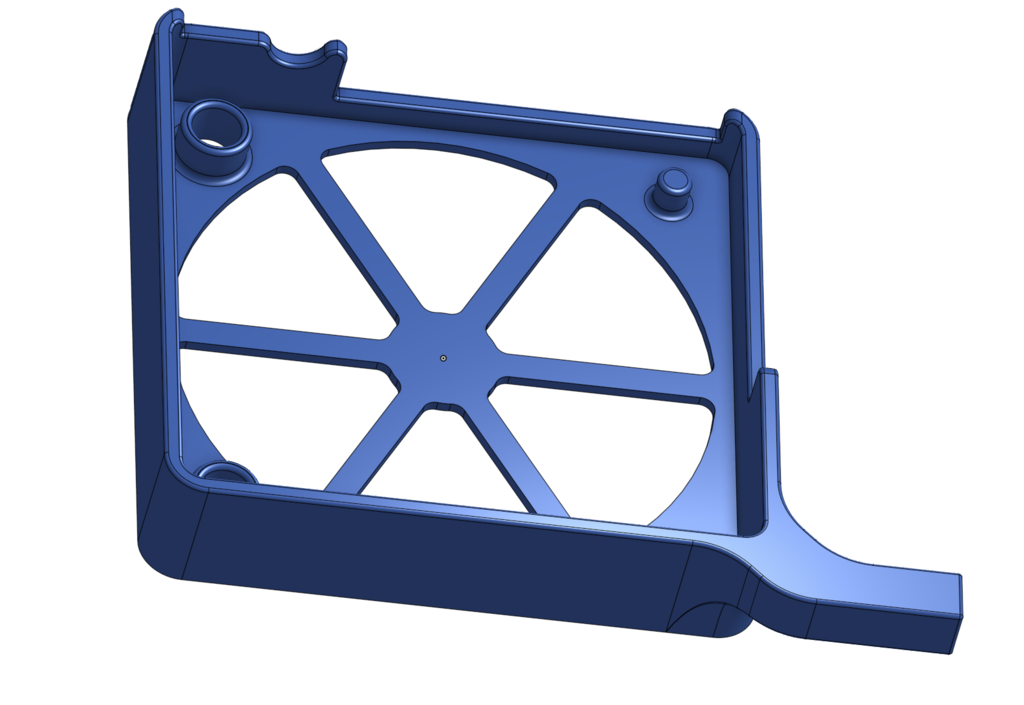
You will need a 25mm M3 bolt (bottom position) and one 16mm or 18mm bolt (upper position) to hold the part in place. Other than this, you'll need to do the Prusa Mk3S+ extruder conversion:
- Mk3S+ extruder parts
- 42.3mm PTFE liner (you can trim your old one if it is in good shape)
- Assembly instructions
Mk2.5 folks will also need the new filament sensor parts (Pay attention to this comment regarding re-pinning the cable)
Best Answer by Kenour:
Yeah, it's absolutely 100% compatible. If you print all the MK3S+ extruder parts, keep your endstop-block (or print a new one, if you're that way inclined... I totally am), and it's a 1 for 1 completely compatible straight swap.
Just replaced all the bits, finally installed the new part cooling fan and high precision heater cartridge I purchased a while back, and she's printing like a champ.
Now if my 50KG of PETG would hurry up and arrive, I have things to print!
RE: Upgrade your Mk2.5/Mk2.5S to use the new Mk3S+ extruder
Good work. I wanted to take a look at this upgrade too, however, as you said, to much work when everything works fine.
But will probably prefer updading another part, so I do not need to cover the fan. I understand you wanted to hide that "ugly" noctua fan, but mine is nice 😉
Anyhow thank you for confirmation, that the end stop actuator is the only not compatible part. There was some theoretical discussion about it, but have not seen a proof yet.
RE: Upgrade your Mk2.5/Mk2.5S to use the new Mk3S+ extruder
Btw I can still see a screw hole in the MK3S+ x-carriage part. So why just not to connect the endstop-block as it was for MK2.5S from the begining? You should have one from the disassembled extruder, so maybe you could be volunteer to test it 😉
RE: Upgrade your Mk2.5/Mk2.5S to use the new Mk3S+ extruder
@milos-v
You could augment the Mk3S+ x-carriage to provide the same end-stop actuation function as my part. Or re-use and modify the old Mk2.5S x-carriage part. As is, I don't think the Mk2.5S x-carriage parts are 100% compatible with the Mk3S+ extruder. There are some subtle changes in bolt locations from what I can tell.
In my case I wanted to use all 100% Prusa parts and just add another part instead of augmenting their parts and the purpose of the fan cover isn't to hide the Noctua, but to prevent my fingers from getting in there by accident 🙂

RE: Upgrade your Mk2.5/Mk2.5S to use the new Mk3S+ extruder
Well the Mk2.5S+ has been running flawlessly for 1 month and has printed about 6 rolls of PLA with no filament jams or X-axis crashes.
With this confidence, I just converted another of my Mk2.5 printers to Mk2.5S+ today mainly to correct some minor sagging of the extruder parts near the heater but also for the refined filament path of the S+-style extruder which should be more forgiving with respect to retraction settings for various filaments.
I also switched both to use this fan duct for more even part cooling: https://www.thingiverse.com/thing:4588226
Absolutely!
Excellent, was just about to do this myself. I've been having a few issues lately with my 2.5S, and decided this is the way to go... A little disappointed Prusa aren't still rolling out the MK3 upgrades to the MK2. All they would need is a screw hole in the right place, and an extra part for the x-axis end stop.
I don't care how old it is, it's still a very functional machine, but could definitely benefit from the MK3's upgrades for very little effort. If you're still going to sell new parts for it (SUPER PINDA), then you should at least provided ongoing part updates. It's not my fault you built these things to last!
Pretty please... looove you! 😘
Since this was posted, has there been any updates for actuating the end stop besides the fan shroud option? Would rather a pretty clean integrated solution, if it exists. I'm a very stock boi!
Err...
Hold up... On closer inspection the hole for the endstop-block still seems to be there on my MK3S+... It seems I just need to print another one for the MK2.5S? Am I missing something? 🤷♂️
endstop-block
That was my question half year ago 🙂
But have had no time to try yet.
Re: endstop-block
That was my question half year ago 🙂
But have had no time to try yet.
Yeah... I just saw that! Mine is being a jerk, printing parts now on my MK3, will post pics when done.
I do want to change all the x axis components too, but will obviously need some way of attaching the switch.
x-end-motor
Surely someone has edited the MK3S+ x-end-motor to be able to attach the MK2.5S switch?
I just started looking into how to do it, and scad and step and meh and bed... UGH! Why so hard.
RE: add block
Maybe the hole at the bottom left will work to add a block to actuate the switch? I bet you can just use a single M3x16mm bolt.
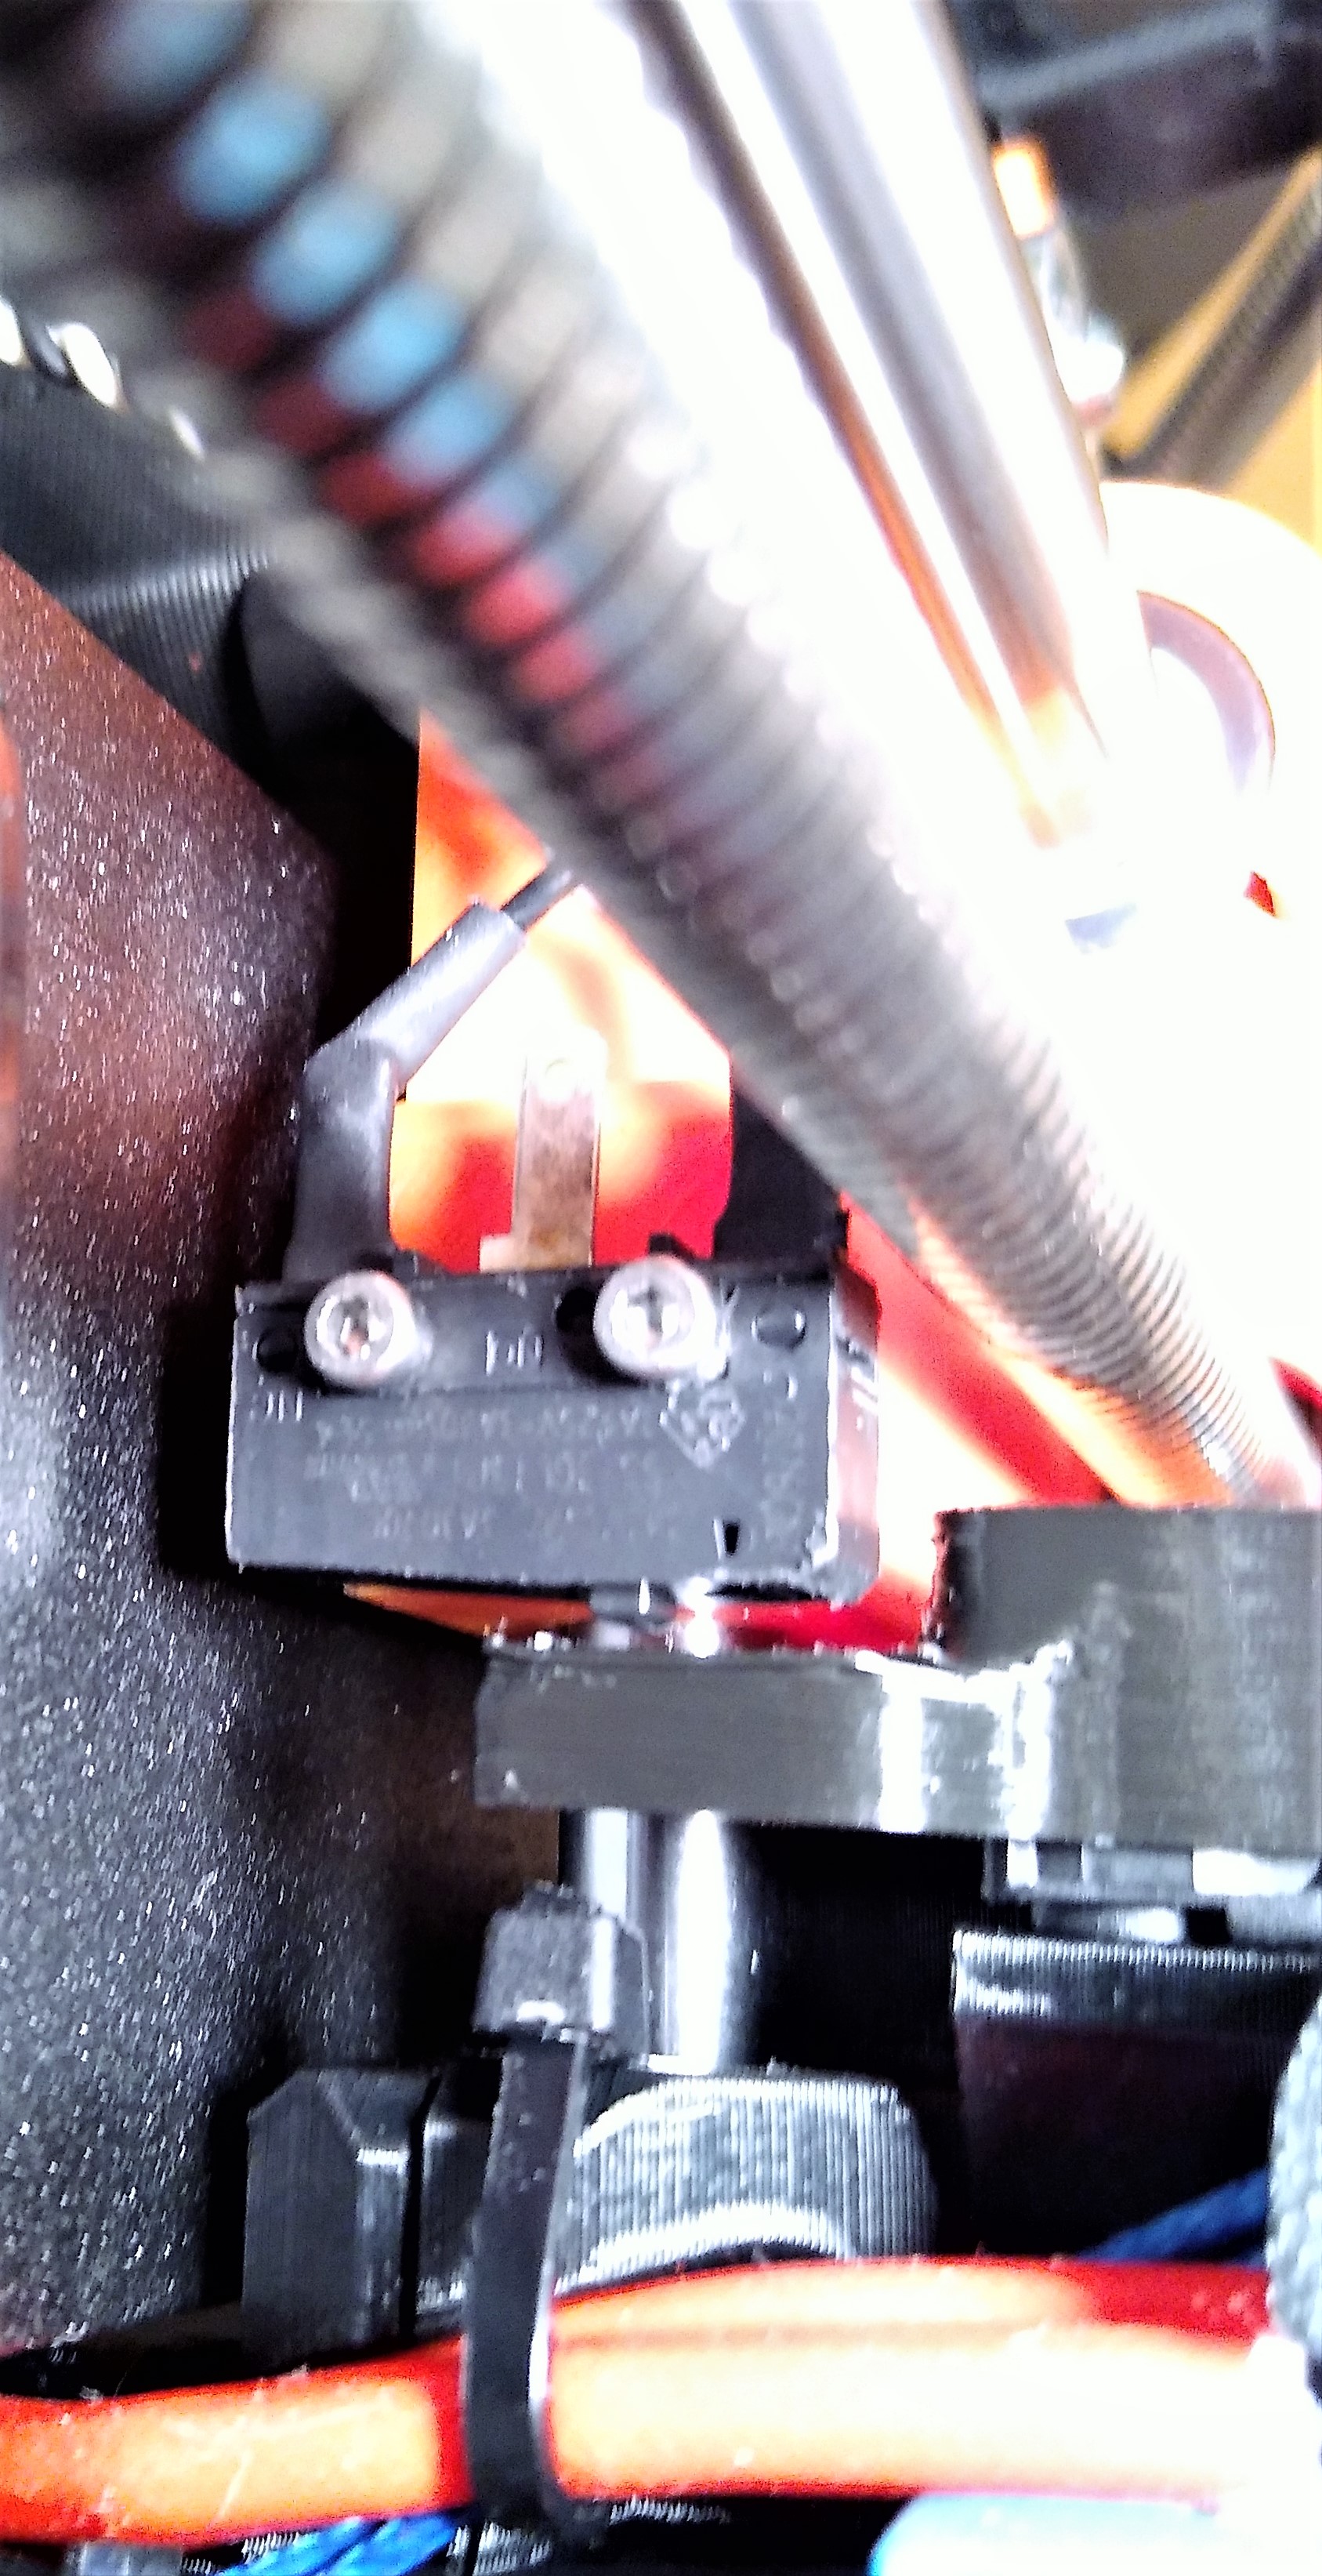
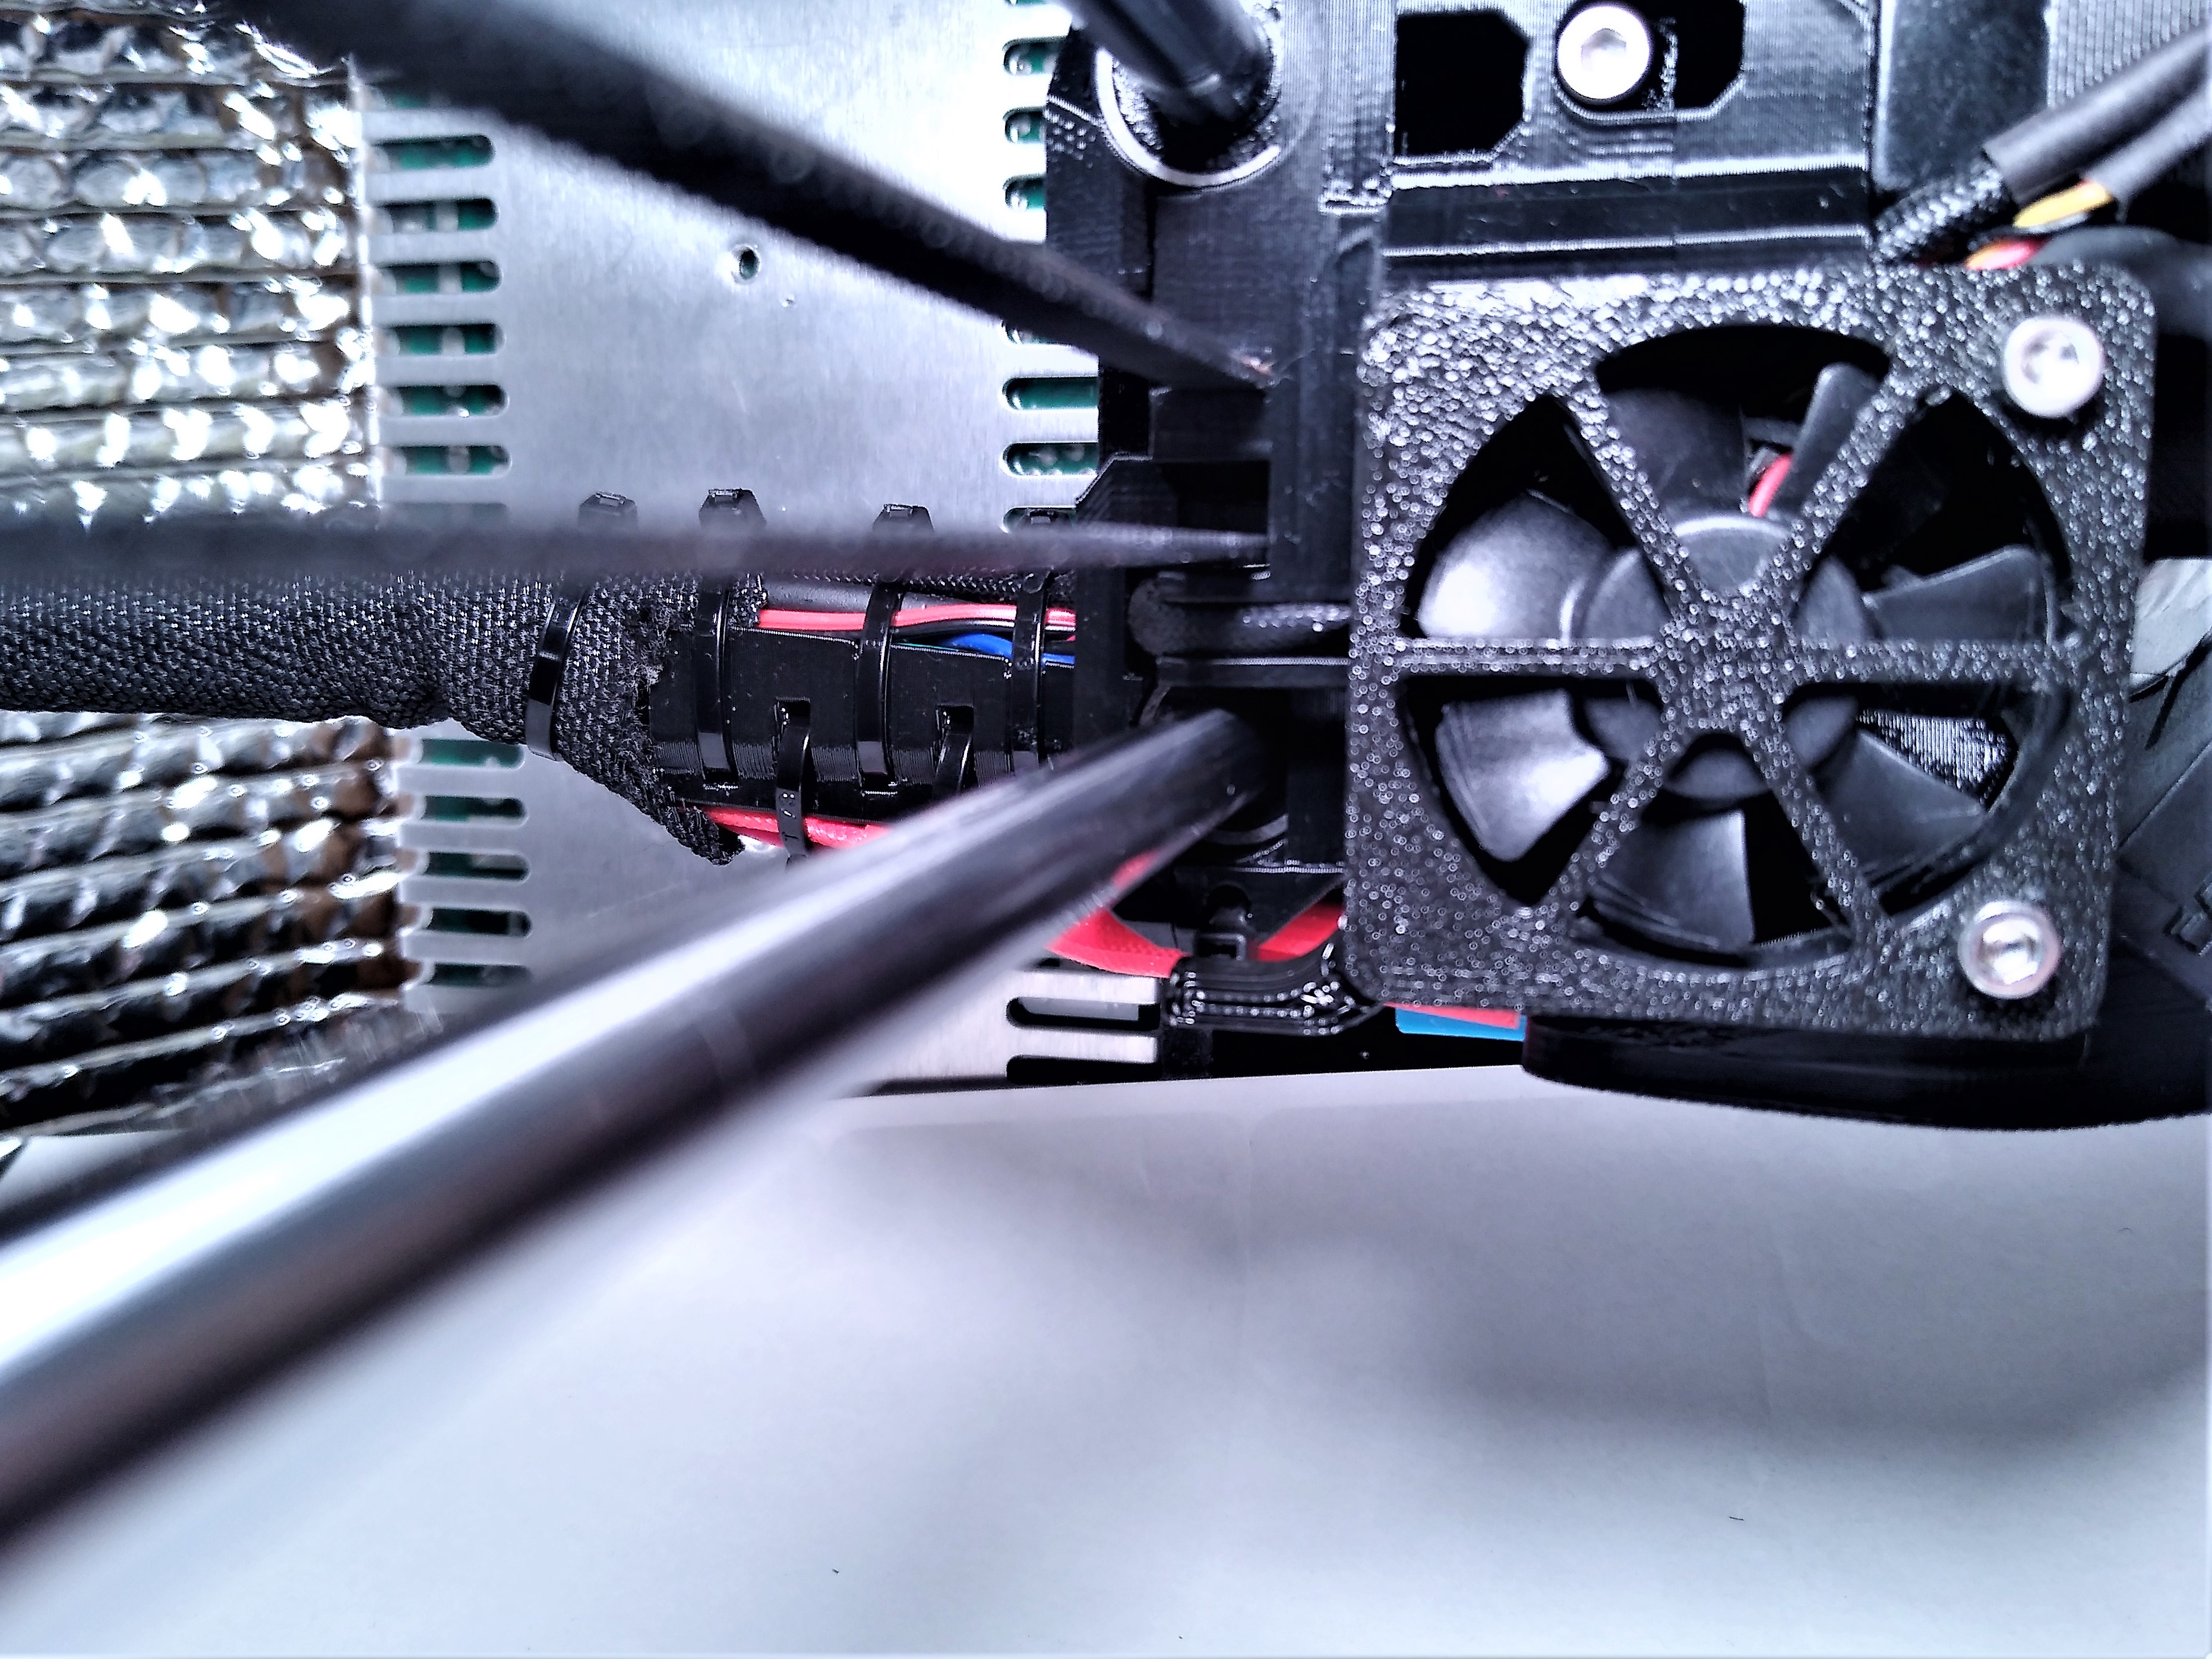
But I prefer to use that hole to zip-tie the heater wires up tighter to the carriage.
As for fastening the switch the X-motor I think just re-using the Mk2.5 part is the best approach. There is little benefit to swapping that out to the Mk3 style - it really isn't any stiffer. But you can re-slice it to make the region where the switch would go to be solid, then use a 1/16" drill bit to add holes to accept the M2 screws to hold the switch in place.
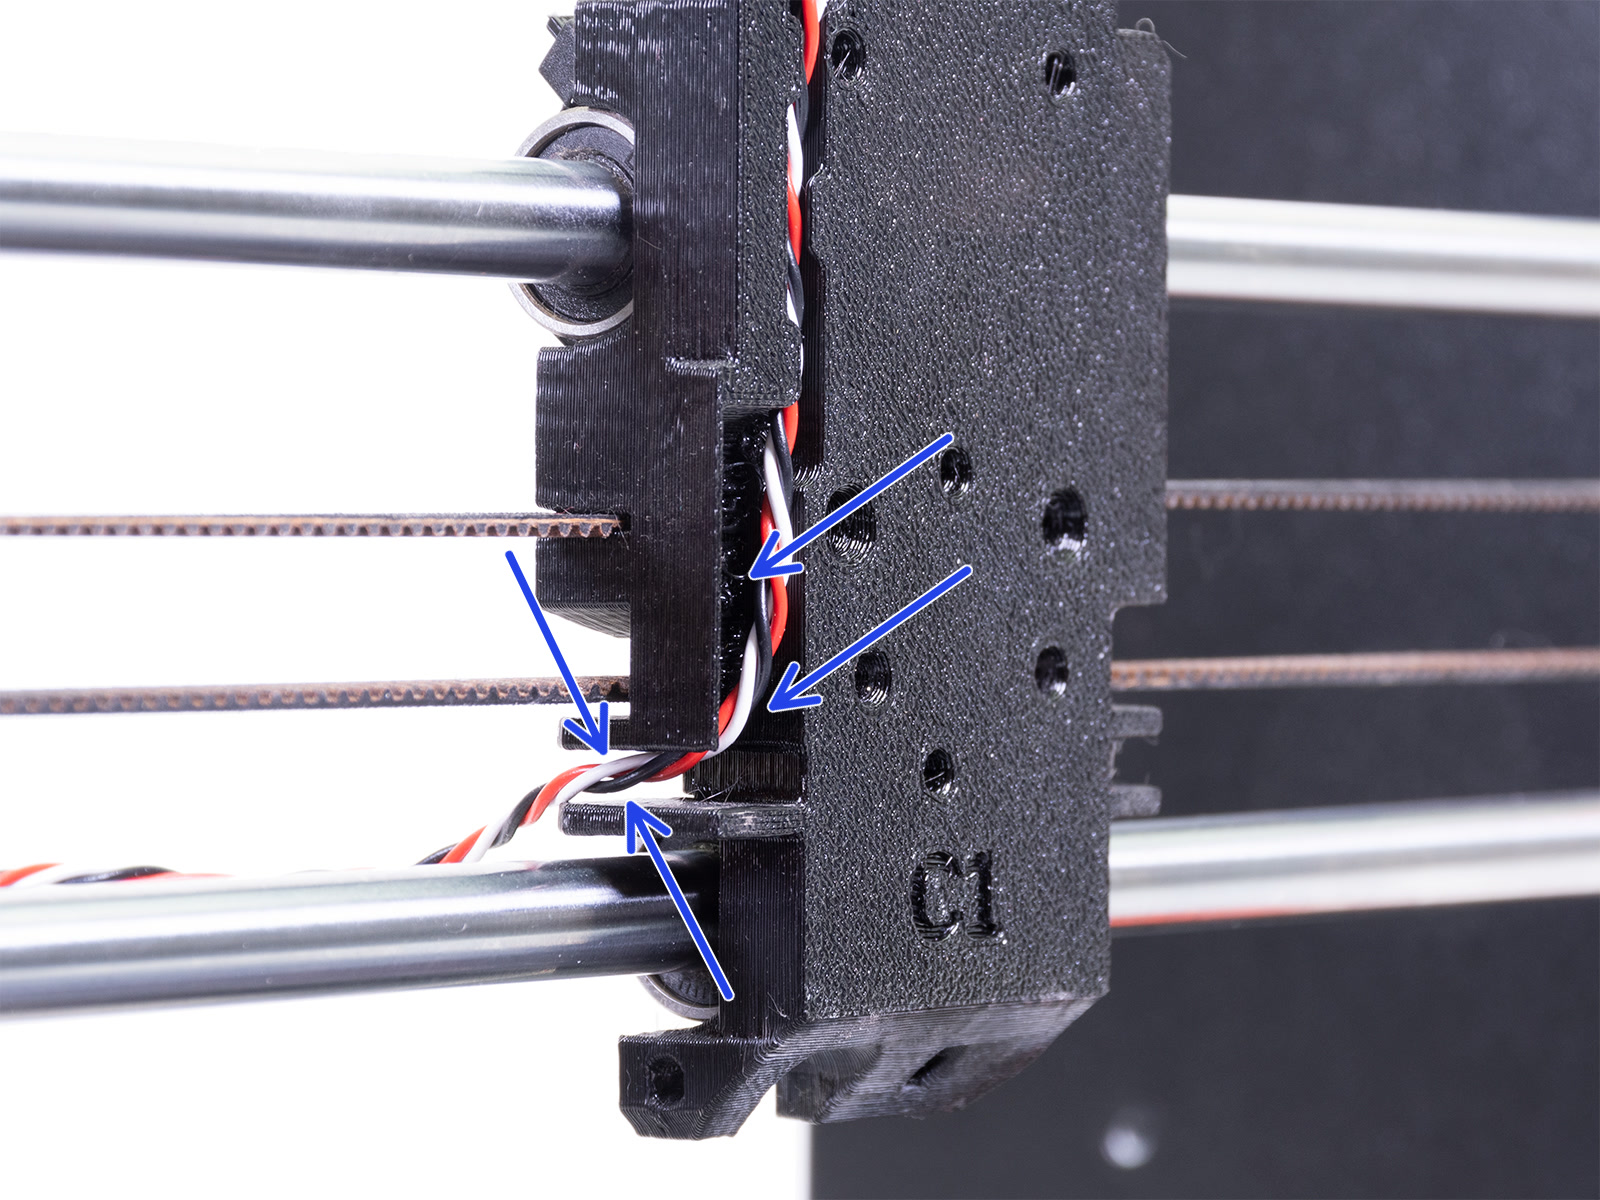
RE: drill holes to accept end-stop switch - print with increased density in this spot (green arrow)
Mk3s+ X axis motor end with limit switch
I was thinking about adding a limit switch to a Mk3s+ x-axis end. So I chopped up the originals and merged them together.
I have not yet tried to use it, but here it is on Thingiverse:
https://www.thingiverse.com/thing:4944769
Good luck!
¡no entiendo Español!
Nein! Nicht Versteh!
Я немного говорю по-руÑÑки но не очень хорошо, и...
I'm not very good at English either! Maybe someday I'll find a language I'm good at?
RE: endstop-block
Yeah, it's absolutely 100% compatible. If you print all the MK3S+ extruder parts, keep your endstop-block (or print a new one, if you're that way inclined... I totally am), and it's a 1 for 1 completely compatible straight swap.
Just replaced all the bits, finally installed the new part cooling fan and high precision heater cartridge I purchased a while back, and she's printing like a champ.
Now if my 50KG of PETG would hurry up and arrive, I have things to print!
thank you
Thank you Kenour for trying and sharing with us. Will print the new one once have some time. But I will keep it as a spare till something goes wrong and there is a reason for the disassembly and replacement.
Well poop!!!
After all that my original issue has not been solved. Getting Jammed! UGH!
First small print looked pretty good, then decided to print something bigger, bloody thing got jammed and filament squirting out above the heat block again, every though I tightened down everything good and proper. Over it!
Heat Block leakage past threads
Hi Kenour
An E3D Hotend is a pain to assemble!
It is not only necessary to tighten the nozzle to the block, but also the heatbreak to the block and to the heatsink. This is made unnecessarily difficult because both the heatbreak and the heatsink are smooth and not easily gripped. The extruder does grip the heatsink but it is only plastic gripping a smooth surface at the top of the heatsink and can spin. This can easily lead to the nozzle being bottomed out against the heater block and the heatbreak being loose in the upper end of the heater block, allowing filament to squirt out past the threads.
here is how I used to deal with this before I switched to a Mosquito hotend, largely because of this issue.
1- Increase the "grip" of the groovemout at the top of the heatsink by wrapping the groove in a layer of heat-resistant tape. This will make it less likely to spin while tightening the nozzle. If it spins, it can cause the heatbreak to back out of the heater block while tightening the nozzle.
2- When tightening the nozzle, it should not "bottom out" against the heater block, but rather against the heat break, which threads in from the top and can only be prevented from turning by holding the heatsink. The nozzle should protrude slightly from the heater block when fully tightened. This provides a seal between the bottom edge of the heatbreak and the top edge of the nozzle, so no filament can leak past the threads. It need not be extremely tight, maybe 2Nm.
This whole procedure leads to what I call E3D Nozzle Change Dread!
Good luck!
¡no entiendo Español!
Nein! Nicht Versteh!
Я немного говорю по-руÑÑки но не очень хорошо, и...
I'm not very good at English either! Maybe someday I'll find a language I'm good at?
Gape!
Yeah I always leave a gap between the nozzle and the block, about 1mm or so.
I have it tight enough so it shouldn't be able to leak, definitely getting some squeeze out between the block and the break, not the break and the sink though. Ugh!
RE: Odd.... it should have worked!
Yeah I always leave a gap between the nozzle and the block, about 1mm or so.
I have it tight enough so it shouldn't be able to leak, definitely getting some squeeze out between the block and the break, not the break and the sink though. Ugh!
Odd, it sounds like it should have worked ok. The E3D is a pain to assemble but normally works well. I only had the filament leaking past threads the first time I assembled one. Maybe the mating surfaces of the heatbreak-to-nozzle are damaged or dirty?
By the way, I heartily recommend the Slice Engineering Mosquito hotend running on the (free to download) modified Prusa extruder on Slices' website. They also sell a small torque wrench for tightening nozzles which works perfectly every time. One-handed 15 second cold or hot nozzle changes are great!
Sure, it's double the cost of an E3D but it's totally worth it. It even uses my E3D nozzles, heaters and thermistors with no issues whatever.
¡no entiendo Español!
Nein! Nicht Versteh!
Я немного говорю по-руÑÑки но не очень хорошо, и...
I'm not very good at English either! Maybe someday I'll find a language I'm good at?
Other bits.
Ok, so it's running the latest extruder files from the MK3S+ and have just replaced the z and x axis bits with the latest files apart from the modified end motor bit to accommodate the micro switch. Test cube printed will, you wouldn't pick it for a MK2 except for the noise. UGH!
NOTE!!! I almost forgot to mention, if you're going to attempt this, the belt really needs to be loosened at least a notch. It's pretty tight, and at the limit of it's adjustment range. I like it a little looser than it currently is, and at the moment there's zero adjustment. So while it's in pieces, take the opportunity to adjust the belt. Or don't, at your peril.