Heat Bed Best Wiring Practices
With our beloved Prusa MK2 - MK2.5S comes a tendency that is less common on the MK3 and newer printers... Heated Bed wiring troubles!
This is because the older MK2 series printers ran at 12 volts, necessitating 12.5 amperes (amps) of current (for the MK52 12v bed). The MK 3 printers use 24 volt systems which use half the current for the same amount of heat and therefore are less susceptible to wiring troubles.
The thing with electricity is that the current is what determines the thickness of wire needed and the integrity of connections. The wiring on our MK2 printers is not terrible, but is a little thin and the single width crimps on the eyelets a little small for a long-term high current draw.... particularly on a constantly moving wire such as for the heated bed. We can do much better, and fortunately for relatively modest cost.
This was made apparent to me after checking over my MK2.5S after a recent 12 hour print. Things had not deteriorated to the point of causing the system to detect lack of correct heating, but it must have been getting close. It had been taking the heat bed a long time to warm up recently.
Look! The heat bed terminal cover has melted. The bolts were tight and the bed undamaged, but the apparent cause of the overheating was at the crimps where the wire joins the terminals. The wire insulation was partially melted for about 2cm. New wiring was called for.

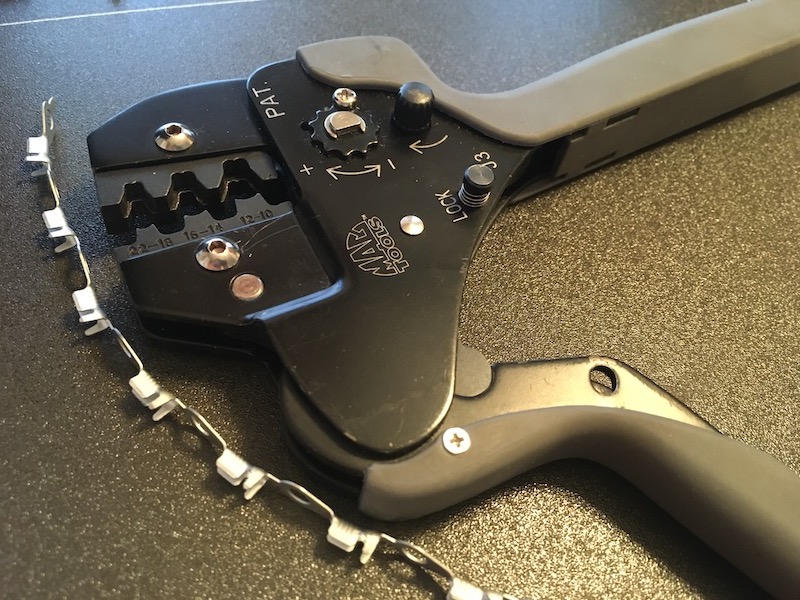
So, I sourced some 2.5mm / 14ga extremely flexible wire with high temperature silicone insulation and some properly designed crimp terminals. I already had an appropriate crimping tool and the appropriate dies. Fortunately for you, an adequate tool of similar design can be bought much cheaper than mine cost years ago.
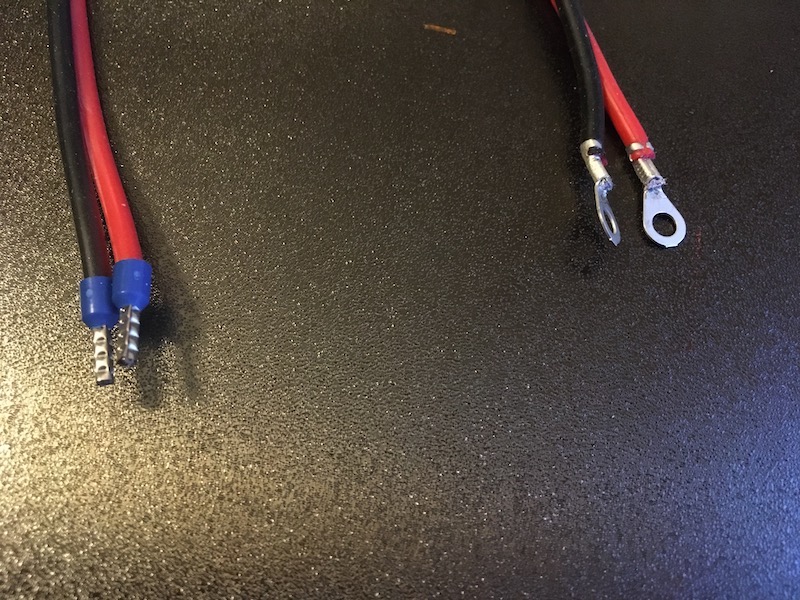
The new Heatbed cable with well-terminated ends. The ferrules at the MiniRAMBO end are also inexpensive, as well as the tool for crimping them. Notice the length of the crimped area... a much longer and tighter crimp that the originals. This is the style of crimps used in an automotive environment for maximum reliability.
The new cable in place at the bed. New nylock nuts are on the bottom, to reduce chance of loosening. A new strain relief cover printed from ASA and the heatbed is better than new.
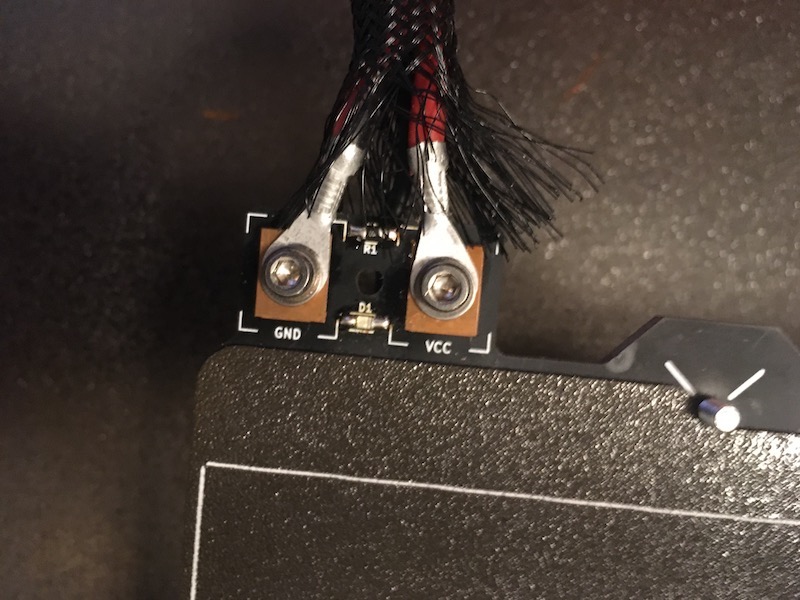
While I had things apart, I created a new harness from the Power Supply to the RAMBO, essentially just two more 2.5mm / 14ga. identical cables about 50cm long with properly crimped eyelets at the PSU end and ferrules at the RAMBO end. Be certain of polarity with these wires, a wrong connection will damage the RAMBO and maybe the PSU. The original wiring seemed OK, but a little thin for the heatbed. By the way, the MiniRAMBO uses a dedicated wire pair just for the heatbed, that's why there are a total of 4 wires from PSU to RAMBO.
All together and it works great! The heatbed warms up as quick as ever now and the heatbed cable stays cool. A thing to consider is that the heatbed draws its maximum current of 12.5 amps when cold. As the bed warms up, the resistance rises and the current will drop a bit. Also, once the target temperature is met, the RAMBO rapidly pulses the current to maintain temperature, reducing the total current. so the long-term current draw will be less than the 12.5 amps maximum. Unless of course you have the temperature cranked way up in a cold room!
It is a good idea to check the tightness of the wire connections at least once a year, and preferably before embarking upon an extremely long unattended print. This means checking the eyelets at the PSU and Heatbed and all 8 setscrews at the MiniRAMBO for the power connections, the heatbed and extruder heater. Any loose connection will generate heat and possibly damage the terminals, wiring, PSU or MiniRAMBO. It can even cause a fire.
This is how I found my heatbed fault, BEFORE it snowballed into a disaster.
Happy Printing!
¡no entiendo Español!
Nein! Nicht Versteh!
Я немного говорю по-руÑÑки но не очень хорошо, и...
I'm not very good at English either! Maybe someday I'll find a language I'm good at?
RE: Heat Bed Best Wiring Practices
I had a similar issue, aslo with plastic melted.
so i went directly on PC Blend to print the new part and "upgraded" to this version with a better cable support.
I'm not an expert. Ma parlo anche italiano 😉
RE: Heat Bed Best Wiring Practices
Thank you! This is exactly what I was looking for after my heat-bed cable broke. I'm a bit of a noob at electronics, so I was wondering where you bought the ferrules and eyelet connectors. Also, do you need a specialized tool in order to crimp the ferrules? I only have a basic crimper. Thank you again for your documentation. Really been helpful!
RE: Heat Bed Best Wiring Practices
@darrellm
All of the above is available on Amazon.
The ferrules have their own special crimper, which crimps the ferrule into a square shape. This gives the best contact for the setscrews at the MiniRambo terminals. Both the ferrules and crimper are cheap on Amazon. You can get a crimper and assortment of ferrules for under $30.
The eyelets I used and highly recommend are known as "Open Barrel" The crimping tool must have appropriate dies for them.
The 14ga flexible dual-conductor silicone insulated wire, the 14ga open barrel eyelets and the crimping tool to match are all on Amazon, though I don't like the look of Amazon terminals. (they might be fine) I bought my terminals from Digi-Key.
I used a Mac Tools crimper. The Iwiss brand from Amazon is about 1/10th the cost and can probably do an adequate job. The Open-Barrel terminal crimp is the best for high current with heat, motion and vibration. It is widely used on cars from the factory. The common yellow, blue and red (closed) barrel connectors with a single-width crimp are vastly inferior.
¡no entiendo Español!
Nein! Nicht Versteh!
Я немного говорю по-руÑÑки но не очень хорошо, и...
I'm not very good at English either! Maybe someday I'll find a language I'm good at?
RE: Heat Bed Best Wiring Practices
Thank you! This is exactly what I was looking for after my heat-bed cable broke. I'm a bit of a noob at electronics, so I was wondering where you bought the ferrules and eyelet connectors. Also, do you need a specialized tool in order to crimp the ferrules? I only have a basic crimper. Thank you again for your documentation. Really been helpful!
I put together some lists for tools and supplies to upgrade or fix our 12v Heatbed and Power Supply wiring. Those with 24v systems could use thinner wire.
Here is an Amazon list. https://www.amazon.com/hz/wishlist/ls/3FM4JWFH0VY1K?ref_=wl_share
It contains:
1- the Ferrule crimper and ferrules I used. They seem to work well.
2- The 14ga / 2.5㎟ dual-conductor silicone insulated extremely flexible wire I used. It seems to work well.
3- A crimping tool that looks adequate for crimping 14ga open barrel connectors.
Unfortunately, I didn't see any terminals that looked adequate on Amazon, so here is a link to the ring terminals I used at the heatbed:
https://www.digikey.com/en/products/detail/te-connectivity-amp-connectors/60770-2/665775
And the forked spade terminals at the Power Supply end:
https://www.digikey.com/en/products/detail/te-connectivity-amp-connectors/60725-1/665804
Happy Printing!
¡no entiendo Español!
Nein! Nicht Versteh!
Я немного говорю по-руÑÑки но не очень хорошо, и...
I'm not very good at English either! Maybe someday I'll find a language I'm good at?
RE: Heat Bed Best Wiring Practices
@chicago-keri
Thank you very much for your help. I really appreciate it. As an electrical newbie, I was quite lost on where to source parts. This thread has been a massive help. Thanks again!