Adjust correctly the Z height for the nozzle
Hi,
looking at the First layer calibration 6.3.9 in the manual, using the V2calibration.gcode, is not so easy to find out the right Z height of the nozzle, because the filament deposited on the bed is very thin.
It's difficult to tell which one of the cases in Pict. 8 - How to tune the nozzle height live during the test print is applying, except for those on the extremities.
I used Live adjust Z and set the height to about -0.350 mm, that seems for me to be acceptable.
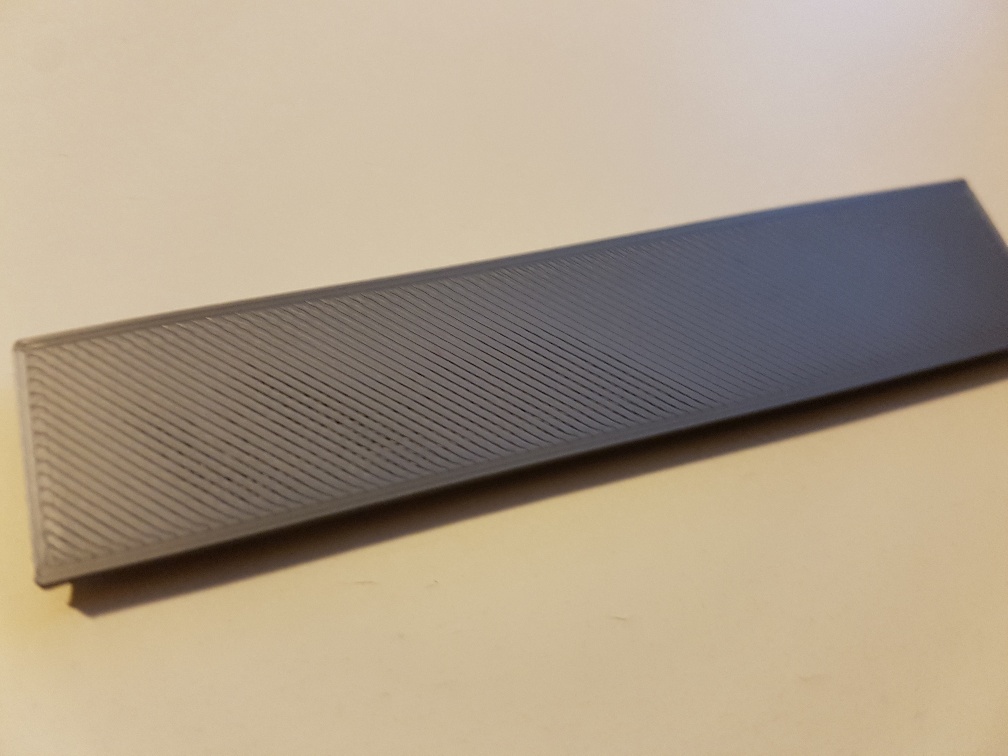
But later, printing the Prusa logo, during the first layer, I gave a look at the printed surface and I saw that there was a distance between the single strings building the surface (see left side of the picture).
I changed the height to about -0.400 mm and then the single strings were more or less touching each other, giving at the end of the print a very smooth bottom surface (see right side of the picture).
- How should be the right setting for the Z height of the nozzle?
The first layer is pressed against the flat bed, but the following layers are only deposited above the preceding layers.
- Does this also to be considered, determining the Z height of the nozzle?
Re: Adjust correctly the Z height for the nozzle
Please read the thread "Life Adjust Z - My Way" over in the Calibration section.
Any advices given are offered in good faith. It is your responsibility to ensure that by following my advice you do not suffer or cause injury, damage or loss. If you solve your problem, please post the solution…
Re: Adjust correctly the Z height for the nozzle
I've learned it's best to adjust the live-Z EVERY time. Maybe it's just my printer but I usually need to make at least minor adjustments with each print. I suspect it's due to temperature variations but I don't know for sure. All I know is it's made a big difference in the quality of my first layer. My method:
I wait for the 9-point calibration to almost finish then I get ready to do the live-Z. As the printer is laying down the perimeter I adjust the live-Z. If I'm too slow or don't get it right and my print starts out crappy (either gappy or too squished), I just abort the print and start over. You can always add additional perimeters to give you more time before your actual print but it only takes seconds to adjust the Z (assuming you turn the knob the correct direction.)
Good luck.
Re: Adjust correctly the Z height for the nozzle
It's still a good question... unless i have some type of microscope, I can't tell what my bead look like compared to the diagrams in the manual. Those diagrams are pretty useless.
Also, cannot find "Life Adjust Z - My Way" over in the Calibration section. A link would be helpful.
------------------------------------------
Prusa I3 MK3S
Re: Adjust correctly the Z height for the nozzle
Here you go.
Also, cannot find "Life Adjust Z - My Way" over in the Calibration section. A link would be helpful.
