Printing Prusa plastic parts and PETG in general
How do you print plastic parts for printers from PETG? There are instructions to print those 0.200 layer height, 20% infill of grid type. But how many perimeters, top and bottom layers?
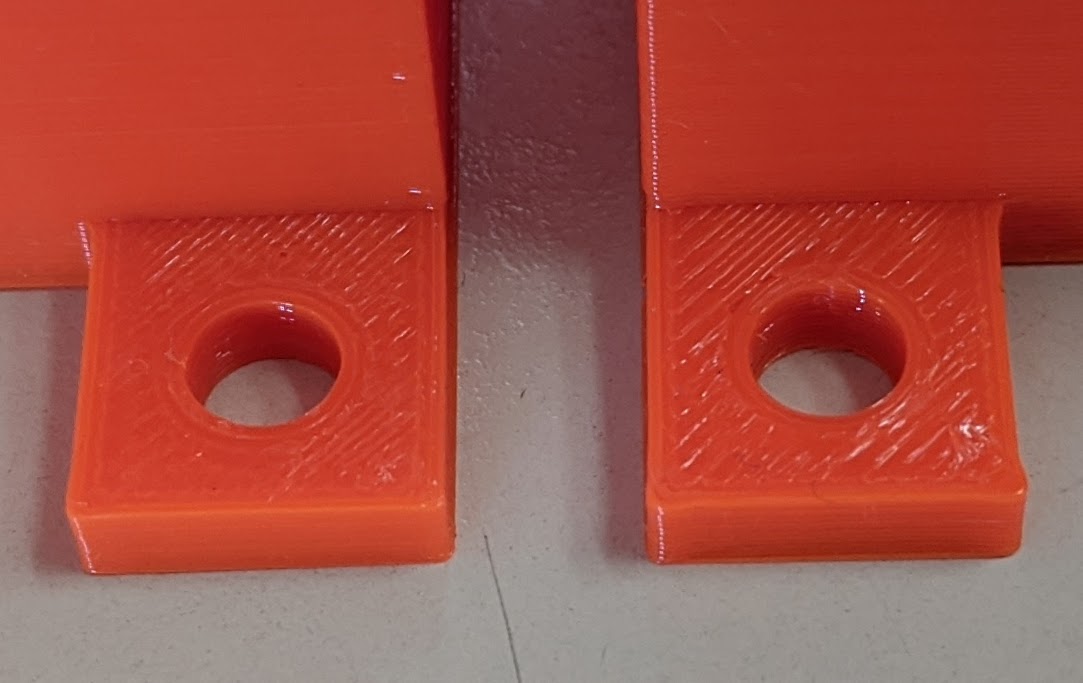
I'd also like to tap onto knowledge of people with more experience in printing PETG. I tried it over the weekend, my first attempts with smaller prints jammed (and filament wrapped around extruder gear, t'was fun to remove). After cleaning filament and drying printer it was successful, but I am not happy with surface finish. There are gaps between perimeters and fill, especially around edges, holes and corners.
I read around that this happens with PETG, but I am not sure how to improve it. I read increasing flow rate or layer width is not recommended for PETG, people decrease it. I was printing at 4 perimeters, could it be that the object geometry just does not match? Or I am missing some setting in slicer to help with this? I look into original printer parts and they look better on top surface.
BTW where is "detect thin walls" option, I must be blind because I don't seem to be able to find it.
Printed as Prusament PETG MINI profile, 0.200 mm height, 20% grid infill, all else is default (245/85 first layer, 250/90 other layers, 25-40 mm/s speed, 80 mm/s infil speed, 25% infill overlap, fan 30-50%). Printer settings also left as default for MINI.
I have also found when unloading filament that extruder idler pressure was probably too high - hobbed gear left considerably deep marks on filament as it was going through. I am not able to recognize it that's under-extruded for that reason, or "just normal PETG behavior". It's hard to know how to set idler pressure right on MINI, on MK3S there's at least some indicator to have screw head "flush with surface of plastic part" but there's nothing like that on MINI and I am going completely blind.
Below is image with prints where it is visible. Other smaller prints (cable clip, extruder visualizers) look better.

Other than this, I am starting to like the material, it makes nice layers and does not smell. PLA has this typical sweet-ish odor, but this one is completely odorless.
RE: Printing Prusa plastic parts and PETG in general
I've only had my printer a few days and had very good luck with PETG. I loaded the Prusa Slicer Version 2.1.1, grabbed the stl files and selected both the .15mm Quality Mini and .25mm Draft Mini Print Settings presets and Prusament PETG mini Filament preset. The only thing I changed is the retraction to decrease stringing.
Both presets gave good results, with nice looking surfaces.
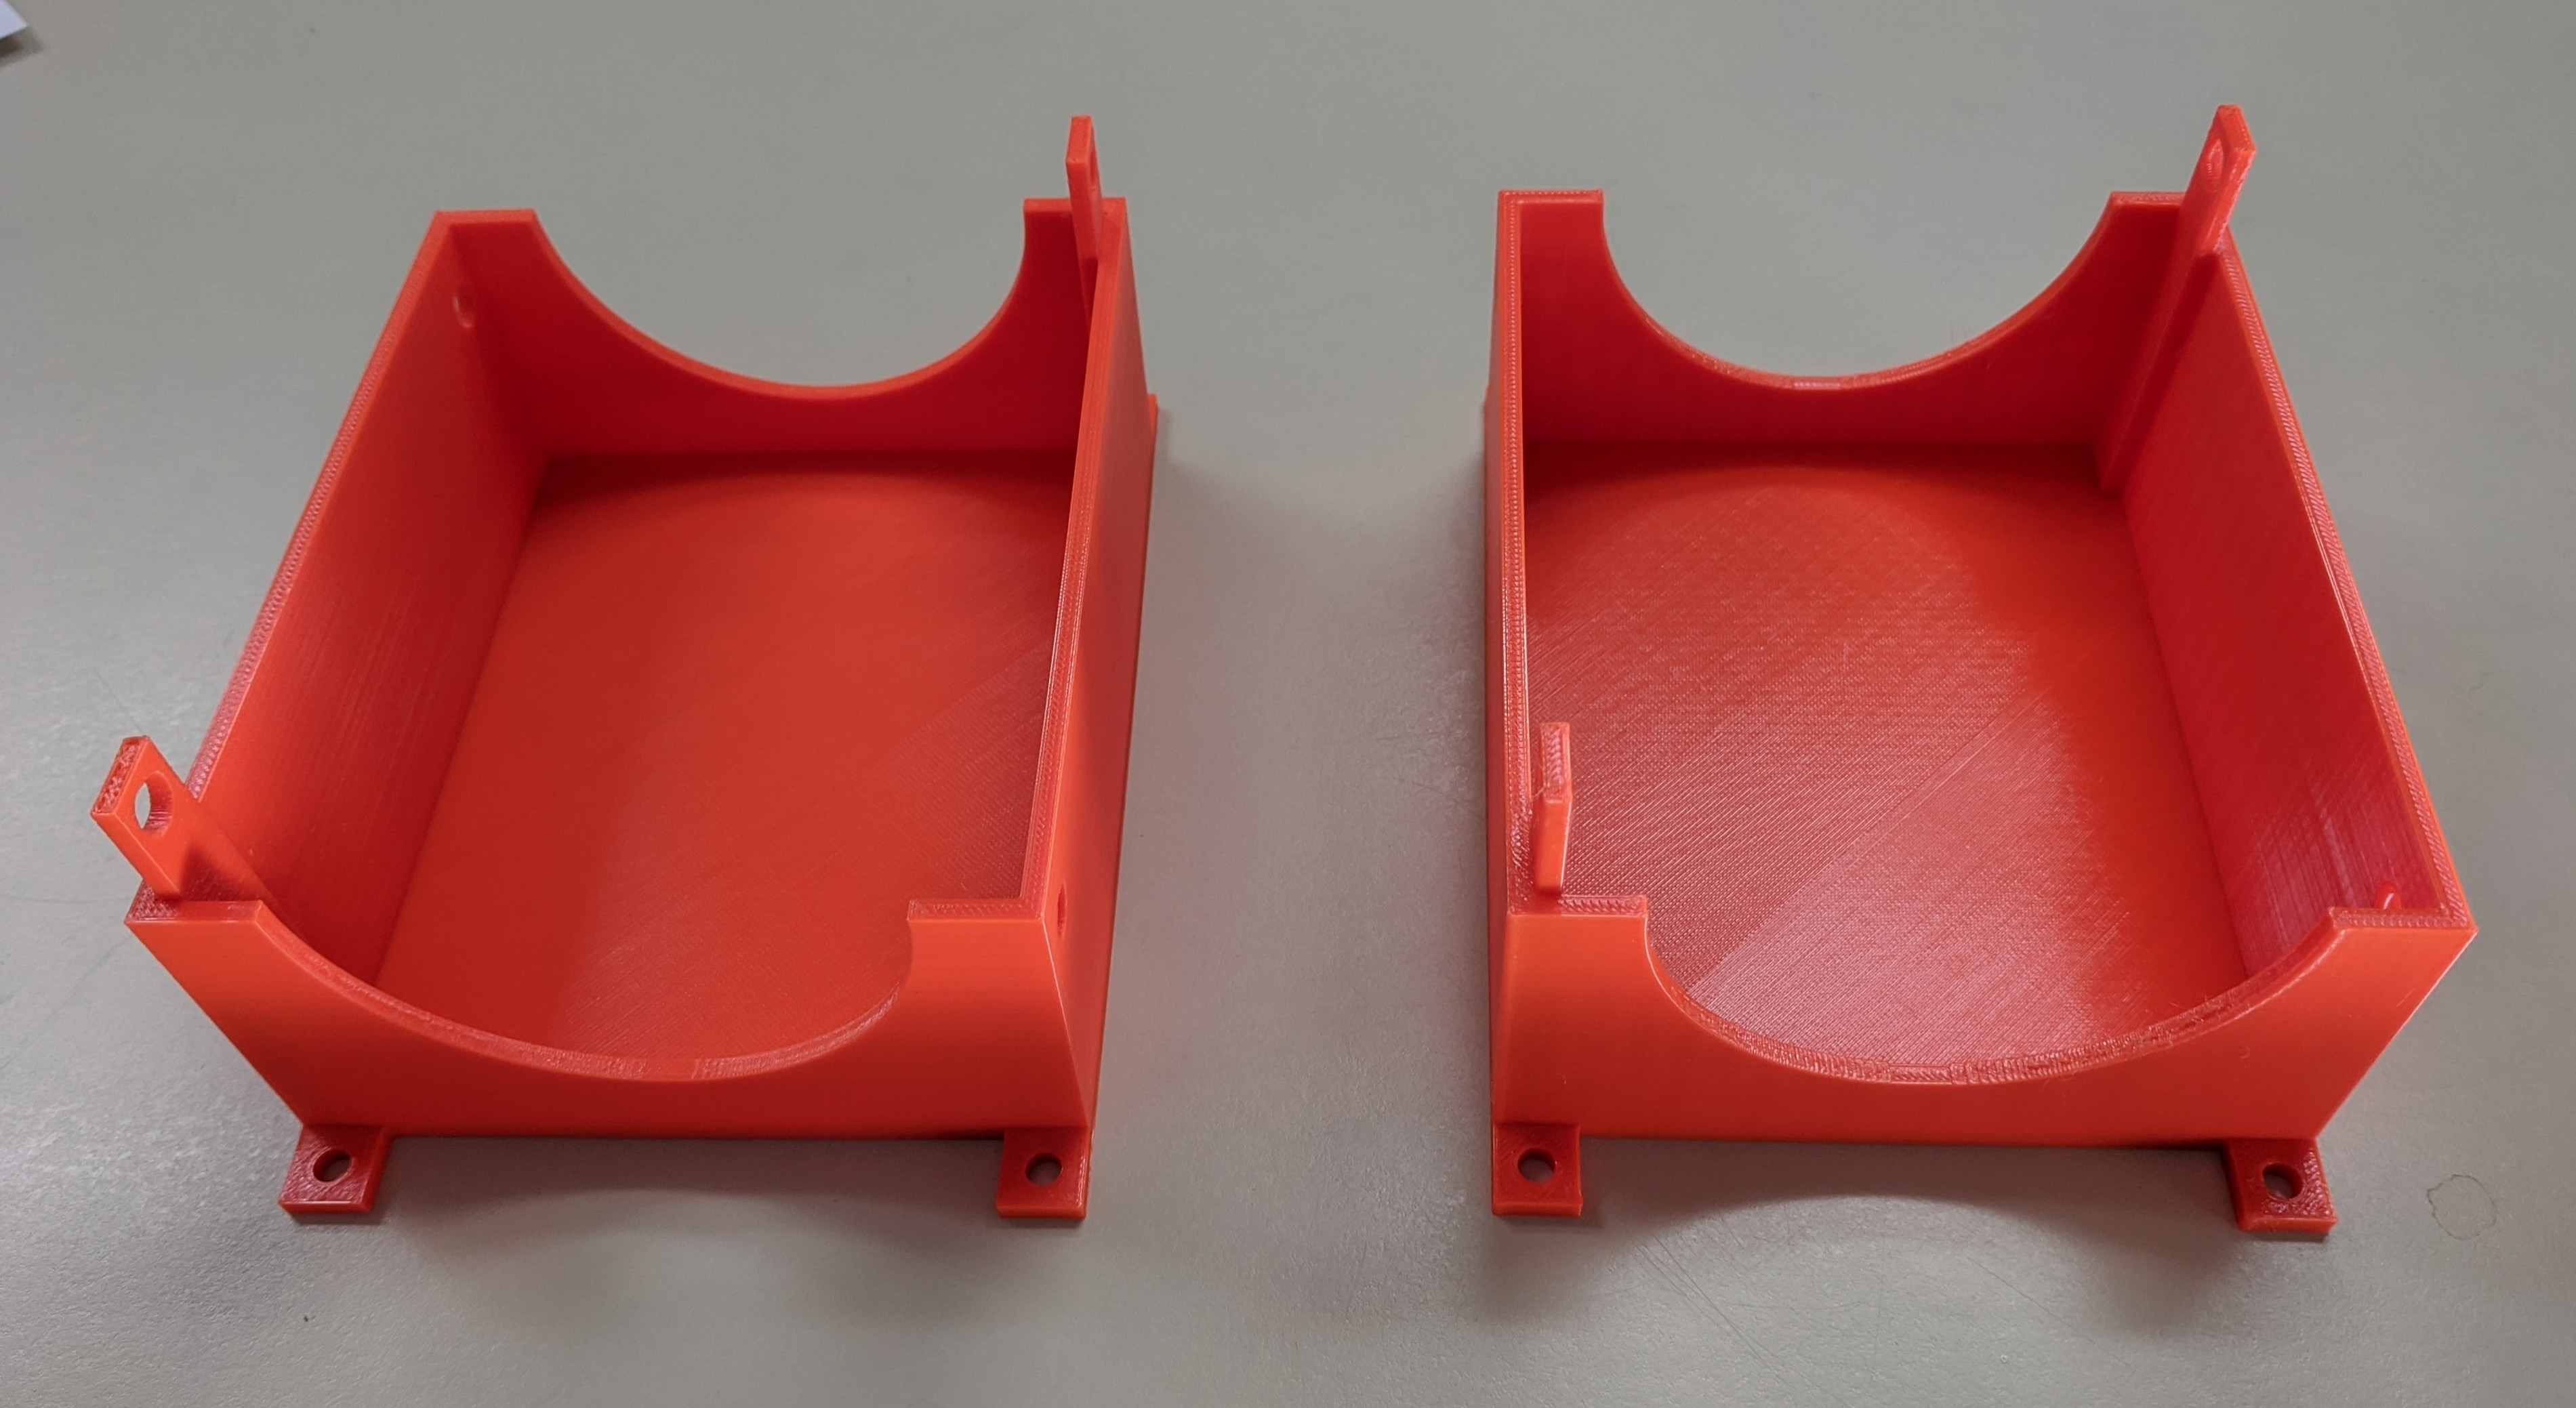
.15mm layer height on the left, .25mm layer height on the right
RE: Printing Prusa plastic parts and PETG in general
... BTW where is "detect thin walls" option, I must be blind because I don't seem to be able to find it. ...
On Slicer 2.2.0 beta you find it on page printer settings ==> quality (slower slicing) ==> detect thin walls
Best regards, Clemens
Mini, i3 MK2.5S, i3 MK4, CClone (Eigenbau)
RE: Printing Prusa plastic parts and PETG in general
@clemens-m
Thanks, I found it there in the end 🙂 it's one of those things that you look directly at yet don't see.
RE: Printing Prusa plastic parts and PETG in general
do you have to redo the first layer calibration when you swithc to PTEG ?
RE: Printing Prusa plastic parts and PETG in general
do you have to redo the first layer calibration when you swithc to PTEG ?
I have to redo the first layer calibration once in a while for any number of reasons. Different filaments is one reason, even different brands of PETG. I found that using the modified G-code found in the discussion at https://github.com/prusa3d/Prusa-Firmware-Buddy/issues/309 reduces the need to calibrate. It is much more consistent.
Regards,
Mark
RE: Printing Prusa plastic parts and PETG in general
@marklgoldberg
Thanks! Does the gcode need to be modified for the Mini ?
RE: Printing Prusa plastic parts and PETG in general
@marklgoldberg
Thanks! Does the gcode need to be modified for the Mini ?
RE: Printing Prusa plastic parts and PETG in general
@marklgoldberg
Thanks! Does the gcode need to be modified for the Mini ?
Yes, I used the G-code in the post by dennisscholing. You enter the modified G-code in the Prusa Slicer.
G90 ; use absolute coordinates
M83 ; extruder relative mode
G28 ; home all
G1 X100 Y100 F4000
G1 Z1.5 F50 ; park position
M104 S170 ; set extruder temp for bed leveling
M140 S[first_layer_bed_temperature] ; set bed temp
M109 R170 ; wait for bed leveling temp
M190 S[first_layer_bed_temperature] ; wait for bed temp
G4 S80; wait 80 secs when heated up
G28 ; home all without mesh bed level
G29 ; mesh bed leveling
M104 S[first_layer_temperature] ; set extruder temp
G92 E0.0
G1 Y-2.0 X179 F2400
G1 Z3 F720
M109 S[first_layer_temperature] ; wait for extruder temp

; intro line
G1 X170 F1000
G1 Z0.2 F720
G1 X110.0 E8.0 F900
G1 X40.0 E10.0 F700
G92 E0.0

M221 S95 ; set flow