Is this a filament issue? Or the known issue with the heatbreak/plastic tube?

Best Answer by bobstro:
[...] I guess I'll also have to fine tune it at .06 at a time like @bobstro said. Recently I have been making changes moving it .50 or so at a time. Maybe that isn't small enough increments to change by.
When in doubt, I start high (Live Z=0 if I'm really unsure) and use the following scale:
- - 0.X is reserved for when the nozzle is too high (Live Z = 0). I move it down until I notice the filament starts to stick. Then I only use the smaller adjustments below.
- +- 0.06mm is a "big" adjustment. I'll see a change in the gaps between extrusions if too high, or the amount of rippling when too low with these moves. These moves get me close.
- +- 0.02mm is a "fine" adjustment. I can't see any effect with a smaller adjustment. Being off by a few notches doesn't usually make much difference.
I'll usually go low past the point where everything closes up by 0.06mm, then work up in 0.02mm increments until the top surface is smooth and even.
If I've made hardware adjustments or am adjusting Live-Z for a new sheet, I'll zero Live-Z and go through this process. Once the "Life Adjust" 75x75x0.2mm square starts printing, the entire process takes 1-2 minutes.
RE: Looks like your Live-Z is just too low
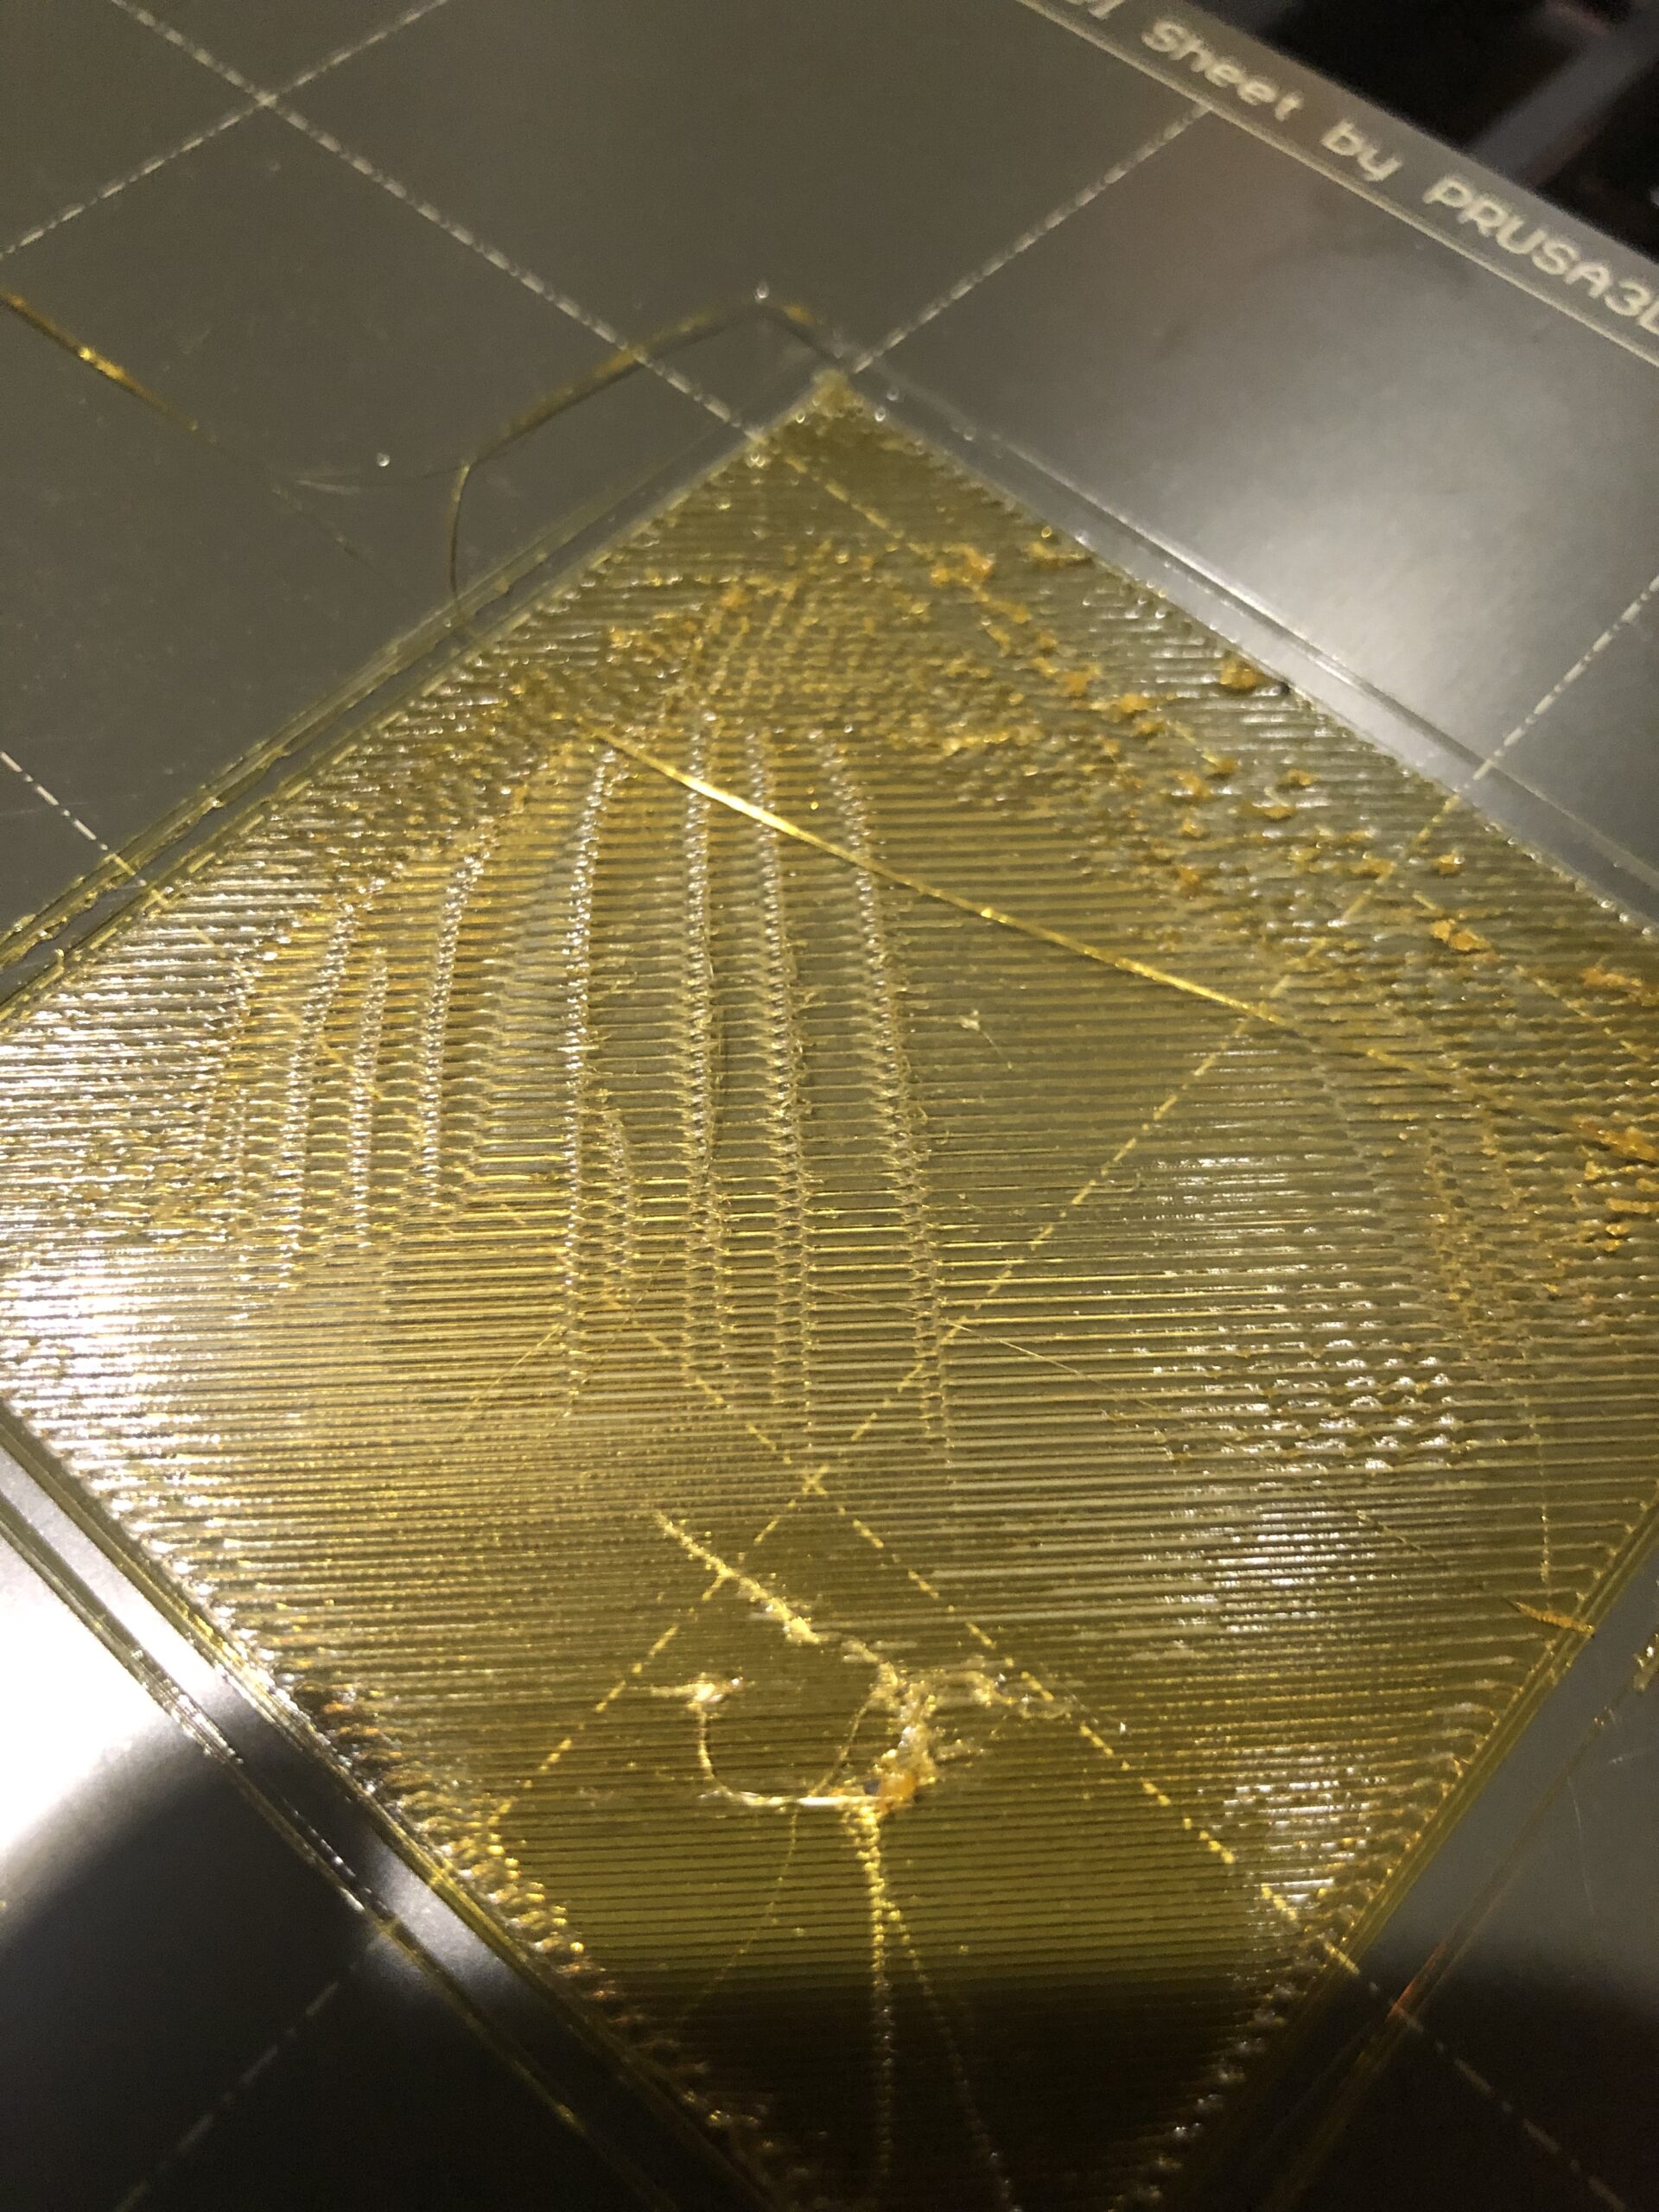
Looks like your live Z is too low (too negative). I'd raise it (make less negative) by 0.06mm and adjust from there. You want that 1st layer to be smooth and even so it peels off and holds together as a sheet. If it's too low, you get that wrinkling as the extrusions deform.
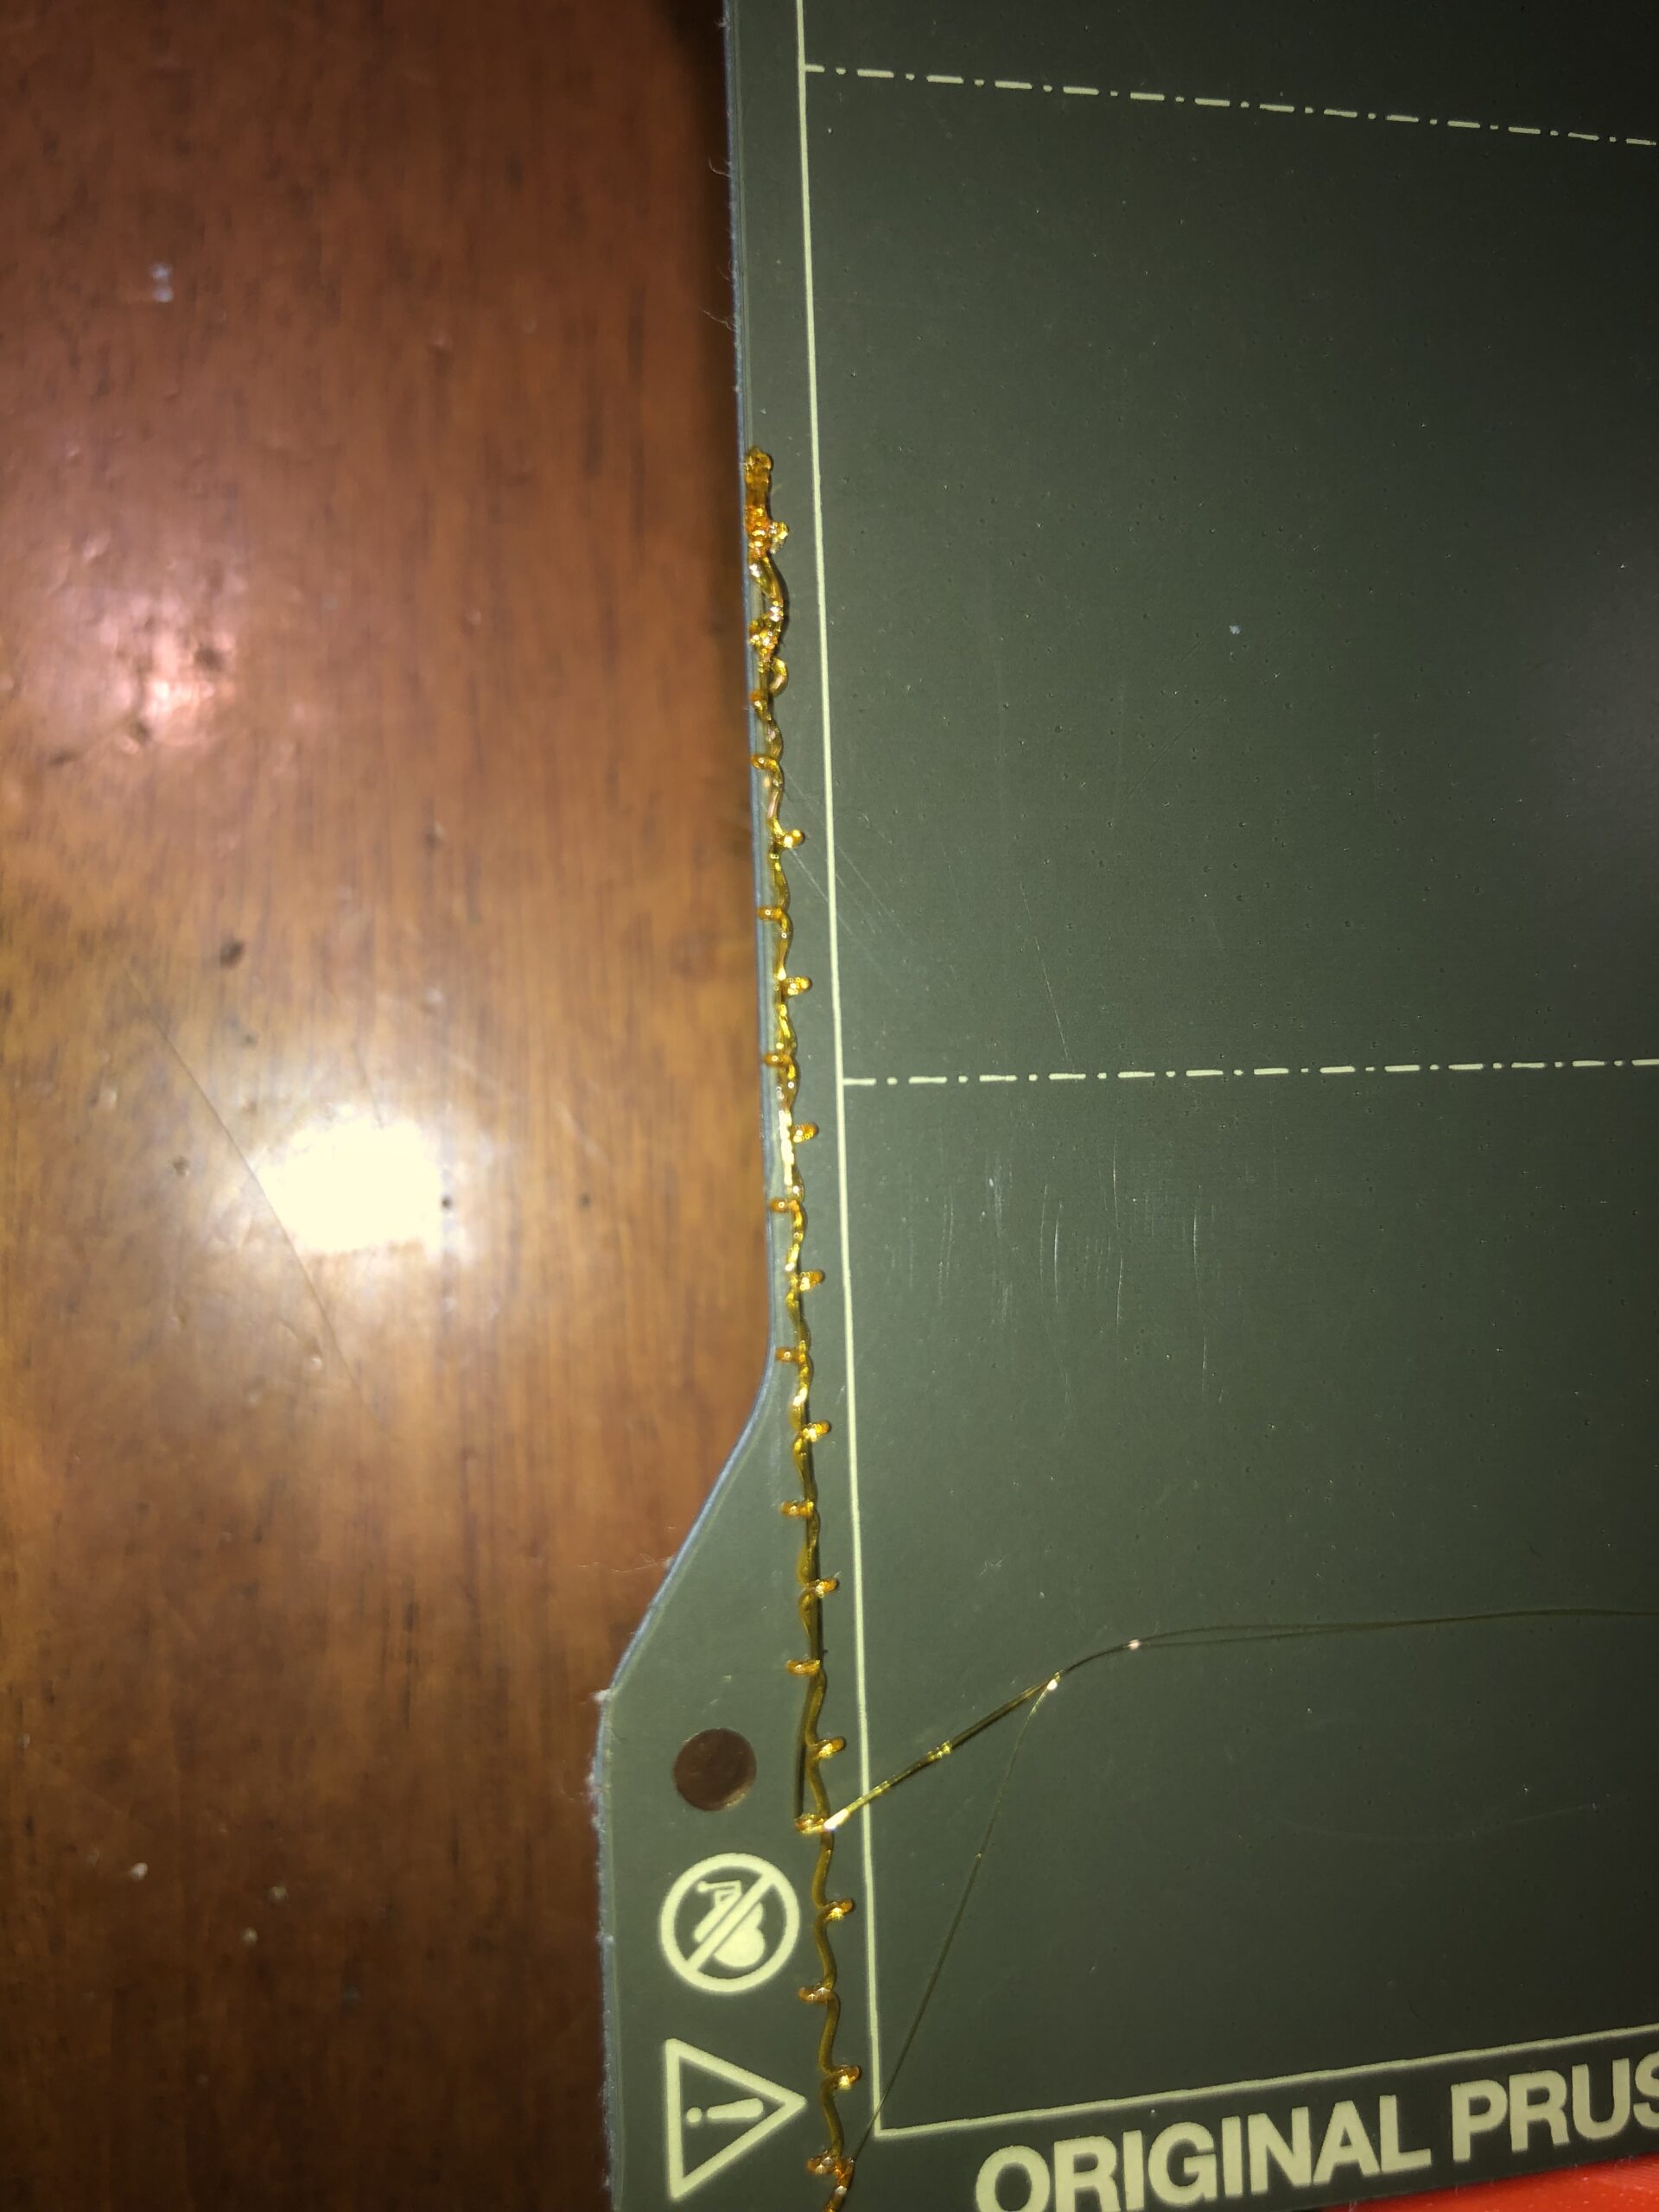
Interestingly, your prime line looks as if your Live-Z is too high. Not sure what's going on there unless the nozzle is so low it's deforming.
Those ridges are a tell-tale indication of a nozzle too low, so live z needs to be less negative.
Bed adhesion
I agree you should adjust your nozzle height a bit higher.
It looks like you use the smooth PEI bed, and with PETG you should maybe also use some kind of bed adhesion. See: https://help.prusa3d.com/en/article/flexible-steel-sheets_2195
I had it at about -.950 during the prime line, the square is at about -1.200
That's what's weird to me. I put it too high and things don't stick. Lower it then this happens. Currently set my Z at -1.200 sometimes seems to work ok then others it seems like it is squishing it. Which made me think extrusion issue. So I did a cold pull and it looked clean. But it seems like either I have ridges or it doesn't form properly. I bought a filament dryer yesterday just to make sure it's not because the filament has moisture or something. I guess I'll also have to fine tune it at .06 at a time like @bobstro said. Recently I have been making changes moving it .50 or so at a time. Maybe that isn't small enough increments to change by.
RE: First layer
That's what's weird to me. I put it too high and things don't stick. Lower it then this happens. Currently set my Z at -1.200 sometimes seems to work ok then others it seems like it is squishing it. Which made me think extrusion issue. So I did a cold pull and it looked clean. But it seems like either I have ridges or it doesn't form properly. I bought a filament dryer yesterday just to make sure it's not because the filament has moisture or something. I guess I'll also have to fine tune it at .06 at a time like @bobstro said. Recently I have been making changes moving it .50 or so at a time. Maybe that isn't small enough increments to change by.
This is not wet filament. If that print was at -1.200, try -1.140 and see if it improves. First layer calibration can be maddening.
--------------------
Chuck H
3D Printer Review Blog
My guidelines, YMMV
[...] I guess I'll also have to fine tune it at .06 at a time like @bobstro said. Recently I have been making changes moving it .50 or so at a time. Maybe that isn't small enough increments to change by.
When in doubt, I start high (Live Z=0 if I'm really unsure) and use the following scale:
- - 0.X is reserved for when the nozzle is too high (Live Z = 0). I move it down until I notice the filament starts to stick. Then I only use the smaller adjustments below.
- +- 0.06mm is a "big" adjustment. I'll see a change in the gaps between extrusions if too high, or the amount of rippling when too low with these moves. These moves get me close.
- +- 0.02mm is a "fine" adjustment. I can't see any effect with a smaller adjustment. Being off by a few notches doesn't usually make much difference.
I'll usually go low past the point where everything closes up by 0.06mm, then work up in 0.02mm increments until the top surface is smooth and even.
If I've made hardware adjustments or am adjusting Live-Z for a new sheet, I'll zero Live-Z and go through this process. Once the "Life Adjust" 75x75x0.2mm square starts printing, the entire process takes 1-2 minutes.
Great answer.
100% the best answer. Copied to my pasteboard.
[...] I guess I'll also have to fine tune it at .06 at a time like @bobstro said. Recently I have been making changes moving it .50 or so at a time. Maybe that isn't small enough increments to change by.
When in doubt, I start high (Live Z=0 if I'm really unsure) and use the following scale:
- - 0.X is reserved for when the nozzle is too high (Live Z = 0). I move it down until I notice the filament starts to stick. Then I only use the smaller adjustments below.
- +- 0.06mm is a "big" adjustment. I'll see a change in the gaps between extrusions if too high, or the amount of rippling when too low with these moves. These moves get me close.
- +- 0.02mm is a "fine" adjustment. I can't see any effect with a smaller adjustment. Being off by a few notches doesn't usually make much difference.
I'll usually go low past the point where everything closes up by 0.06mm, then work up in 0.02mm increments until the top surface is smooth and even.
If I've made hardware adjustments or am adjusting Live-Z for a new sheet, I'll zero Live-Z and go through this process. Once the "Life Adjust" 75x75x0.2mm square starts printing, the entire process takes 1-2 minutes.
--------------------
Chuck H
3D Printer Review Blog
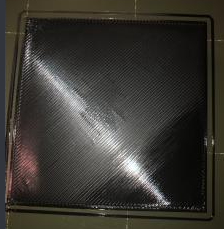
brought it up quite a bit and it looks like this. Top left corner is at about -1.032
This is what I'm not understanding. The bottom right is -1.200 Then I brought it up to about -1.05 and still overlapping. If I bring it up anymore it doesn't fill in all the edges and is stringy. But in the bottom right -1.200 corner it almost looks sheen/ totally flat. Going to try another here in a minute to see how far I can bring it up before it stops making full connections on the perimeter of the square.
Now I'm having an issue where it connects on half of the square but the first half is stringy. While keeping the Z the same the whole time
Now I think something is off. I may need to post another question... I kept my Z at the same height the entire square this time. And for some reason on half of it is stringy. The other half has ridges but sticks properly at least. If I am not touching the Z at all and it varies that much would that be an issue with bed leveling? or maybe an issue with clogging or nozzle angle?