Guide for (dis)assembling the mini X Axis motor
Is there any guide for disassembling and assembling the X axis of the mini? I have trouble with shifting X layers and I believe is might be related to the set screws for the X Axis pulley.
Best Answer by jweaver:
Is there any guide for disassembling and assembling the X axis of the mini? I have trouble with shifting X layers and I believe is might be related to the set screws for the X Axis pulley.
My X grub screws were loose from new, which resulted in leaning prints..
Luckily you don't need any disassembly to fix this.. Look down at the very top of the X axis, Just infront of the motor and there is a hole.
Shine a torch and move the X carriage and you will see the grub screws come into view... Remember there are 2, so line each one up with the hole.. Stick in an allen key, and tighten away. Its a 2 min job.
I have attached as photo to show the hole in question.
RE: Guide for (dis)assembling the mini X Axis motor
I would second that -- My X end stop (F1) makes way to much noise -- I have printed the replacement (R2) and hope that whould fix it
My X belt is tearing against the End stop and has started losing fibers / as well as The belt for the Y axis
Mini with FW:4.4.1 + SuperPINDA + Bondtech Heatbreak + PC4-M8 couplers + 1 piece boden
RE: Guide for (dis)assembling the mini X Axis motor
Is there any guide for disassembling and assembling the X axis of the mini? I have trouble with shifting X layers and I believe is might be related to the set screws for the X Axis pulley.
My X grub screws were loose from new, which resulted in leaning prints..
Luckily you don't need any disassembly to fix this.. Look down at the very top of the X axis, Just infront of the motor and there is a hole.
Shine a torch and move the X carriage and you will see the grub screws come into view... Remember there are 2, so line each one up with the hole.. Stick in an allen key, and tighten away. Its a 2 min job.
I have attached as photo to show the hole in question.
RE: Guide for (dis)assembling the mini X Axis motor
Hi Jweaver,
Thank you for the reply. I eventually took the motor off before I noticed your valuable tip. And yes, my printer also have the set screws loose on arrival. Luckily the disassembly process is not too painful, because the parts are designed well enough for modular disassembly. I believe I loosen less then 10 screws before I get to the X motor.
Discussion and complaint
I believe Prusa should be more aware that with the Mini, they are selling a mostly-assembled product. This new manufacturer / assembler role is perhaps new to them, but it is a whole different story how to manage a factory assembly line to have quality output. Generally I would expect a pre-assembled part to function when it comes. If it had not been my prior experience in making and servicing CNC machines, this shifting layer problem would be hard to diagnose because shifting occurs only when acceleration is high.
Note on the many other people's advice to tune the X axis End Cap. For someone who suffers from shifting layer problem, tightening the two belt tensioning screws will appear to alleviate the problem, because it increases the friction between the motor-side-belt-pulley towards the motor shaft. This of course does not solve the problem completely and will eventually lead to user superstitiously over tension the belt and permanently damage the motor.
RE: Guide for (dis)assembling the mini X Axis motor
Discussion and complaint
I believe Prusa should be more aware that with the Mini, they are selling a mostly-assembled product. This new manufacturer / assembler role is perhaps new to them, but it is a whole different story how to manage a factory assembly line to have quality output. Generally I would expect a pre-assembled part to function when it comes. If it had not been my prior experience in making and servicing CNC machines, this shifting layer problem would be hard to diagnose because shifting occurs only when acceleration is high.
Note on the many other people's advice to tune the X axis End Cap. For someone who suffers from shifting layer problem, tightening the two belt tensioning screws will appear to alleviate the problem, because it increases the friction between the motor-side-belt-pulley towards the motor shaft. This of course does not solve the problem completely and will eventually lead to user superstitiously over tension the belt and permanently damage the motor.
In my opinion, its a disgrace they are shipping the Mini with loose grub screws.. They should frankly be ashamed.
Anyone who has ever built a 3D printer knows the importance of tight grub screws and this is by far one of the most common causes of problems.
The fact that Prusa could build their printers like this from the factory is a disgrace... And I don't say that lightly... This is shoody workmanship and points to bad training or people who don't care... We have bought a premium product and should not have to suffer problems like this.
RE: Guide for (dis)assembling the mini X Axis motor
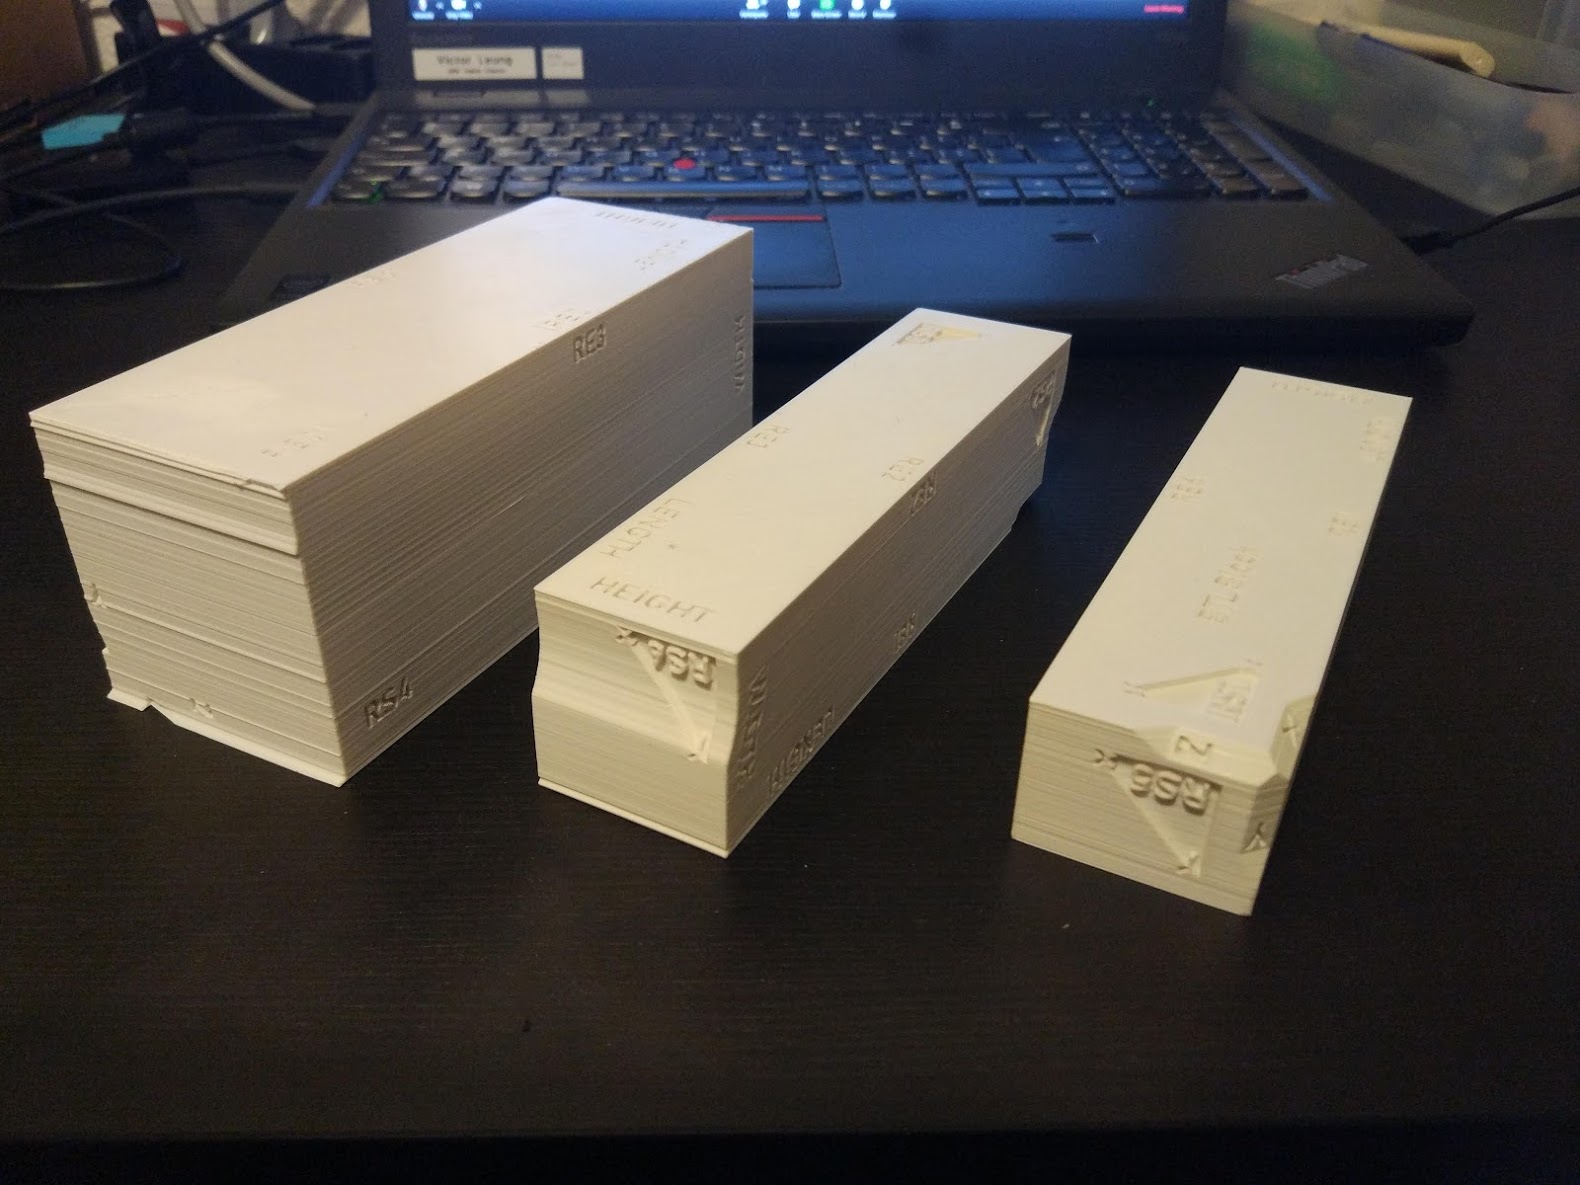
For future reference:
Left and middle models are printed before the fix. X axis is shifting occasionally.
Right model is after the fix.