Issues with Prusa Mini+
Hello there! Is this the right place to post begginer questions?
So I recently got a Prusa Mini+ but I have been having a few issues with the prints.
Firstly when doing the first layer calibration the value I found to work is -1.500 which seems a lot higher than the recommended values. Is it alright?
Secondly, intermediate layers have tears and bulges in them. What is the source of the issue and how can I fix it?
Thank you in advance.
RE: Issues with Prusa Mini+
The required Z-offset value depends on PINDA height (distance between print bed and PINDA) -"the best" Z-offset value doesn't exist. If your first layer is successful at -1.500, then everything is fine. However, if you wish Z-offset value to be more in the middle of range (between 0 and -2), then pull up PINDA for about 0.5mm and start fresh first layer calibration -now expected Z-offset should be at about -1.00
Don't raise PINDA too much up, because it can happen nozzle will damage print bed.
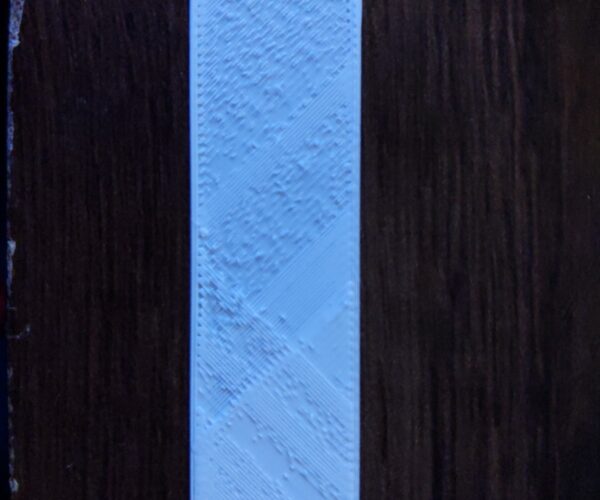
About tars and bulges on print (print not smooth)... one would need a close-up photo to get an opinion. It would also help if you tell what filament are you using, at what temperatures and if you changed anything in Prusa slicer before printing... plus, have you tried another filament?
[Mini+] [MK3S+BEAR]
RE: Issues with Prusa Mini+
Hello there! Is this the right place to post begginer questions?
So I recently got a Prusa Mini+ but I have been having a few issues with the prints.
Firstly when doing the first layer calibration the value I found to work is -1.500 which seems a lot higher than the recommended values. Is it alright?
Secondly, intermediate layers have tears and bulges in them. What is the source of the issue and how can I fix it?
Thank you in advance.
issue got solved!!
RE: Issues with Prusa Mini+
Damm even I am having a similar kind of issue, I have searched all over the internet and even have posted on number of threads on different forum, no solution seems to work. I am really frustrated, can anyone of you here help me resolve this issue, I am very much tired now.
RE: Issues with Prusa Mini+
I am having a similar kind of issue.
RE: setting Pinda
I am having a similar kind of issue.
As stated above, I upgraded my Pinda to the Super ( may not be needed for this issue ) used some feeler gauges to get my nozzle close to the bed and used a printed part https://www.prusaprinters.org/prints/50161-simple-super-pinda-adjusting-tool or credit card if you don't have another printer to set, make sure your X axis is square at 90' degrees to the bed and not twisted slightly.
The blobs or under extrusion ( image dependant would be easier to detect as stated above )
could be down to the tension screw on the extruder being to tight I personally found, also higher grades like Prusament make a difference.
Over / Under extrude with clicking noise
Hello
I bought a Original Prusa Mini at the beginning of the year and have similar issues of "messy" prints. My first few prints with the printer were absolutely perfect and I used ABS. I eventually bought Prusament PLA and after loading the PLA I could never get my printer working again. I've gone through many of the basic troubleshooting steps like purging abs, cleaning extruder head with the supplied needle, adjusting Z level, adjusting limiter, cleaning feed gear, etc. I even took the feed gear stepper motor off to see if maybe the stepper motor gear was improperly set on the axle, it wasn't.
Essentially my problem is the printer does first layer perfectly, then it goes down hill from there. It will over extrude and under extrude. The feed gear clicks frequently but not consistently and I can't tell if the clicking associates with over/under extrude.
I'll provide a picture and possibly a video showing what's happening. What I'm very confused about is getting ABS to work but not PLA.
RE: Over / Under extrude with clicking noise
I don't know how to embed a video into the forums so here's a link to my YouTube upload of the printer in action.
RE: Hotend PTFE Tube
Since I don't see mention that you've already done so, try replacing the hotend PTFE tube, according to these instructions. This is not necessarily a troubleshooting step, but rather it falls under the category of regular maintenance which you can expect to do periodically in order to maintain print quality, and basic functioning of your printer.
RE: Hotend PTFE Tube
I'll go ahead and order a new PTFE tube for replacement, but I don't think that's my problem. I've done 4 successful prints with this printer before switching to PLA where my problems started. I've also pulled the PTFE tube twice and didn't see any damage or wear on it.
Thank you for the suggestion 24kJames. Do you have any other suggestions I could try while I wait for the new parts. (ordering a new nozzle too).
Also I want to be clear for all, I've done 4 prints since I unboxed this machine.
aah...
I see. 4 total prints makes it less likely to be the case that the HPTFET is, "worn," that is, lost its ability to maintain its shape, and its "spring," due to the inherent exposure to heat during normal operation, combined with the compressive forces applied to it when properly installed. It does, however, suggest something you can try in the meantime, that being ensure the HPTFET is properly installed, with adequate compressive force applied, and as well that the filament path is entirely free of debris.
Refer to the installation documentation I linked to previously. Start at the beginning, and follow each step closely, just as you would if you were replacing a, "worn," HPTFET. You wont be skipping any steps. At step 6, when extracting the tube, be extra careful not to damage, or even slightly mar its beveled ends, since you will be reinstalling that same tube instead of a new one. At step 7, you might optionally wish to perform a cold pull. Either way, just ensure that the print head is completely free of any debris. You'll want to use a small pen light, or similar, when peering down into the print head for inspection. At step 9, instead of preparing a new piece of tube, you'll simply be inspecting the tube you just extracted, ensuring it closely matches the provided schematic. Step 11 describes the installation technique for achieving proper compressive force on the tube. I was going to suggest releasing the fitting by a full turn, as opposed to a quarter turn, but it seems the guide has now been updated to suggest precisely that.
Hopefully you'll see improvement after this effort. If not, you'll at least have gained the experience, and the piece of mind knowing the hotend tube is properly installed, so you can move on with troubleshooting.
I used quotes on the word, "worn," when describing the hotend tube because in such instances, I found it may not actually be. Replacing it will certainly correct the associated issue with printing, but so, possibly, will reinstalling the existing tube to once again achieve the required compression. I found this evident in the fact that when I switched from a quarter turn, to a full turn (as suggested by a reputable source somewhere during one of my extended reading sessions on these forums, and as is now officially suggested in the guide,) the amount of successful print time that has accumulated before encountering diminished print quality, and other associated symptoms, clicking being one, has been greatly extended. In fact, since I last installed using a full turn (my first time doing so,) I've not yet faced these issues again, to the tune of, so far, at least double the amount of continuous successful print time, with regard to only that specific issue of course.
If this effort does not improve your situation, do not be dismayed. Press on, because you can be sure a most enjoyable printing experience awaits you, and towards that I wish you the best.
I'll go ahead and order a new PTFE tube for replacement, but I don't think that's my problem. I've done 4 successful prints with this printer before switching to PLA where my problems started. I've also pulled the PTFE tube twice and didn't see any damage or wear on it.
Thank you for the suggestion 24kJames. Do you have any other suggestions I could try while I wait for the new parts. (ordering a new nozzle too).
Also I want to be clear for all, I've done 4 prints since I unboxed this machine.
I GOT IT!
FIXED!
I performed two tasks:
- Cold Pull (See picture below of what came out 🙂 )
- "Stressed" the Hotend PTFE tube to reduce any gap that may have existed.
For anyone else in the future who may be going through what I did, my cold pull process went as follows:
- Follow steps to remove the Hot End PTFE Tube.
- Once the PTFE tube is removed heat the nozzle to 260 C. I picked 260 C because my first prints were done with ABS and I had a strong suspicion that there was still ABS in the nozzle and ABS preferably melts at 260C. Thinking back, most people recommend heating the nozzle to its max temp when performing a cold pull.
- Once the nozzle is heated take about an arms length of filament you want to use (PLA for me but preferably nylon) and force that piece through the nozzle manually.
- Once you see extrusion immediately start cooling the nozzle while still applying constant pressure until the nozzle cools to a point where you can't push anymore out. Let the nozzle cool to about 60C, crank the heat all the way up again and give the filament sticking out a constant forceful tug while the nozzle heats up until you pull it out.
- Repeat again if you feel its necessary.
An additional step you may want to perform while putting the PTFE Tube back together is Prusa's How to replace hotend PTFE tube (MINI/MINI+) Step 10
My friend who was helping me with this endeavor hypothesized that the hotend PTFE Tube wasn't making full contact with the nozzle and likely created a small gap for back pressure. As a note, if you perform step 10 you need to "calibrate" the MINDA/PINDA/SuperPINDA probe because you likely changed the nozzle's Z height. After "calibrating" the probe perform a First Layer Calibration.
Thank you again 24kJames for the support. Your replies to me alone motivated me to keep trying to troubleshoot. Shout out to my friend who came over to give moral support too!
I'm super excited to start printing again!
First print after the fixes. Need to fine tune the first layer calibration and/or speed of print near the top of Benchy. The print head knocked it loose right near the end 😀

What I got out of my Cold Pull.

RE:
Nice! Glad to know you are up and running.
And thank you for sharing that cold pull method (a slight modification of the method I follow, suggested by Prusa documentation.) Pulling on the way back up in temperature seems like it will take the timing element out of the equation, for a sure pull.
Oh, btw, I still haven't had to replace, or even re-tension my hotend tube, many, many hours of printing later. Hotend tubes as a "consumable," is fading in relevancy with each print. I'm printing with pretty high temps too, 260C (with full exhaust to outside.)
Cheers!