Prusaslicer Q
Hi
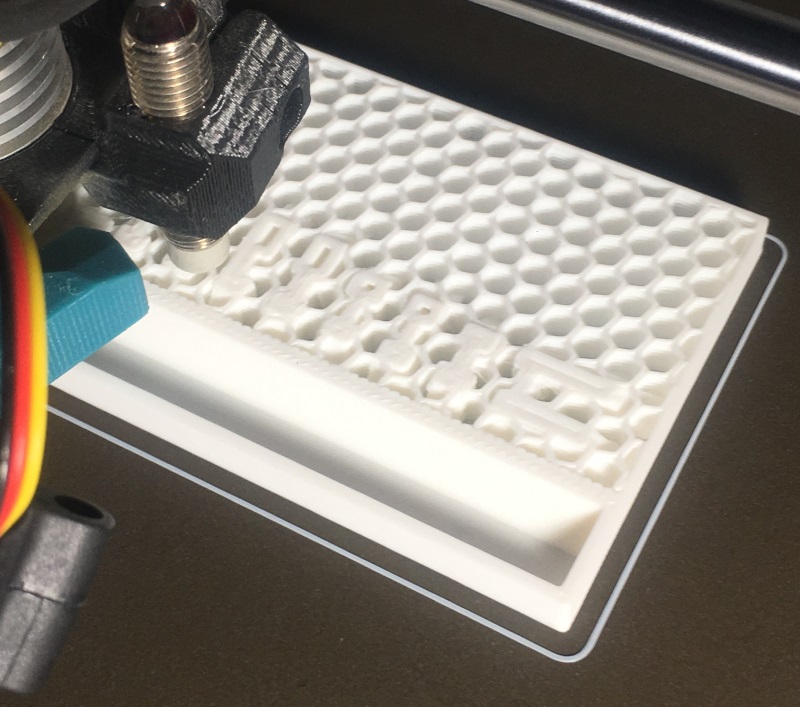
I want an infill but without loosing my designed inner structures. But every time I calculate an infill this structures are gone as to be seen on the picture. The part on the front hast inner structures... the one in the back already lost that information after calculating an infill pattern over it... My intention is to keep my structures and add in full to it too...
Amy idea?
Any idea?
Yes!
Any idea?
Sorry, couldn't help myself 😉
Prusa i3 MK3S+ FW 3.11.0 (kit dec -20), PrusaSlicer 2.5.0+win64, Fusion 360, Windows 10
Need to see the details, attach zipped 3MF project file
Save your current 3MF project file, zip it up, and attach it to a reply here so we can see your part & settings and give better recommendations.
Yes, if you could please zip up and provide a .3mf , it really makes it a lot easier for us to help if we have a project file we can get a better idea of what your wanting to do.
regards
Swiss_Cheese
The Filament Whisperer
Zipped File
Sure...
Internal structures are there but may not offer much of an advantage.
I loaded your 3MF into PrusaSlicer and it preserves the internal structure:

I'm just not sure what you're trying to do. Whatever prints inside there is going to be entombed in plastic. You might want to change the bridging angle (Print Settings->Infill->Advanced->Bridging angle) to 90 to reduce the length of the internal bridging spans. Otherwise, they have to stretch the full length of the print. Alternately, rotate the part 90°.

If you're thinking the internal structure will help with part strength, there are a few issues to be aware of:
- The part angled "ramp" sticking out the top is printed vertically, which means the layer lines run across the legs. If you encounter any shear stress from the side, that is the weakest part of most FFF prints. You can try a number of techniques (e.g., reduced cooling) to improve it, or even different filaments (e.g., nylon) to improve inter-layer adhesion, but those internal structures won't help strengthen the ramp.
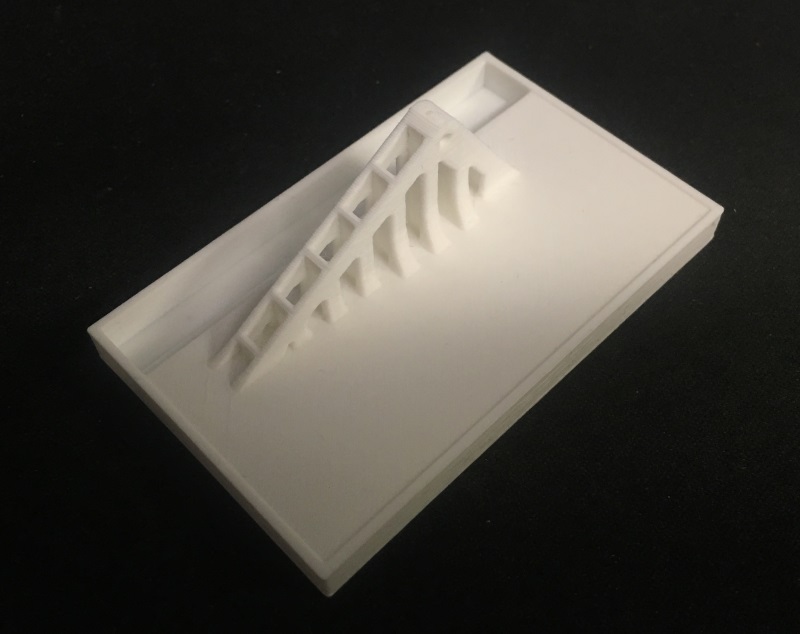
- The angled ramp on top is not "attached" to the internal structures. It is stuck on top of the top surface. The interface layer between the ramp and top surface is where any strength (or lack thereof) will come from. Here's a pic to illustrate that point:

Notice that the internal ramp structure doesn't stick through that flat surface in any way. Your top ramp is no more attached using that internal structure than it would be if you'd simply used sparse infill. In fact, the interface is possibly weaker due to that bridging layer. If you want to strengthen the ramp, consider adding some holes through the top so more perimeters are printed to create pillars the full depth of the print.
???
@kopplog
It's not clear to me at all what you were trying to do here, but I took a shot at what I think you were trying to do.


It printed, it's strong, however there are better ways to make this.
your model wasn't setup for this to work the way I think you wanted it to, so I fixed it up a bit to make this example.
Um,.. Good Luck?
Swiss_Cheese
The Filament Whisperer
RE: What I try to achieve
Hi, thanks for your answers.
What I try, in other words:
The internal structure you see shall stay, but I want to add infills to the rest of the cavity (WITHOUT losing my designed structures)...
PS thanks for telling me about shear structures. What I do here is learning by empirical testings... I'm still at Reh beginning 😉
Ah ok, well I managed that, take a look at MysteryThinG.Zip I posted above.
The Filament Whisperer
Preserving internal structures can be done, but doesn't gain you much
[...] The internal structure you see shall stay, but I want to add infills to the rest of the cavity (WITHOUT losing my designed structures)...
Can you clarify a bit about what exactly you want to do with the internal structure? You can likely get a far stronger result using infill and perimeters appropriately. It's possible to print all kinds of fancy stuff that will be entombed in plastic and never seen, but it usually just adds to print time.
PS thanks for telling me about shear structures. What I do here is learning by empirical testings... I'm still at Reh beginning 😉
Again, if you want to make the ramp stronger, put some vertical holes in through the depth of the print. The perimeters around the holes will make the print much stronger than that solid base slab.
@kopplog
@bobstro wrote:
Again, if you want to make the ramp stronger, put some vertical holes in through the depth of the print. The perimeters around the holes will make the print much stronger than that solid base slab.
As was done in MysteryThinG.Zip posted above.
Good luck
Swiss_Cheese
The Filament Whisperer
Not exactly...
As was done in MysteryThinG.Zip posted above.
No, as was written in my post before you posted.
MysteryThingy
Dear SwisaCheese, Whisperer.
Thanks for your help!
To everybody in this thread: This thing is a tester, hope giving me answers to how fdm-printing is done right (fast and strong), so - thank you. I will take all Tipps into consideration!
Best and have a good oncoming week ahead