How To - Enclosure Temperature & Odour Control
Hello everyone, I thought I would put up a How To on how I've gone around implementing temperature control in my enclosure for the MK3S along with venting out all the odours from the enclosure.
Items required
- Raspberry Pi - with OctoPrint Installed
- The Enclosure plugin installed in OctoPrint
- OdourCube System - I use one similar to this kit but there could be other solutions too

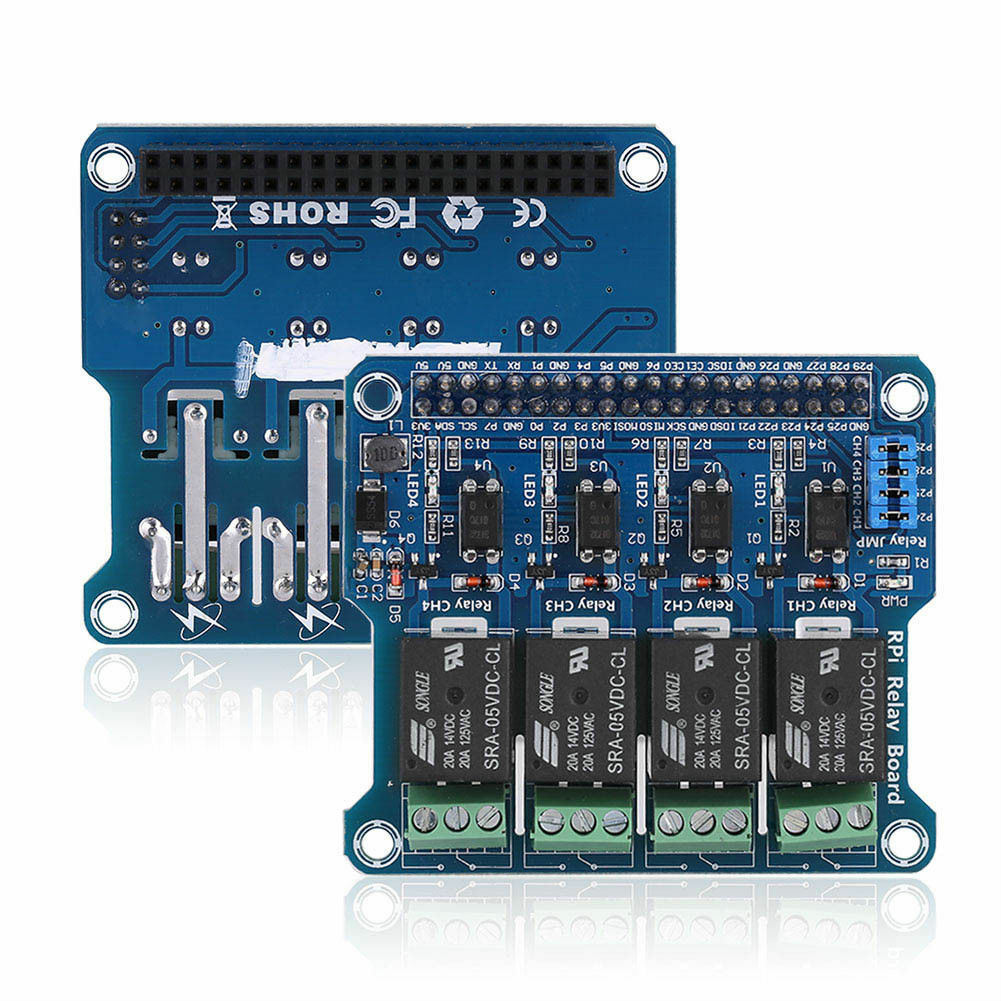
- Raspberry Pi 4 Relay board. Something like this one (purchased from eBay):
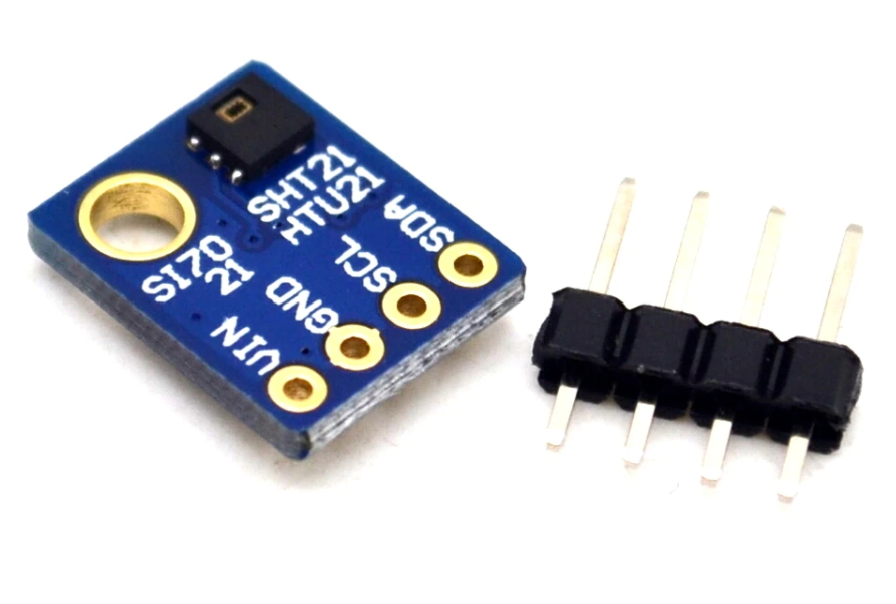
- I2C Temperature Sensor - I used the SHT21 Temperature/Humidity sensor (purchased from eBay):
- One 5V Power Supply, any will do, I've used a 1A power supply
- One 12V Power Supply, again I've used a 1A power supply
Wiring
Below is the wiring diagram for the whole setup

Here are a couple of shots of the Raspberry Pi, and relay board wired up:


Hardware installation
Below is how I have setup the OdourCube system on the side of my enclosure. The ventilation side of the system vents out the window.

Below is a poor photo of the wiring under the printer.

Below is the SHT21 at the top of the enclosure

Software Configuration
With everything wired up (including the sensor) follow the steps in this link (or similar) to enable I2C and to detect the address of the sensor (it could be different to mine)
For the configuration of the Enclosure Plugin do as follows (assuming you have already installed the Enclosure Plugin within OctoPrint)
Go to Settings -> Enclosure Plugin
Click Add Inputs
- Label: Temp Sensor
- Input Type: Temperature Sensor
- Sensor Type: SI7021
- Sensor Address: 0x40 (your address could be different - use whatever showed up when you did the sudo i2cdetect -y 1 in the I2C setup)
- Show temperature on navbar: Checked
Click Add Outputs and configure as follows:
- Output Type: Temperature/Humidity Control
- Label: Vent Fan Low
- IO Number: 20
- Auto Shutdown: Checked
- Shutdown Delay: 600
- Temperature Sensor: Temp Sensor
- Active Low: Checked
- Temp Control Type: Cooler
- Value Deadband: 0.5
Click Add Outputs and configure as follows:
- Output Type: Temperature/Humidity Control
- Label: Vent Fan High
- IO Number: 21
- Auto Shutdown: Checked
- Shutdown Delay: 600
- Temperature Sensor: Temp Sensor
- Active Low: Checked
- Temp Control Type: Cooler
- Value Deadband: 0.5
Click Add Outputs and configure as follows:
- Output Type: Regular IO
- Label: Recirculation Fan
- IO Number: 26
- Auto Startup: Checked
- Startup Delay: 0
- Auto Shutdown: Checked
- Shutdown Delay: 0
- Active Low: Checked
If you wired the light - Click Add Outputs and configure as follows:
- Output Type: Regular IO
- Label: Light
- IO Number: 19
- Start with server: Checked
- Active Low: Checked
You are done!
On the main OctoPrint page you select the Enclosure Plugin tab and you should see the current readings from your enclosure and various settings for the switch points of the low and high ventilation fan for temperature regulation. Below is a snap shot of my configuration with temperature setpoints for printing ABS. When printing PLA, I set the low fan at 25degC and high at 30degC.

If you want to get really fancy, you can embed specific temperature commands into your Gcode files or within the Gcode scripts section of OctoPrint. For example I use the following commands to automatically set the temperatures shown in the screen shot above:
ENC O1 W0 S45; Low speed fan temperature
ENC O4 W0 S46; High speed fan temperature
The O1 and O4 values are the ID numbers which are shown when you are setting up the outputs in the Enclosure Plugin so make sure you look those up because they will most likely be different to mine.
I hope this will be useful for someone!
RE: How To - Enclosure Temperature & Odour Control
Sorry for the squashed images, I missed the window of time to edit the thread to fix that. Also I spotted another error. In the wiring diagram the LED light is actually 12V not 5V!
If you have any questions, let me know. Or if you spot more errors...
RE: How To - Enclosure Temperature & Odour Control
@stirlsilver
Thanks for the detailed information. You have made quite an effort! Also a good idea to lead the warm exhaust air out of a window.
Statt zu klagen, dass wir nicht alles haben, was wir wollen, sollten wir lieber dankbar sein, dass wir nicht alles bekommen, was wir verdienen.