Mini+ succeeds first layer test, fails first print
I assembled my Mini+ and have aligned the nozzle to the heatbed. I ended up having to use around -1.4mm. I could possibly go down further but I'm worried about scratching the sheet/nozzle and it looks like it's flush.
When doing the first layer test, the corners are sharp and the square is one plastic sheet rather than stringy.
However, when I try any of the test prints (Benchy, Frog, Sheep) after the first layer, it starts to pull the print around. Inevitably plastic then gets melted onto the end of the nozzle. (Gently using pliers removes it fine.)
I'm using the powder coated sheet. It's properly cleaned with IPA. I'm using Prusa Galaxy Black PLA.
(There are no leaks like the other thread suggested on the other person's problem.)
I'd love some advice. Thank you.
RE: Mini+ succeeds first layer test, fails first print
Zach,
I had a similar experience. I had to nudge the Z down by almost -2.0 in order to get a decent first layer test and it was still marginal. I tried a Benchy and the first layer failed. Then I tried the Prusa Logo because the manual suggests it as a good way to evaluate the first layer. It's skirt was poor and the first layer wasn't close to the picture in the manual but it printed successfully.
I did some reading here and found that the Z adjustment range is -2.0 max so I adjusted the SuperPINDA upwards about 1.5mm and re-ran the calibration Wizard. The next first layer test was much better. I am still not getting a first layer that matches the picture in the manual, but it is much closer.
RE: Mini+ succeeds first layer test, fails first print
@russwig
I'm closer. I managed to get one good print (The whistle) but everything else fails between 0-30 minutes in.
The tips that helped me but may not work for you was;
* Fix any vibrations. I bought this; https://www.amazon.co.uk/gp/product/B00AVJ9GBY/ref=ppx_yo_dt_b_asin_title_o00_s00?ie=UTF8&psc=1
* Lower the SuperPINDA even lower than you think.
Going to try keep readjusting and hope I can fix it.
RE: Mini+ succeeds first layer test, fails first print
Hi Zach,
Same problem here. I've made several good prints, but also a lot of problems with the first layer.
If I do the first layer calibration it looks perfect, sharp corners and sticks enough to the bed.
But when I try to make a print most of the time the first layer won't stick enough. Especially with round shapes. It pulls the line along the bed and creates a mess.
I've sent questions to support with photo's and movie clips, but they just say the nozzle looks a bit high and the bed doesn't look clean enough. Believe me, I've cleaned the bed in all ways possible (soap and hot water, 96% alcohol) but no luck. Also, if I put the nozzle even lower (-1.440) it scrapes the lines from the bed.
If I find a fix I will let you know.
Greetings,
Edward
RE: Mini+ succeeds first layer test, fails first print
@zach-inglis
Hello Zach
Just assembled my mine and i'm having exactly the same problems.
How are you adjusting the PINDA sensor?
Ive looked at it and there seems to be no way to adjust its depth
Kind regards
Paul
RE: Mini+ succeeds first layer test, fails first print
@paul-9
There is a hex cap screw to the left of the sensor. If you loosen it a turn you can then rotate the sensor (CCW to raise it, CW to lower) and then retighten the screw to hold it in place at the new height. Now that I have adjusted mine up I only need to tweak the Z by 0.25 to get perfect first layers. Print the Prusa logo as a good test. It is better than the one little square in the first layer calibration test.
RW...
RE: Mini+ succeeds first layer test, fails first print
@russwig
I tried adjusting it up and the calibration did go better with a much smaller -Z adjustment (-0.06) however every print i try still fails on the first layer.
They either
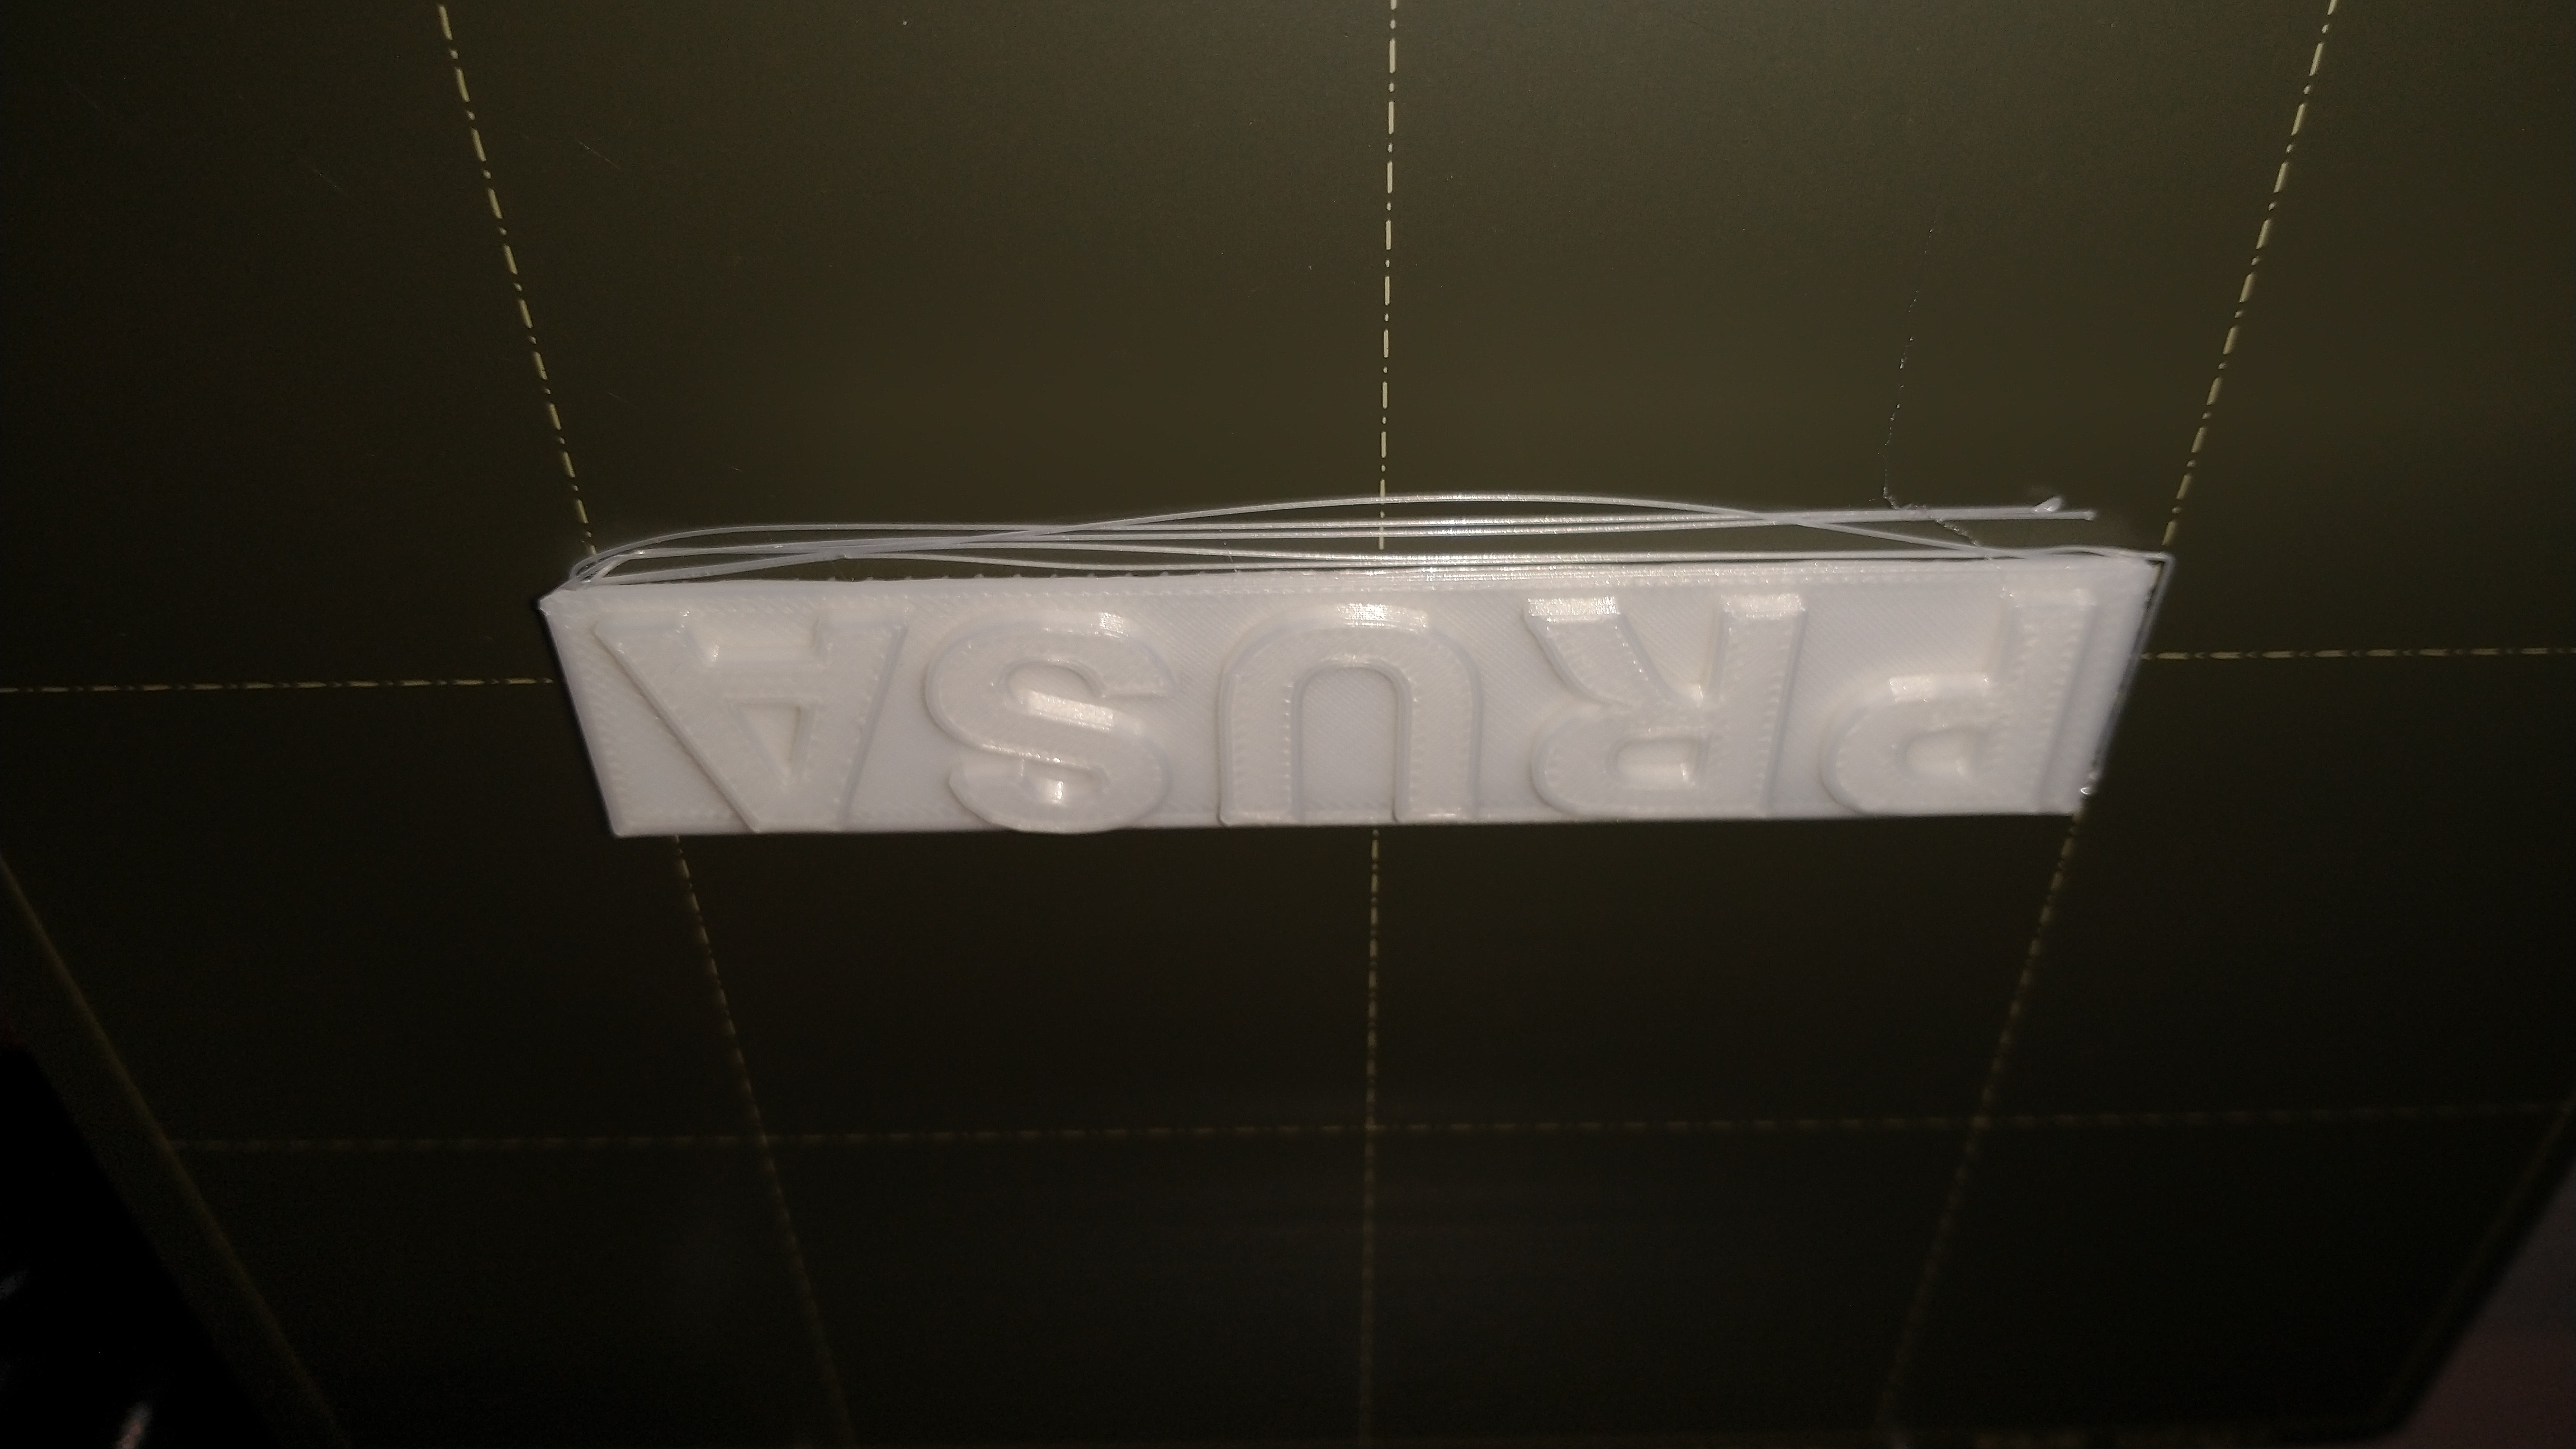
I tried the PRUSA logo print several times and it looked like it was going well then it pealed up at one corner which then got caught on the nozzle nozzle.
RE: Mini+ succeeds first layer test, fails first print
I have finally got it working and managed a successful print of the PRUSA logo first time.
I sent a video of the failed prints to PRUSA and it seems that even though the calibration layers looked like the diagram in the manual it was still not pushing the filament into the bed enough for actual printing.
I went through multiple calibrations decreasing Z depth by 0.3 to 0.4 each time.
Went all the way to Z -2.00 and blocked the nozzle. Used the manuals unblocking procedure and worked back from there.
At z -1.35 it stuck nicely to the bed.
I used the yellow filament and you can see a distinct change in the colour when you have the correct depth. It goes from a bright yellow to a darker and more translucent yellow. All the prints at a higher Z depth did not show this change and did not stick to the bed or lifted part way through the print. With this depth i tried the PRUSA logo and it was perfect first time.
RE: Mini+ succeeds first layer test, fails first print
Hey.... I just finished building my Mini+ kit this weekend and had this exact problem. After a lot of faffing around, I managed to get it working by just increasing the nozzle temp (using the "tune" menu when printing) by about ten degrees. (to 225).
I spoke to support and they advised that the tube inside the hot-end is probably out of position which impacts the heating of the filament (it came preassembled but whatever). For now increasing the temp slightly works, but I'm going to have to disassemble the hotend to fix it long term I think.
RE: Mini+ succeeds first layer test, fails first print
When you do the first layer it must be a completely solid sheet of plastic. Sounds like first layer issues for all, set the pinda probe as per the manual, and then adjust your Z as per the below article.
The above is for the mk3s but you can make a 75x75mm x 0.2mm square in prusa slicer.
Read jeffs description on how to adjust first layer, and look at Joans illustration on pg 40.
Make sure the bed is clean as well, any grease from your fingers will mess up your day, wash with fragrance free fairy/dawn rinse with lots of hot water and dry on a radiator.
Tank you very much!
RE: Mini+ succeeds first layer test, fails first print
P.S looks like the SPINDA adjust is the same as on the mk3. Use a cable tie to set the height.
https://help.prusa3d.com/en/guide/7-preflight-check_204705
Step 1, Preflight check
Tank you very much!
RE: Mini+ succeeds first layer test, fails first print
The first layer of PRUSA logo was failing to adhere to the surface that came with my Mini+ (not the kit version.)
- using Prusa PLA that came with Mini+
- kept surface clean with 95% isopropyl alcohol
- tried re-adjusting the sensor height
- tried Z settings from 0 to -1.35. -1.35 seemed too low as the filament was bunching up around the head
- ended up liking -1.00 based on best Configuration 1st Layer test results
- successfully print the Whistle first attempt on default surface
- swapped surfaces to the FYSETC 3D PEI Spring Steel Build Sheet for Prusa Mini (ordered it prior to my Mini+ arriving expecting to need it for PETG printing)
Successfully printed PRUSA logo first attempt on the FYSETC surface.
RE: Mini+ succeeds first layer test, fails first print
@3djoe
Yours still looks high. Those strands need to be connected together and squished a bit.
RE: Mini+ succeeds first layer test, fails first print
@crawlerin
Yes it was still too high. Unfortunately this forum software and Prusa's settings are bad; I can no longer edit it nor delete it. Anyways, I'm back to using the Prusa smooth surface since I haven't got into my PETG filaments yet. (I got the FYSETC surface for PETG filament.)
Two weeks in as a first time 3d printer owner and my judgement of calibration test results has helped improved my setting of the Z axis tip. My printings also improved once I used up the filament Prusa includes with the printer and switched to SunLu PLA+. I'm not saying go out and try SunLu PLA+ as I've been told what filament works for me may not work for others depending on the local weather conditions. I'm also using a SunLu S1 Dryer Box @50C.
RE: Mini+ succeeds first layer test, fails first print
@crawlerin
Yes, I realized that tho I was getting nice square corners and decent adhesion on the lines of the First Layer Test I was still able to separate the strands on the solid rectangle it prints at the end. I brought down the z until lines were identifiably "flatter" to my eye and that square peeled up as a solid piece at the end. I am hopeful this will resolve adhesion failure issues. I also realized that my brims were not centered to my prints because when I was rotating models in Prusa Slicer I was not dead on flat on the "x" axis but didn't realize it until I had a series of failed attempts to print the handle. I guess I expected there would be a "snap-to" function when nearing 0 or 90 degree positions. Learning process...
RE: Mini+ succeeds first layer test, fails first print
Hi guys,
I just received my brand new Mini+ this week. Unfortunately, I'm facing exactly the same issue like you guys.
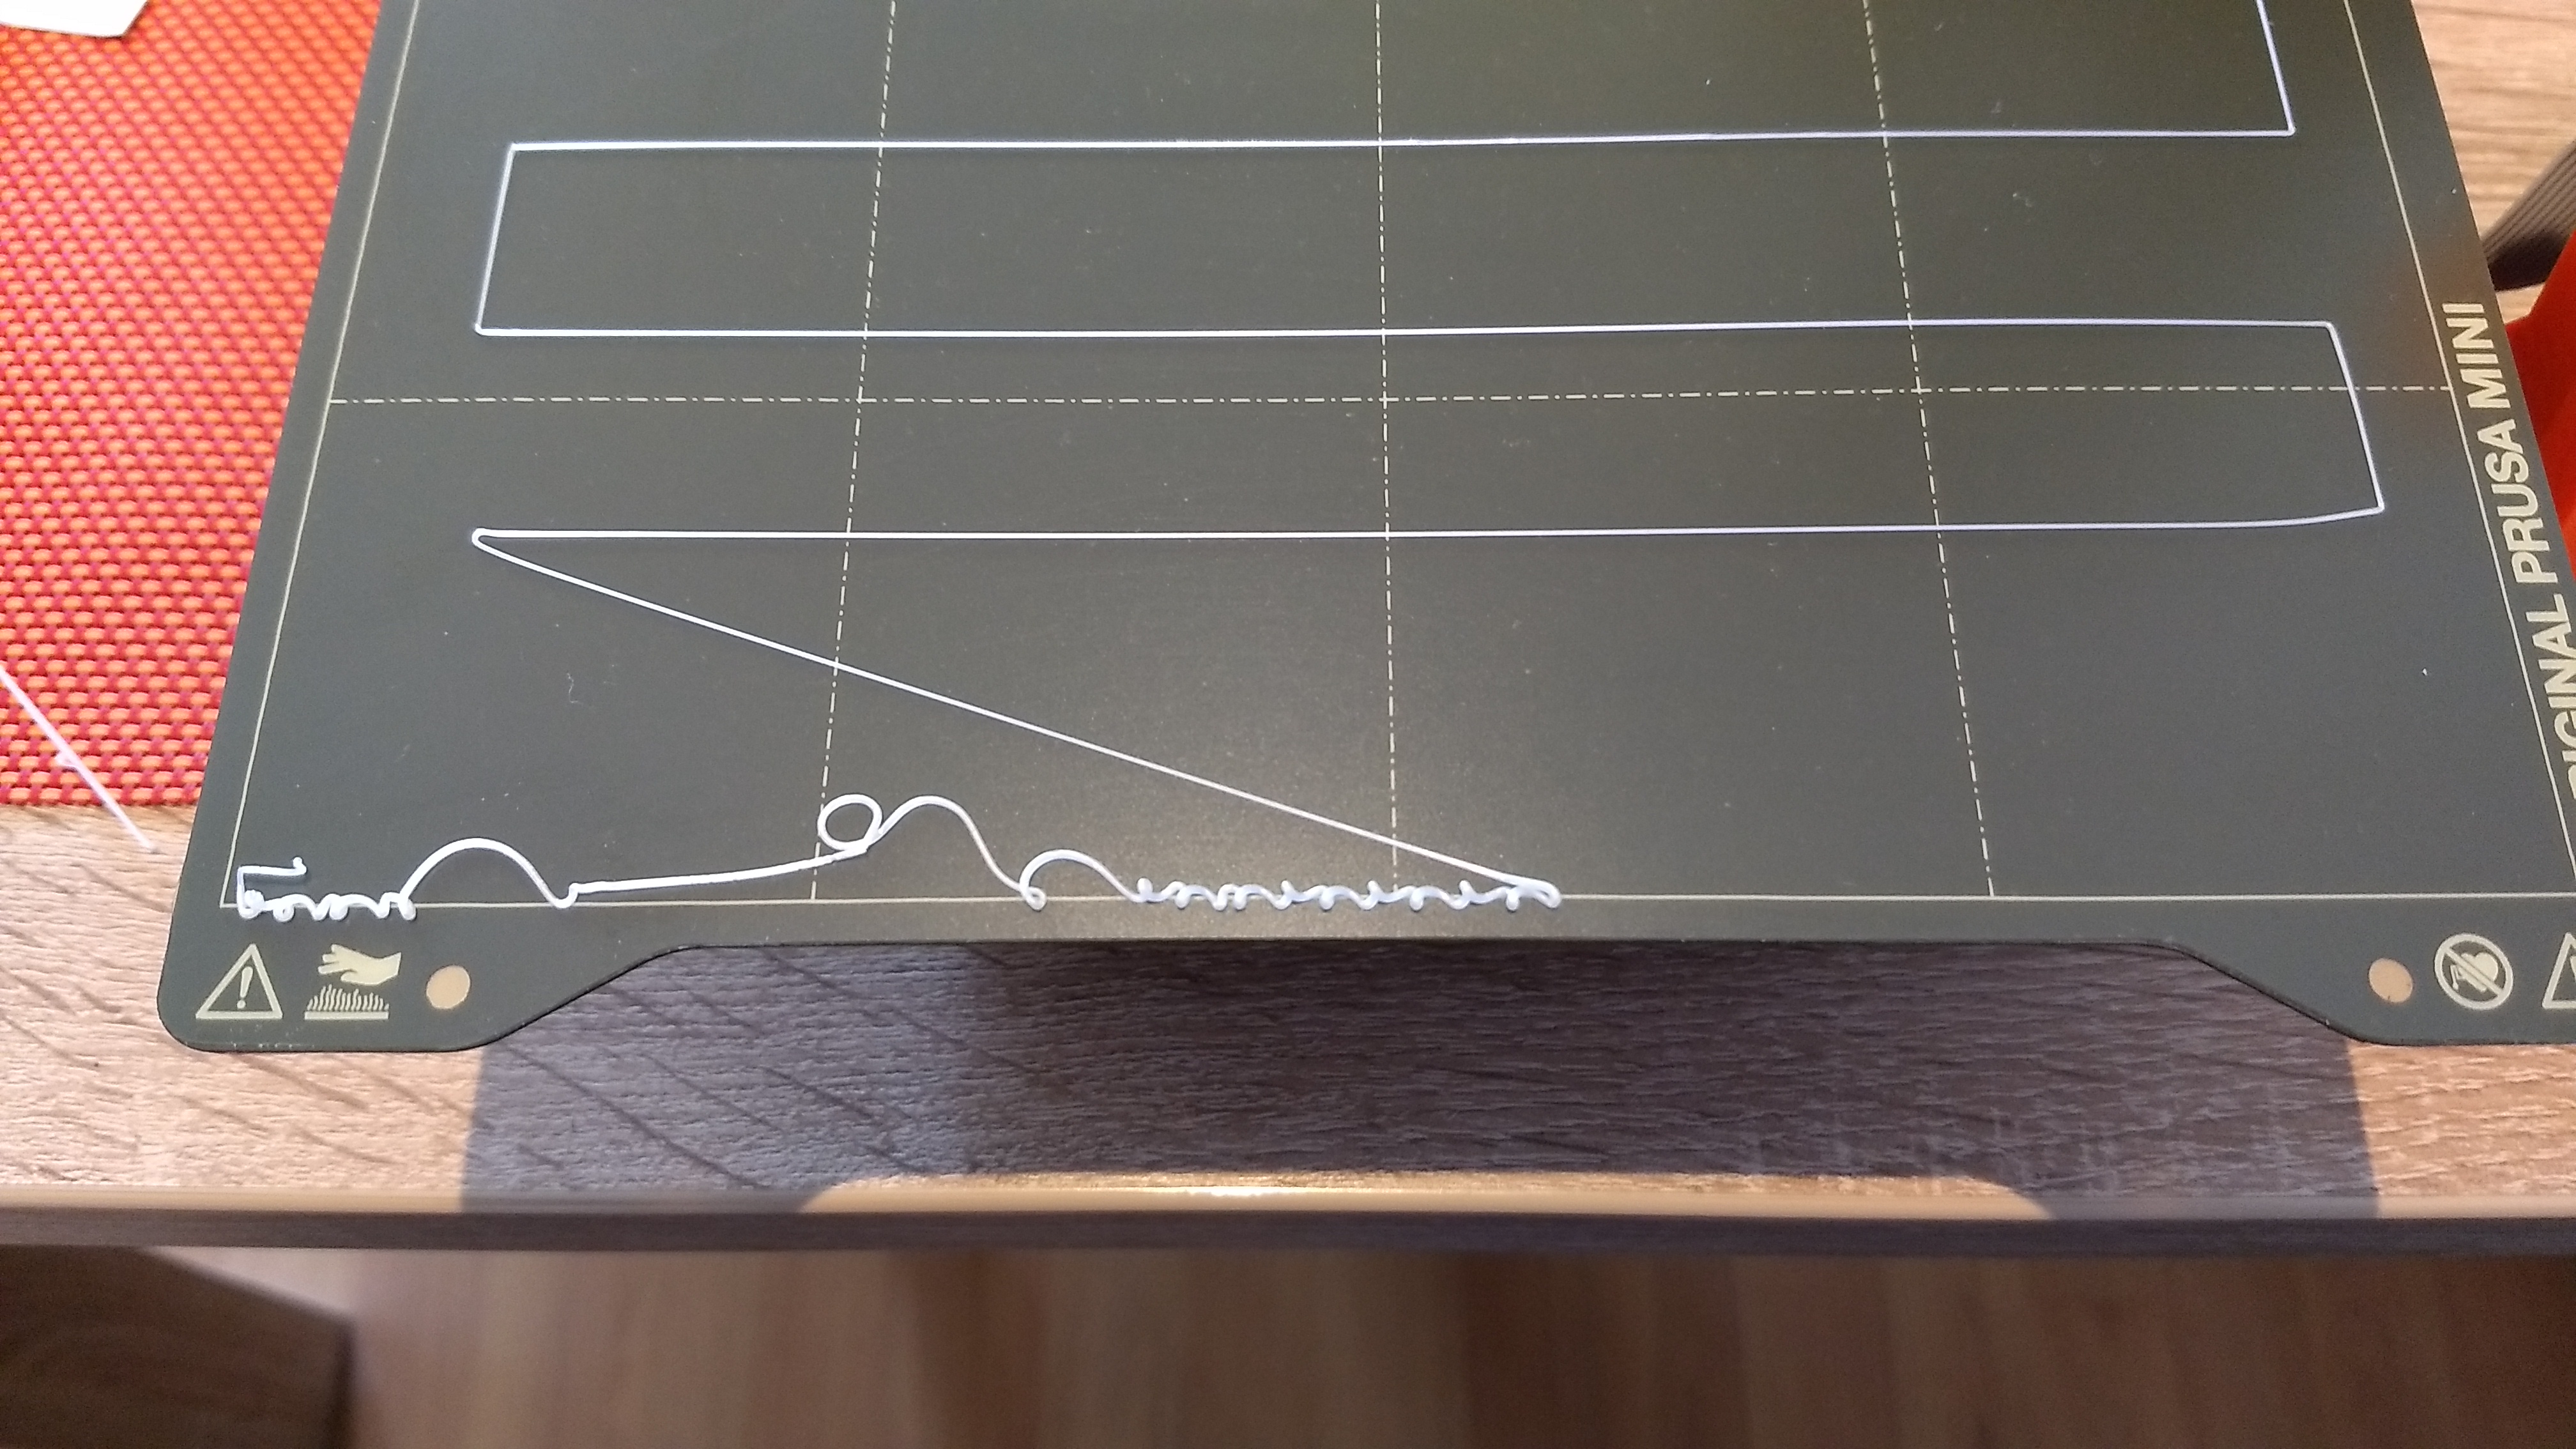
Even with the maximum z value of -2.0, the solid rectangle at the end of the first layer calibration doesn't show up a closed surface.
Tried the calibration three times now, every single time with exactly the same result.
When looking at the first filament line from the test starting with a z value of 0.0, you might imagine how big the distance between nozzle and PEI heatbed is with a z value of 0.0.

RE: Mini+ succeeds first layer test, fails first print
@nett_flanders
Loosen the screw and slightly lower your SPINDA 1-2 clicks and redo your Z calibration from Zero.
--------------------
Chuck H
3D Printer Review Blog
RE: Mini+ succeeds first layer test, fails first print
@cwbullet
Not lower, SPINDA needs to go higher if you get close to -2, so the nozzle can be moved closer to the bed before the PINDA triggers. I know it's confusing.
For an illustration of relationship of distance of PINDA to nozzle and sheet, see 
The Super PINDA should have about 1.5 mm distance between nozzle and SPINDA, so that you’re around -1 when your Live Z is correct. (For the old PINDA, it was 0.8mm).
Instructions are in Step 16 of https://help.prusa3d.com/en/guide/how-to-replace-superpinda-mini-mini_179912 (Mini) or https://help.prusa3d.com/en/guide/how-to-replace-superpinda-mk3s-mk3s_179920 (Mk3S)
I put this little helper on Prusaprinters.org to help position the SPINDA: https://www.prusaprinters.org/prints/57192-spinda-height-adjustment-tool-mounts-into-3030-ext. Works better than zip ties or credit cards, which have less well-defined heights.
@nett_flanders et al
Do yourself a favor and follow @clarmrrsn's advice and use the Live Z My Way method https://forum.prusa3d.com/forum/original-prusa-i3-mk3s-mk3-assembly-and-first-prints-troubleshooting/life-adjust-z-my-way/ instead of the inadequate built-in first layer calibration approach. It's just good enough to get you roughly in the right ballpark but not for optimizing your Live Z...
RE: Mini+ succeeds first layer test, fails first print
@nett_flanders
Loosen the screw and slightly lower your SPINDA 1-2 clicks and redo your Z calibration from Zero.
Oops.
@fuchsr is right. It is easy to confuse.
--------------------
Chuck H
3D Printer Review Blog
RE: Mini+ succeeds first layer test, fails first print
@nett_flanders
fuchsr direct messaged me that information weeks ago and was a big help. Since configuring my SPINDA correctly and as long as I've been using the same filament make and type, I don't need to recalibrate to narrow down the Z axis sweet spot. However, I recalibrate after removing the surface to remove a printed piece and using the opposite side. Using the same surface side may change the Z axis sweet spot for a couple prints by 0.025 - 0.050, but flipping the surface changes the Z axis sweet spot by more.