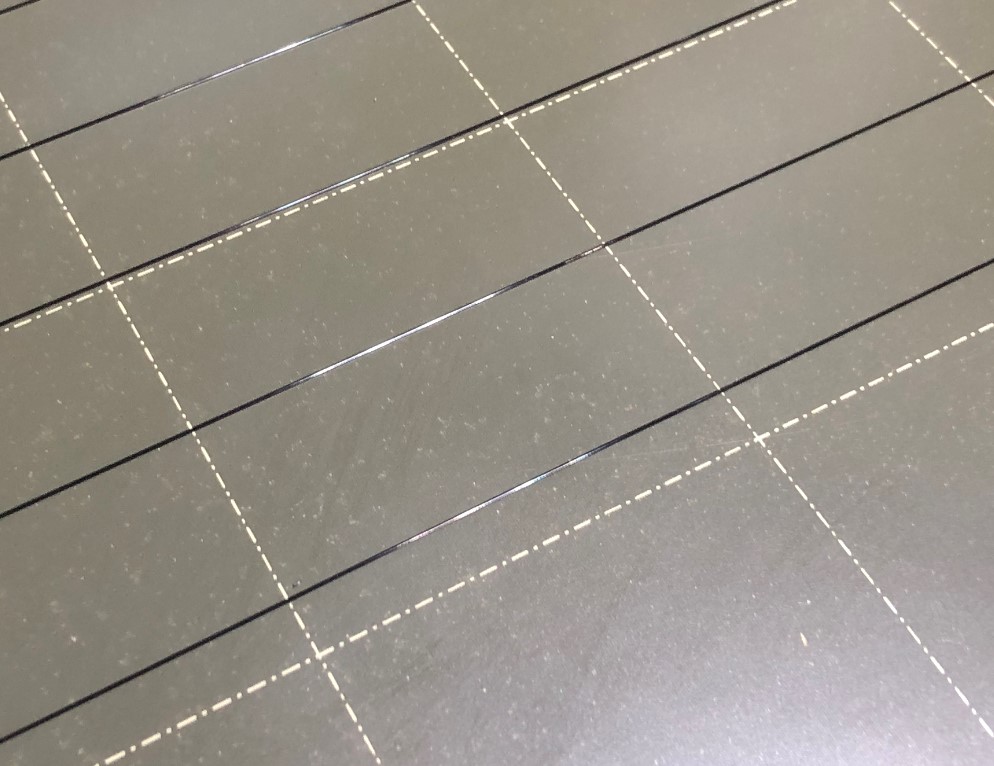
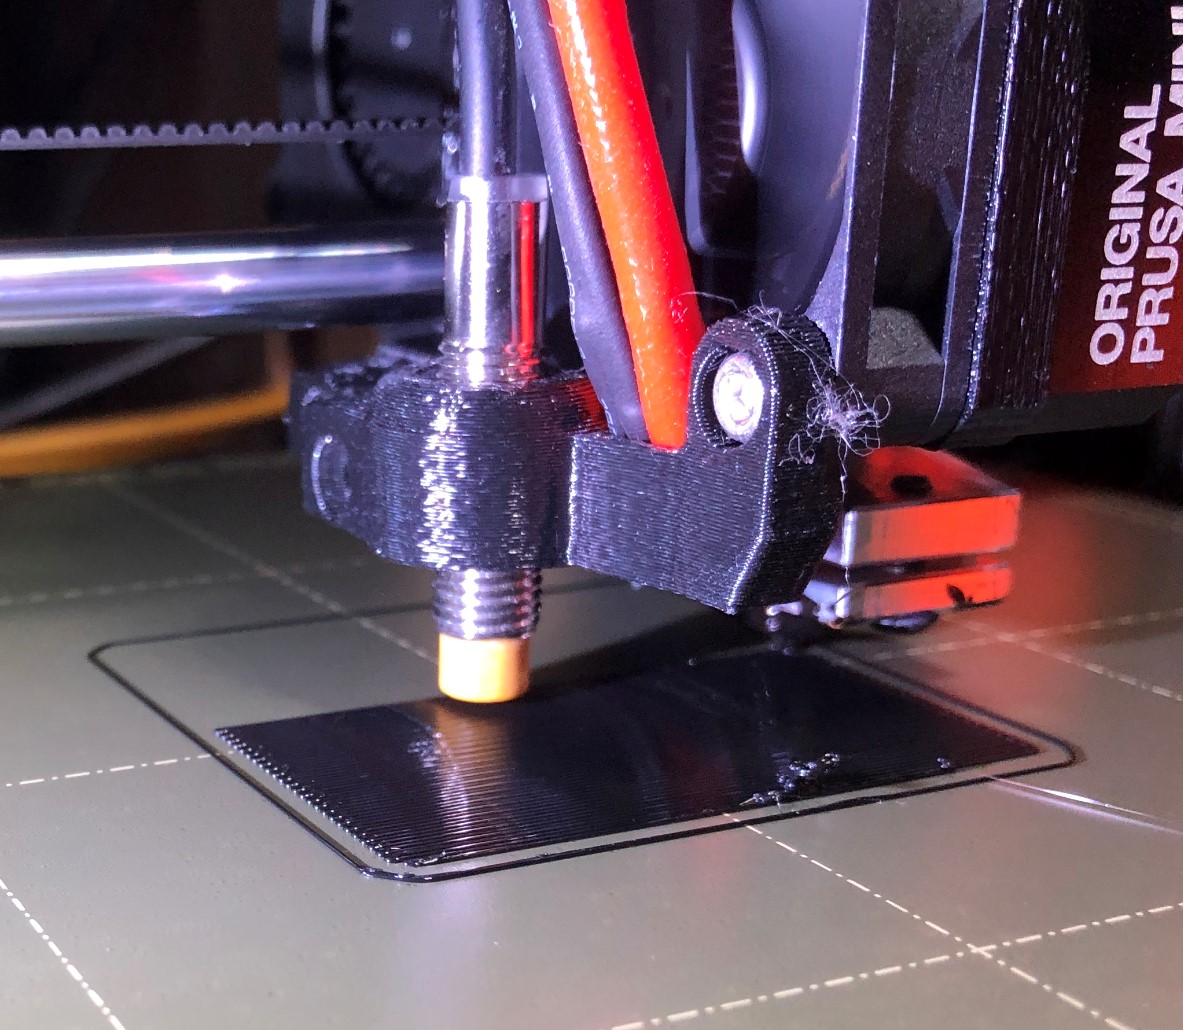
Any idea what causes this pilling and mess on the first layer?
Whether or not I use a raft, my first layer always gets pilled up like this. Any idea why?
Not sure if there's a related setting. Other than adding raft, I didn't change any layer settings in the Mini template in PrusaSlicer
This is PETG. The raft on this particular print was a mistake. I forgot and left it on after a print that needed it. Nevertheless, it helps a tiny bit with this mess of a first layer.
Oddly, the raft itself prints pretty much fine.
It looks almost like it's not making proper contact and so it only adheres on direction change, and then piles up and breaks off.
It starts getting better after another layer or two smooth it out.
I imagine this is a pretty obvious issue to folks, but I never ran into it with my i3, so I'm not sure what needs to change here.
Pete
RE: Any idea what causes this pilling and mess on the first layer?
Are you able to print exactely that filament on your MK3 without this issue. I once had a reel of PETG which had the same behavior (that was on my MK2.5) - I couldn´t solve that issue.
Best regards, Clemens
Mini, i3 MK2.5S, i3 MK4, CClone (Eigenbau)
RE: Any idea what causes this pilling and mess on the first layer?
That looks like pillowing. Usual fixes are:
- Reduce temps (may reduce inter-layer adhesion with PETG)
- Increase cooling (may be tough with PETG)
- Increase top layers
RE: Any idea what causes this pilling and mess on the first layer?
To add to bobstro's list:
- Try changing infill pattern or density. Some patterns (gyroid) can result in longer and shorter stretches of filament that are unsupported; the longer ones tend to perform poorly with filaments that are sticky and don't bridge well (AKA PETG)
RE: Any idea what causes this pilling and mess on the first layer?
Thanks all.
No, I haven't printed from this exact spool on the i3.
I'll try these things, as well as a different spool.
Pete
RE: Any idea what causes this pilling and mess on the first layer?
Grid infill looks yo be ok for petg. Rectilinear is each layer in different direction which can cause problens. But does gyroid really have stretches of u supported filament? I seem to find transition between infill directions pretty smooth.
Look at the overlap between the top bridging layer and the infill for gyroid. Rectilinear (or grid) is actually best in that regard as the unsupported distance being bridged is constant (the bridge layer is always 90 degrees to the infill) , though rectilinear has other issues with unsupported sections, as you note.
RE: Any idea what causes this pilling and mess on the first layer?
Thanks all
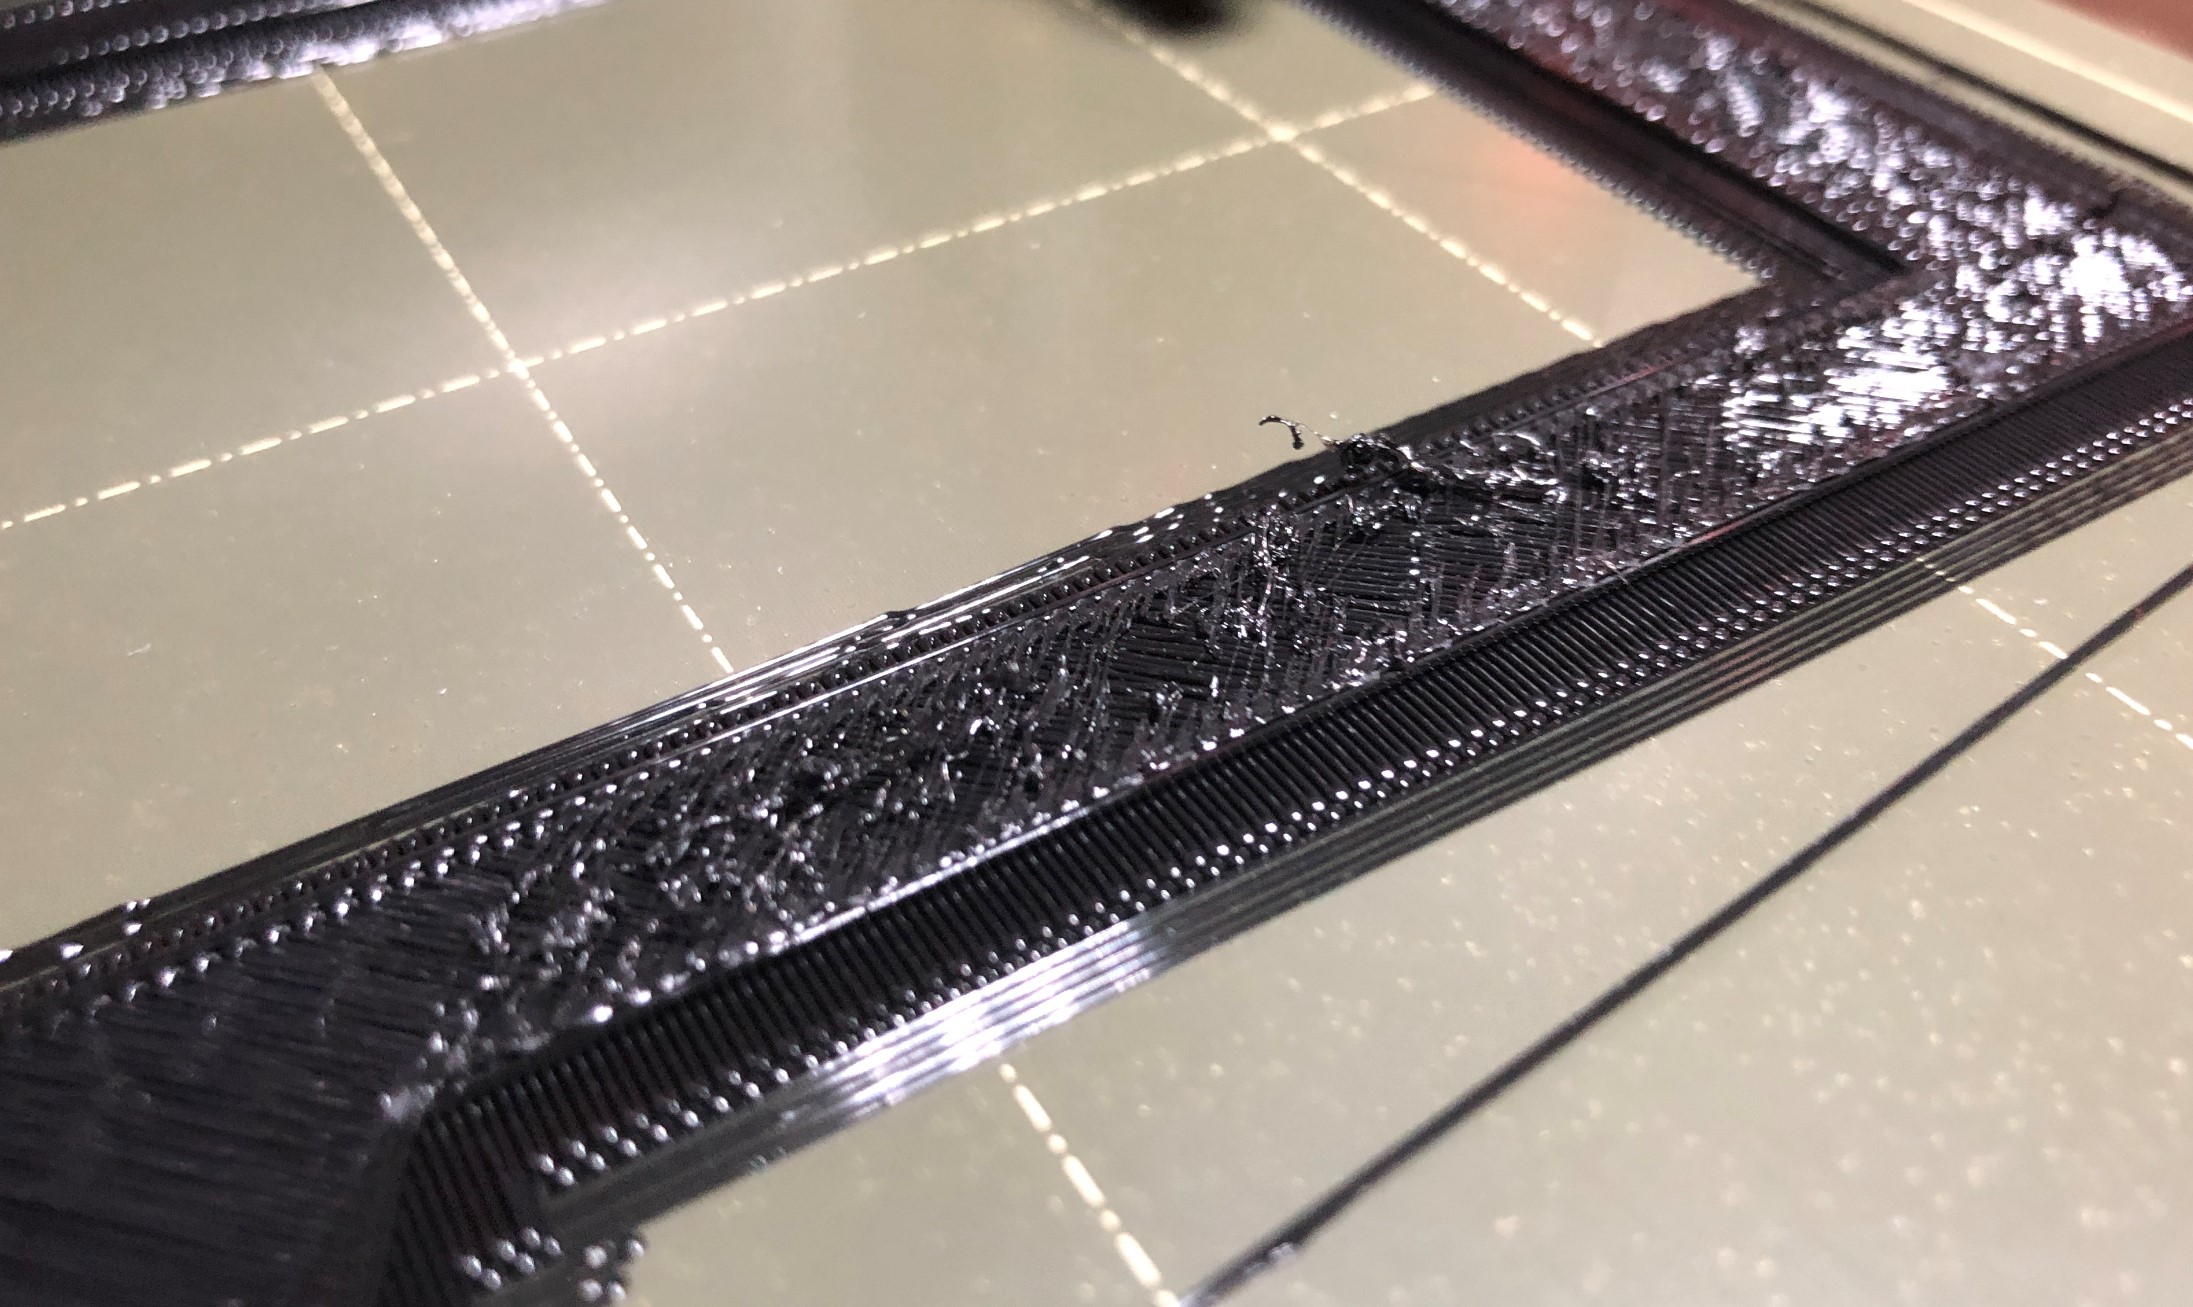
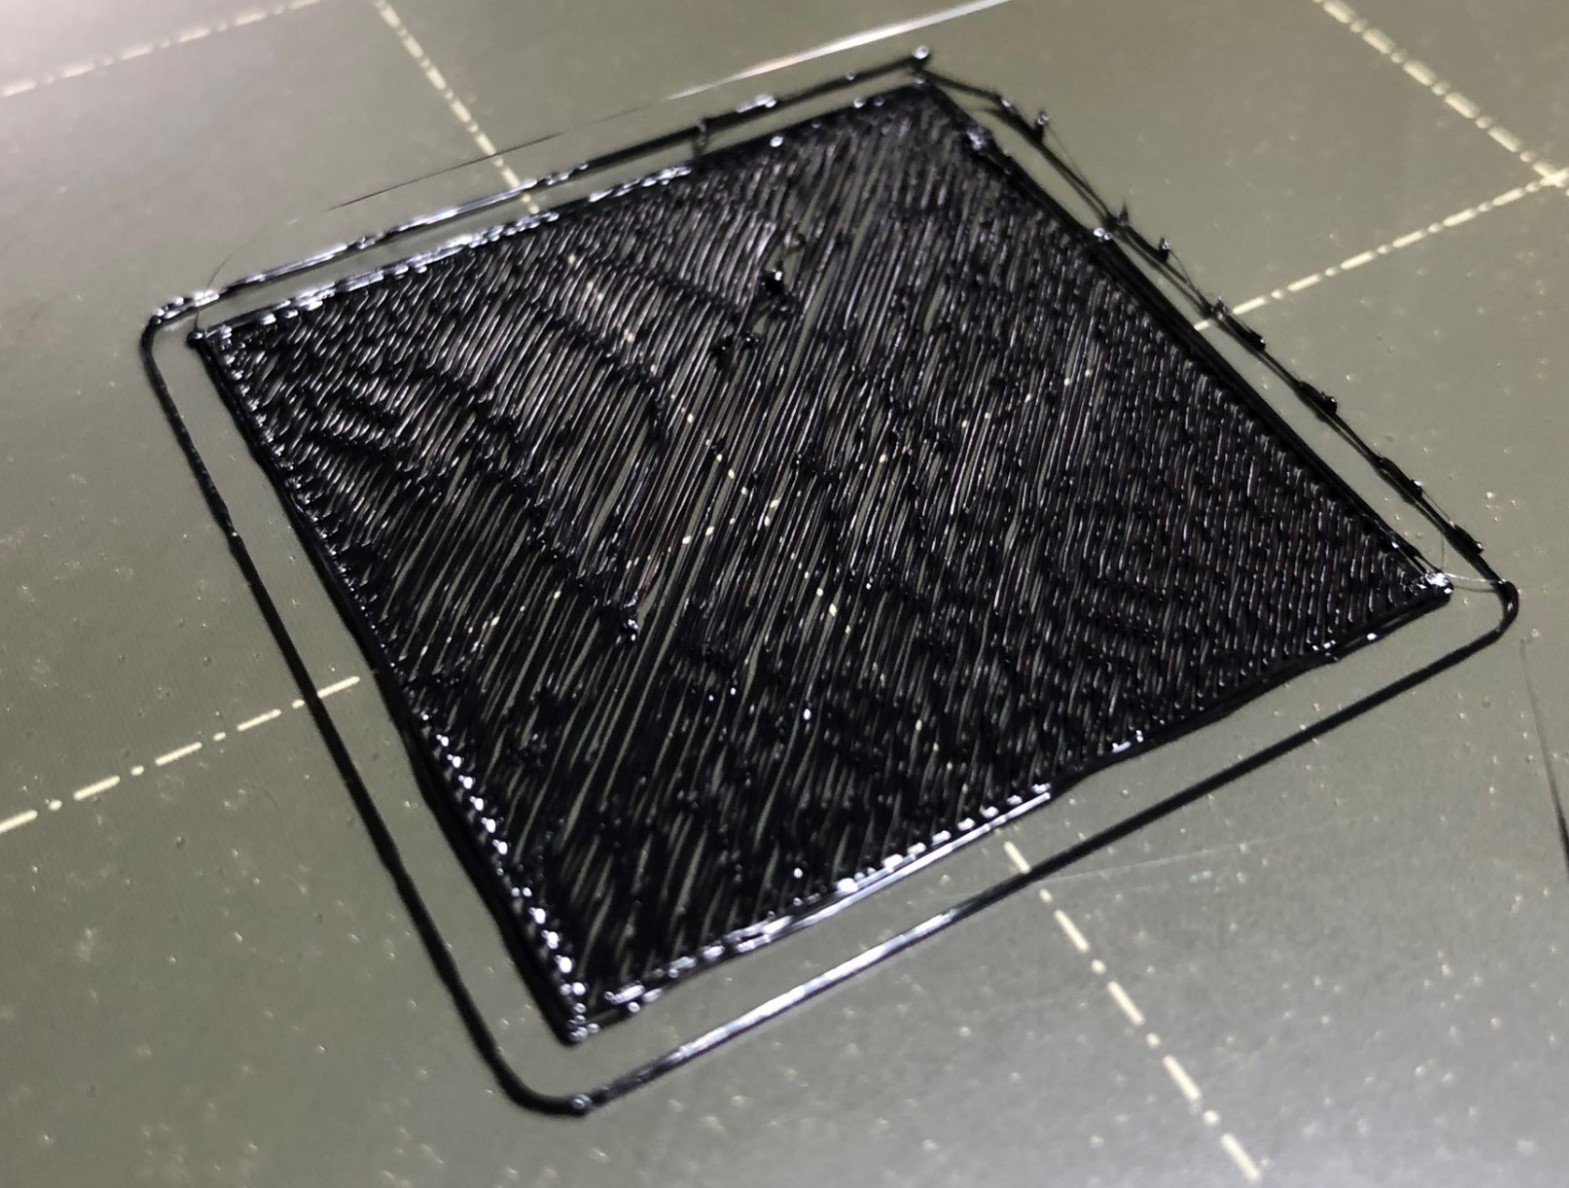
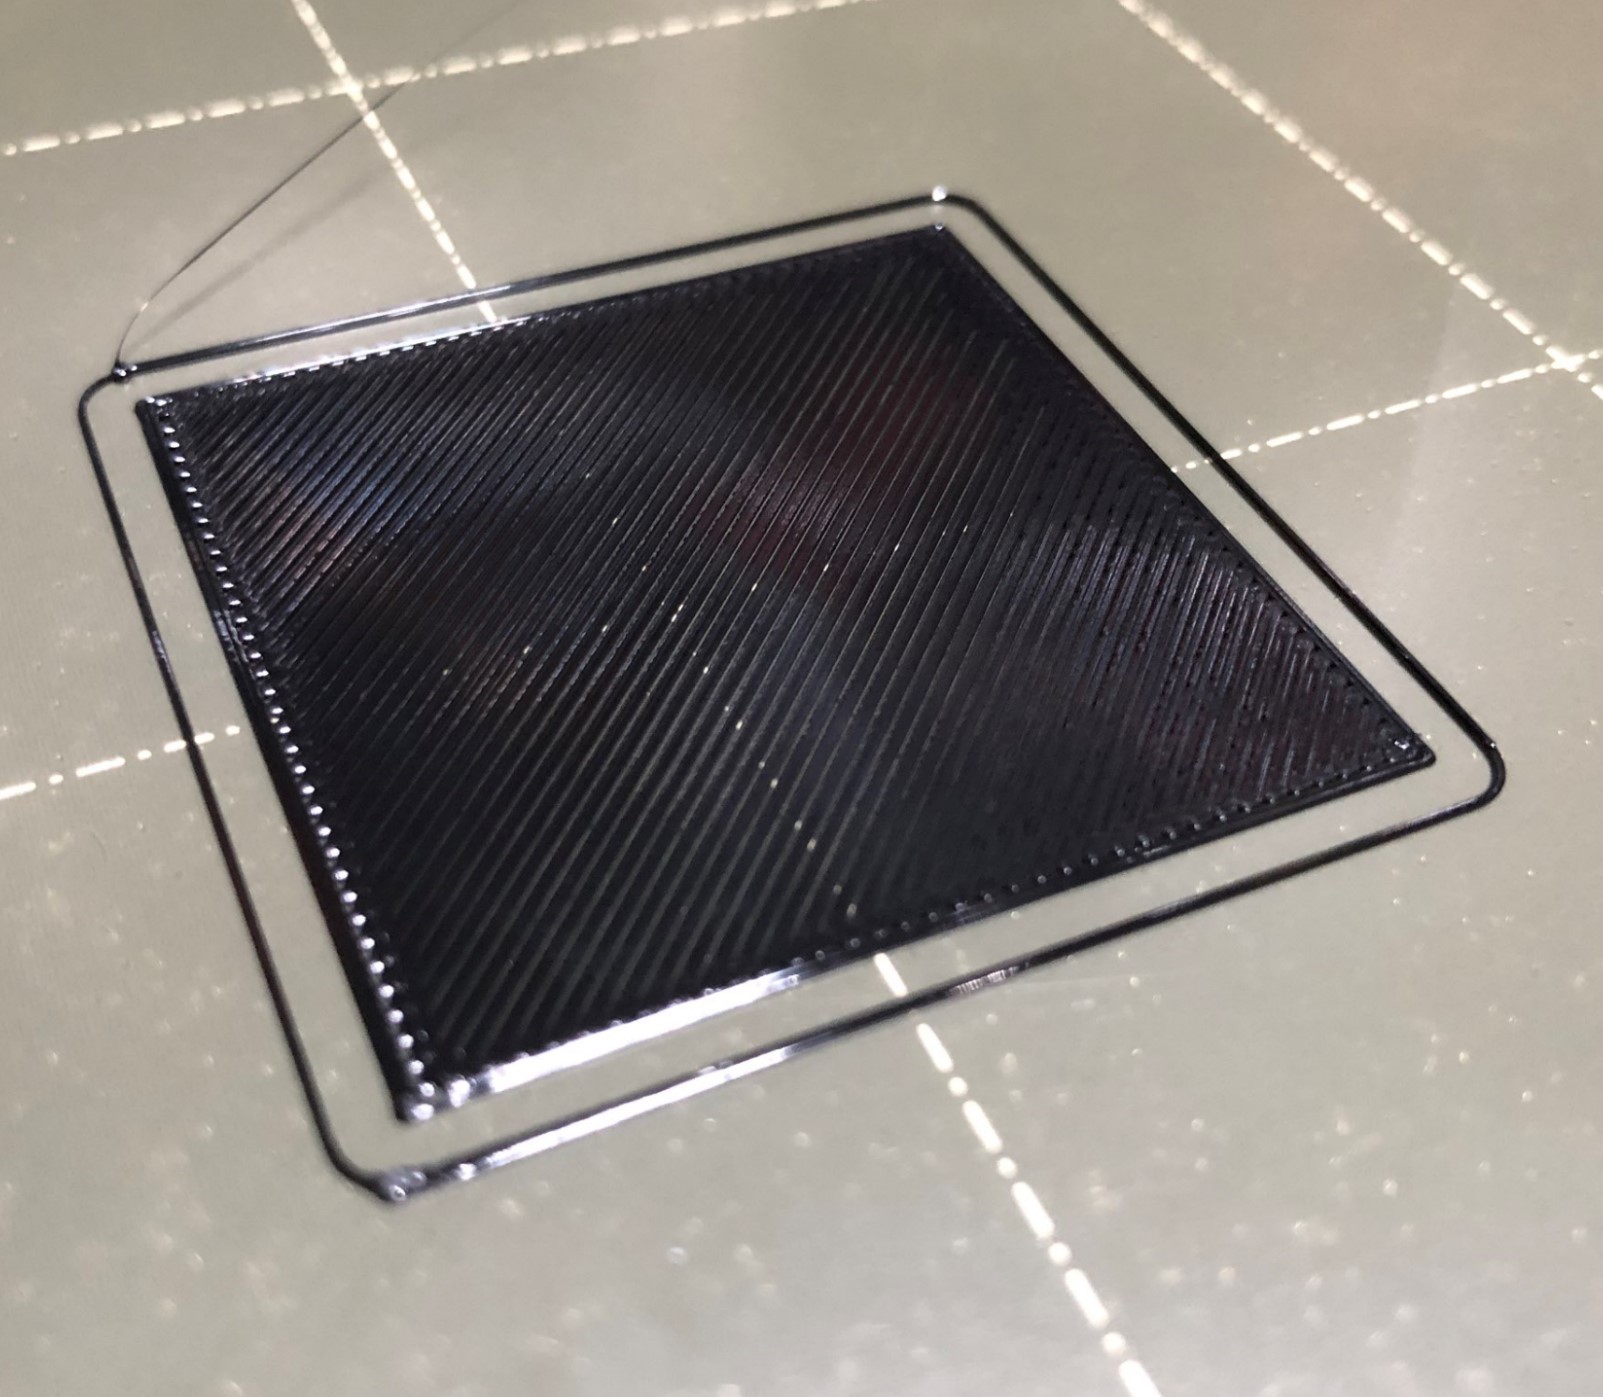
It may not be clear in the photos, but the pics are the *bottom* layers. There's no infill or top layers involved. What you see torn away here is one of the bottom layers.
Here's the pic, zoomed-in. You can see that there's a torn away diagonal layer. Infill hasn't yet started.

Looking at the pic, I guess it's actually the second layer that ends up so rough. The first layer isn't perfect, but not as bad as this.
So that would mean, I assume, that PETG->PETG adhesion is bad here, but somehow gets better after more layers.
Nozzle temp is 250c, bed temp is 90c. The PETG is Prusament black.
Pete
RE: Any idea what causes this pilling and mess on the first layer?
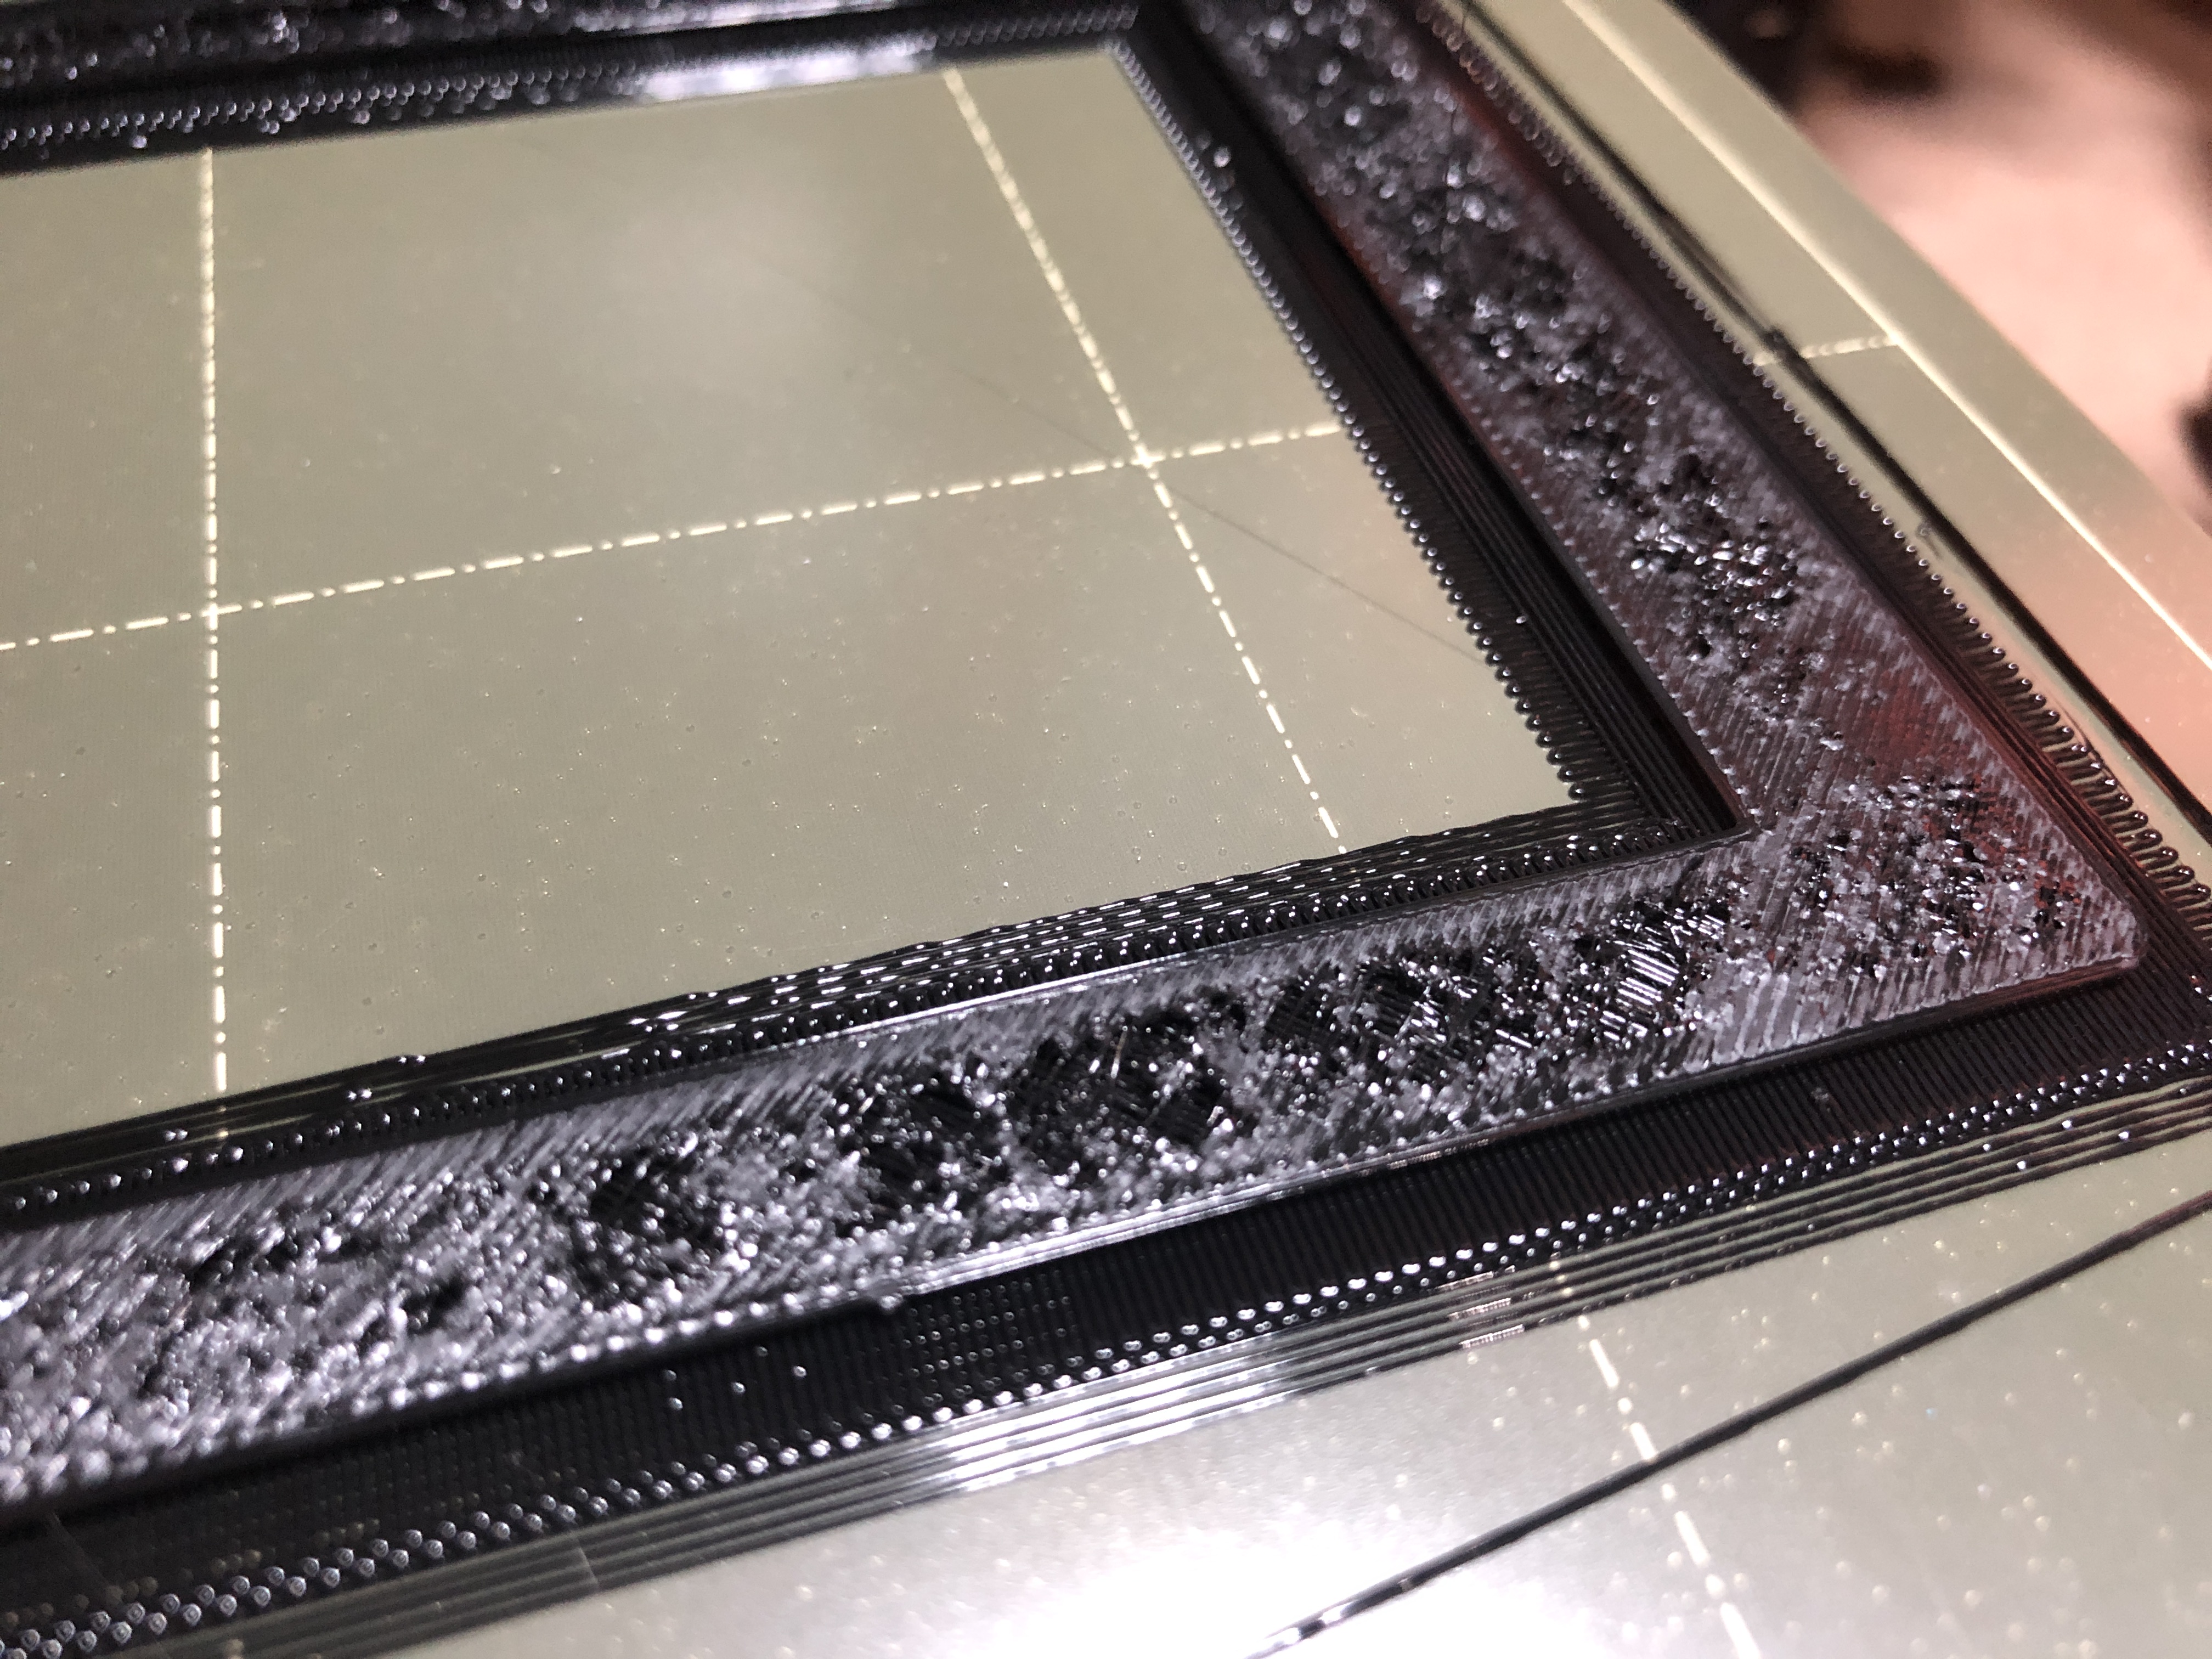
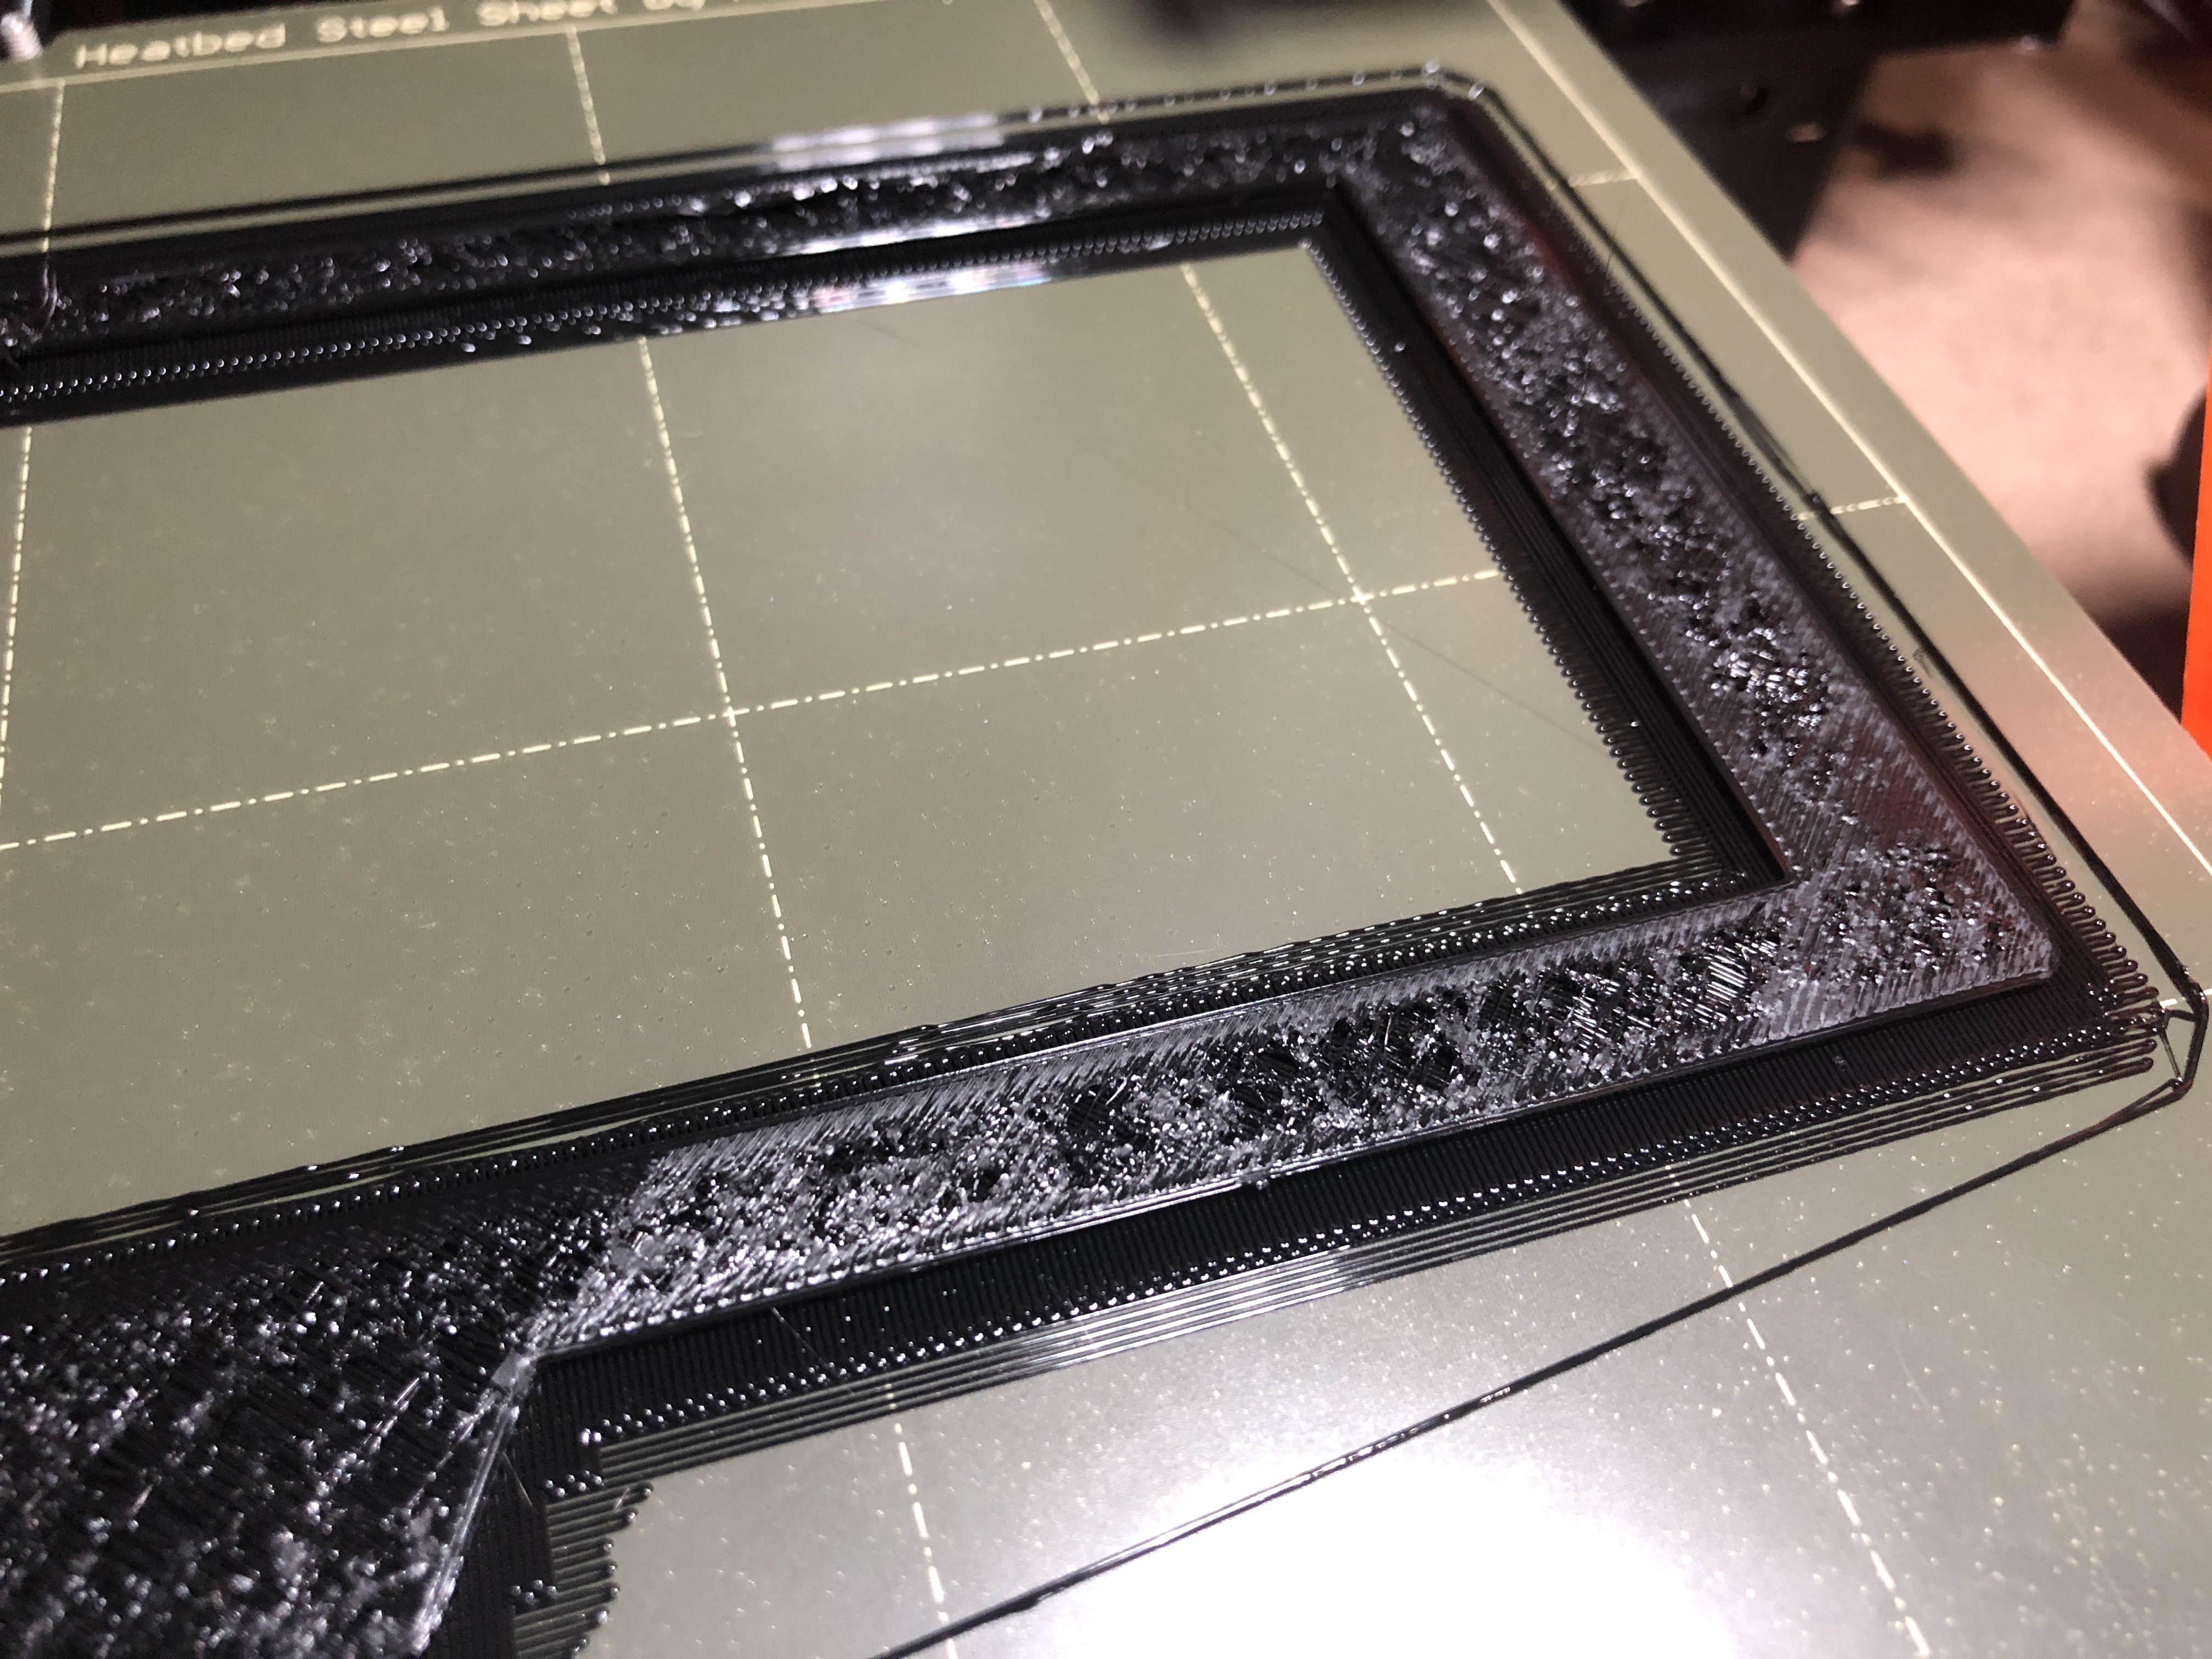
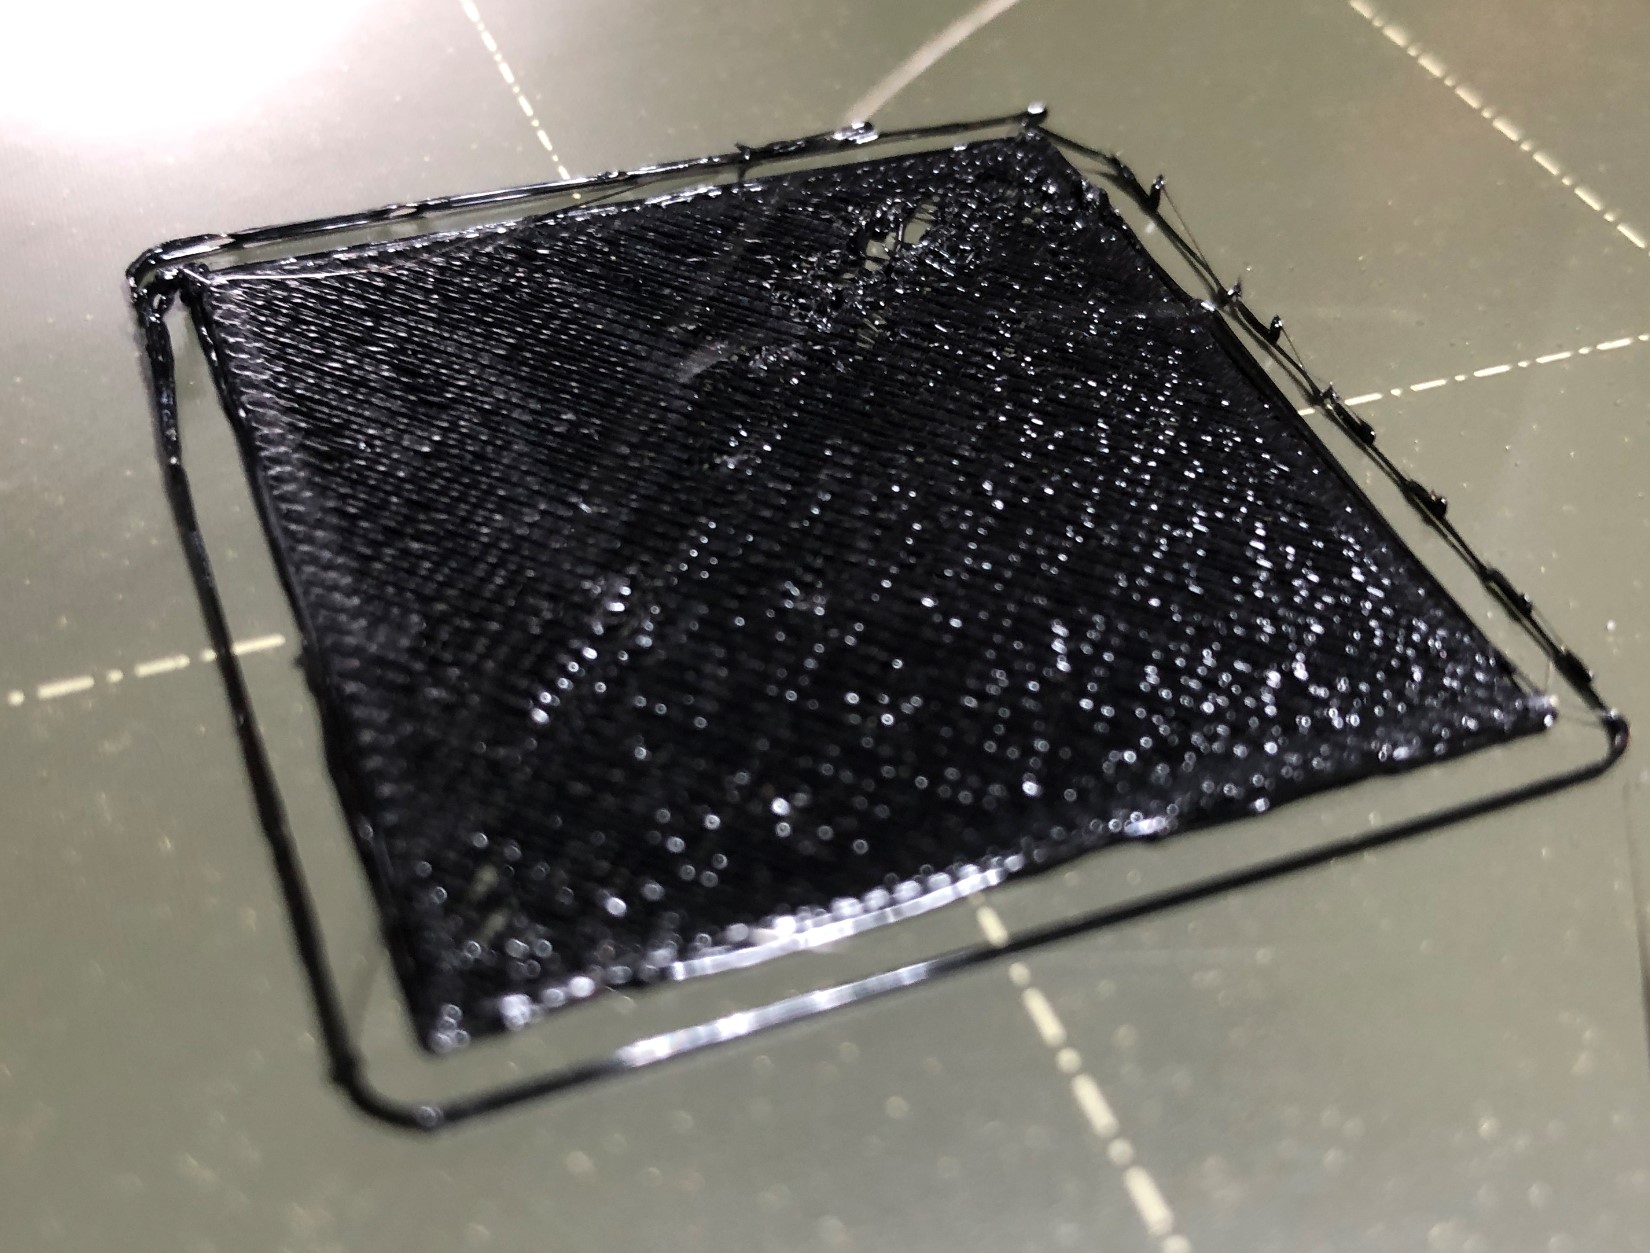
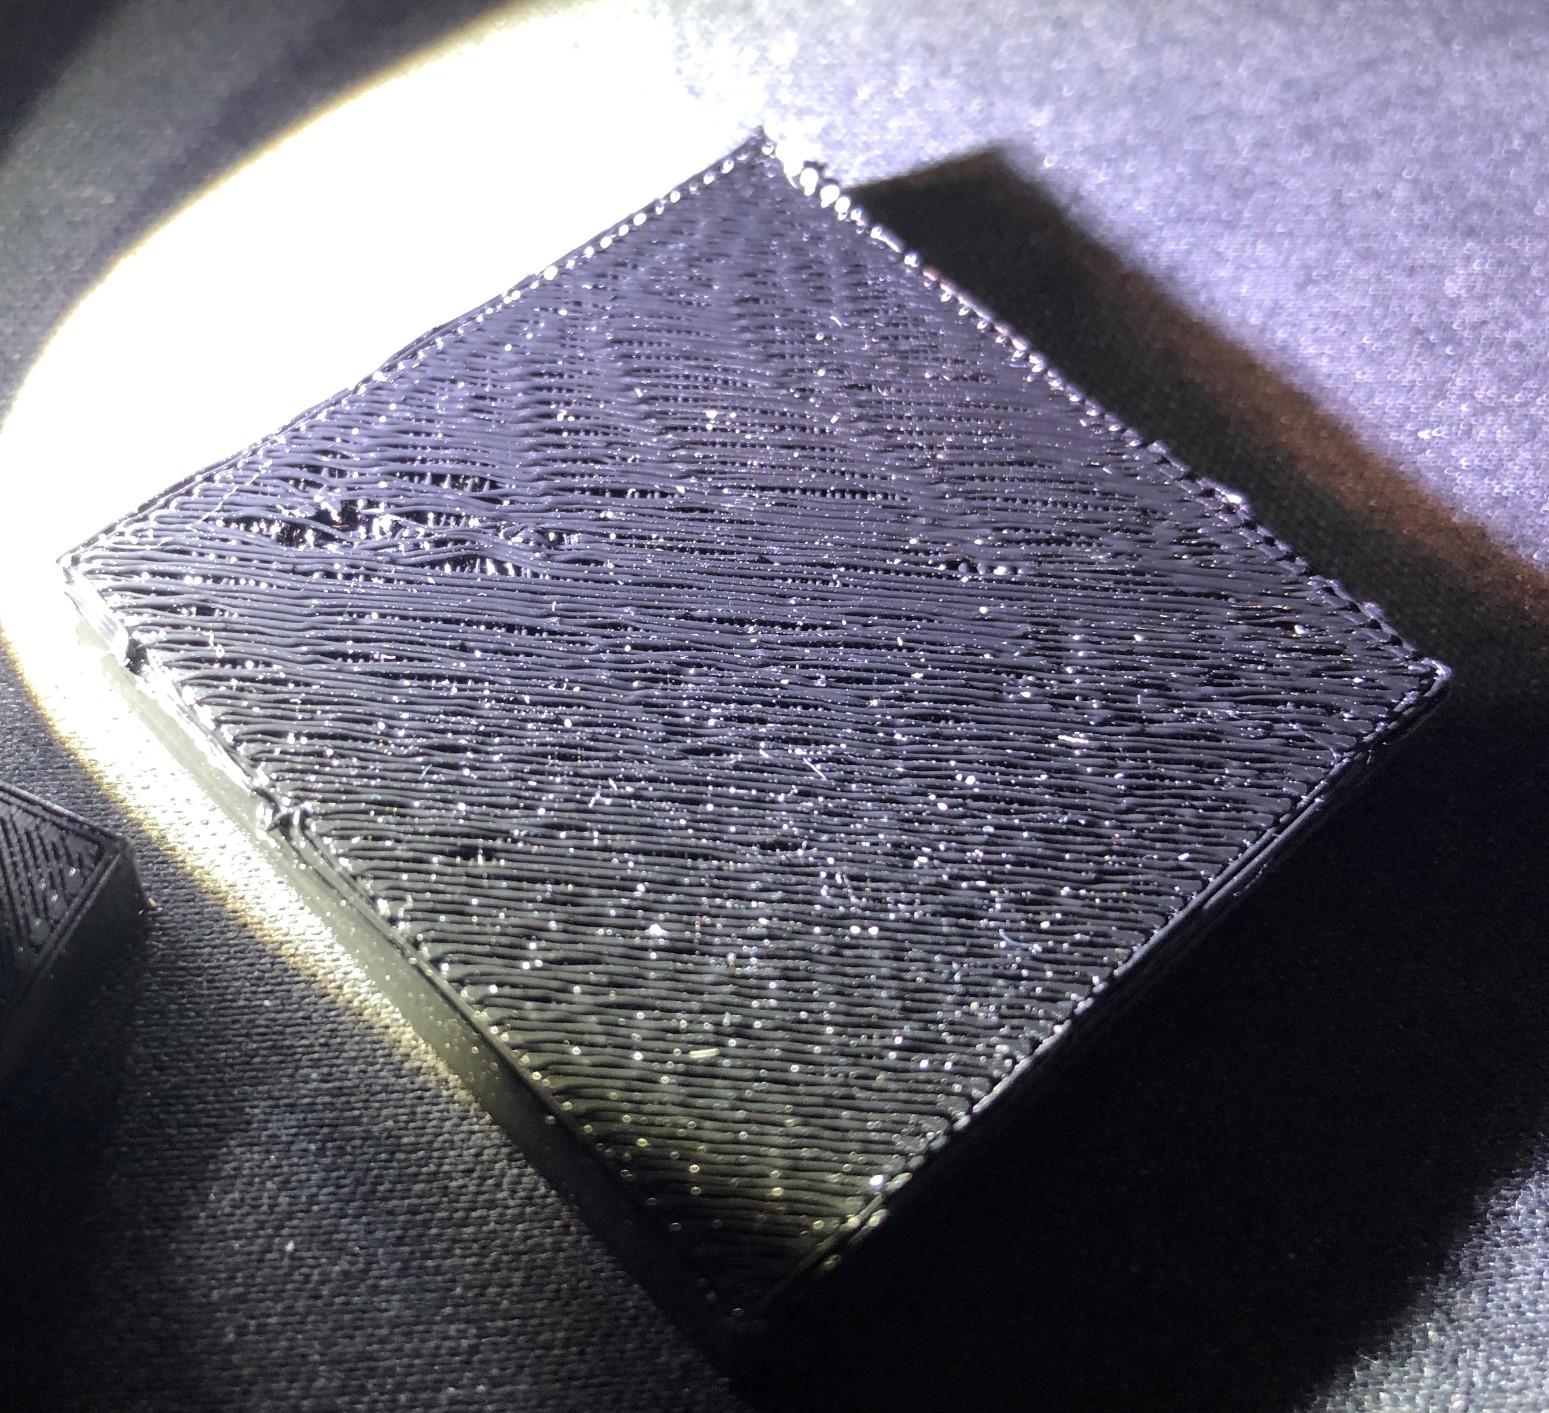
Zoomed-in third bottom layer (no infill involved yet)
RE: Any idea what causes this pilling and mess on the first layer?
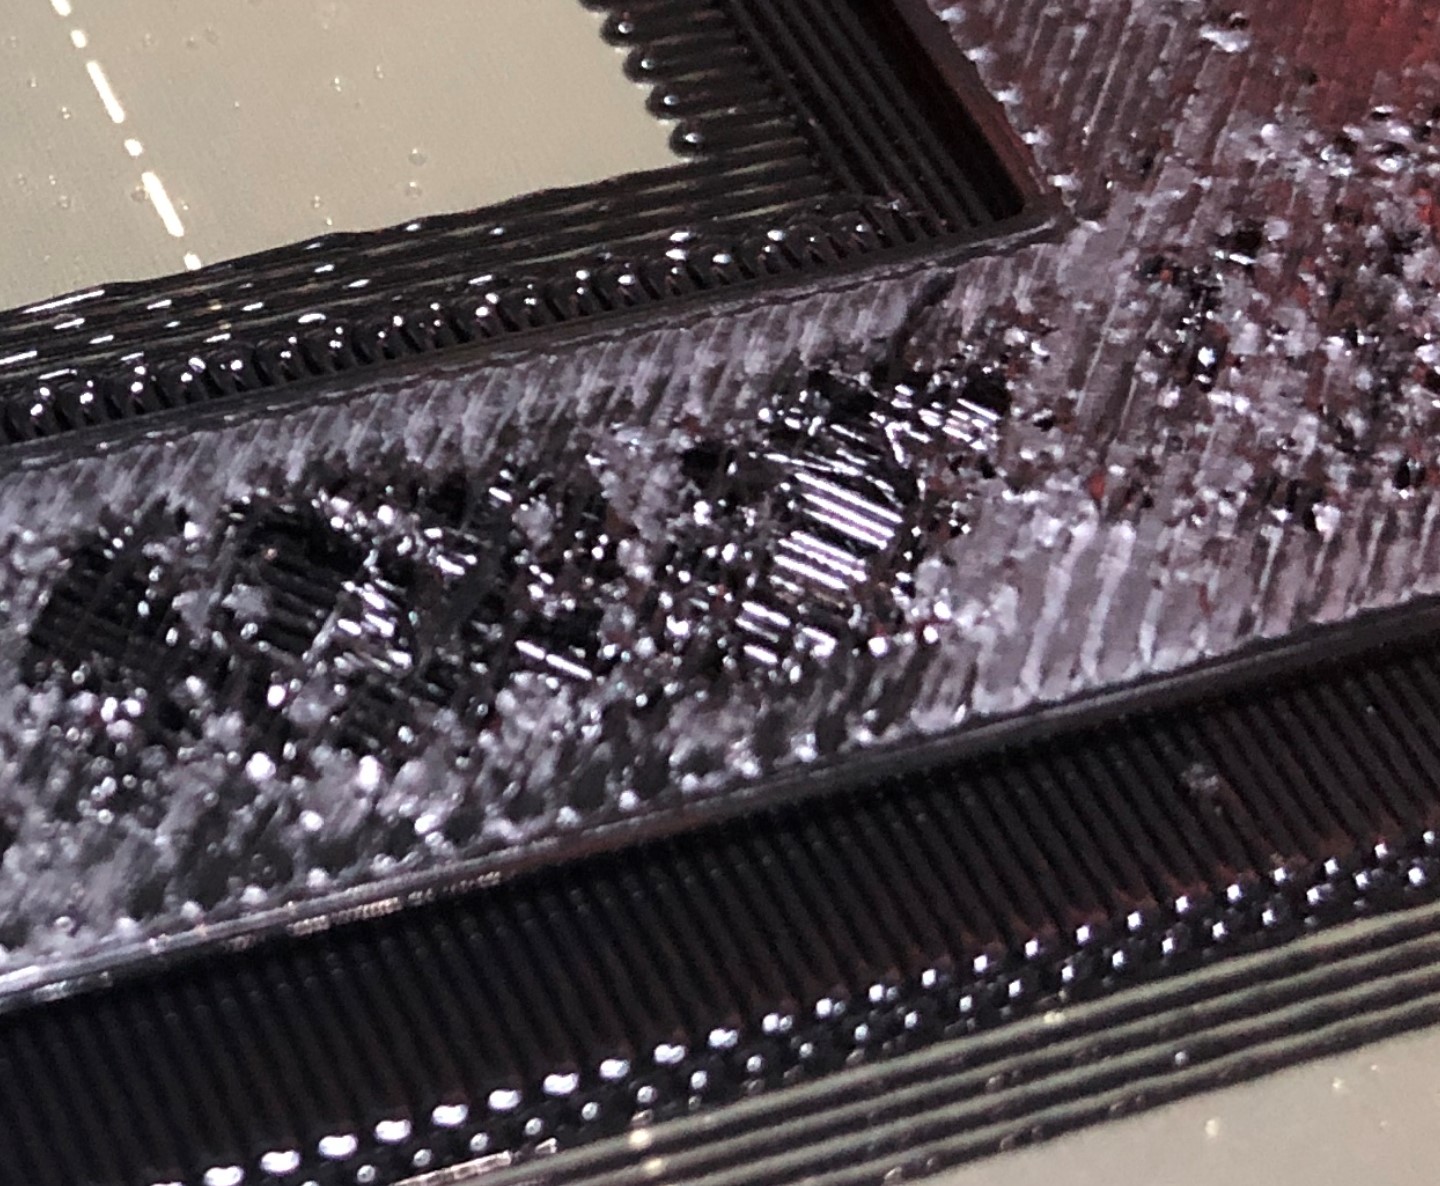
What I can't make sense of is it looks in your last pic like it has started a layer of solid infill on top, but the underlying layers are very stringy. Are all 3 layers supposed to be solid infill? Looking at the brim lines along the top, they do look very uneven as well.
Obvious thing to try is another spool, maybe even PLA, to confirm your print settings are sane. If that looks OK, start looking at PETG issues. If PLA gives similar results, check for a partial clog and do some cold pulls.
Is it possible the filament has absorbed moisture perhaps? That can cause an uneven surface and general extrusion inconsistencies.
RE: Any idea what causes this pilling and mess on the first (actually the second) layer?
Thanks. Some notes
1. The pics are of the bottom layers. Infill has not yet started. All layers shown, other than the raft, are supposed to be solid.
2. Settings (all are defaults) are 7 top solid layers, 5 bottom solid layers. In the pics, you are looking at bottom 1 (ok), 2 (all fouled up) 3 (last pic). First layer is 0.2mm, remaining are 0.15. Perimeters set to 2.
3. This gets "fixed" as you get more layers, as though the problem is only really between layers 1 and 2, but telegraphs up until there's enough material to obscure it.
I'll try to get more pics, without the raft, and stop it so they can be a bit more clear. I forgot to take pics in this current print, but it was similar: first layer went down just fine, second layer was torn up, and those problems telegraph up.
Pete
RE: Any idea what causes this pilling and mess on the first layer?
Printing a test square. Now I'm confused. The problems are not consistent.
In this case, first layer is not going down well at all, lots of blobbing. I'll have to check to see if the calibration went out of whack again (there's so much flex in this frame), or if something else is happening.
This is not quite the same problem as in the photos above. Although I do see some oddness where it looks like teardrop shapes instead of a nice straight line. That brim looks awful, for example. I imagine that's what skipping in the extruder might look like, but I'm not hearing any clicking or anything, and again, it works fine in upper layers.
First Layer (no raft)

Second Layer
Third Layer (took the photo from the side this time, for better light)


I haven't yet tried a different spool of PETG Prusament or PLA. This spool is quite new (opened only once I got my Mini), but I suppose it could have issues.
Again, as you get up in layers, it gets much better, although the walls are still a bit janky on this one Here's the final result:

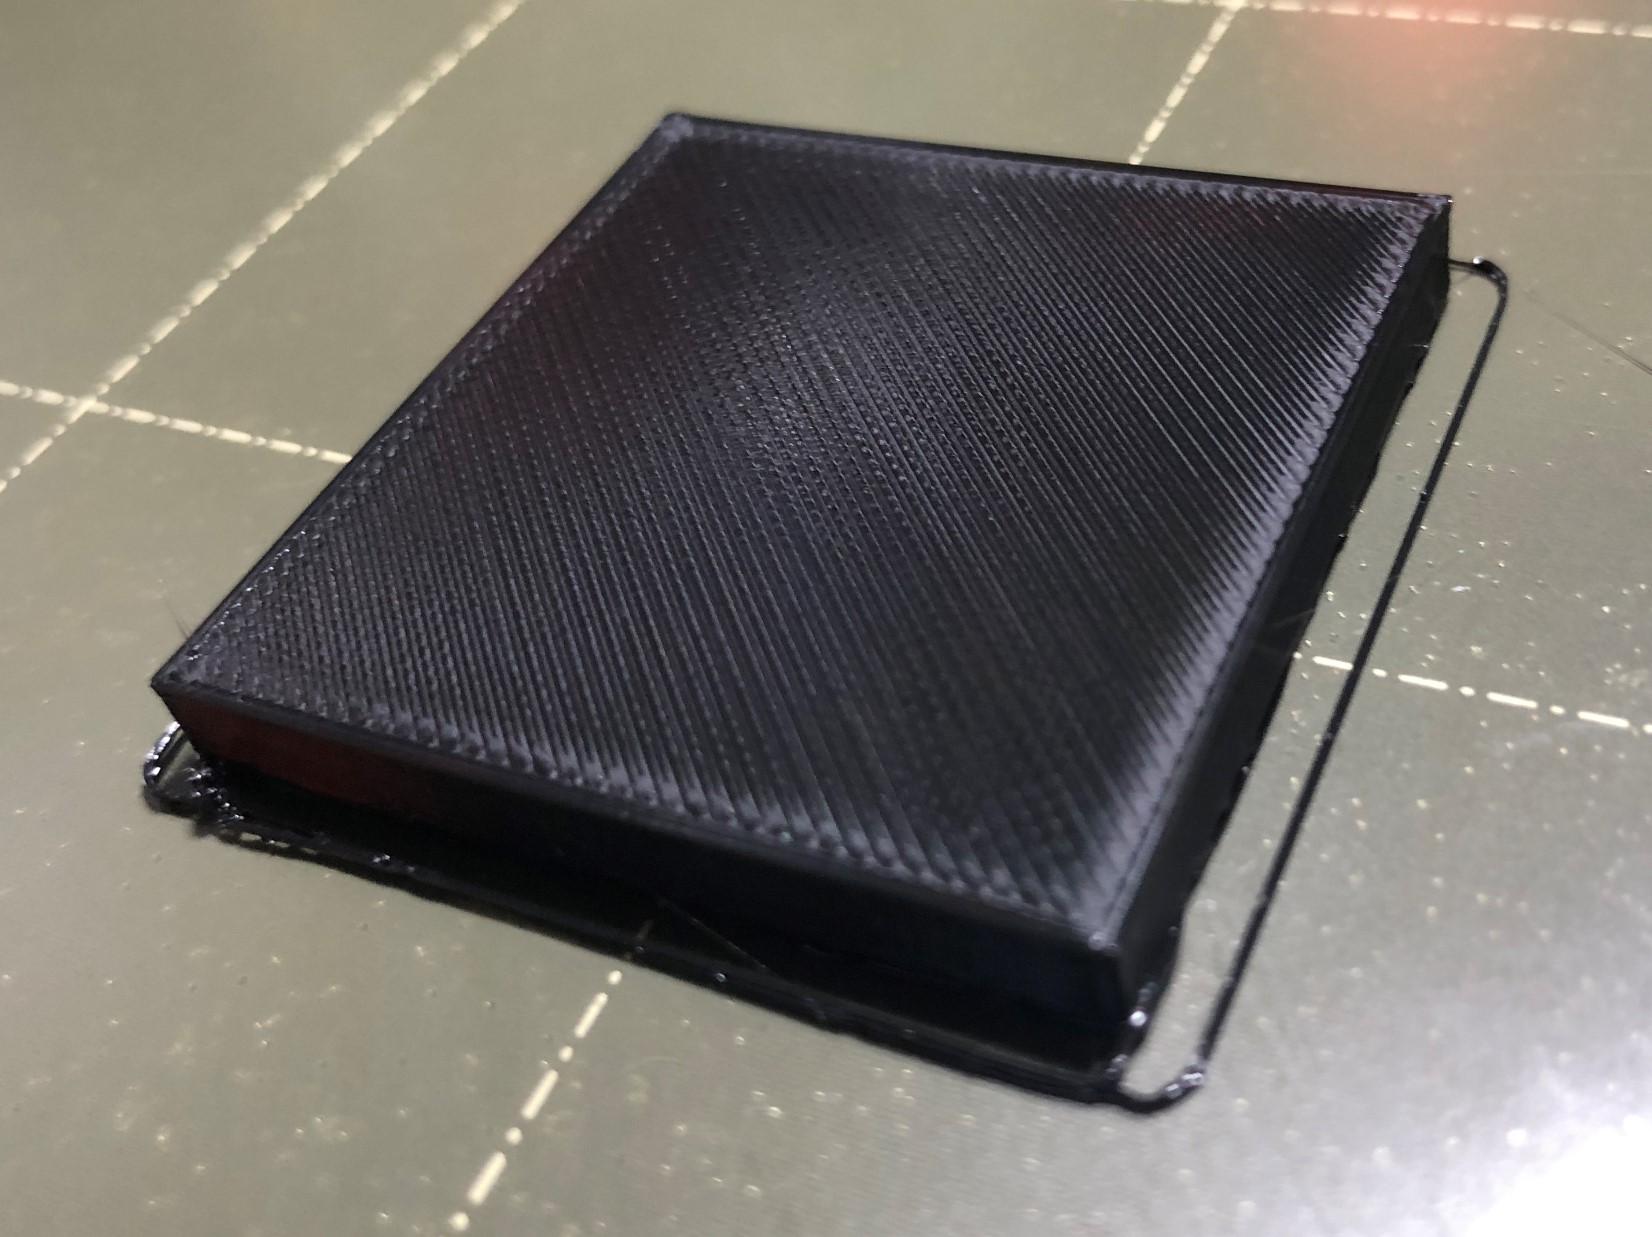
Flipped over to see the underside

I should add that, despite making a lot of things on the various printers, I'm a 3d printing troubleshooting noob. 3d printing itself is not my hobby. Instead, I use 3d printing to support other hobbies. That's why I bought the i3 and SL1 both pre-assembled and calibrated. I've never run into these types of problems with the i3, so I may be doing something obvious and stupid, so please don't assume any particular level of expertise on this 😛 (I'm not mechanically disinclined: I've built synthesizers, kitchen cabinets, furniture, CNC routers, and even replaced the alternator in my SUV and the headlight assemblies in our old minivan. I just don't have the backlog of troubleshooting techniques here to look back at)
Pete
RE: Any idea what causes this pilling and mess on the first layer?
@pete-b3
There is something weird about that first layer, it looks like your nozzle is too high, and there's inconsistent extrusion? I suspect you have it high high first, because your skirt does not look squished enough, there are gaps between it and surface, and first layer lines are not together. Can you do the First Layer Calibration quickly and post photo here?
Are you printing with PETG? Is the filament dry? Does it make popping sound when it extrudes from the nozzle?
Agreed, and I'll try the first layer cal again. But do note that this happens also on top of a *raft* as well as shown in the top pics.
But I'm going to check square again and then run the cal in case this thing has come loose.
I hear a little bit of spattering sound (just a little) when it does the little purge line on the front edge of the plate. After that, not that I've noticed.
Pete
RE: Any idea what causes this pilling and mess on the first layer?
So, first layer calibration was way out. Somehow, it has drifted.
Before changing the distance:

New value:

After changing:
I need to print the rafted part again to see if there's still an issue there, because I don't get how first layer calibration impacts a rafted part.
Pete
RE: Any idea what causes this pilling and mess on the first layer?
Old bottom layer
New bottom layer. Looks like I can go a little lower, even.
I also need to figure out why that probe distance setting is changing over time. It doesn't look like it's moving up at all. As it is now, it's very close to the printed material when printing.
Pete
RE: Any idea what causes this pilling and mess on the first layer?
Printing on top of a raft is still a problem. So maybe two unrelated problems here.

Pete
RE: Any idea what causes this pilling and mess on the first layer?
@pete-b3
I had the same problem with my Mini. Checked my 1st layer calibration using PETG. It was ok. Problems were exactly what you describe, 1st layer is perfect, 2nd layer starts tearing up and is really messed up, third layer is no better, but eventually it gets better and after about the 7th or 8 layer its printing ok, except with some blobs on the walls. Eventually I lowered the overall speed of the print job using the front control panel, "Tune" and printed at 50% speed and the print came out perfect. (I tried lowering it slowly from 100% and quality started improving, so I just lowered it to 50% and the print came out perfect. Didn't like having to lower the speed by 50% but that's the only thing that worked. I then went into Prusa Slicer and adjusted the "Print Settings" - "speed" settings and lowered the settings to approx. 50% and that enabled me to print the part on my Mini successfully. BTW, I was able to print the same item on my MK3 at normal speed with perfect results, so don't know what is happening with the Mini that causes this problem. I just know that for now I'm printing at 50% speed for now, until I can figure out what is happening. Also, should mention that I did go through the procedure to make sure the teflon tube in the hotend is properly adjusted with the nozzle according to the instructions on Prusa's website, and I also checked the tension on the filament feed gear. So my suggestion is to try printing at 50% speed and see if that helps. Would be interested to hear if this helps in your case.
That's great information. Thanks for sharing! I'll try the 50% speed and see if it works.
Pete
RE: Any idea what causes this pilling and mess on the first layer?
@pete-b3
I had the same problem with my Mini. Checked my 1st layer calibration using PETG. It was ok. Problems were exactly what you describe, 1st layer is perfect, 2nd layer starts tearing up and is really messed up, third layer is no better, but eventually it gets better and after about the 7th or 8 layer its printing ok, except with some blobs on the walls. Eventually I lowered the overall speed of the print job using the front control panel, "Tune" and printed at 50% speed and the print came out perfect. (I tried lowering it slowly from 100% and quality started improving, so I just lowered it to 50% and the print came out perfect. Didn't like having to lower the speed by 50% but that's the only thing that worked. I then went into Prusa Slicer and adjusted the "Print Settings" - "speed" settings and lowered the settings to approx. 50% and that enabled me to print the part on my Mini successfully. BTW, I was able to print the same item on my MK3 at normal speed with perfect results, so don't know what is happening with the Mini that causes this problem. I just know that for now I'm printing at 50% speed for now, until I can figure out what is happening. Also, should mention that I did go through the procedure to make sure the teflon tube in the hotend is properly adjusted with the nozzle according to the instructions on Prusa's website, and I also checked the tension on the filament feed gear. So my suggestion is to try printing at 50% speed and see if that helps. Would be interested to hear if this helps in your case.
So far, this evening, I had a print fail twice. So I used the Tune option, like you recommended, but set to 70%. That fixed it the third time around.
I'm not yet ready to call this victory, but it seems very promising. It seems maybe Prusa was too aggressive in their speed settings.
Pete